Set up the Earthquake Platform
Teacher Toolbox - Before the Activity
Review the steps on this page as a whole class before the students begin working on the activity to avoid troubleshooting during the challenge. Allow students access to these steps as they are working through the activity as reference if they begin to experience difficulty getting the platform to shake.
Review the steps on this page as a whole class before the students begin working on the activity to avoid troubleshooting during the challenge. Allow students access to these steps as they are working through the activity as reference if they begin to experience difficulty getting the platform to shake.
Step
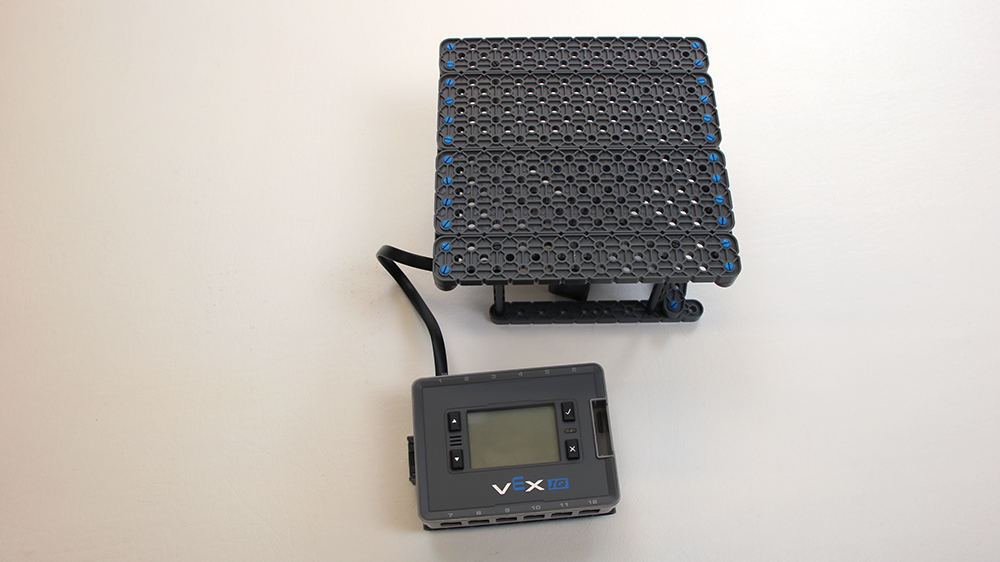
Connecting the Earthquake Platform
Teacher Tips
Ensure that the robot batteries are charged before beginning the activity. The student in the role of the Builder is also expected to inspect the Earthquake Platform.
Instruct students to make sure there is enough room around their Earthquake Platforms if their structure does fall off of it to avoid collisions with other students.
The Builder should check that the Earthquake Platform is ready with a charged battery and that the Smart Motor is properly connected to Port 1 on the VEX IQ Robot Brain.
Step
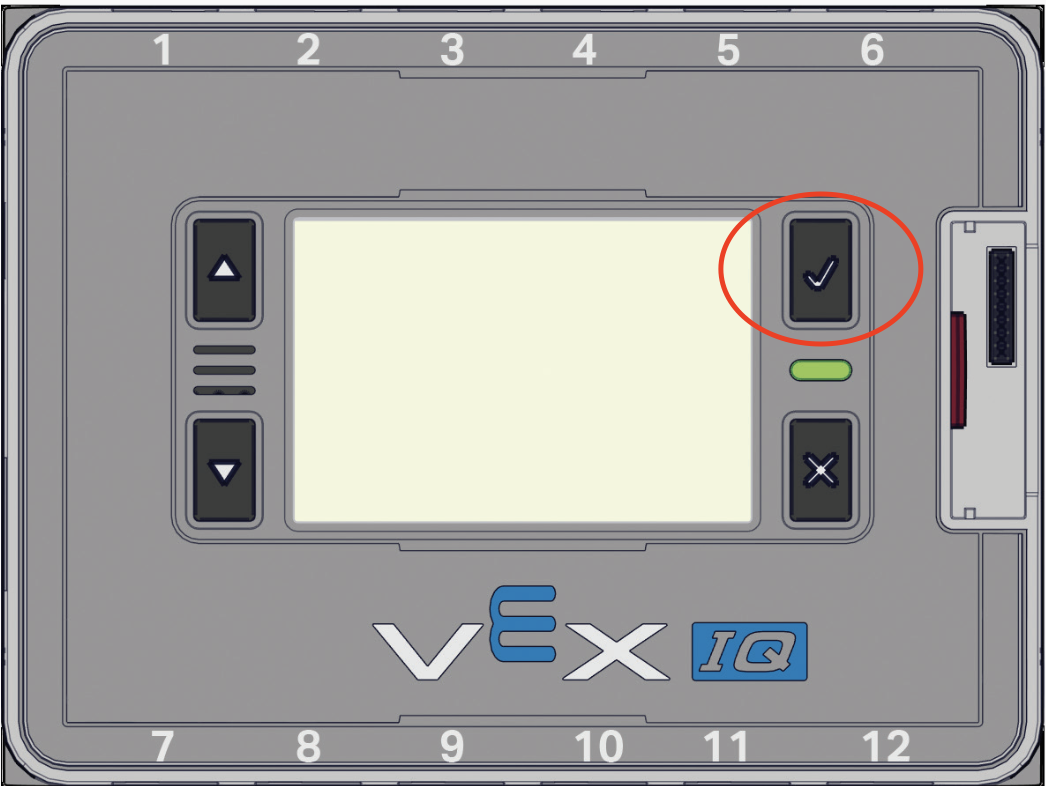
Powering on your Robot Brain
A powered off Robot Brain screen
The Tester can now operate the Robot Brain and press the Check button to power on the Robot Brain.
Step
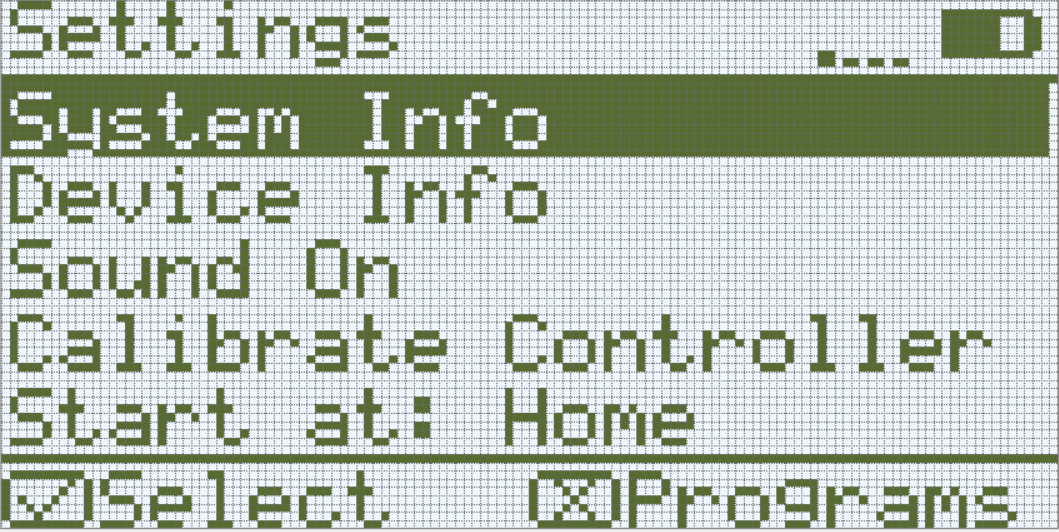
Opening the Settings menu
The top-level Settings menu
Press the X button until you arrive at the Settings menu.
Step
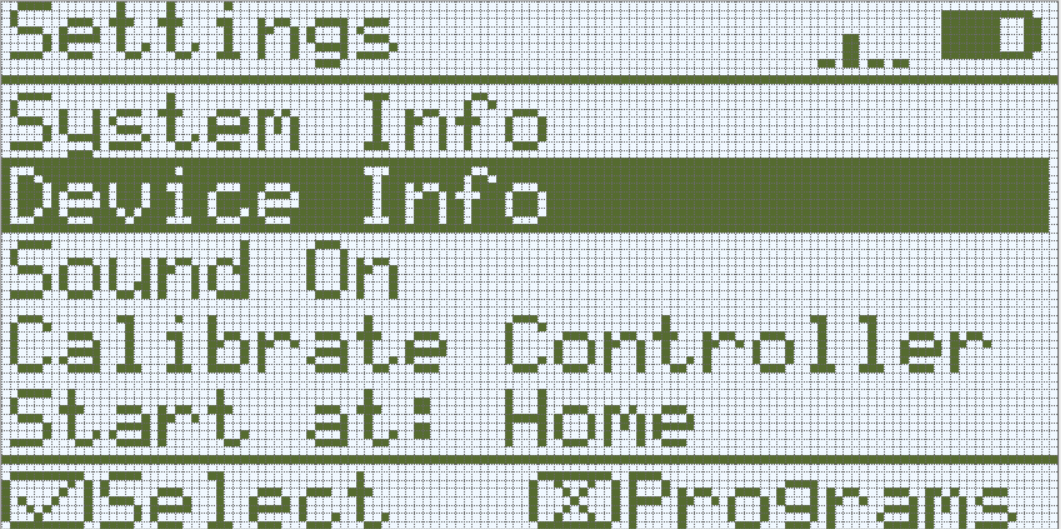
Opening the Device Info menu
The Device Info option
Use the arrow buttons to navigate down to the 'Device Info' selection on the Settings menu and press the Check button.
Step
Viewing a Connected Smart Device
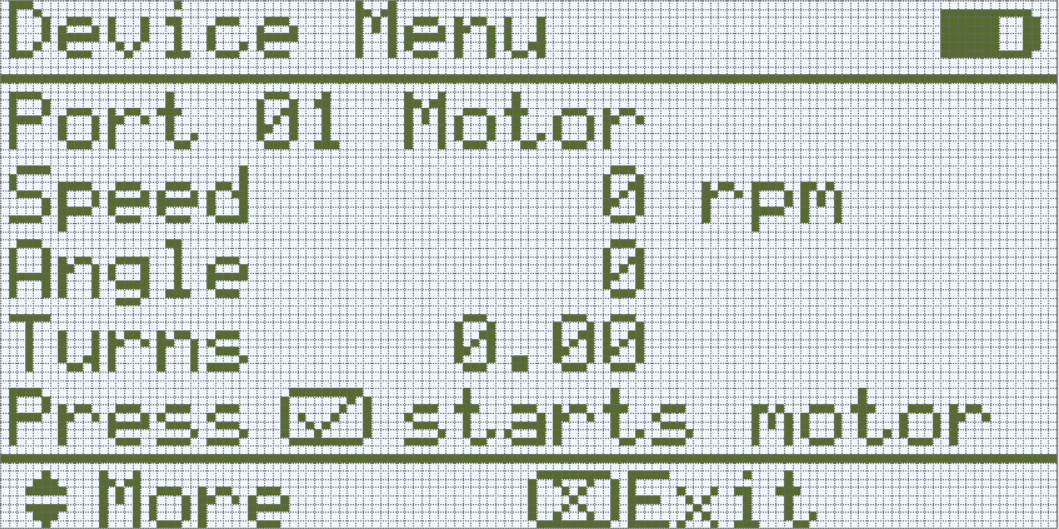
The Device Menu for Port 1 with a Smart Motor connected
You can use the up and down arrows to navigate through the Smart Devices that you have connected.
Step
Activating the Motor
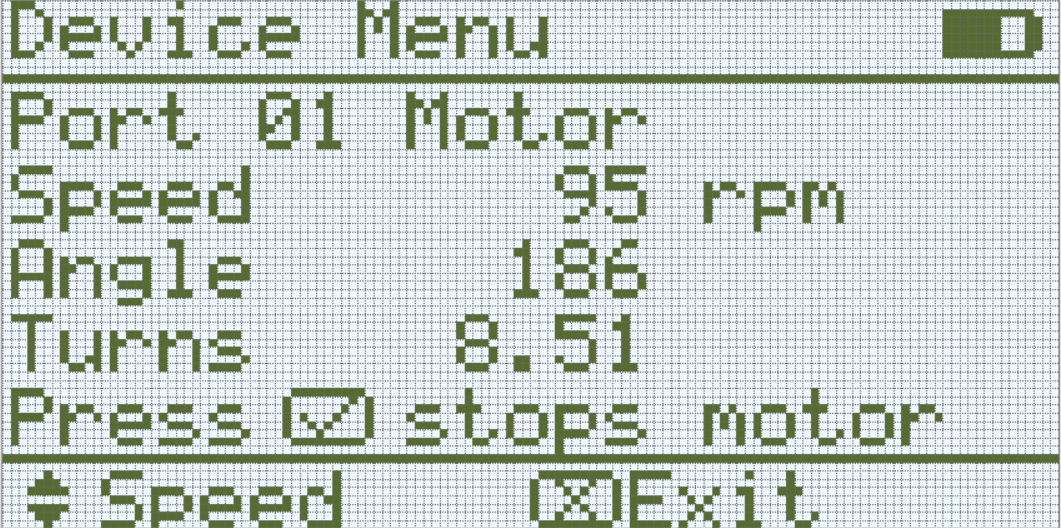
The Device Menu for Port 1 with a Smart Motor connected
The Tester should press the Check button again to activate the motor. Press X to stop it at any time, and press the Check button again to restart it.