Play
Part 1 - Step by Step
- InstructInstruct students to measure out a 600 millimeter (~ 24 inch) track for their Motorized Super Car trials. Explain that they will perform three trials in which they record their car’s speed. The track should be in a straight line. Watch the animation below to see the Motorized Super Car complete a trial by driving forward while being powered by the Motor.
Track for Motorized Super Car trials - ModelModel how to complete a trial using the track and timer, and demonstrate how to record the results on their Data Collection Sheet.

Record trials using track and timer
- Model for students how to use the Switch.
- Setting the Switch to '+' will rotate the Motor in the forward direction and move the Motorized Super Car forward.
- Setting the Switch to '-' will rotate the Motor in the reverse direction and move the Motorized Super Car in reverse.
- Letting go of the Switch will return the it to the Neutral position, which will turn the Motor off.
- Watch the animation below to see how the Switch can be used to control the Motor and move the Motorized Super Car.
Video file - Model for students how to use the Switch.
- FacilitateFacilitate by walking around the room and asking students what they are seeing in their trials.
- Are the speeds consistent?
- Encourage students to use good teamwork and collaboration, as well as vocabulary words in their conversations.
- RemindRemind groups that they should start the timer at the same moment that the car takes off, and stop the timer right when it reaches the end of the track.
- AskAsk students to study the gears on the outside of their build.
- Which gear is driving and which is driven?
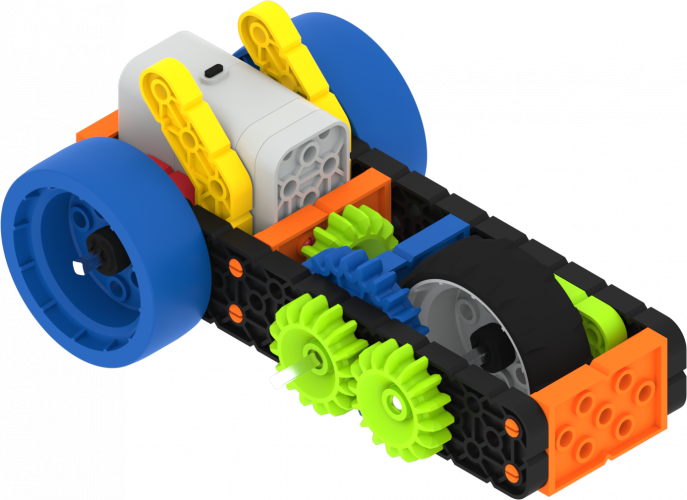
- What are the gear sizes in relation to each other? (should be same size)
Mid-Play Break & Group Discussion
As soon as every group completed their Motorized Super Car trials, come together for a brief conversation.
- How did the Motorized Super Car get the energy to move forward?
- How is the force transferred to the wheels?
- How do the gears affect the car’s performance?
Part 2 - Step by Step
- InstructInstruct students that they will continue with two more trials, but this time they will change the gear configuration and track how the gear size and arrangement affects the speed of their car.
- ModelModel How to change the external gears. (The two gears should have been the same size in the first build.) You can also use the slideshow animations to demonstrate the different arrangements.
-
Point out which gear is driving, and which is driven.

The green gear on the left is driving the green gear on the right -
Now, change the gears so that a smaller gear is driving a larger gear.

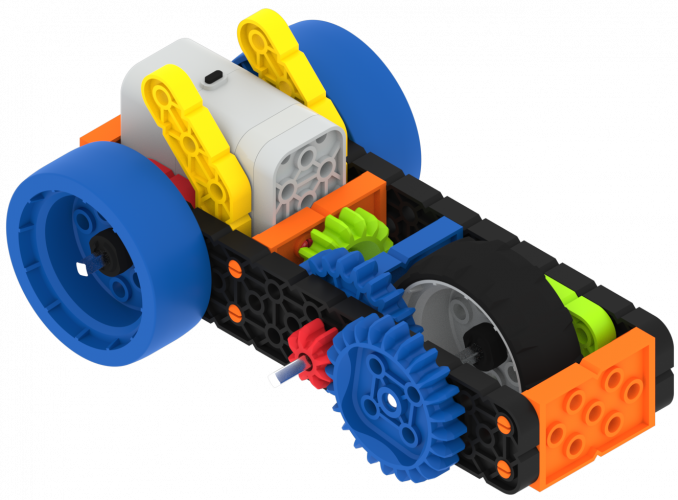
The smaller gear is driving the bigger gear - Call this configuration: "small to big."
-
Show how the little gear is pushing the bigger gear. Watch the animation below to see a small gear turning a larger gear.
Video file - Use the animations in the Lab 3 Slideshow to help demonstrate the 3 different gear configurations.
Explain that students are going to first configure their external gears from “small to big,” then test and record the car’s speed on the same track. How does it compare to the speeds they recorded in the previous trials?
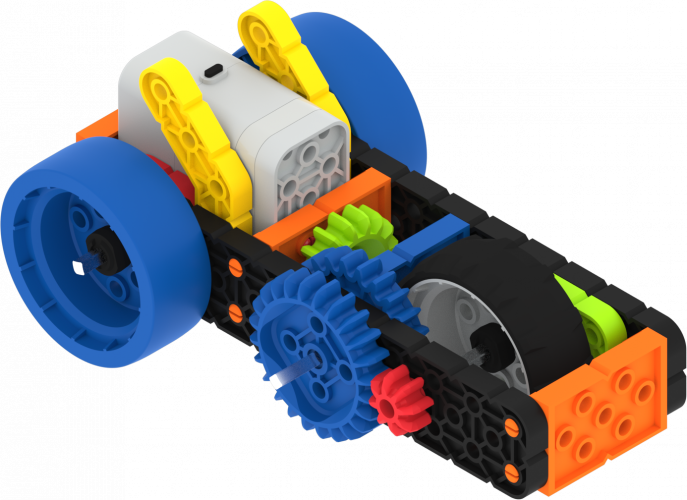
Then they will rearrange their gear configuration to “big to little” and repeat the trial.

The bigger gear is driving the smaller gear Watch the animation below to see a large gear turning a smaller gear.
Video file -
- FacilitateFacilitate discussions during investigations, as you circulate around the room. Ask students questions about why they think changing the gears changes the movement of the car.
For more information on how the VEX GO Gears function in the Super Car build, see the Gears section of the Using VEX GO Wheels, Gears, and Pulleys VEX Library article.
- RemindRemind groups that the gear that is pushing is called the driving gear, and the one being pushed is the driven gear. Replay animations from the Lab 3 Slideshow to demonstrate gear configurations at the beginning of Play Part 2, or while groups are working, if they need help to understand how the gears are working together.
- AskAsk students to predict what will happen before they actually drive the car. Why do they think that? How did their thinking change after observing the movement of the car? What relationship can they see between the gear orientation and speed?