Controller Exploration - Part 3
![]() Teacher Toolbox
-
[Forever] Blocks
Teacher Toolbox
-
[Forever] Blocks
This step discusses the importance of the [Forever] block. You should review the information as a class. You can model the behavior with your Clawbot and Controller, or if time permits, have the students run the program without the [Forever] block.
Step 1: Controller Programming
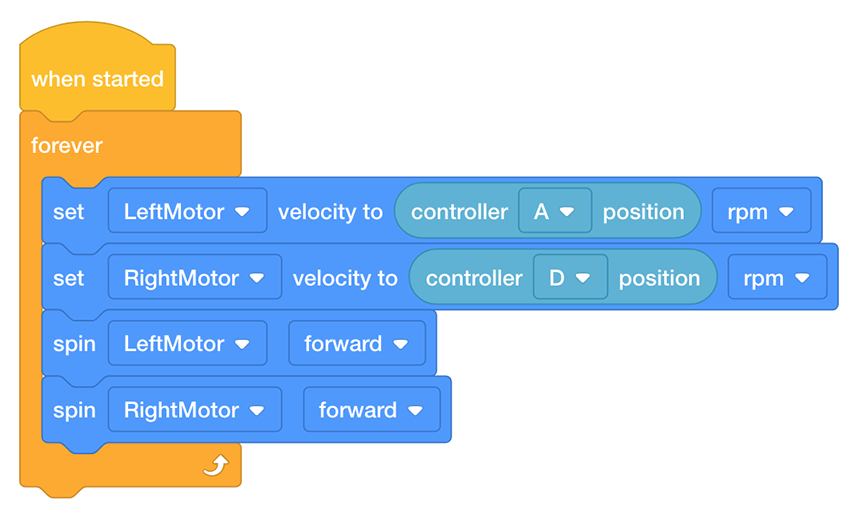
What are the benefits of using a [Forever] block?
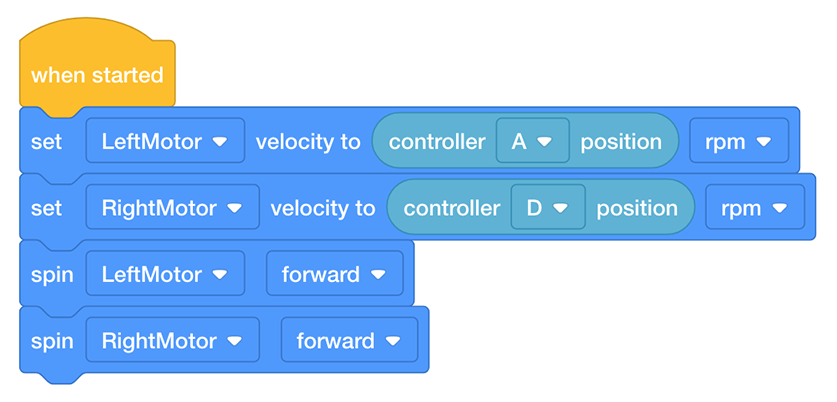
Build this project as shown below without the [Forever] block:

What do you think would happen if this program were run? Discuss as a group. The Recorder should write down the team’s prediction in the engineering notebook.
![]() Teacher Toolbox
-
Understanding the Block
Teacher Toolbox
-
Understanding the Block
Without the [Forever] loop, the velocity’s value for each motor is set as soon as the project is run, and that value remains constant until the project is stopped. In other words, if you run the project without moving either Joystick, because the Joystick’s default position on its axis is 0, the velocity of both motors will remain at 0, even if you move the Joystick.
Likewise, let’s say you move the left Joystick up as far as it will go along its A axis and hold it there. If you run the project above, the left motor will move at full speed and will remain at that velocity even if you move the Joystick down along the A axis. This is because Clawbot receives its initial instruction from the Controller as soon as the project is run; however, without a Loop, that initial value cannot update.
The [Forever] loop tells the Clawbot to constantly update the velocity and run for the duration of the project. In other words, the [Forever] loop, in this project, enables you to change the velocity of each motor by moving either Joystick along the A or D axis, and the Clawbot will respond accordingly until you stop the project or turn off the Clawbot.

Step 2: Navigate a Slalom Course

Now that the Controller is paired and the project is downloaded, you are ready to move your Clawbot using the Controller!
- The Builder and the Programmer should collect the four classroom items you will use as flags in your slalom from the teacher.
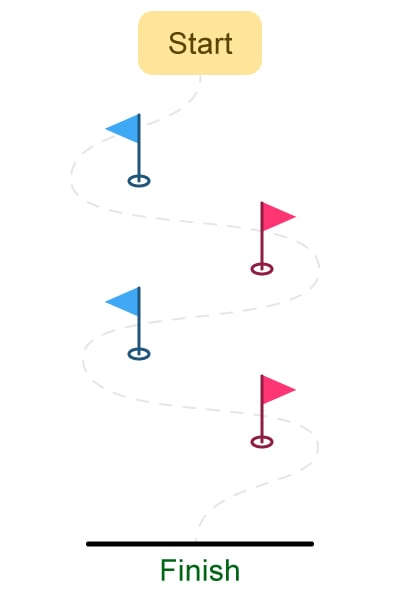
- The Builder, Programmer, and Recorder should collaborate to set them in place for the Driver to navigate the Clawbot around, according to the slalom diagram.
- The Driver should download the clawbotController project. If there are any questions about how to download a project, check out the Download and Run a Project tutorial.
![]() Teacher Toolbox
-
Setting Up the Challenge
Teacher Toolbox
-
Setting Up the Challenge
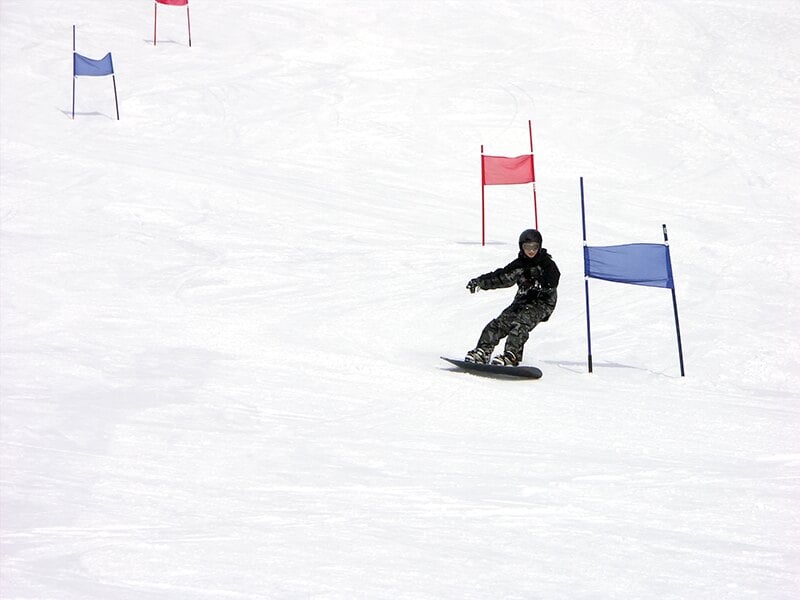
Have students complete this slalom by using the Controller to move the Clawbot along the outside of each “flag.” The Clawbot’s path must prevent it from touching any flag and allow it to cross the finish line. Flags can be any classroom material/object you have handy (eraser, roll of tape, tissue box) and can be set in place prior to operating the Clawbot.
- If time permits, have students switch roles to give others the opportunity to drive the Clawbot. You could even turn this into a competition within groups or between groups by seeing how quickly each driver can navigate the slalom.
-
For information on how to organize a classroom competition with the Slalom course, click below.
Google Doc / .docx / .pdf
Step 3: Robo-Slalom

Use the Controller to move your Clawbot along the outside of each “flag.” The robot’s path must prevent it from touching any flag, and allow it to cross the finish line.
- The Driver should run the project and drive the Clawbot forward and reverse, and turn left and right using both Joysticks.
- The Recorder should time how long it takes for the Clawbot to complete the course. Document the times in the engineering notebook.
- How fast can you get Clawbot through the Slalom course?
![]() Motivate Discussion
-
Reflecting on the Activity
Motivate Discussion
-
Reflecting on the Activity
Q: Did the Clawbot respond to the Controller as you expected it to?
A: Answers will vary; however, the goal of this question is to promote cognitive thinking. Students began by predicting behaviors before testing them, documenting their results, and reflecting.
Q: What is the biggest challenge in moving the Clawbot forward or reverse in a straight line?
A: While answers may vary, a common response should be that both Joysticks must move in sync with one another to ensure that the Clawbot’s motors are moving in the same direction and at the same velocity.
Q: How does using the [Forever] loop enable you to continuously use the Controller to move the Clawbot?
A: Without the [Forever] loop, the Clawbot would only perform the behaviors as determined by the blocks in the project once. The [Forever] loop tells the Clawbot to constantly update the velocity and run for the duration of the project. In other words, the [Forever] loop enables you to use the Controller to move the Clawbot indefinitely, or until the battery dies.