
ปราสาทแครชเชอร์

6 บทเรียน

ในบทนี้ คุณจะได้สำรวจวิธีใช้เซ็นเซอร์แบบออปติคอลและระยะทางเพื่อค้นหา ชน และเคลียร์ 'ปราสาท' ลูกบาศก์เพื่อทำคะแนนในการแข่งขัน Castle Crasher!

ไปที่พอร์ทัลครูเพื่อดูสื่อและวิดีโอสนับสนุนครูเกี่ยวกับเนื้อหาและการอำนวยความสะดวกของบทเรียน Castle Crasher

ปราสาทแครชเชอร์ พอร์ทัลของครู  >

VEX IQ 2nd generation BaseBot build.

บทที่ 1: บทนำ

ในบทเรียนนี้คุณจะได้รับการแนะนำให้รู้จักกับการแข่งขัน Castle Crasher สร้าง BaseBot และเตรียมพร้อมสำหรับการเขียนโค้ด

A close up view of the BaseBot at the corner of the raised Field with 3 Cubes falling off the Field to the surface below.

บทที่ 2: Castle Crasher ไม่มีเซ็นเซอร์

ในบทเรียนนี้คุณจะได้เรียนรู้เกี่ยวกับการคำนวณมุมและการเปลี่ยนความเร็วของหุ่นยนต์ของคุณเพื่อให้คุณสามารถแข่งขันใน Tower Over Challenge ได้

A close up view of the BaseBot at the edge of the raised Field, having just pushed a green Cube off the Tiles. The Distance Sensor on the front of the robot is highlighted in yellow.

บทที่ 3: Castle Crasher + เซ็นเซอร์ระยะทาง

ในบทเรียนนี้คุณจะได้เรียนรู้เกี่ยวกับเซ็นเซอร์ระยะทางคืออะไรและสามารถใช้กับหุ่นยนต์ของคุณได้อย่างไร นอกจากนี้คุณยังจะได้เรียนรู้เกี่ยวกับบล็อก [รอจนกว่า] และวิธีใช้ในโครงการ VEXcode IQ จากนั้นคุณจะนำสิ่งที่คุณได้เรียนรู้ไปใช้ในการแข่งขัน Cube Crasher Challenge!

A close up of the BaseBot pushing a green cube off the edge of the raised Field, with the Distance and Optical Sensors attached to the front of the robot highlighted in yellow. The Distance Sensor faces forward, and the Optical Sensor is positioned downward.

บทที่ 4: การสร้างอัลกอริทึม

ในบทเรียนนี้คุณจะได้เรียนรู้เกี่ยวกับออปติคัลเซนเซอร์และวิธีการสร้างอัลกอริทึมที่ใช้ข้อเสนอแนะของเซ็นเซอร์ จากนั้นคุณจะต้องตั้งรหัสให้หุ่นยนต์ของคุณค้นหาลูกบาศก์โดยอัตโนมัติและผลักออกจากสนามในการแข่งขันกวาดล้างสนาม

A close up image of the BaseBot with the Distance and optical Sensors on the front, pushing a stack of two cubes off the corner of the raised Field, with cubes on and off the Field in the background.

บทเรียนที่ 5: การแข่งขัน Castle Crasher

ในบทเรียนนี้คุณจะใช้การเรียนรู้ของคุณจากบทเรียนก่อนหน้านี้เพื่อแข่งขันในการแข่งขัน Castle Crasher!

Blue light bulb icon.

บทที่ 6: บทสรุป

ในบทเรียนนี้คุณจะได้ทบทวนหน่วยและระบุความเชื่อมโยงระหว่างสิ่งที่คุณทำกับอาชีพ STEM

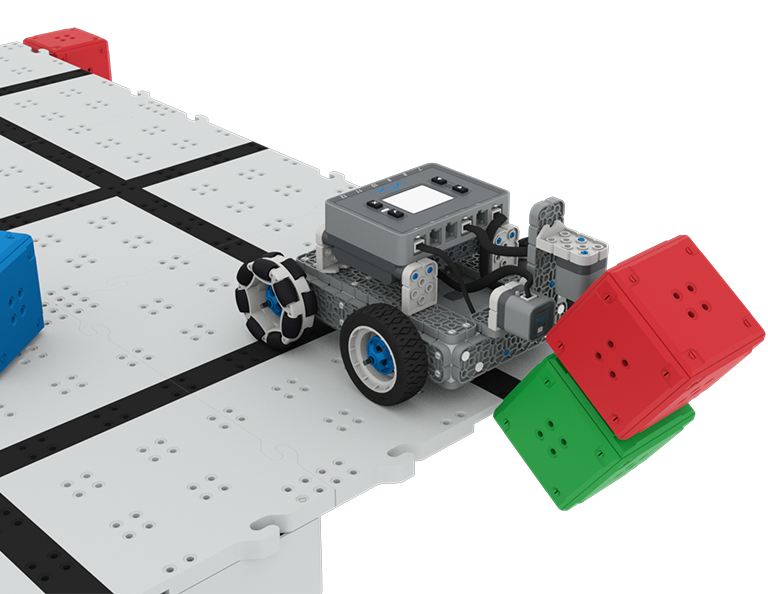
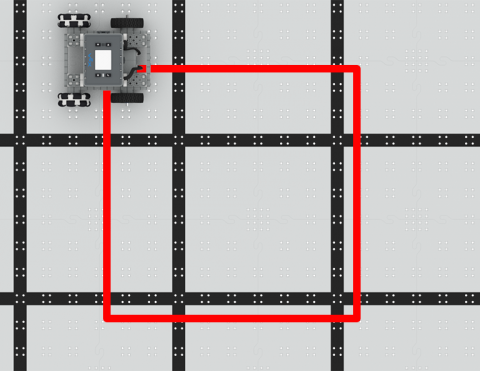
เขียนโค้ด BaseBot เพื่อขับเป็นสี่เหลี่ยม!

Activity Image
Image
Square Dance
VEX Platform
Builds
Activity PDF Link
https://content.vexrobotics.com/assets/education/stem-labs/docs/iq/Activities/IQ Activity - Square Dance.pdf

เขียนโค้ด BaseBot เพื่อล้มลูกบาศก์!

Activity Image
Image
Cube Crasher Challenge
VEX Platform
Builds
Activity PDF Link
https://content.vexrobotics.com/assets/education/stem-labs/docs/iq/Activities/IQ Activity - Cube Crasher Challenge.pdf

เรียนรู้เกี่ยวกับทิศทางของ BaseBot ในการผลักลูกบาศก์!

Activity Image
Image
Turn Around
VEX Platform
Builds
Activity PDF Link
https://content.vexrobotics.com/assets/education/stem-labs/docs/iq/Activities/IQ Activity - Turn Around.pdf

โค้ด BaseBot เพื่อเลี้ยวซ้ายและขวา

Activity Image
Image
To the Left, To the Right!
VEX Platform
Builds
Activity PDF Link
https://content.vexrobotics.com/assets/education/stem-labs/docs/iq/Activities/IQ Activity - To the Left To the Right.pdf

เคลื่อนหุ่นยนต์ของคุณไปข้างหน้าและข้างหลังโดยอัตโนมัติ!

Activity Image
Image
Drive Forward and Reverse Tile
VEX Platform
Builds
Activity PDF Link
https://content.vexrobotics.com/assets/education/stem-labs/docs/iq/Activities/IQ Activity - Drive Forward and Reverse.pdf

ล่าสมบัติ

5 บทเรียน

ในหน่วยการเรียนรู้นี้ คุณจะสร้างและเขียนโค้ด Simple Clawbot ด้วยเซ็นเซอร์ออปติคัลเพื่อจดจำและรวบรวมลูกบาศก์สีแดงเพื่อแข่งขันในการแข่งขัน Treasure Hunt!

ไปที่พอร์ทัลครูเพื่อดูสื่อและวิดีโอสนับสนุนครูเกี่ยวกับเนื้อหาและการอำนวยความสะดวกของบทเรียน Treasure Hunt

ล่าสมบัติ พอร์ทัลของครู  >

VEX IQ 2nd generation Simple Clawbot build.

บทที่ 1: บทนำ

คุณจะได้รับการแนะนำเกี่ยวกับการแข่งขันล่าสมบัติ สร้าง Simple Clawbot และเตรียมพร้อมสำหรับการเขียนโค้ด

A close up view of the Simple Clawbot with the claw open approaching a red Cube as if to grasp it.

บทที่ 2: กรงเล็บไม่มีเซ็นเซอร์

ในบทเรียนนี้ คุณจะได้เรียนรู้เกี่ยวกับการใช้บล็อก Drivetrain และ Motion ใน VEXcode IQ เพื่อเขียนโค้ด Simple Clawbot เพื่อรวบรวมและเคลื่อนย้ายลูกบาศก์ในความท้าทาย Clawbot Collector

A close up image of the Simple Clawbot with the claw open, in front of a red Cube, with the Optical Sensor at the base of the claw highlighted in yellow.

บทที่ 3: กรงเล็บพร้อมเซ็นเซอร์

ในบทเรียนนี้ คุณจะได้เรียนรู้เกี่ยวกับการเขียนโค้ดเซ็นเซอร์ออปติคัลเพื่อตรวจจับ รวบรวม และเคลื่อนย้ายลูกบาศก์สีแดงในความท้าทาย Treasure Mover!

An aerial view of the Simple Clawbot at the edge of the Field delivering two red Cubes in its claws.

บทที่ 4: การแข่งขันล่าสมบัติ

ในบทเรียนนี้ คุณจะนำการเรียนรู้จากบทเรียนก่อนหน้ามาประยุกต์ใช้ในการแข่งขันล่าสมบัติ!

Blue light bulb icon.

บทที่ 5: บทสรุป

ในบทเรียนนี้คุณจะได้ทบทวนหน่วยและระบุความเชื่อมโยงระหว่างสิ่งที่คุณทำกับอาชีพ STEM

ฐานรหัสการขับขี่ด้วยตนเอง

0 ห้องทดลอง

เขียนรหัสฐานรหัสการขับขี่ด้วยตนเองของคุณเพื่อใช้เซ็นเซอร์ตรวจจับดวงตาเพื่อตรวจจับความสว่างและสีในชุดกิจกรรมนี้

คลอว์บอทพร้อมคอนโทรลเลอร์

0 บทเรียน

ตั้งโปรแกรม VEX Controller เพื่อควบคุม Clawbot ผ่านความท้าทายต่างๆ โดยใช้แนวคิดของลูปและเหตุการณ์

ต้องทำหรือไม่ทำ

0 บทเรียน

ตั้งโปรแกรมหุ่นยนต์ของคุณให้ดำเนินการตามเงื่อนไขและสร้างอินเทอร์เฟซผู้ใช้ (UI)

Subscribe to การเข้ารหัส