
Program Joint Movement
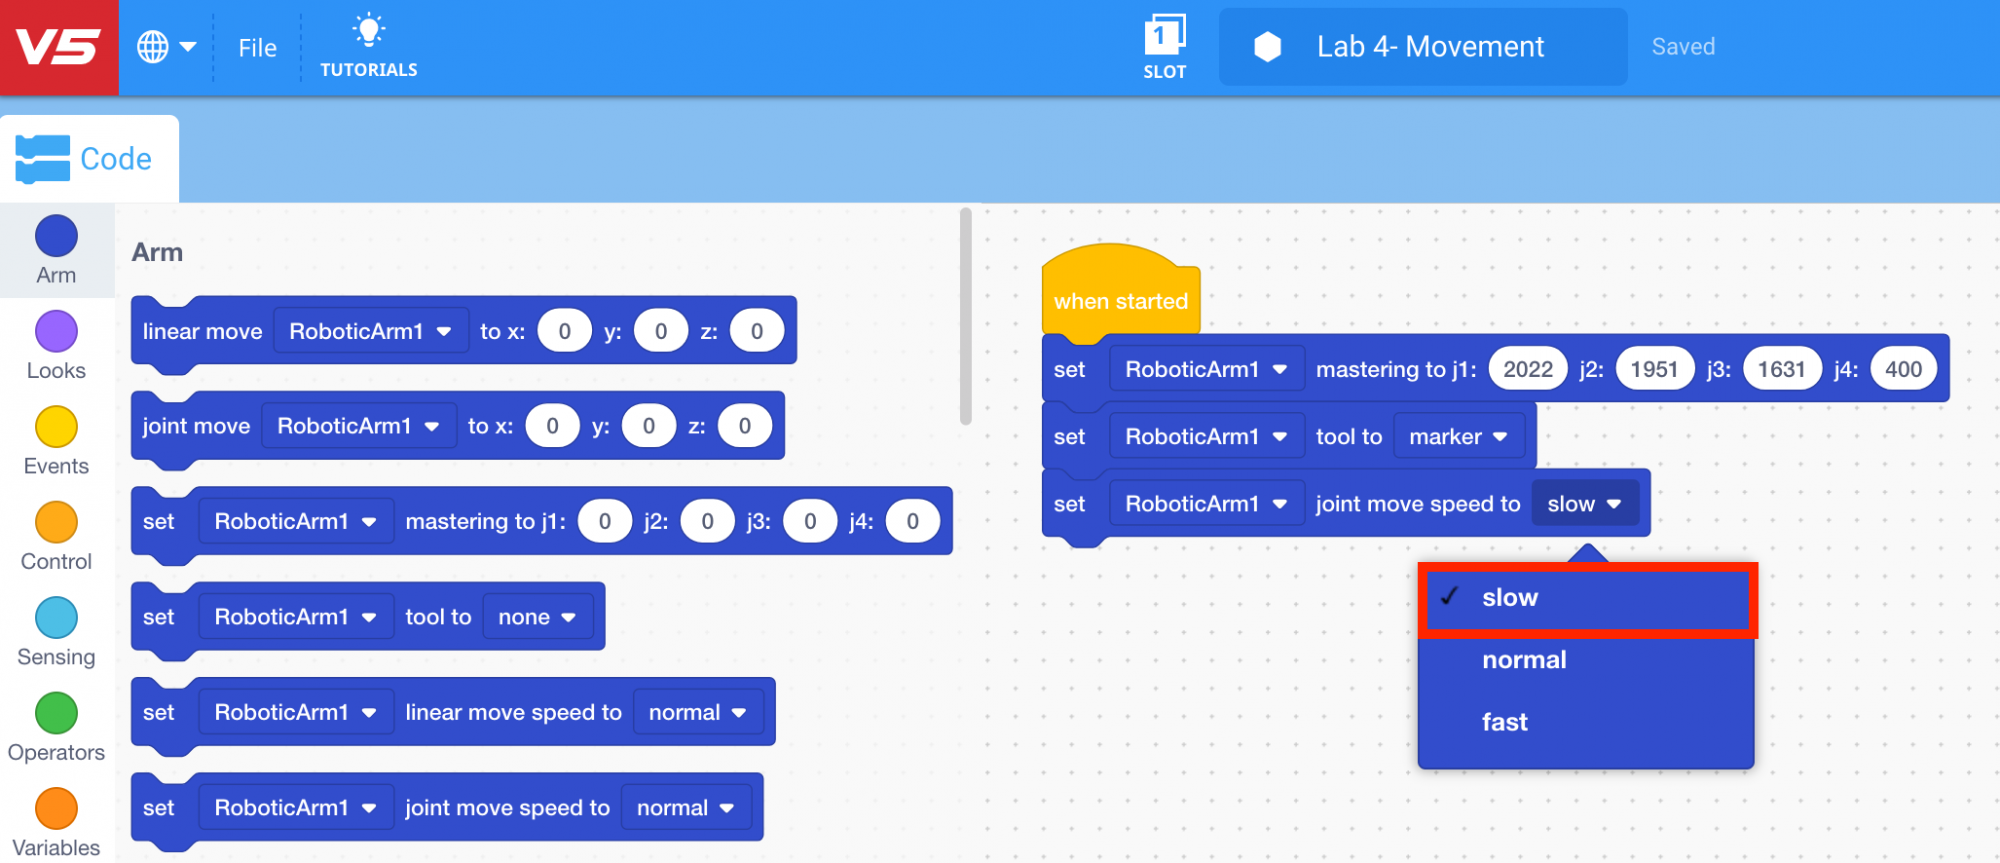
- To ensure the arm mounted on the VEX V5 Workcell does not move too quickly, select and drag the [Set joint speed] block from the ‘Arm’ category in the Tool Box and attach it to the [Set tool] block.
![Add [Set joint speed]](/stemlabs/sites/default/files/inline-images/Add%20%5BSet%20joint%20speed%5D.png)
- Set the speed to ‘slow.’
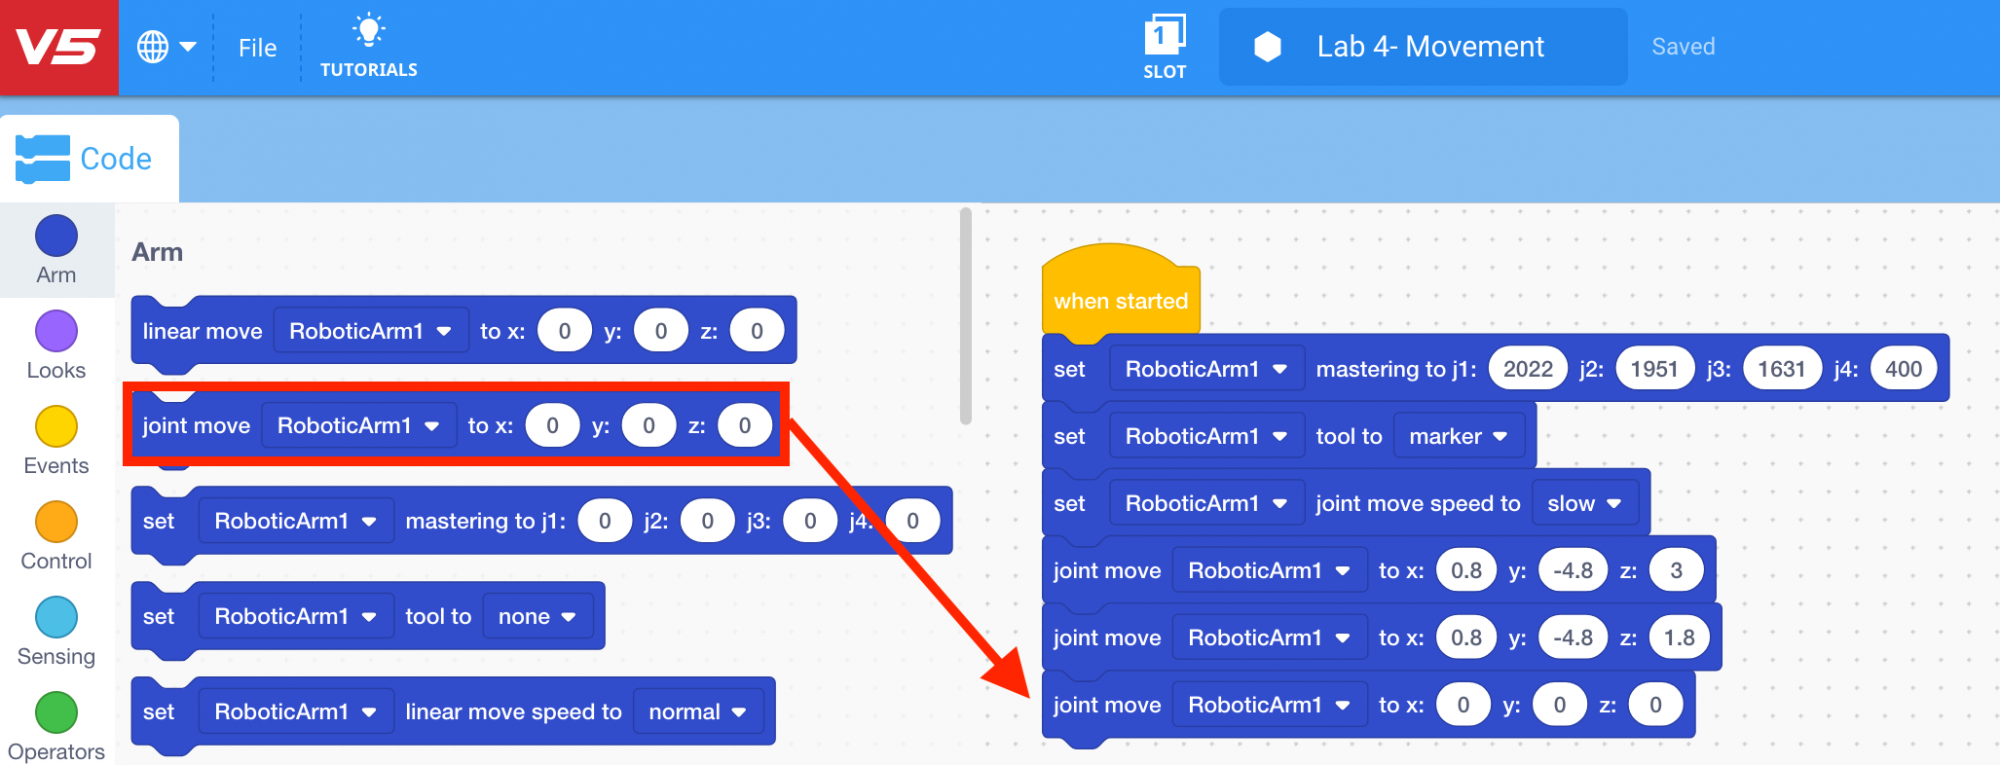
- Select and drag the [Joint move] block from the ‘Arm’ category in the Tool Box and attach it to the [Set joint speed] block.
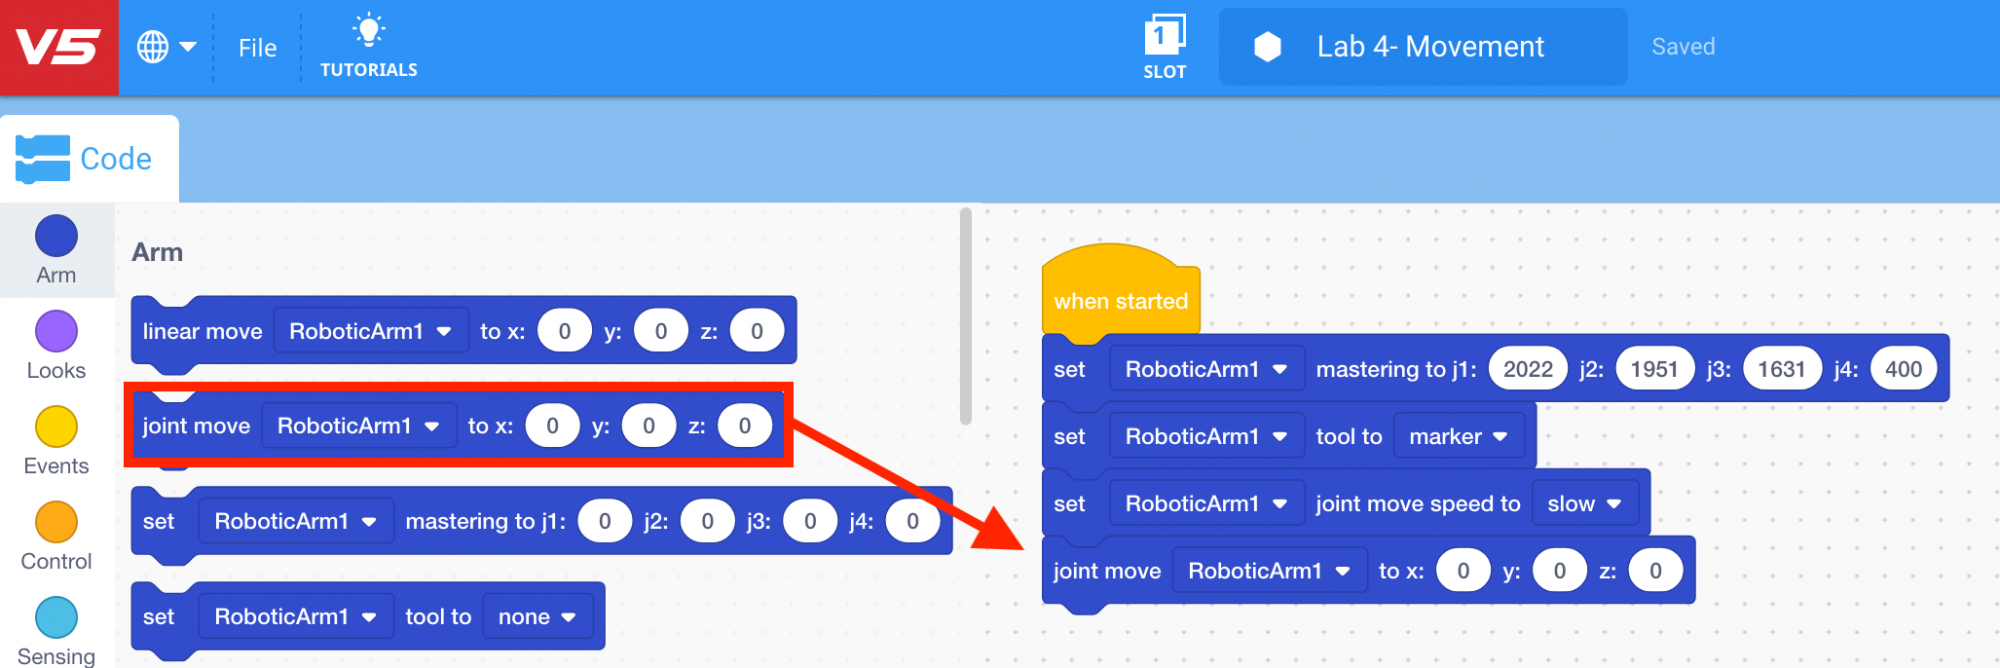
- Input the (x, y, z) coordinates of the location above Point 1 into the [Joint move] block.]
![Add above point 1 values [Joint move]](/stemlabs/sites/default/files/inline-images/Add%20above%20point%201%20values%20%5BJoint%20move%5D.png)
- Select and drag another [Joint move] block from the ‘Arm’ category in the Tool Box and attach it to the first [Joint move] block.
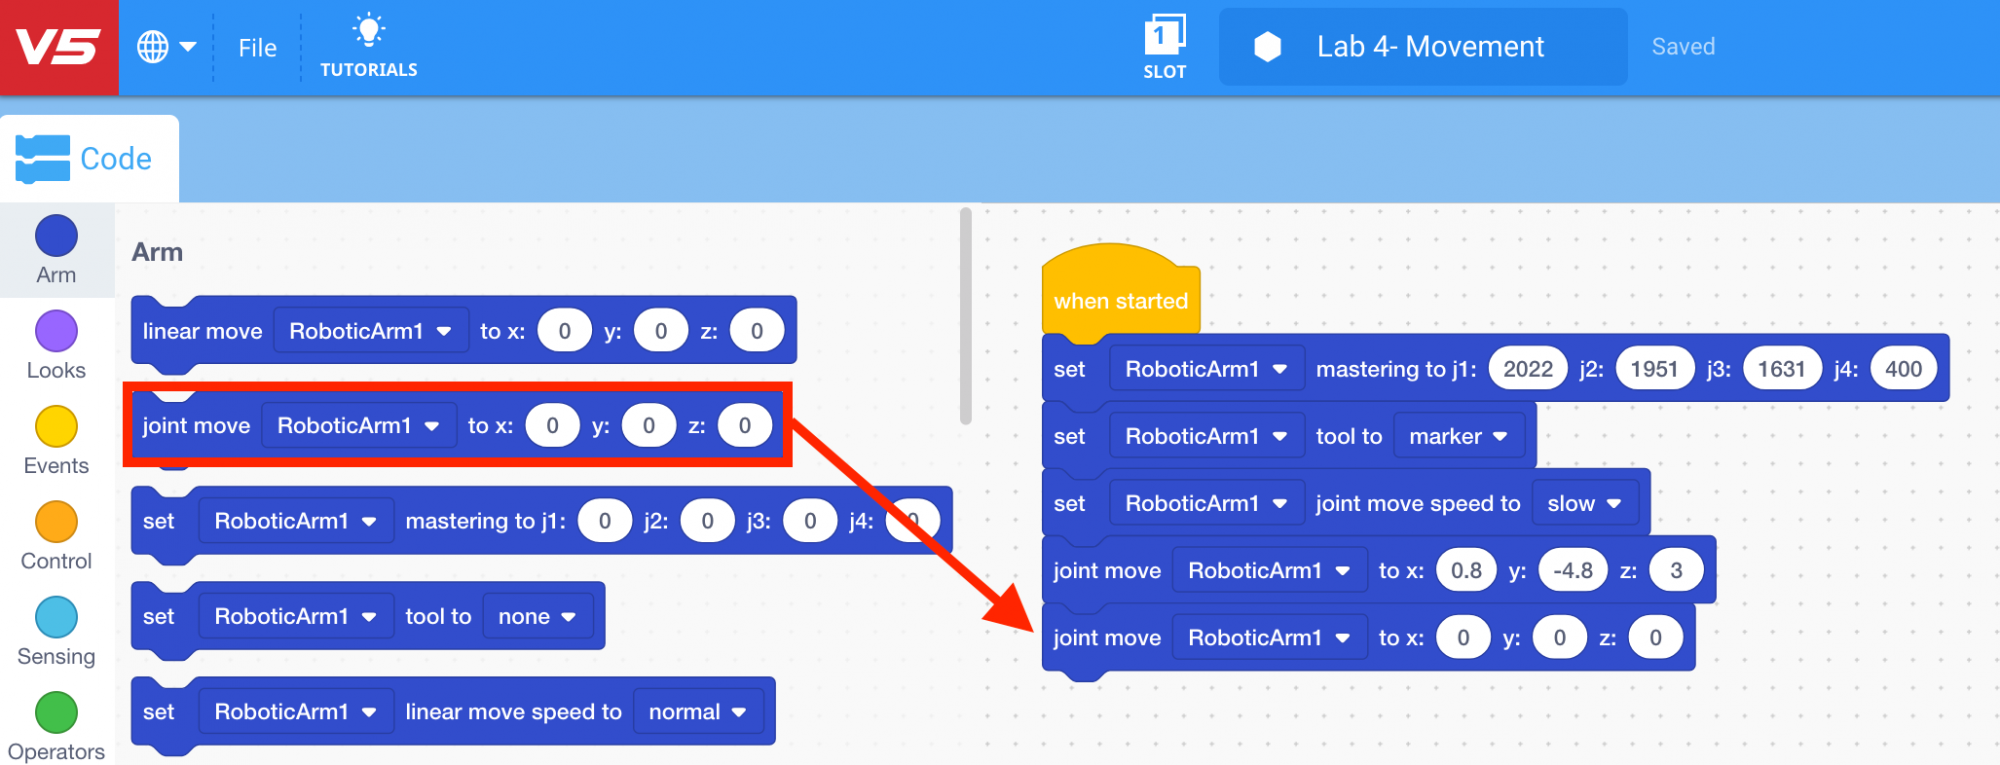
- Input the (x, y, z) coordinates of Point 1 into the second [Joint move] block.
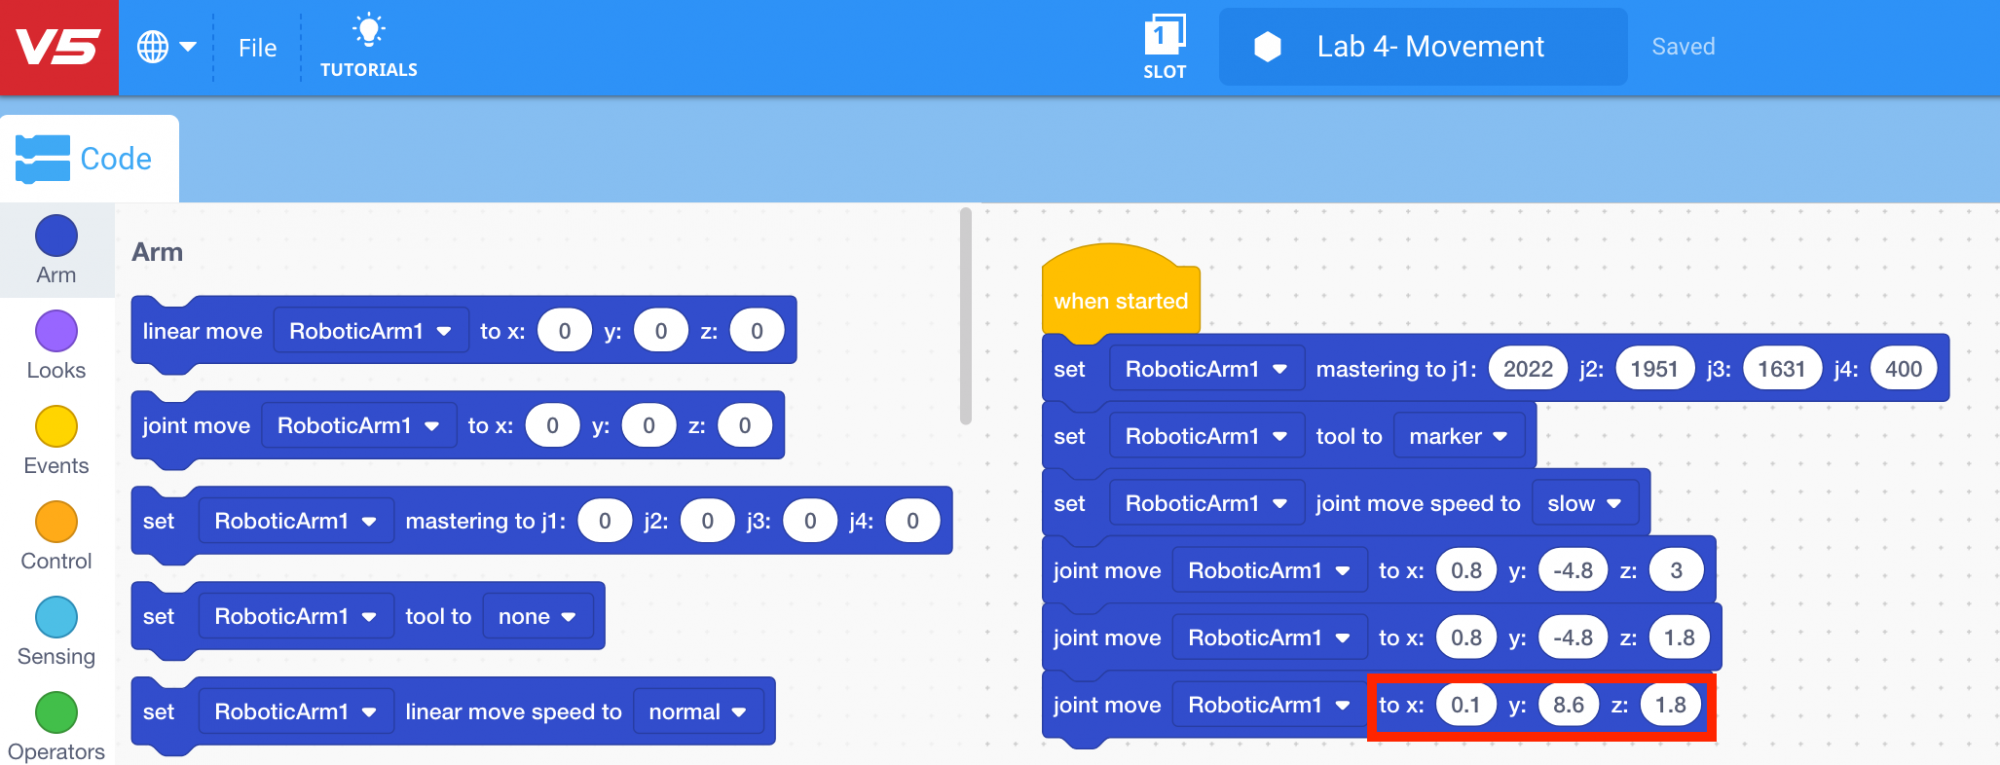
- Select and drag another [Joint move] block from the ‘Arm’ category in the Tool Box and attach it to the second [Joint move] block.
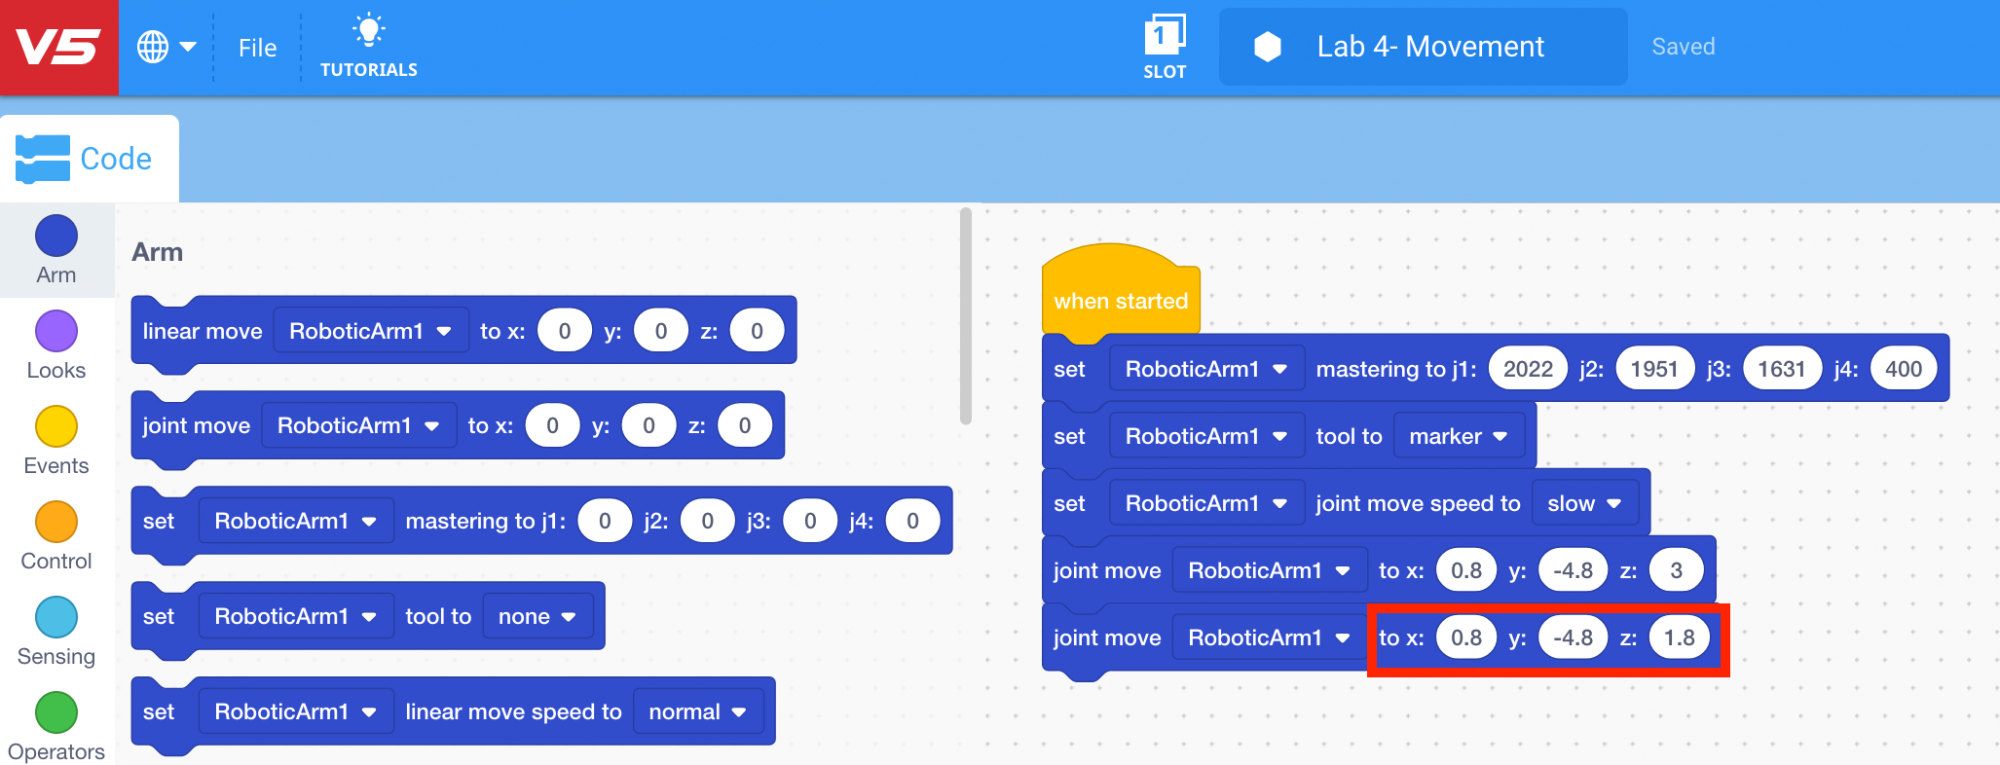
- Input the (x, y, z) coordinates of Point 2 into the third [Joint move] block.
- Download and run the project.

Note: if the dry-erase marker is not drawing well, adjust the z-axis values to provide more force.
- Observe that the arm mounted on the V5 Workcell drew an arc (joint motion) between Point 1 and Point 2 using the dry-erase marker.
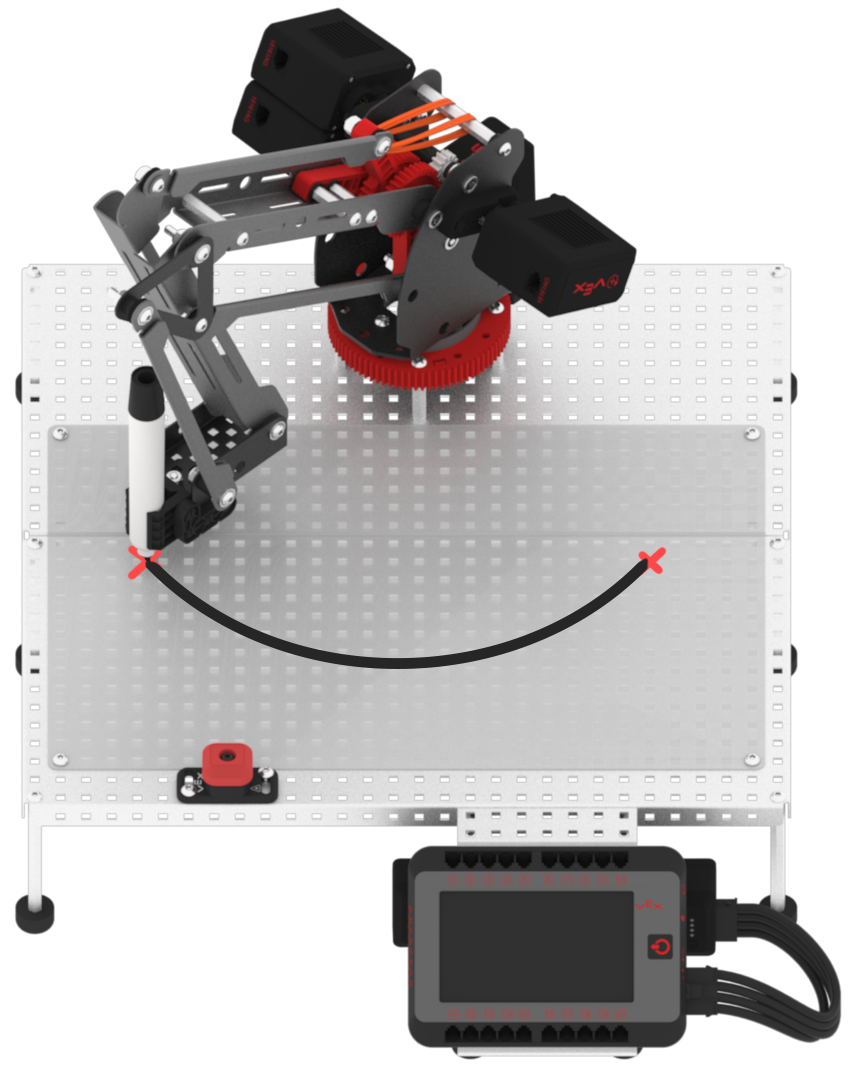
- Stop the project.
