Tips for Coding Fling
There are many other ways to code Fling using VEXcode IQ features or other elements of the robot. This is not an exhaustive list, but a great place to get started as you continue to code Fling.
Multiple {When Started} Blocks
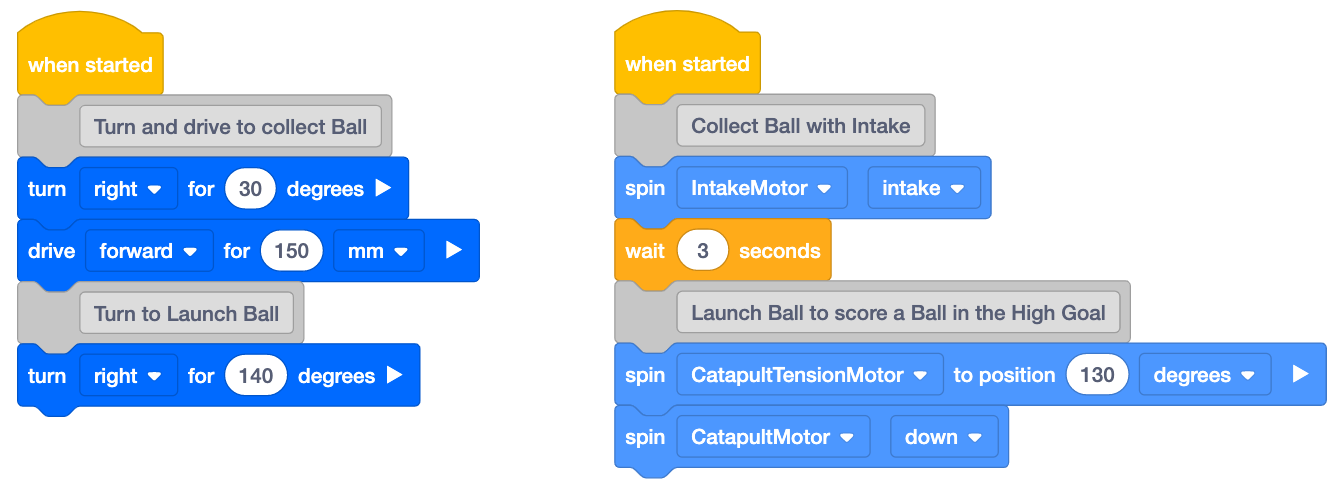
By using multiple {When started} blocks, you can start two or more stacks of code at the same time.
When the project is started in this example, Fling will begin turning right for 30 degrees while spinning the Intake Motor at the same time.
"And don't wait" Modifier
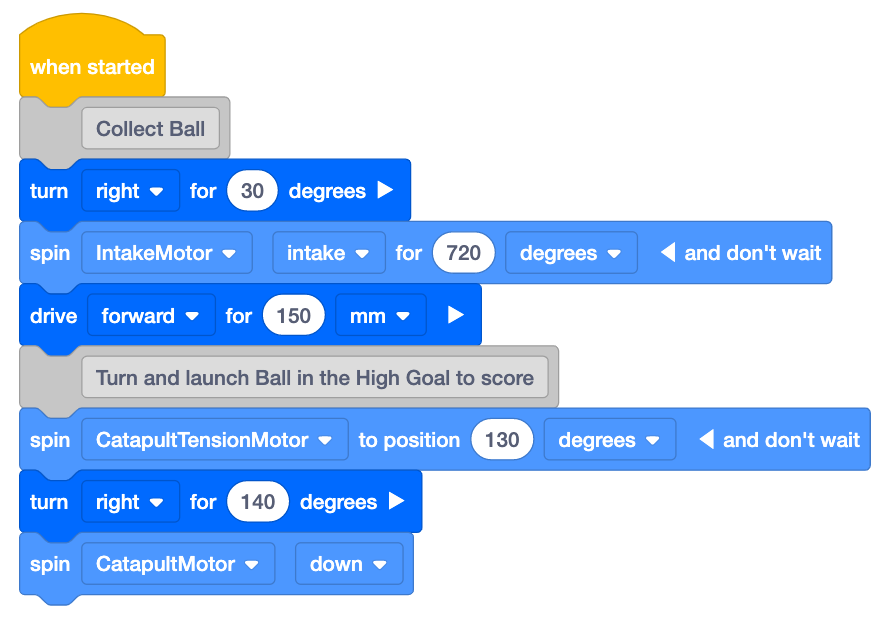
It is possible to change some blocks from waiting to non-waiting by selecting the white arrow on the side of the block.
In this example, the Intake Motor will begin spinning and continue to spin for 720 degrees while the robot is driving forward for 150mm because the [Spin for] block used with the Intake Motor has the "and don't wait" modifier selected.
Color Sensor
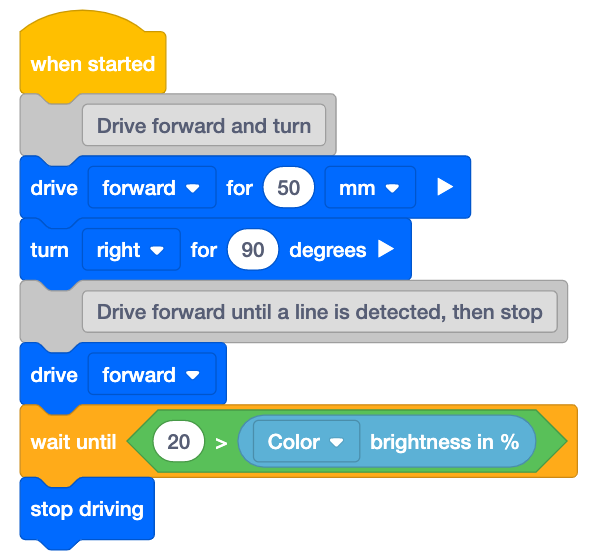
Fling is equipped with a Color Sensor on the bottom. The (Color brightness) block can be used to detect lines on the Field.
In this example, Fling will drive until a line on the Field is detected.
See this Knowledge Base article for more information about the VEX IQ Color Sensor.
Distance Sensor
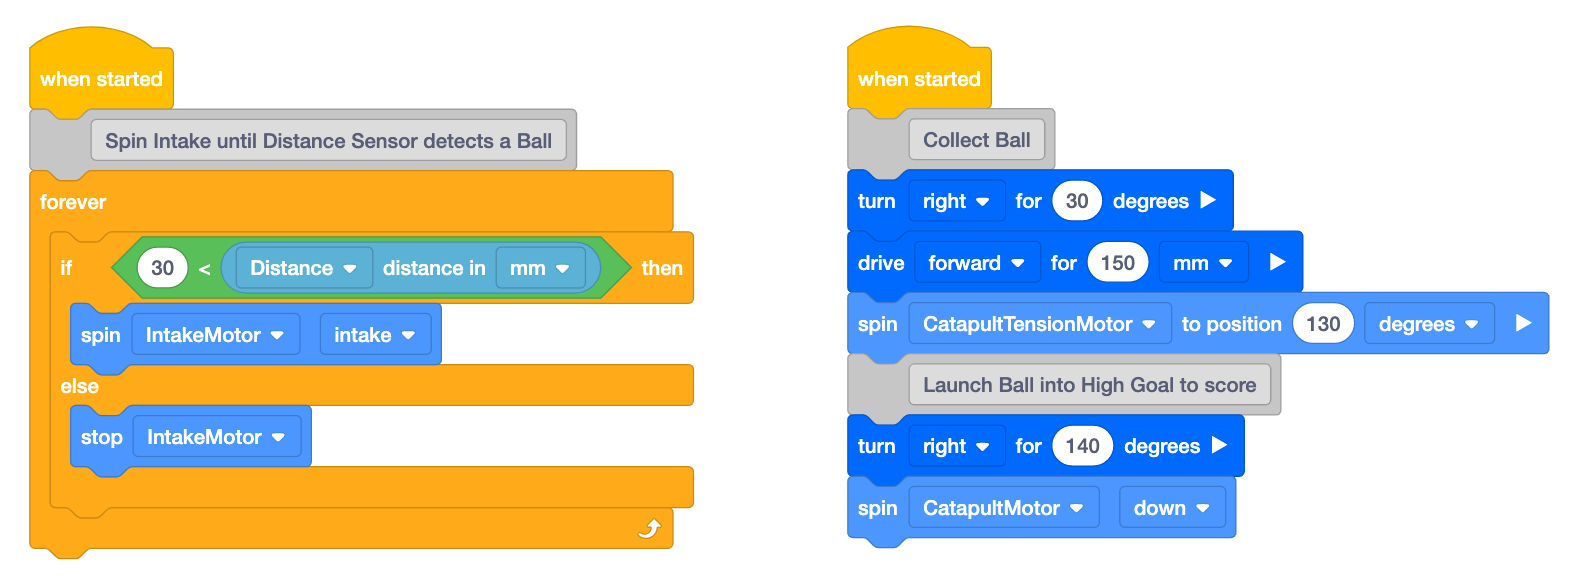
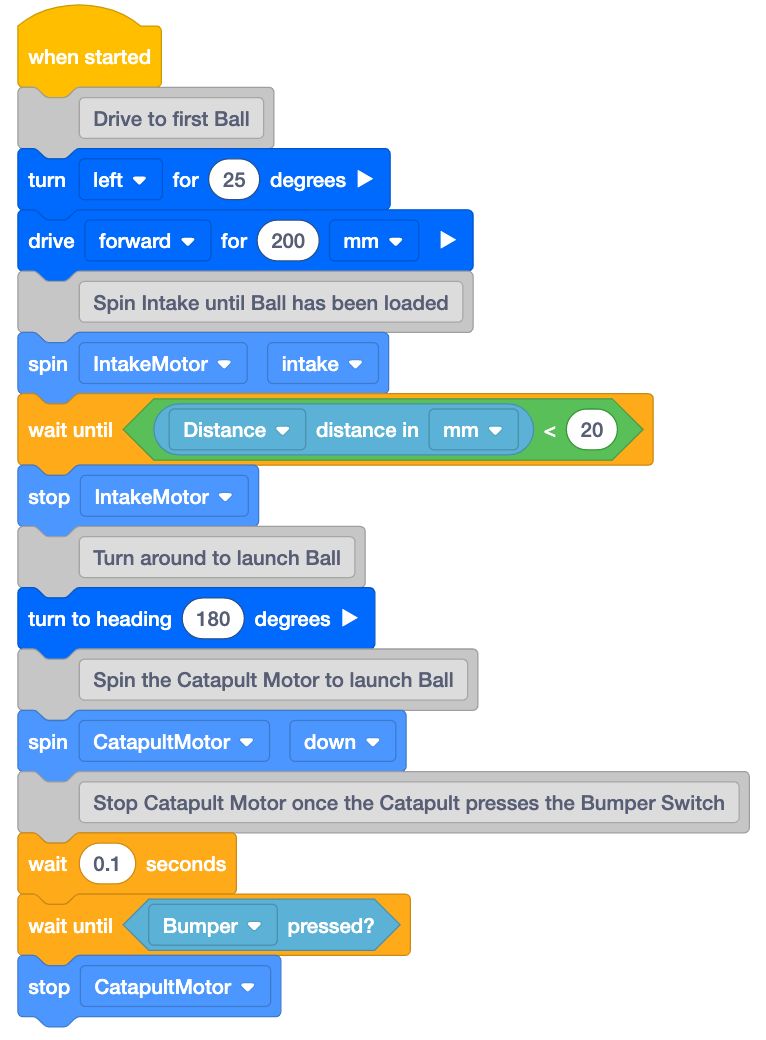
Fling is also equipped with a Distance Sensor to detect when Balls have been loaded onto the Catapult Arm.
In this example, Fling will continuously spin the Intake Motor until the Distance Sensor detects a Ball, then the Intake Motor will stop spinning. This example also uses two {When started} blocks as shown above.
See this Knowledge Base article for more information about the VEX IQ Distance Sensor.
Bumper Switch
Fling is also equipped with a Bumper Switch to detect when the Catapult Arm is fully lowered. This switch was also covered briefly in Lesson 4.
In this example, Fling will launch a Ball and continuously spin the Catapult Motor until the Bumper Switch is pressed, then the Catapult Motor will stop spinning. This example also uses the Distance Sensor as shown above.
See this Knowledge Base article for more information about the VEX IQ Bumper Switch.
Select < Return to Lessons to go back to the Lesson Overview.