
Locating Coordinates
Now that you have explored moving the arm up and down the z-axis on the previous page, you will now build on this knowledge to draw two triangles.
First, you will plan the locations of the two triangles on the whiteboard. Then, the 'Triangles' project needs to be modified to allow manual movement so you can obtain the coordinates for the triangles. Two of the ten points needed will move the marker up off of the whiteboard to prevent a line from being drawn between the two triangles.
Each triangle will be outlined with three points. Draw six points on the whiteboard using the marker. The exact location of the points may vary, but should be far enough apart to view lines between them.
In VEXcode V5, follow the steps in this video to edit the 'Triangles' project by removing the [Linear move] blocks and adding the [Set manual movement] block.
Ensure you are using your mastering values, and not the ones displayed in this video.

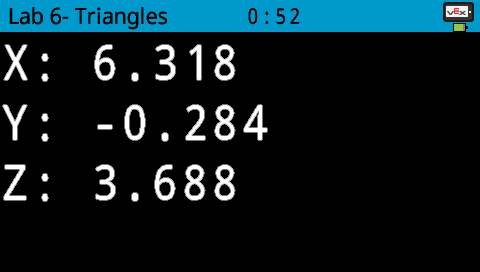
Download and run the project. (x, y, z) values will be displayed on the Brain's screen.

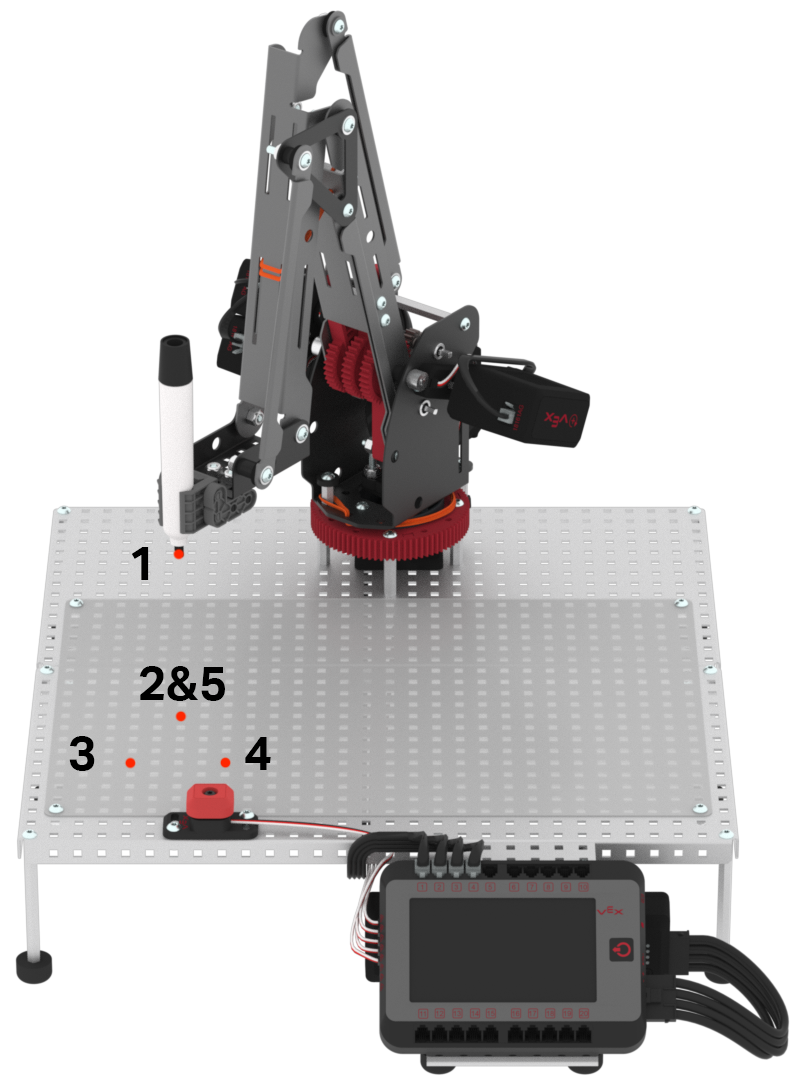
Manually move the arm on the Workcell to Point 1 and record the (x, y, z) coordinates of the location in your engineering notebook. Repeat the same process for all five points of the Triangle 1.
The five points of Triangle 1 include:
- Point 1: The marker is above but not touching the first corner of the triangle
- Point 2: Triangle point 2
- Point 3: Triangle point 3
- Point 4: Triangle point 4
- Point 5: Back to Point 2 to complete the triangle
Point 2 and Point 5 should be the same coordinate.
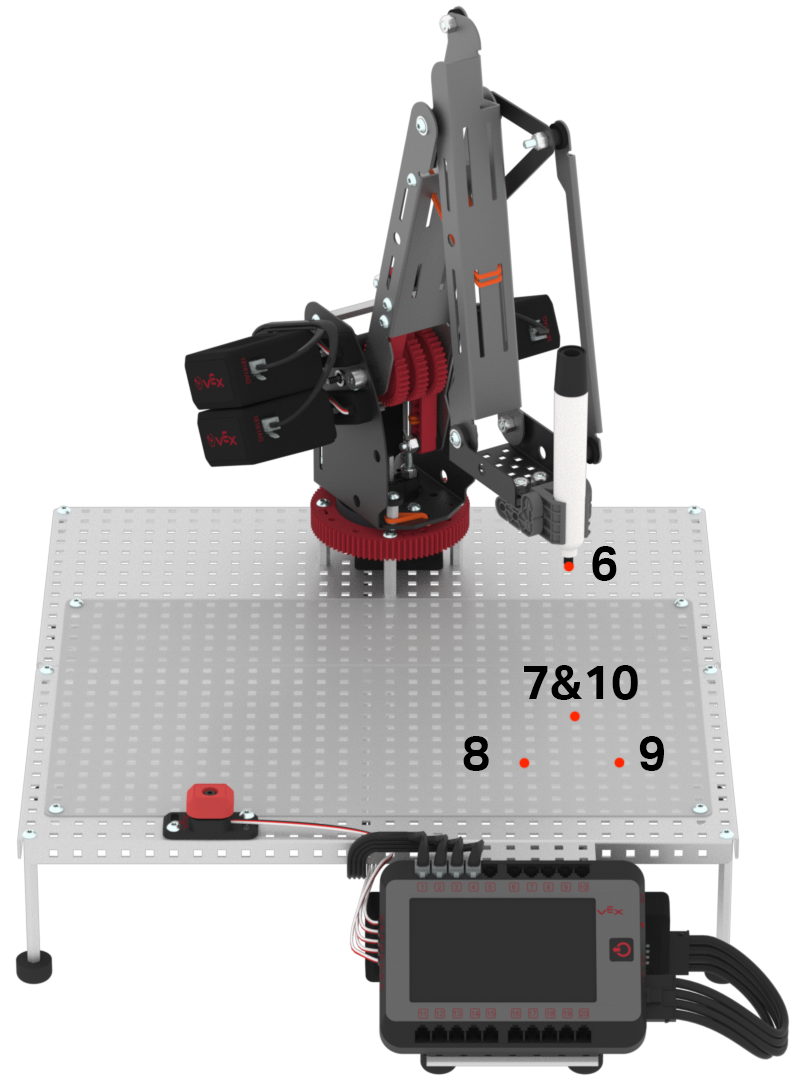
Manually move the arm on the Workcell to Point 6 and record the (x, y, z) coordinates of the location in your engineering notebook. Repeat the same process for all five points of the Triangle 2.
The five points of Triangle 2 include:
- Point 6: The marker is above but not touching the first corner of the second triangle
- Point 7: Triangle point 7
- Point 8: Triangle point 8
- Point 9: Triangle point 9
- Point 10: Back to Point 7 to complete the second triangle
Point 7 and Point 10 should be the same coordinate.
Once you have finished recording all 10 points in your engineering notebook, stop the project and check in with your teacher.
Do not erase anything on your whiteboard, as you will continue to build on your project in the next part of Play.
