
Before you can take off, you need to prepare your equipment for flight. In this lesson, you'll ensure your VEX AIR Drone has charged batteries and up-to-date firmware, and is paired to a charged VEX AIR Drone Controller. These steps ensure your drone is powered, safe to fly, and ready to respond to controller inputs.
Watch the video below to learn how to:
- Charge VEX AIR Drone Batteries.
- Install a battery in the drone.
- Pair a drone and controller.
- Update drone firmware.
Hover & Discover
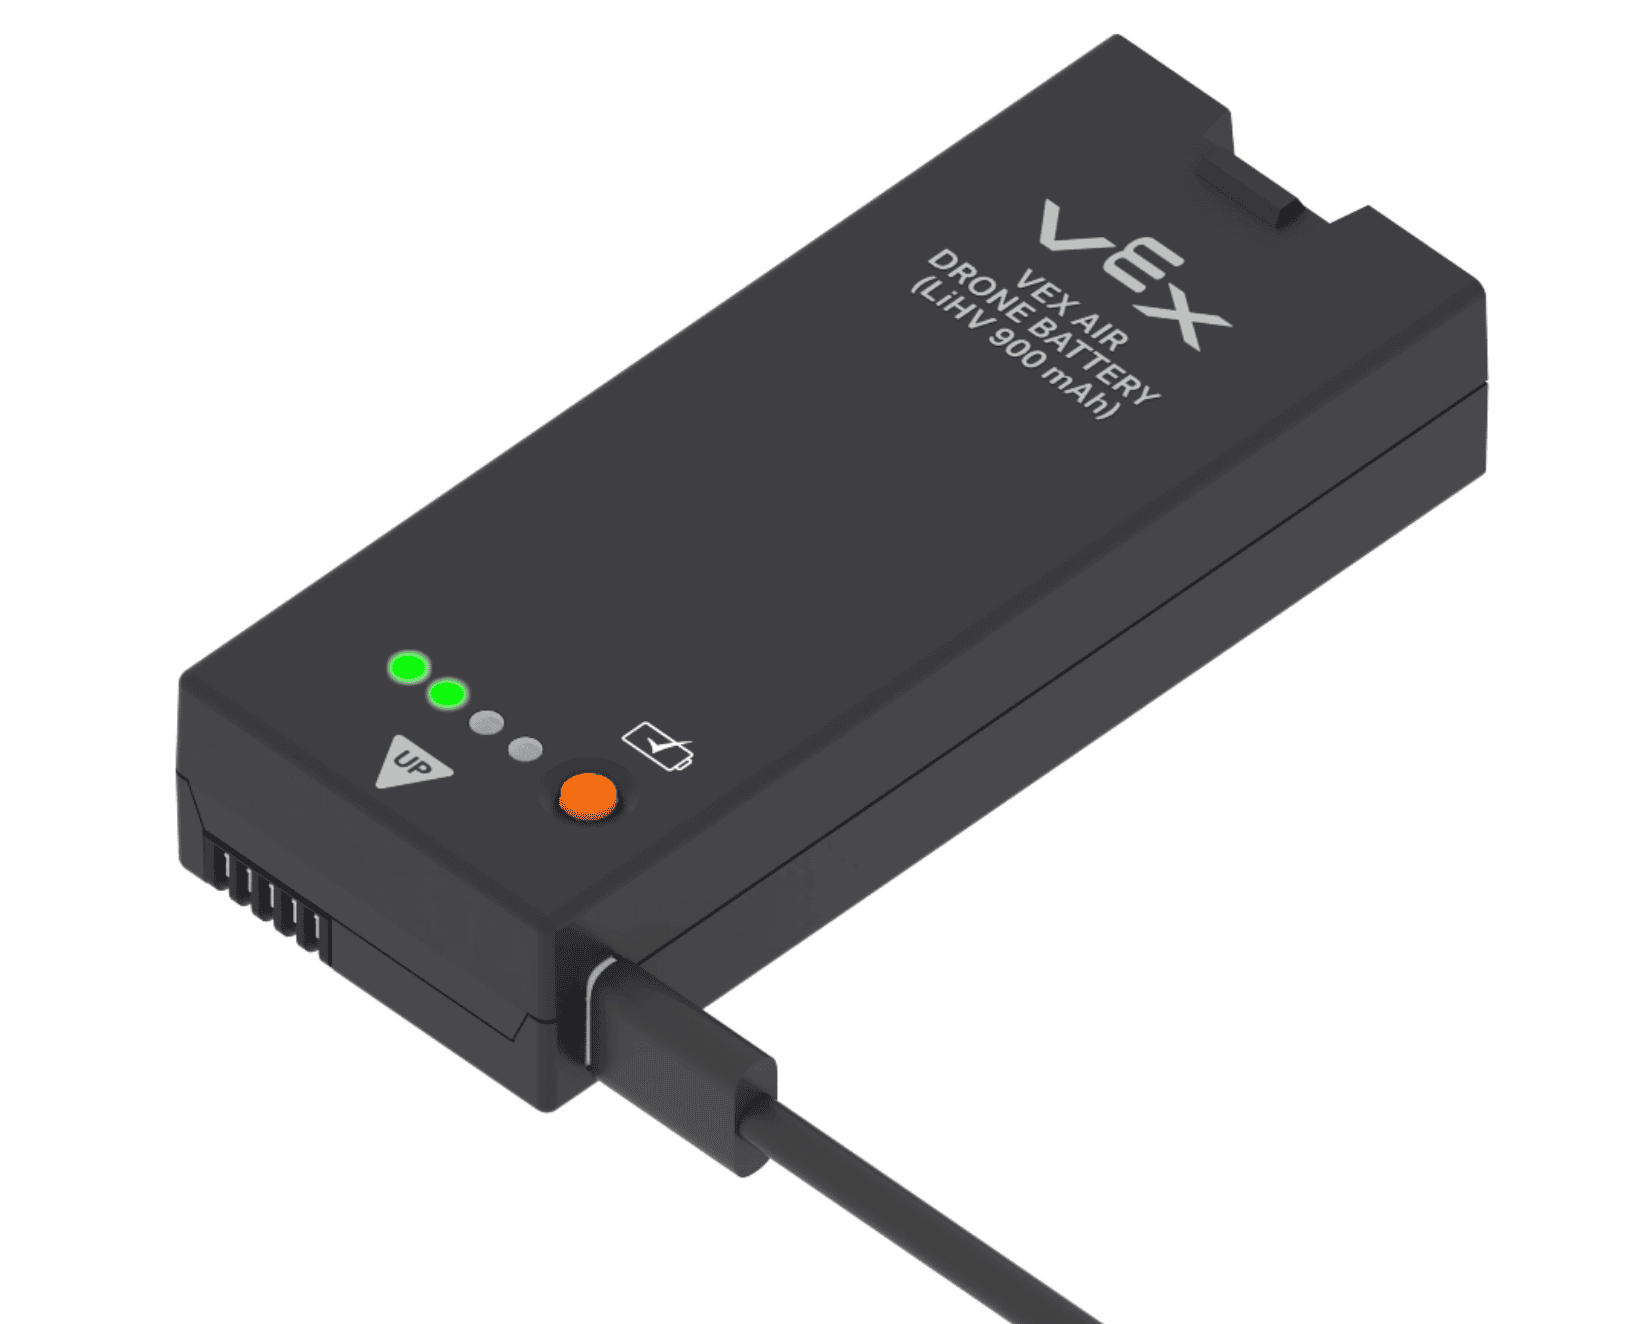
The lights on the drone and controller are an important way the system communicates with the pilot. These indicator lights show information such as whether the drone and controller are powered on, connected, charging, or ready to fly. Pilots use these visual signals to quickly understand the drone’s status without looking at a screen.
Before and during flight, checking the indicator lights helps pilots confirm that everything is working as expected. If something isn’t ready (like a missing connection or low power) the lights provide an early warning. Learning to notice and interpret these indicators is an important habit for safe and successful drone operation, both in the simulator and in real-world flights. Read this article to learn more about the specific indicator lights on the drone and controller.
Mission: Prepare Your Drone
In this mission, you will complete the tasks you saw in the video to get your drone and controller ready for use in this course. You can review the video content and follow along with each section in the video, or use the links provided below to follow the steps outlined in each article.
By the end of this mission, your drone will be ready for takeoff!
Charge Batteries
Plug the battery into a power source using its USB-C port.
- Follow the steps in this article to learn more about charging batteries.
- View this article for reference on where charging materials are located in your kit.
It is recommended to use the USB Charging Hub with the four short USB cables (A-C) to charge all four batteries at once. Each time a new battery is used, place the depleted battery back on the charger, so that there are always charged batteries available.
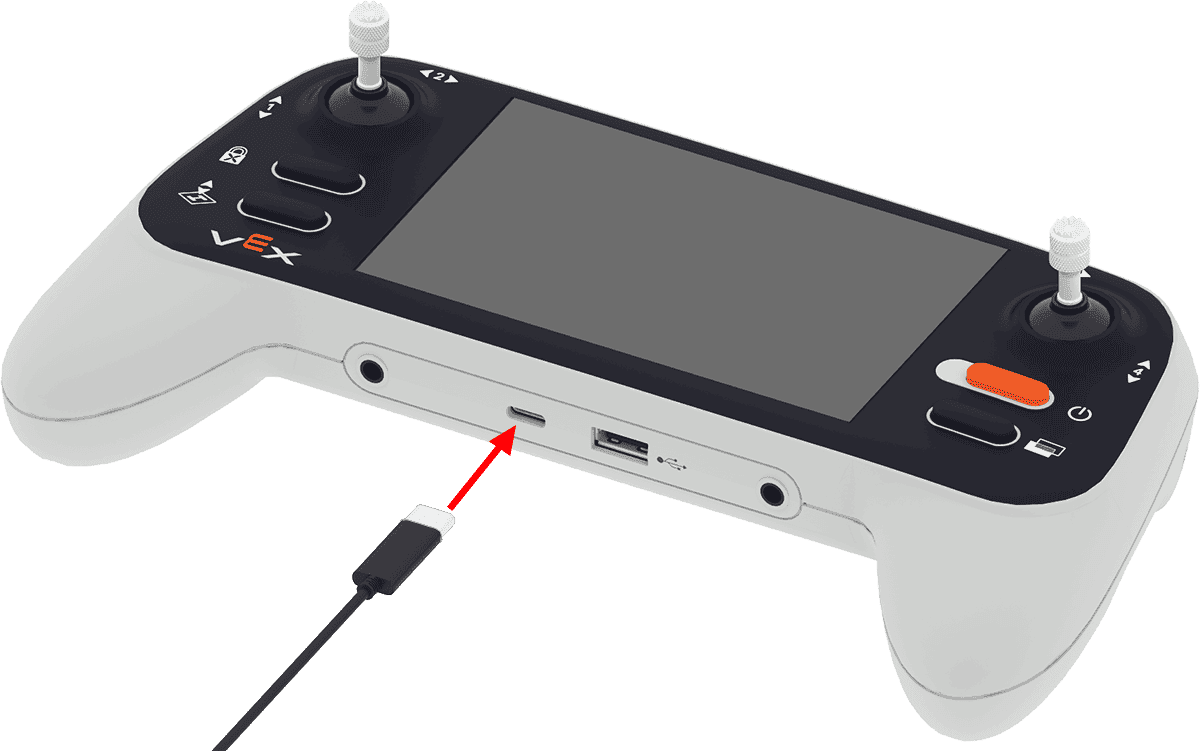
Charge Your Controller
Plug the controller into a computer or other outlet using a USB cable connected to the controller’s USB-C port. The indicator light will blink red while it charges.
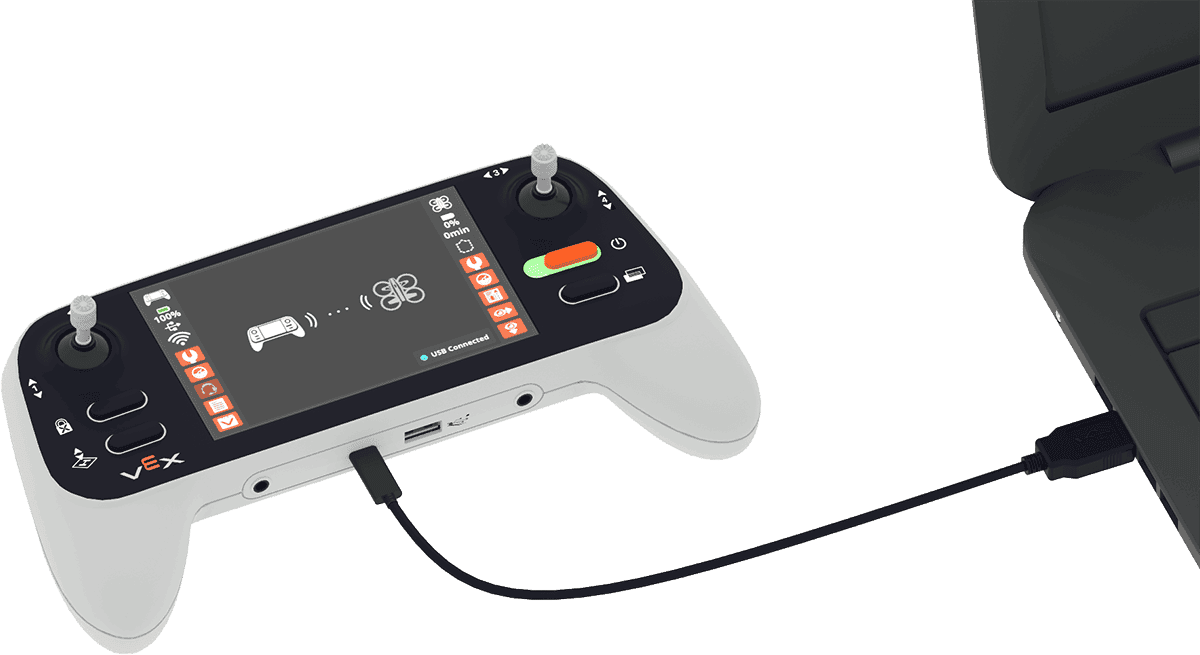
Update Controller Firmware
With your controller connected to your computer, power on the controller and open VEXcode AIR.
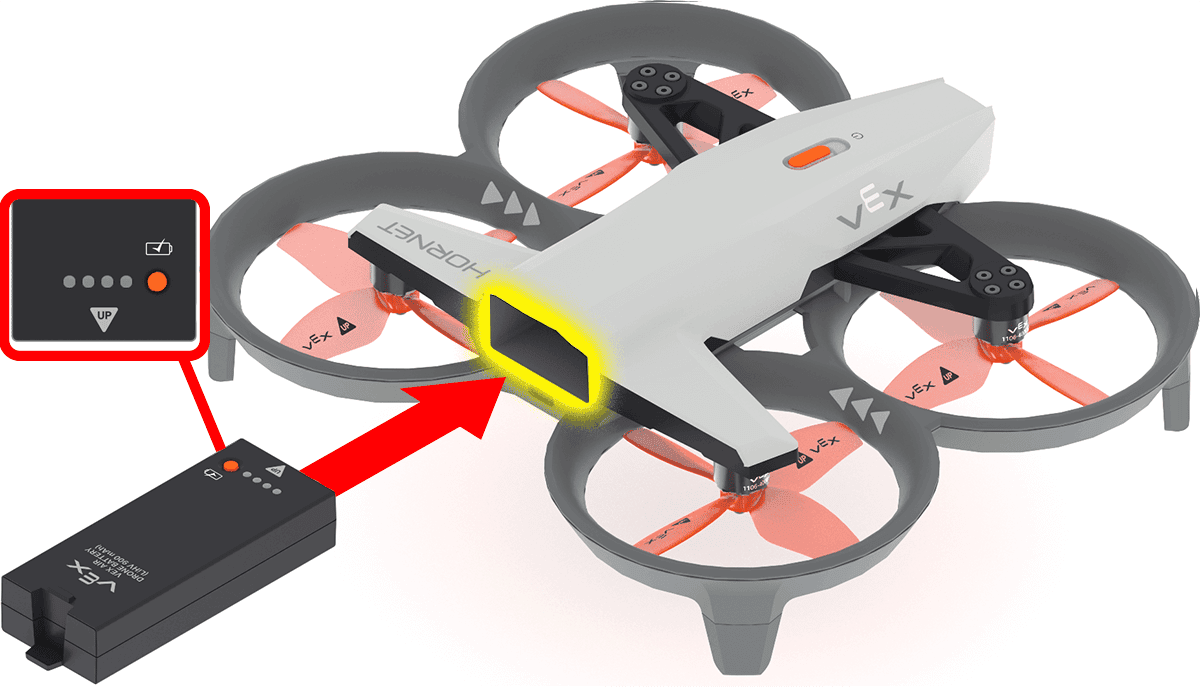
Install Battery
Insert a charged battery into the drone with the Up arrow facing upward. The drone will automatically turn on when the battery is inserted.
Pair the Controller and Drone
With both the controller and drone powered on and charged, pair them to enable communication during flight.
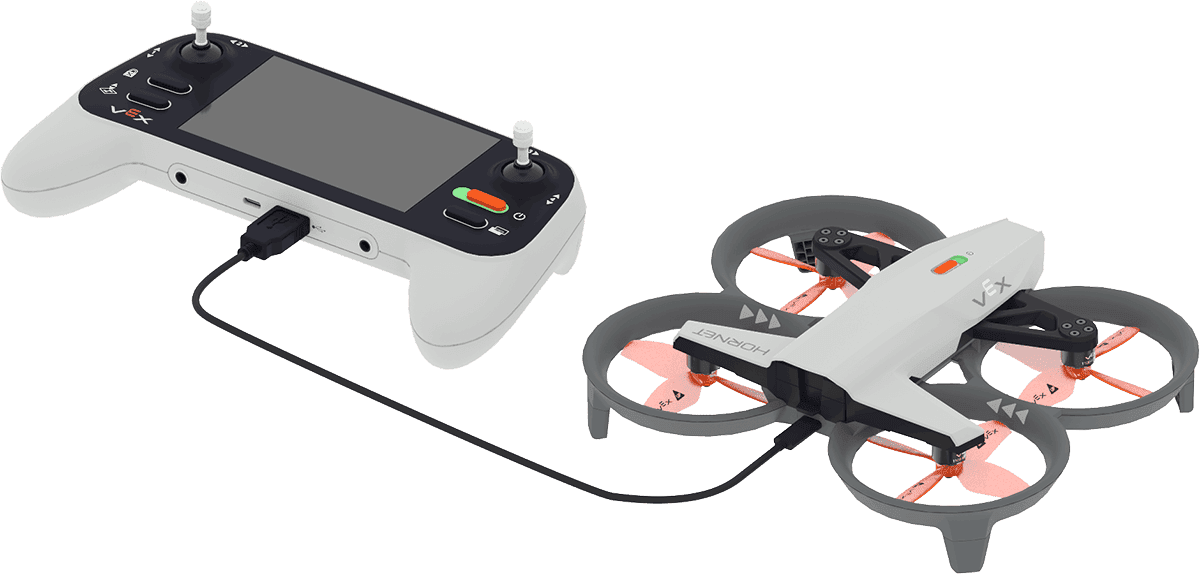
- Connect a USB-A cable to the controller’s USB-A port.
- Plug the other end into the drone's USB-C port.
- A wired connection image will show briefly on the screen when the controller begins pairing with the drone.
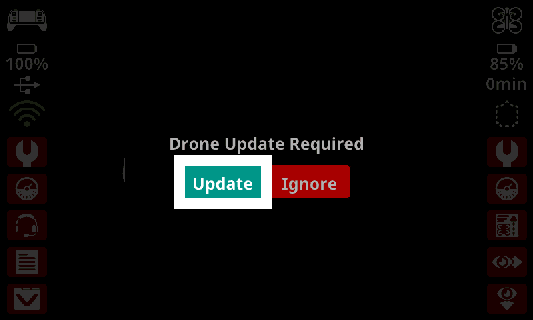
Update Drone Firmware
After being paired, if the drone needs its firmware updated, a prompt will appear on the controller screen.
- Press Update on the screen and wait for the progress bar that appears to finish.
- Do not disconnect the drone and controller until the update is completed.
This article outlines how to update drone and controller firmware if you need additional help.
Check Your Understanding
Before moving on, ensure that you understand the concepts in this lesson by answering the questions here (Google Doc / .docx / .pdf).
Select Next > to move on to the next lesson.