
Now that you have experience flying with cargo, you are ready to explore how to move objects with greater control and precision. Carrying cargo adds a new challenge since you will need to manage your flight path while keeping your VEX AIR Drone on the right path and your cargo secure.
Even experienced pilots make mistakes, so it’s important to check that your drone is safe and ready before every flight. Inspect the propellers and frame for any damage, as even small cracks can affect performance. In this lesson, you will explore new flight paths while also learning how to maintain your drone so it flies reliably during more complex missions.
Watch the video below to learn about:
- Inspecting your drone for damage
- Identifying cracked or damaged propellers
- Safely replacing a propeller
Mission Prep
Each exploration mission in this lesson focuses on flying with cargo while controlling your movement carefully and precisely. For each mission, make sure you:
- Complete a pre-flight check before every mission. Inspect your drone and propellers for damage before flying.
- The Pre-Flight Checklist will be available in each Mission Log below so you have multiple reminders to complete these safety checks.
- Be sure the Magnet Module is installed on the drone.
- See this article for pre-flight safety reminders and guidance on getting your drone ready for flight.
- Log each flight in your Mission Log. Record what worked, what didn’t, and what you want to improve. Even if you fly the path and successfully deliver cargo objects once, continue to practice to ensure repeatability and improve your precision.
- Practice each mission multiple times. Your goal is not just to complete the task, but to improve your accuracy and control while using the Magnet Module.
- Reset the indoor flight area between attempts. This ensures that other pilots are starting with a consistent setup.
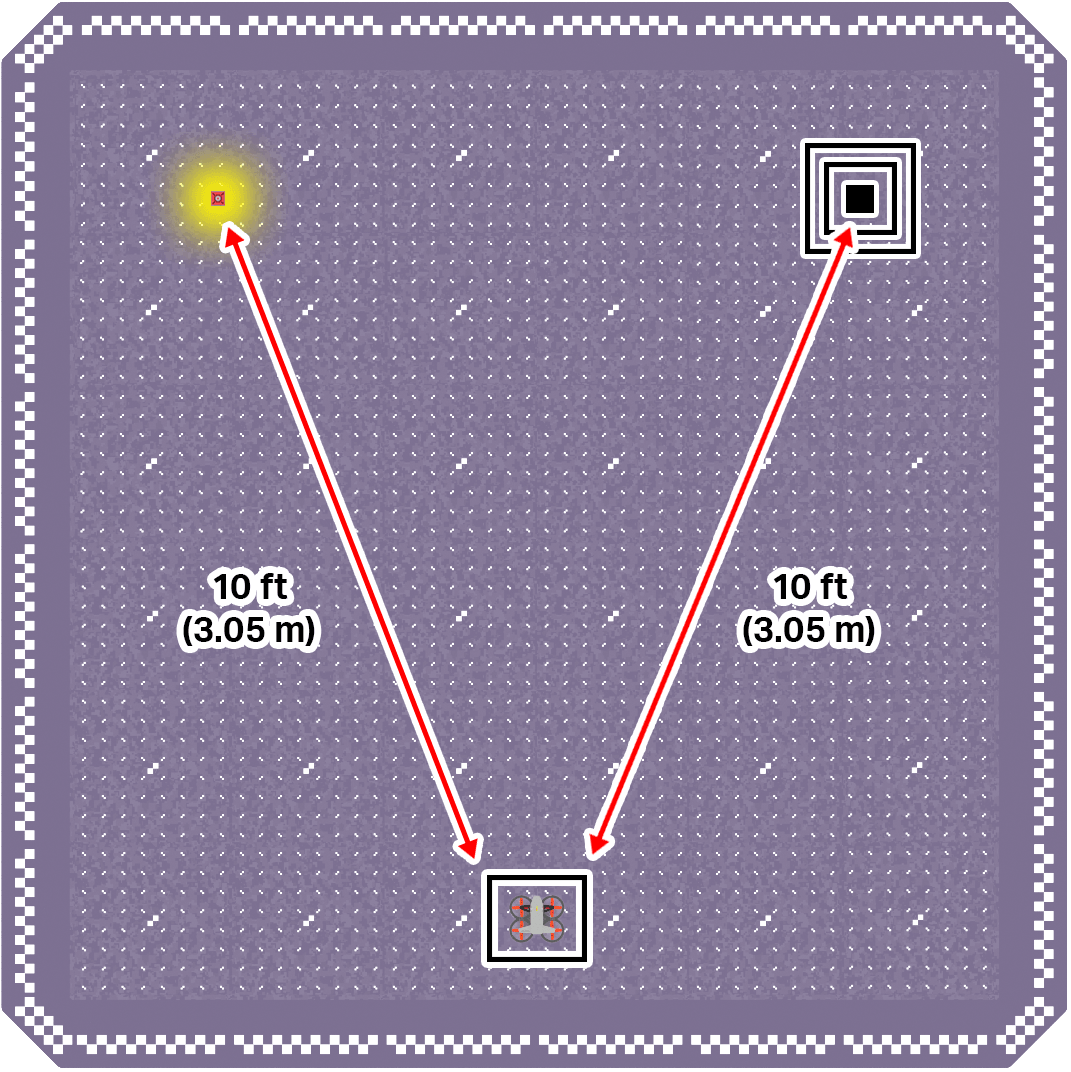
The goal of this mission is to fly the drone to pick up and move a piece of cargo from its starting location to the target. Get as close to the center of your target as you can!
To set up your indoor flight area, place a piece of cargo in the upper left corner. The cargo should be 10 ft (3.05m) apart from the takeoff zone in the center of the bottom of the field. Mark a target zone in the upper right corner. The target zone should be 10 ft (3.05m) apart from the drone. Use the image below for reference as you set up your indoor flight area.
Record your results in your Mission Log (Google Doc / .docx / .pdf).
- Mark where the cargo landed in the target zone for each flight.
- Note strategies you used to help improve your precision and success with the Magnet Module for each flight attempt.
Pro Tips:
- A combination of camera views can be useful when determining how high the drone is and how far away it is from the target.
- Notice how reticle alignment is affected by how close the drone is to the object. Make sure you are maintaining your desired position as you throttle up and down.
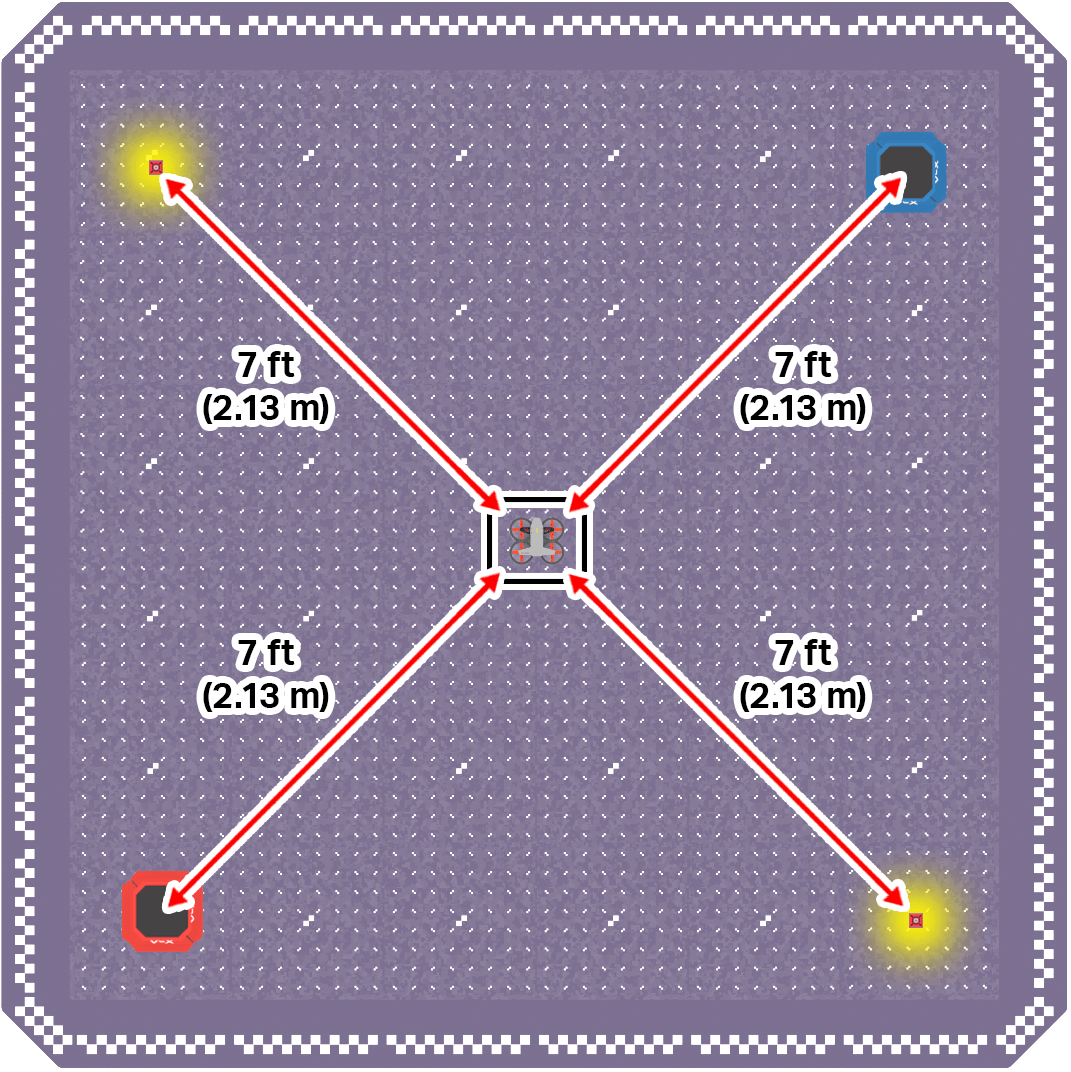
The goal of this mission is to fly the drone to pick up and move cargo from its starting location across the flight area to drop-off zones. Only one piece of cargo can be delivered to each drop-off zone.
To set up your indoor flight area, place one piece of cargo in the upper left corner and one in the lower right corner. Mark drop-off zones in the upper right and lower left corners of the flight area. Each one should be 7 ft (2.13 m) apart from the takeoff zone, in the center of the field. Use the image below for reference as you set up your space.
Record your results in your Mission Log (Google Doc / .docx / .pdf).
- Note your intended path for each flight in your Mission Log. Number each location 1 through 4 in the order you intend to fly to them. You can also use arrows to indicate your intended path.
- Record how well your flight path worked and any strategies or tips you learned about moving cargo with precision and efficiency in your reflection.
Pro Tip: Downwash can make picking up cargo difficult. Line up the drone above the piece of cargo at a height where downwash allows you to be steady and more exact, then throttle down to quickly pick up the cargo.
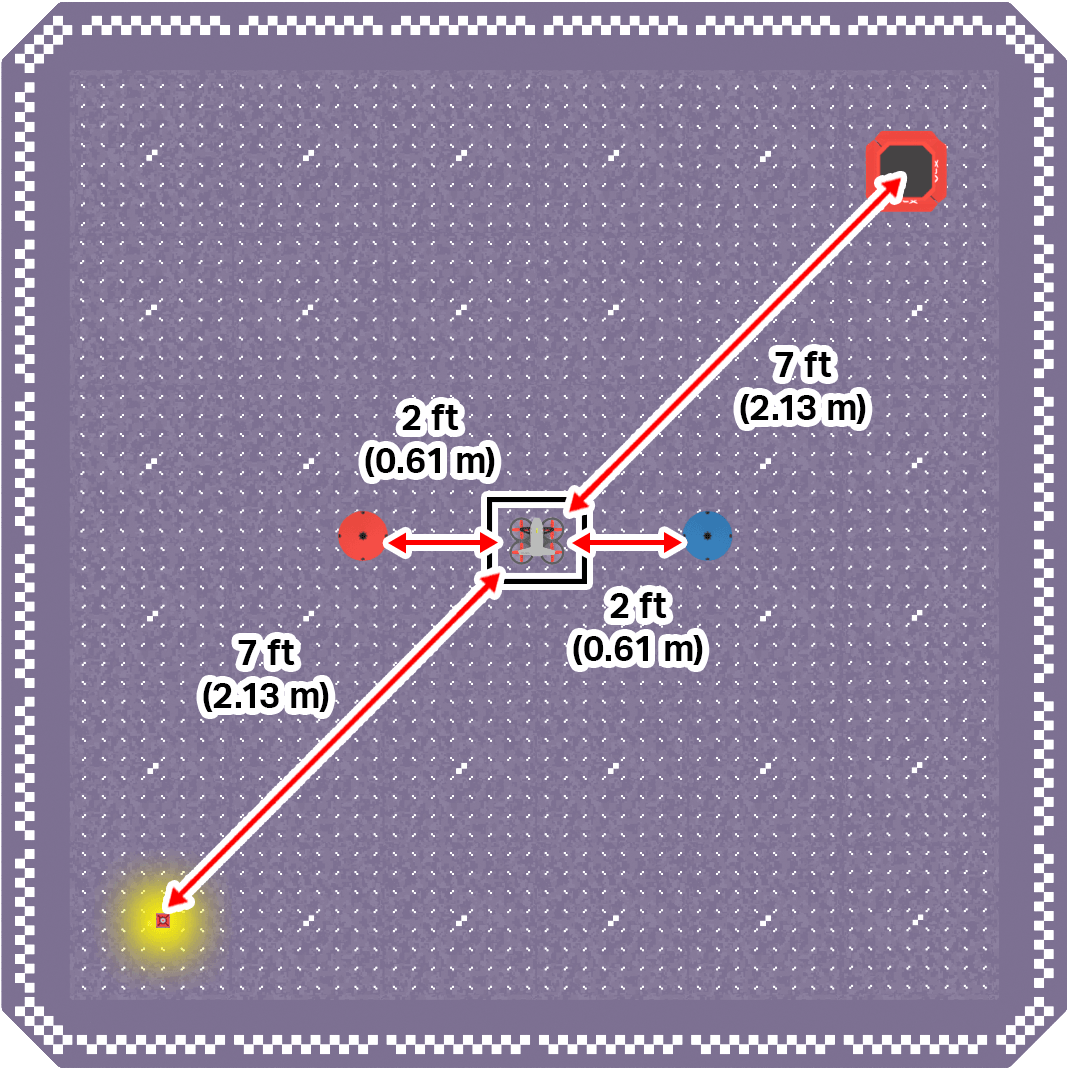
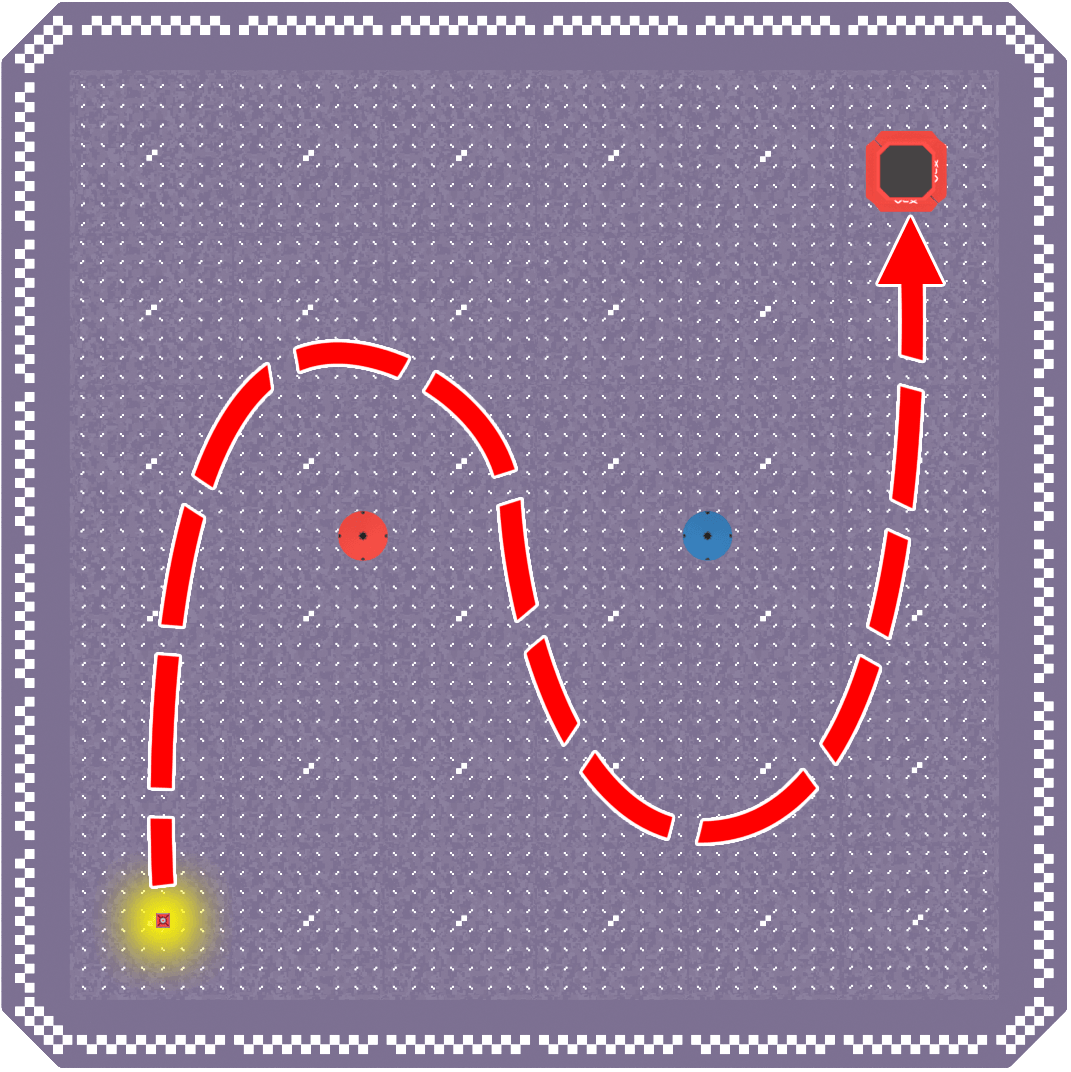
The goal of this mission is to pick up and move a piece of cargo across the flight area in a zigzag path, and drop it in the drop-off zone.
Use the image below for reference as you set up your indoor flight area:
- Place one piece of cargo in the lower left corner. The cargo should be 7 ft (2.13 m) apart from the takeoff zone in the center of the field.
- Mark a drop-off zone in the upper right corner. The drop-off zone should be 7 ft (2.13 m) apart from the drone.
- Mark two “obstacles” in the center of the flight area that you will fly around. Each “obstacles” should be 2 ft (0.61 m) apart from the drone.
Record your practice flights in your Mission Log (Google Doc / .docx / .pdf).
- Note things like how you knew when to change direction on the zigzag path, how the drone moved with cargo attached, and tools you used to improve your cargo movements.
Pro Tip: This mission is meant to simulate more complex movements, so be sure you are flying around each marked obstacle location. Reference the image in the Mission Objectives section if you need help remembering where the drone should fly to complete the mission.
Check Your Understanding
Before moving on, ensure that you understand the concepts in this lesson by answering the questions here (Google Doc / .docx / .pdf).
Select Return to Units > to move to the next unit in the course.