
Before you can fly with precision, you need to know how to read and navigate the VEX AIR Drone Controller screen. In this lesson, you will learn how to move through the controller interface, open the Drone Dashboard, and rotate between different camera views.
Switching between the front and down cameras — and understanding what you see on the screen — helps you make better decisions while flying the VEX AIR Drone in your indoor flight area. By the end of this lesson, you will be able to use camera views alongside flight data to support safer, more accurate flight.
Watch this video to learn about:
- How to rotate through available camera views on the controller.
- When to use the Front Camera while flying.
- When to use the Down Camera for alignment.
Hover & Discover
When flying a drone, what you see on the screen does not always match what you think you see in space. The Front Camera gives you a forward-facing view, which helps you navigate toward objects and markers that may be difficult to identify from a distance. However, judging distance and alignment from this perspective can be difficult.
The Down Camera gives you a straight-down view of the ground from the nose of the drone. This view removes perspective distortion and makes it easier to position the nose of the drone directly over a target. Professional drone pilots often switch between camera angles to confirm their position and improve accuracy.
Learning when to change views helps you fly with more control and confidence.
Mission: Measured Movement
In this mission, you will create a diamond path using ground markers and use the Drone Dashboard to guide your movement. Follow these steps to complete the mission:
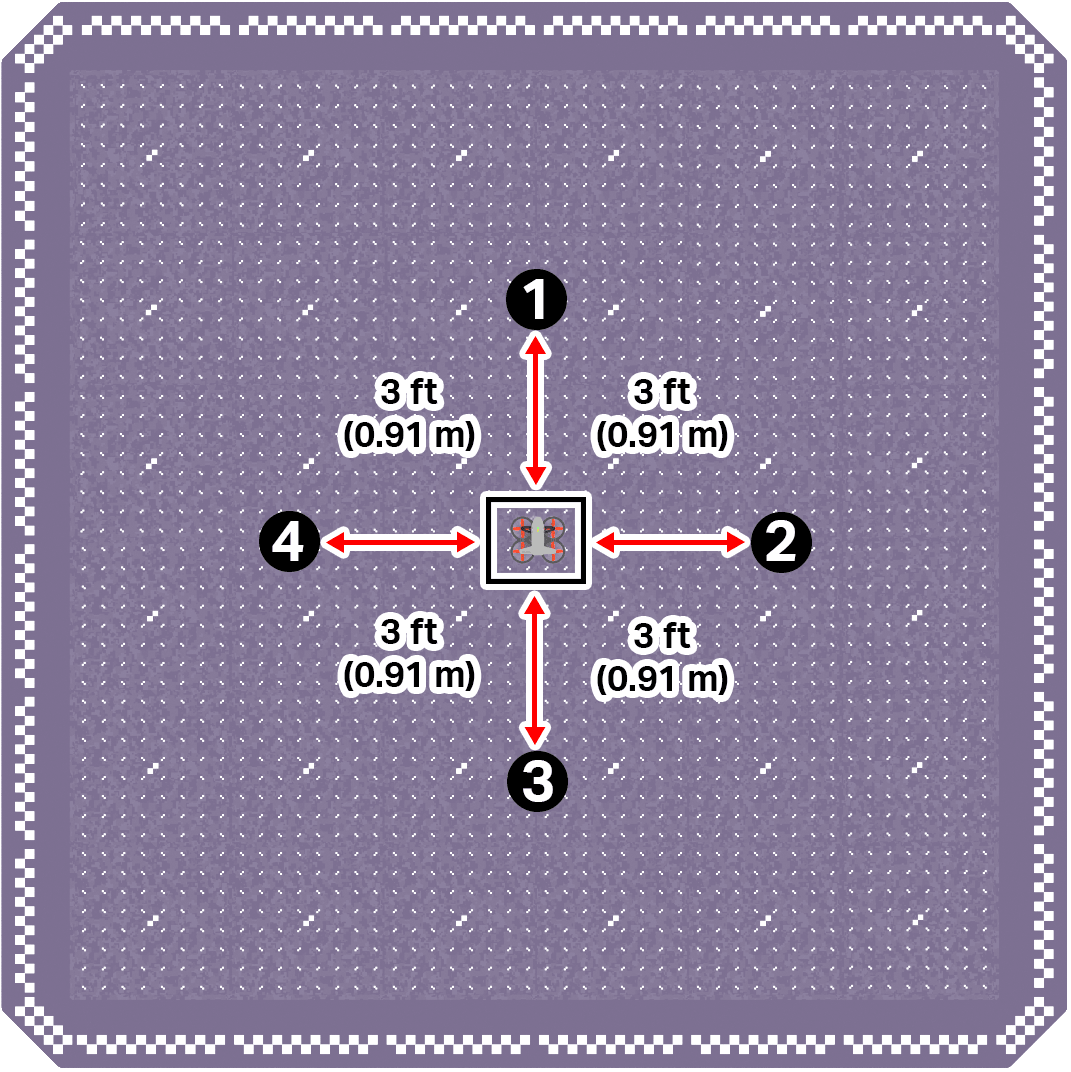
- Designate four markers on the ground to create a diamond shape around the drone's takeoff location, in the center of the field.
- Label the markers 1 through 4, starting with the marker directly in front of the takeoff location and moving clockwise. Each mark is facing the north, west, east and south and they are 3 ft (0.91 m) apart from the drone's take off location.
Use the image below for reference as you set up your flight area.
- Ensure all flight team members are clear on their roles, then use the pre-flight checklist in the Mission Log (Google Doc / .docx / .pdf) to ensure you, your indoor flight environment, and the drone itself are ready and safe for flight.
- Place the drone in the center of the flight area in the takeoff zone.
- Fly to each marker, in numerical order, using data from the Drone Dashboard while maintaining a stable z-coordinate. At each marker:
- Stabilize above the marker and face the designated heading.
- 0° at Marker 1.
- 90° at Marker 2.
- 180° at Marker 3.
- 270° at Marker 4.
- Record the (x, y, z) coordinates and heading of the drone in your Mission Log.
- Stabilize above the marker and face the designated heading.
Pro Tip: Depth perception can be misleading while flying. The Down Camera helps confirm your true position over the marker.
Check Your Understanding
Before moving on, ensure that you understand the concepts in this lesson by answering the questions here (Google Doc / .docx / .pdf).
Select Return to Units > to move to the next unit in the course.