
Lesson 2: Using a While Loop
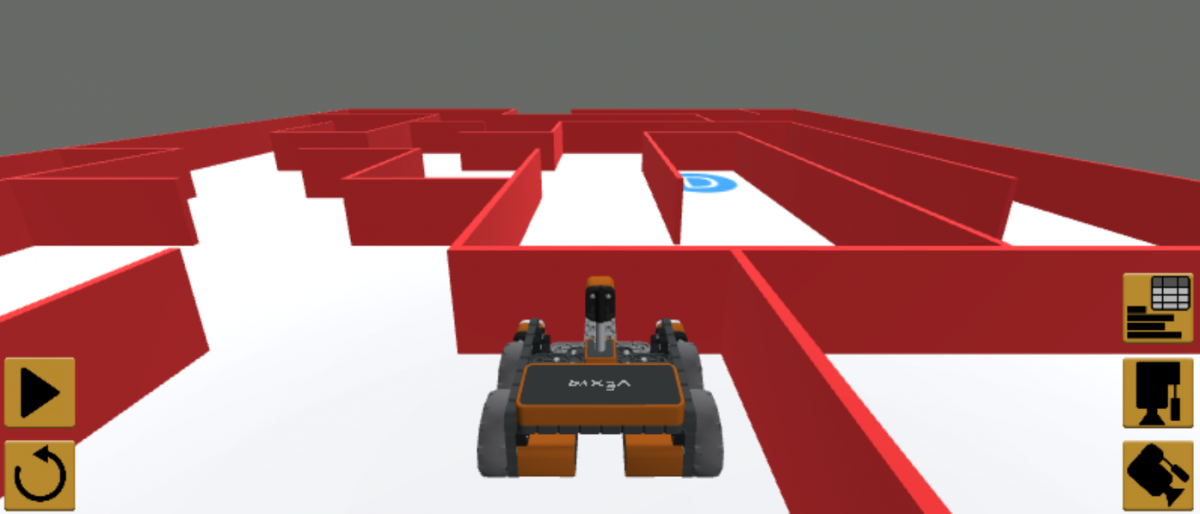
In this Lesson, you will create a project using the Bumper Sensor and the while loop. In the mini-challenge, you will apply these skills to navigate from the beginning of the Wall Maze to the letter ‘A.’
Learning Outcomes
- Identify that non-waiting commands have the project continue even if the command's behavior is not yet complete.
- Identify that a waiting command completes the behavior before continuing through the project.
- Identify that the while loop will repeatedly check a Boolean condition, and will not move to the next command until the condition reports True.
- Identify that the while loop is used with non-waiting commands (e.g. drive) in order to check the sensor condition.
- Identify that the not keyword inverts the value of a Boolean condition from True to False or False to True.
- Identify that the left_bumper.pressed and right_bumper.pressed commands return a True or False value in a while loop.
- Describe how to create a project that has a VR Robot drive forward until the Bumper Sensor is pressed.
While Loops
The while loop accepts Boolean conditions. While loops repeatedly check a Boolean condition and control the project flow. The while loop will continue looping as long as the condition is& True. The while loop will exit the loop and move to the next command outside the loop once the condition reports as False.
Essentially, a while loop is telling the VR Robot to continue to do a behavior while a certain condition is being met. The logic is similar to this scenario: While the sun is shining, go play outside. What would you do? The condition of "the sun is shining" determines where you should be. When the sun is shining, the condition is True, so you go play outside. When the sun goes down, that condition is False, so you would come back inside.

While Loops and the Wall Maze Problem
The same logic applies to the VR Robot in the Wall Maze. While the Bumper Sensor is not pressed, the VR Robot should keep driving forward. When it is pressed, it should stop or turn. Using while loops in conjunction with non-waiting commands, such as drive, we can code the VR Robot to do just that. However, the Bumper Sensor commands use the condition of the Bumper Sensor being pressed (left_bumper.pressed or right_bumper.pressed) In order to code the VR Robot to drive while the Bumper Sensor is not pressed, we need to use a not operator.
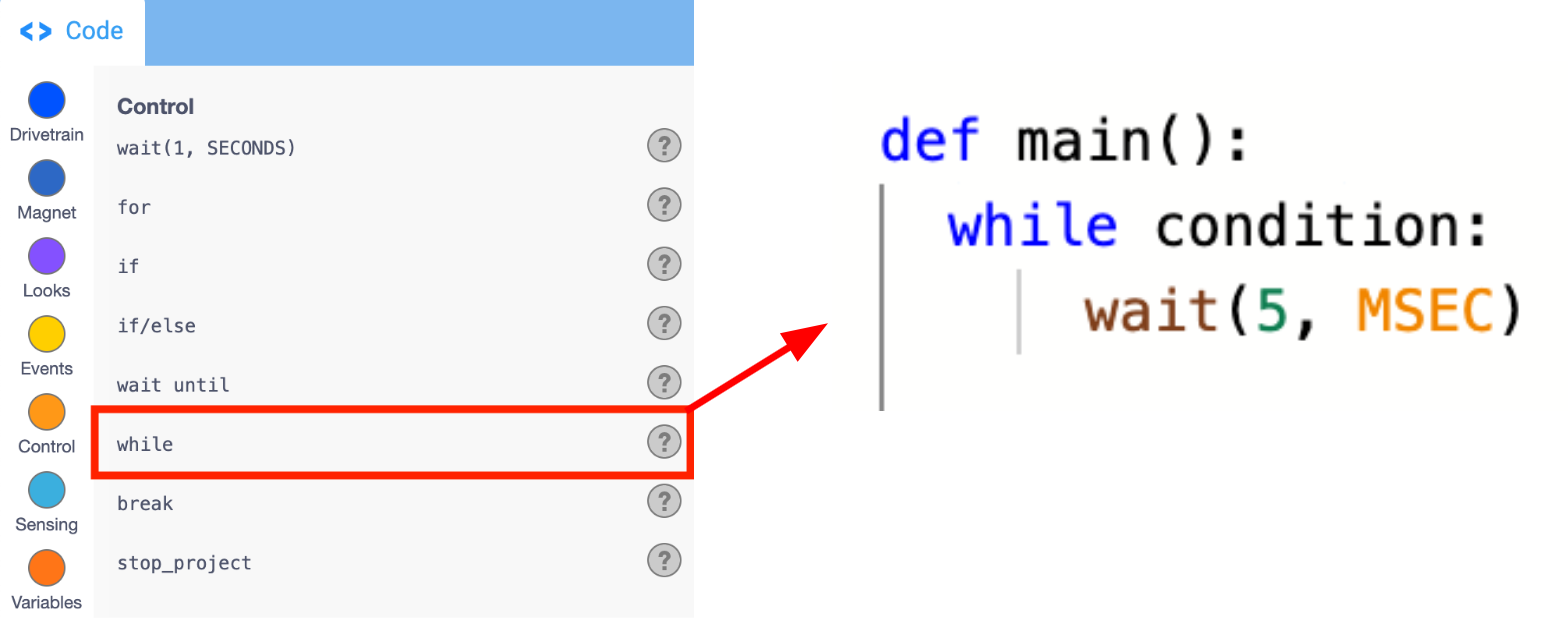
def main():
	while not condition:
		wait (5, MSEC)
For Your Information
Non-waiting and waiting commands determine when the next command begins a behavior. Waiting commands, like drive_for and turn_for, complete their behaviors before moving onto the next command in the project. Non-waiting commands, such as drive and turn, continue to move to the next command in the project even if the behavior of the non-waiting command is not complete.
Waiting Commands
drivetrain.drive_for(FORWARD, 200, MM)
drivetrain.turn_for(RIGHT, 90, DEGREES)
Non-waiting Commands
drivetrain.drive(FORWARD)
drivetrain.turn(RIGHT)
The Not Keyword
The not keyword will typically be used with while loops, to make the commands inside the loop execute while the condition returns False. To use the 'sun is shining' example, the same effect can be reached using a not operator. While the sun is not shining, come inside.

In the Wall Maze, this is useful so that we can code the VR Robot so that while the Bumper Sensor is not pressed, it will drive forward. The condition is still 'if the Bumper Sensor is pressed', but this way, when it reports False (not pressed), the project flow remains in the loop. When the Bumper Sensor is pressed, the condition is then True, so the project will move out of the loop.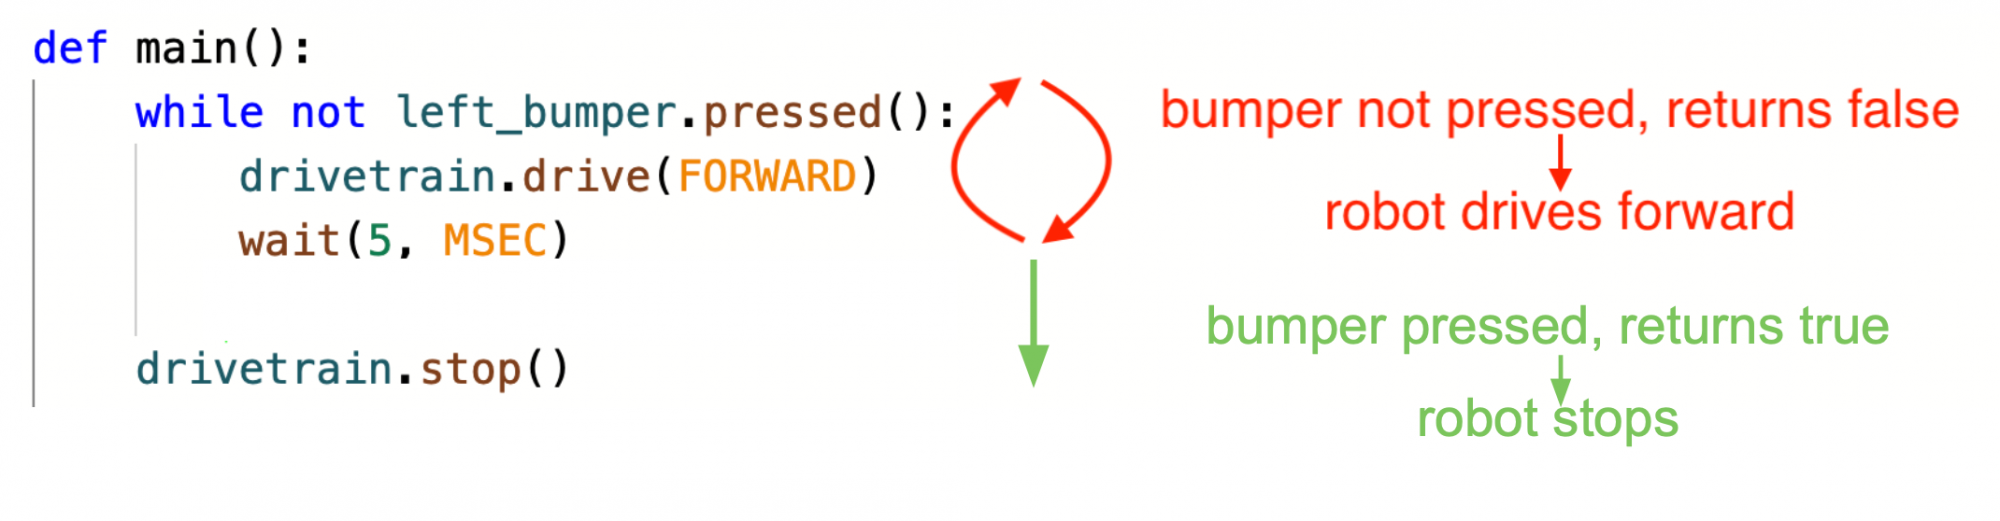
For Your Information
The not keyword is a logical operator that inverts the value of a Boolean. Putting the keyword not in front of a command that returns a Boolean value will invert True to False, and False to True. For example, imagine that the Left Bumper Sensor on the VR Robot is pressed, and the left_bumper.pressed command returns True. The not keyword will invert the Boolean value, and make this expression return False.
not left_bumper.pressed()Depending on the sensor data that you are using, the not keyword may be necessary in order to make a VR Robot execute the desired behaviors.
def main():
	while not left_bumper.pressed():
		drivetrain.drive(FORWARD)
		wait(5, MSEC)
	drivetrain.stop()
Building a Project with a While Loop and the Bumper Sensor
Name and Save the Project
- Open a new text project and select the Wall Maze Playground when prompted.

-
Name the project Unit4Lesson2.

-
Drag or type the while command into the workspace to replace the Drivetrain command that automatically populates as part of a new Text project. Notice there is a wait command inside the loop. Do not remove the wait command, it will ensure the VR Robot executes the project correctly. Your project should look like this:
def main(): while condition: wait(5, MSEC) -
Type a not operator after the 'while' in the while command. Your project should now look like this:
def main(): while not condition: wait(5, MSEC) -
Drag or type the left_bumper.pressed command in the while loop's 'condition'. The commands inside the loop will execute while the condition is not True, meaning when the Left Bumper Sensor is not pressed. Your project should now look like this:
def main(): while not left_bumper.pressed(): wait(5, MSEC) -
Inside the while loop, drag or type the drive command. Ensure that the drive command and the wait command are correctly indented within the while loop, so that the loop runs as intended. You can use the guiding lines as a visual aid. Your project should now look like this:
def main(): while not left_bumper.pressed(): drivetrain.drive(FORWARD) wait(5, MSEC) -
Drag in or type a stop command outside the while loop. Ensure that the stop command is aligned with the while loop, and not indented, so that it runs outside the loop as intended. You can use the guiding lines as a visual aid. Your project should now look like this:
def main(): while not left_bumper.pressed(): drivetrain.drive(FORWARD) wait(5, MSEC) drivetrain.stop() - Open the Playground Window if it is not already open. Be sure the Wall Maze Playground opens.
- Run the project.
- Watch the VR Robot drive from the start of the Wall Maze and stop when the Bumper Sensor is pressed by the wall.
- The Drive command allows the VR Robot to keep driving forward while checking the condition of the Bumper Sensor with the Left Bumper Pressed command. Once the left_bumper.pressed command reports as True, the VR Robot will move to the next command outside the loop and stop driving.
Select the Next button to continue with the rest of this Lesson.