
Lesson 1: What is a Bumper Sensor?
In this Lesson, you will learn what a sensor is and why you would use sensors with a VR Robot. The first sensor that you will learn about is the Bumper Sensor. You will learn how the Bumper Sensor works and how to use the VR Robot Bumper Sensors in a VEXcode VR Python project.
Learning Outcomes
- Identify that the Bumper Sensor is a type of switch that can report when pressed or not pressed.
- Identify that the Bumper Sensor can be used to cause a VR Robot action when pressed or not pressed.
- Identify that the left_bumper.pressed and right_bumper.pressed are commands that report a Boolean value about the Bumper Sensor.
- Describe why the Bumper Sensor would be used in a project.
Apply
Sensors are essential to robotics. For a VR Robot to truly be considered a robot, it must be able to sense and interact with its environment. This is commonly referred to as the Sense → Think → Act decision loop.
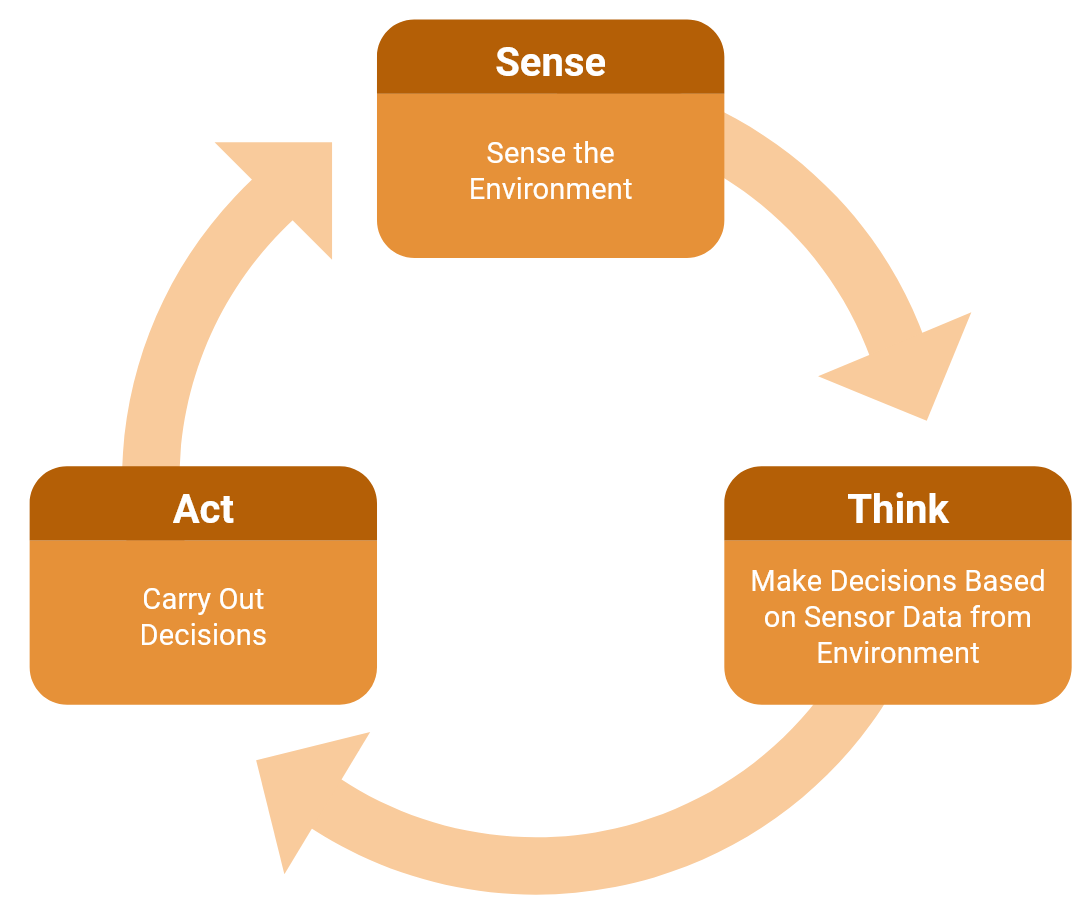
A VR Robot uses sensors to collect data from its surroundings (Sense), make decisions based on this information (Think) and turn that information into instructions for behaviors (Act).
Sensors enable a VR Robot to interact with its environment, and allow the user to create more dynamic projects. These dynamic projects require a VR Robot to interact and respond to changing environments.
The Bumper Sensor
In this Unit, you will use the Bumper Sensor, a sensor that can detect physical contact. The Bumper Sensor is used to inform a VR Robot when it has made contact with an object or wall. A VR Robot can then use the reported information from the Left or Right Bumper Sensor to make decisions.
The VR Robot has two Bumper Sensors located on the front.
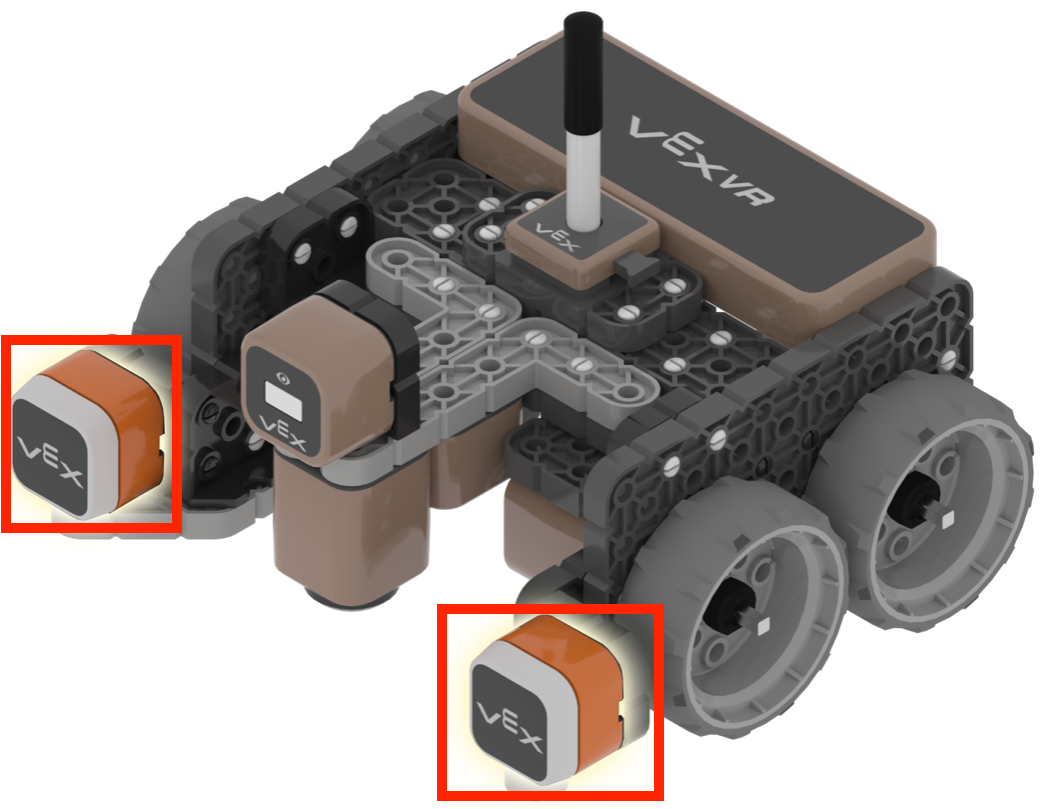
A Bumper Sensor is a switch that reports if it is pressed or not pressed.
- The Bumper Sensor will report a sensor value of True when the Bumper Sensor is pressed.
- The Bumper Sensor will report a sensor value of False when the Bumper Sensor is not pressed.
The Bumper Sensor is pressed by walls in the Wall Maze Playground, or by the outer walls surrounding other Playgrounds.
Read the Bumper Sensor - Robot Features - VEX VR article for detailed information on how the Bumper Sensor works.
Bumper Pressed Commands
The Bumper Sensor is used to determine if the VR Robot is touching an object or wall. That data can then be used in a project so the VR Robot can make a decision when the Bumper Sensor is pressed.
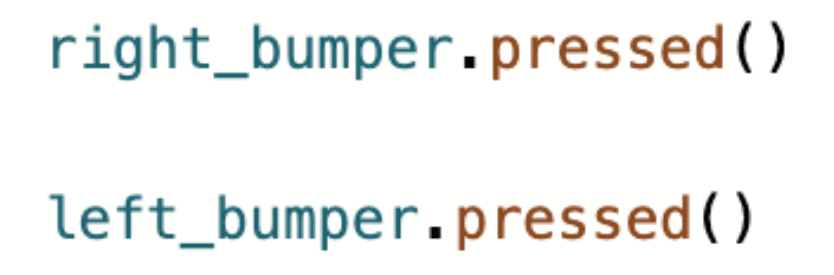
Use the left_bumper.pressed and right_bumper.pressed commands in a text project to check the condition of the Bumper Sensor.
Left_bumper.pressed and right_bumper.pressed are Boolean reporter commands, that report True if the Bumper is pressed, and False if it is not pressed.
The left_bumper.pressed and right_bumper.pressed commands are typically used with a Control structure, like a while loop, so that the VR Robot can use the data from the Bumper Sensor to make a decision. You will learn more about while loops in the next Lesson.
The Bumper Sensor and the Wall Maze Problem
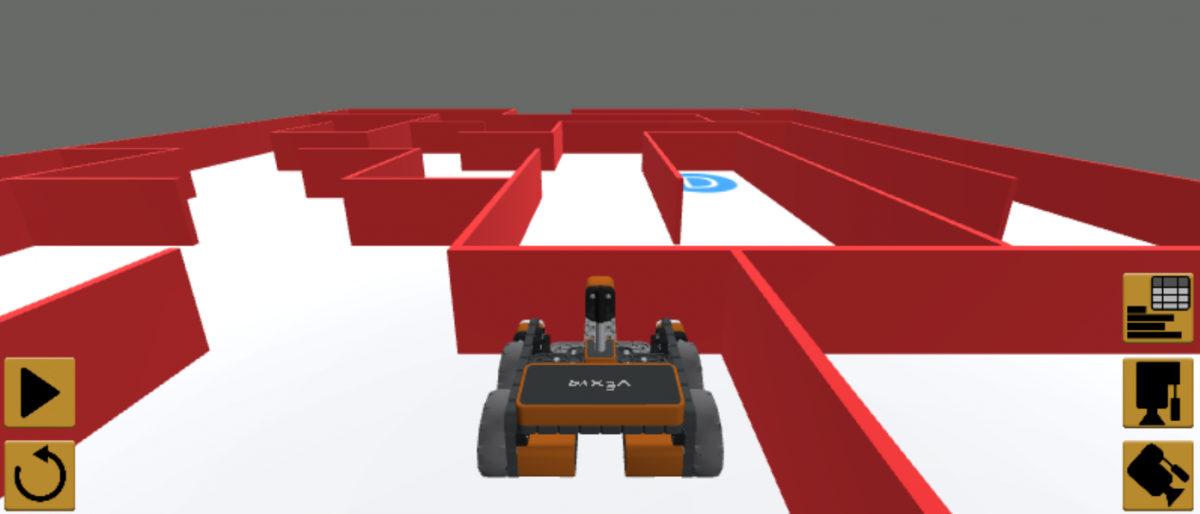
Thinking about the Wall Maze Problem, the goal is to have the VR Robot drive while the Bumper Sensor is not pressed. When the Bumper Sensor is pressed, the VR Robot has reached a wall, and then needs to stop or turn to continue on in the maze.
In the following example, the VR Robot will drive forward from the starting location, until the Left Bumper is pressed when it reaches the wall opposite. Once the Left Bumper is pressed, the VR Robot will stop driving.
You will notice that the Dashboard displays the value the Bumper Sensor is reporting in real time as the project is run. When the Bumper Sensor is not pressed, the value is reported as False.
|
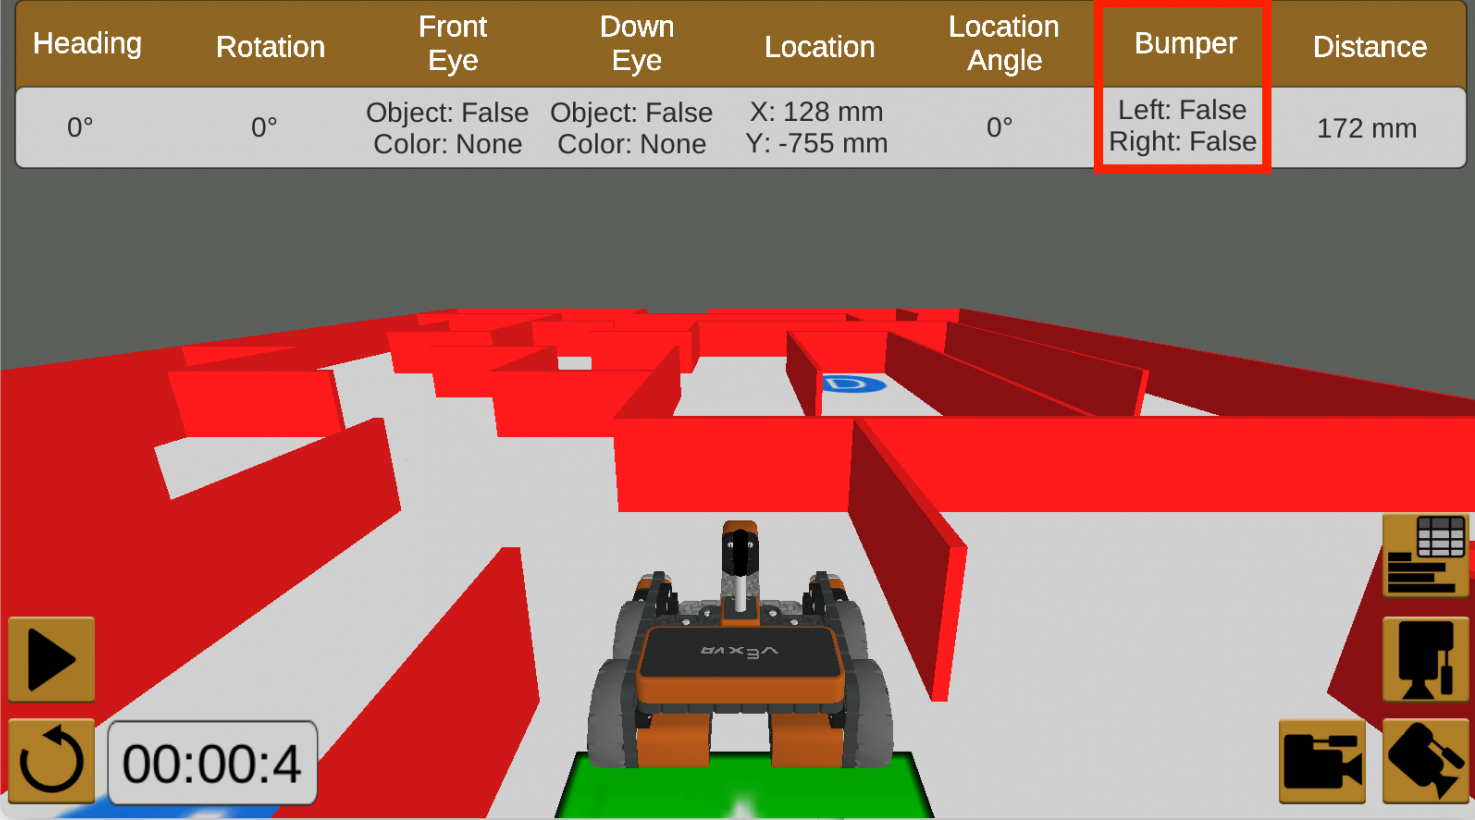 |
When the Bumper Sensor is pressed, and the VR Robot is against the wall, the value is reported as True.
|
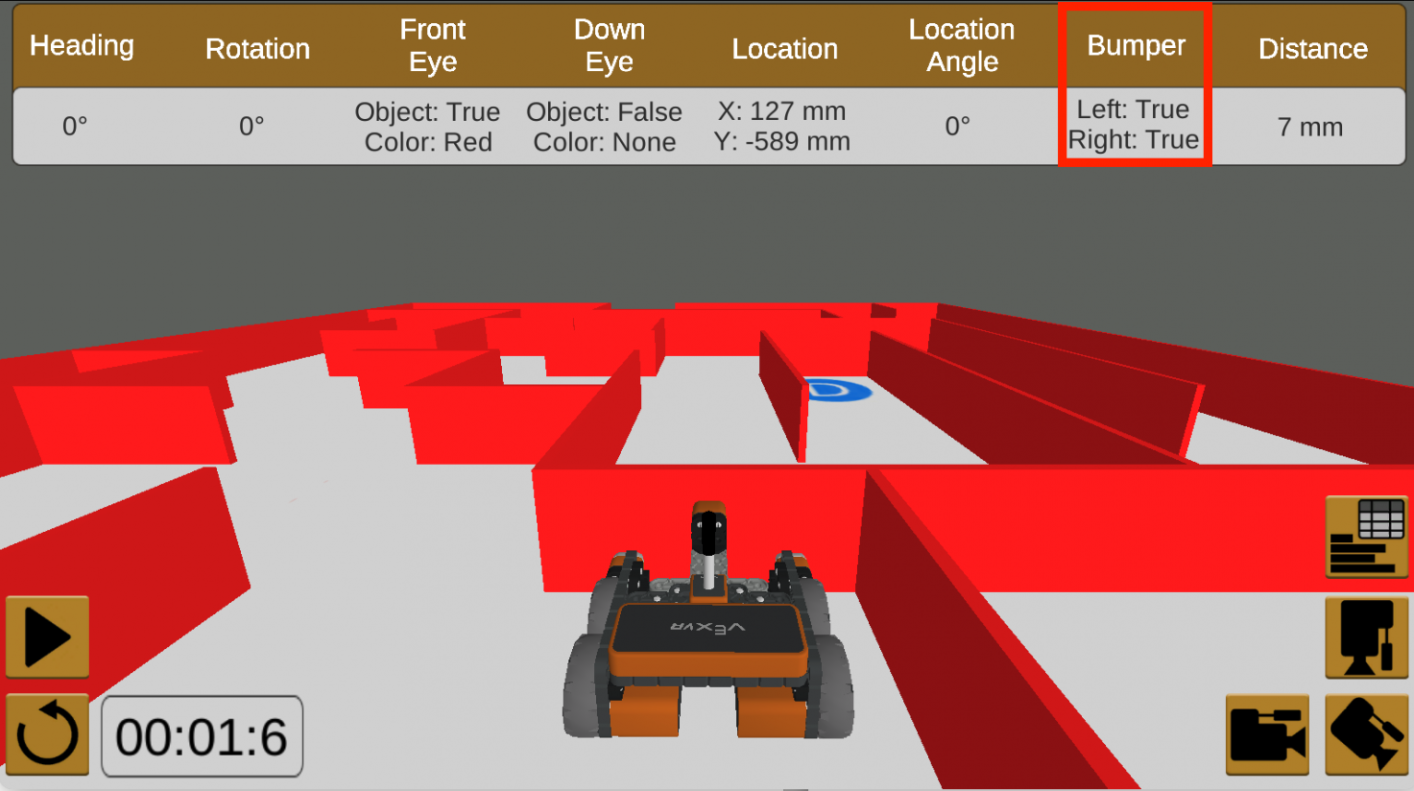 |
You can use the Dashboard at any time, to help visualize sensor data as your project is running. Note, the Dashboard can be hidden and reopened at any time, as shown in this video. In the video clip below, the hamburger menu in the upper left corner of the Playground window is selected to display the Dashboard button below it. The Dashboard button is then selected and the Dashboard opens. This process is repeated to close the Dashboard.