
Lesson 3: Project Flow with Multiple While Loops
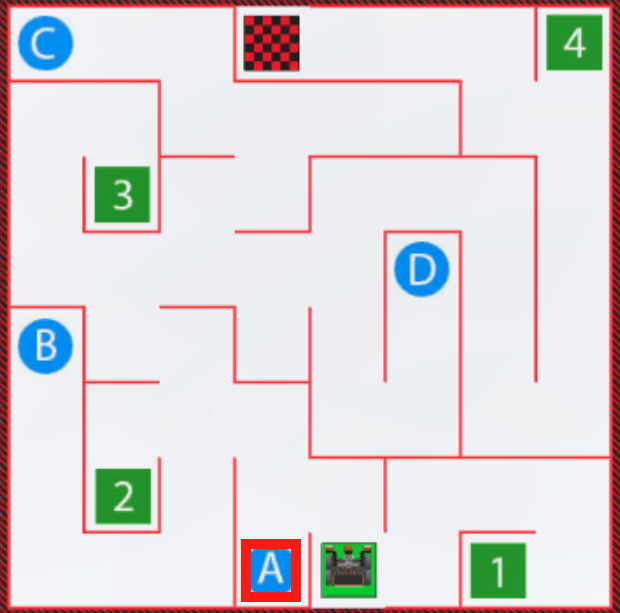
Now that you have created a text project to navigate the VR Robot to the letter ‘A’ on the Wall Maze Playground, you will expand your skills using conditionals and sensor values. In this Lesson, you will navigate the VR Robot to the number ‘2’ in the Wall Maze Playground, then explore why additional commands are needed to drive to the letter ‘B.’ In the mini-challenge, you will apply these skills to navigate from the beginning of the Wall Maze to the number ‘3.’

Learning Outcomes
- Describe the program flow in a project that has a VR Robot drive forward until the Bumper Sensor is pressed.
Rename the Project
- If the previous Lesson’s project is not already loaded, load the Unit4Lesson2 project.
-
Rename the project Unit4Lesson3.

Flow of the Project to Drive to the Letter ‘A’
In the previous lesson, the VR Robot drove to the letter ‘A’ on the Wall Maze Playground. Let's break down the project flow as we prepare to navigate to a new location in the Wall Maze.
-
To better understand the project flow for driving to the letter ‘A’ on the Wall Maze Playground, begin by modifying your previous project or create a new project to match this base project.
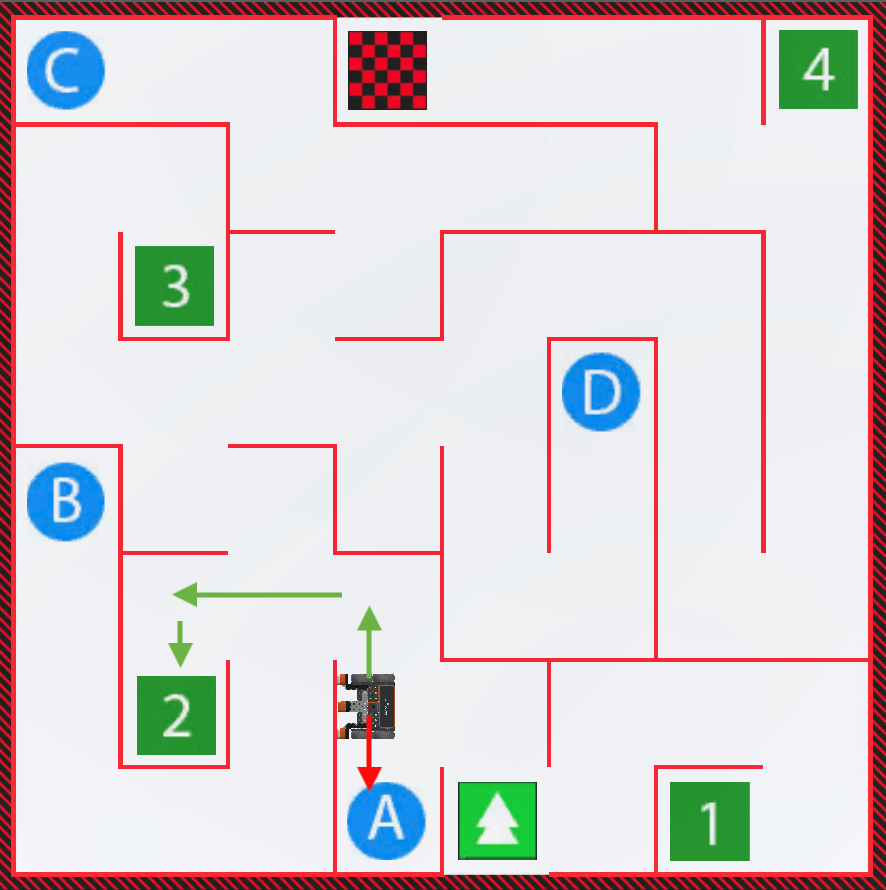
def main(): while not left_bumper.pressed(): drivetrain.drive(FORWARD) wait(5, MSEC) drivetrain.turn_for(LEFT, 90, DEGREES) while not left_bumper.pressed(): drivetrain.drive(FORWARD) wait(5, MSEC) drivetrain.turn_for(LEFT, 90, DEGREES) while not left_bumper.pressed(): drivetrain.drive(FORWARD) wait(5, MSEC) drivetrain.stop() - When a project uses a while loop with a not condition, the program flow of the project still follows the same top-to-bottom sequence. The while loop allows the program flow to "pause" at a certain point, while a condition is met. The not operator allows the project to stay in the loop until the condition is reported False. Then the project will flow to the next command outside of the loop. A Boolean condition, such as the Left Bumper being pressed, will report a True or False value. In this code for driving the VR Robot to the letter ‘A,’ the VR Robot will drive forward until the Boolean condition of the Left Bumper being pressed, is True.
The project flow of the project to drive to the Letter 'A' would look like this: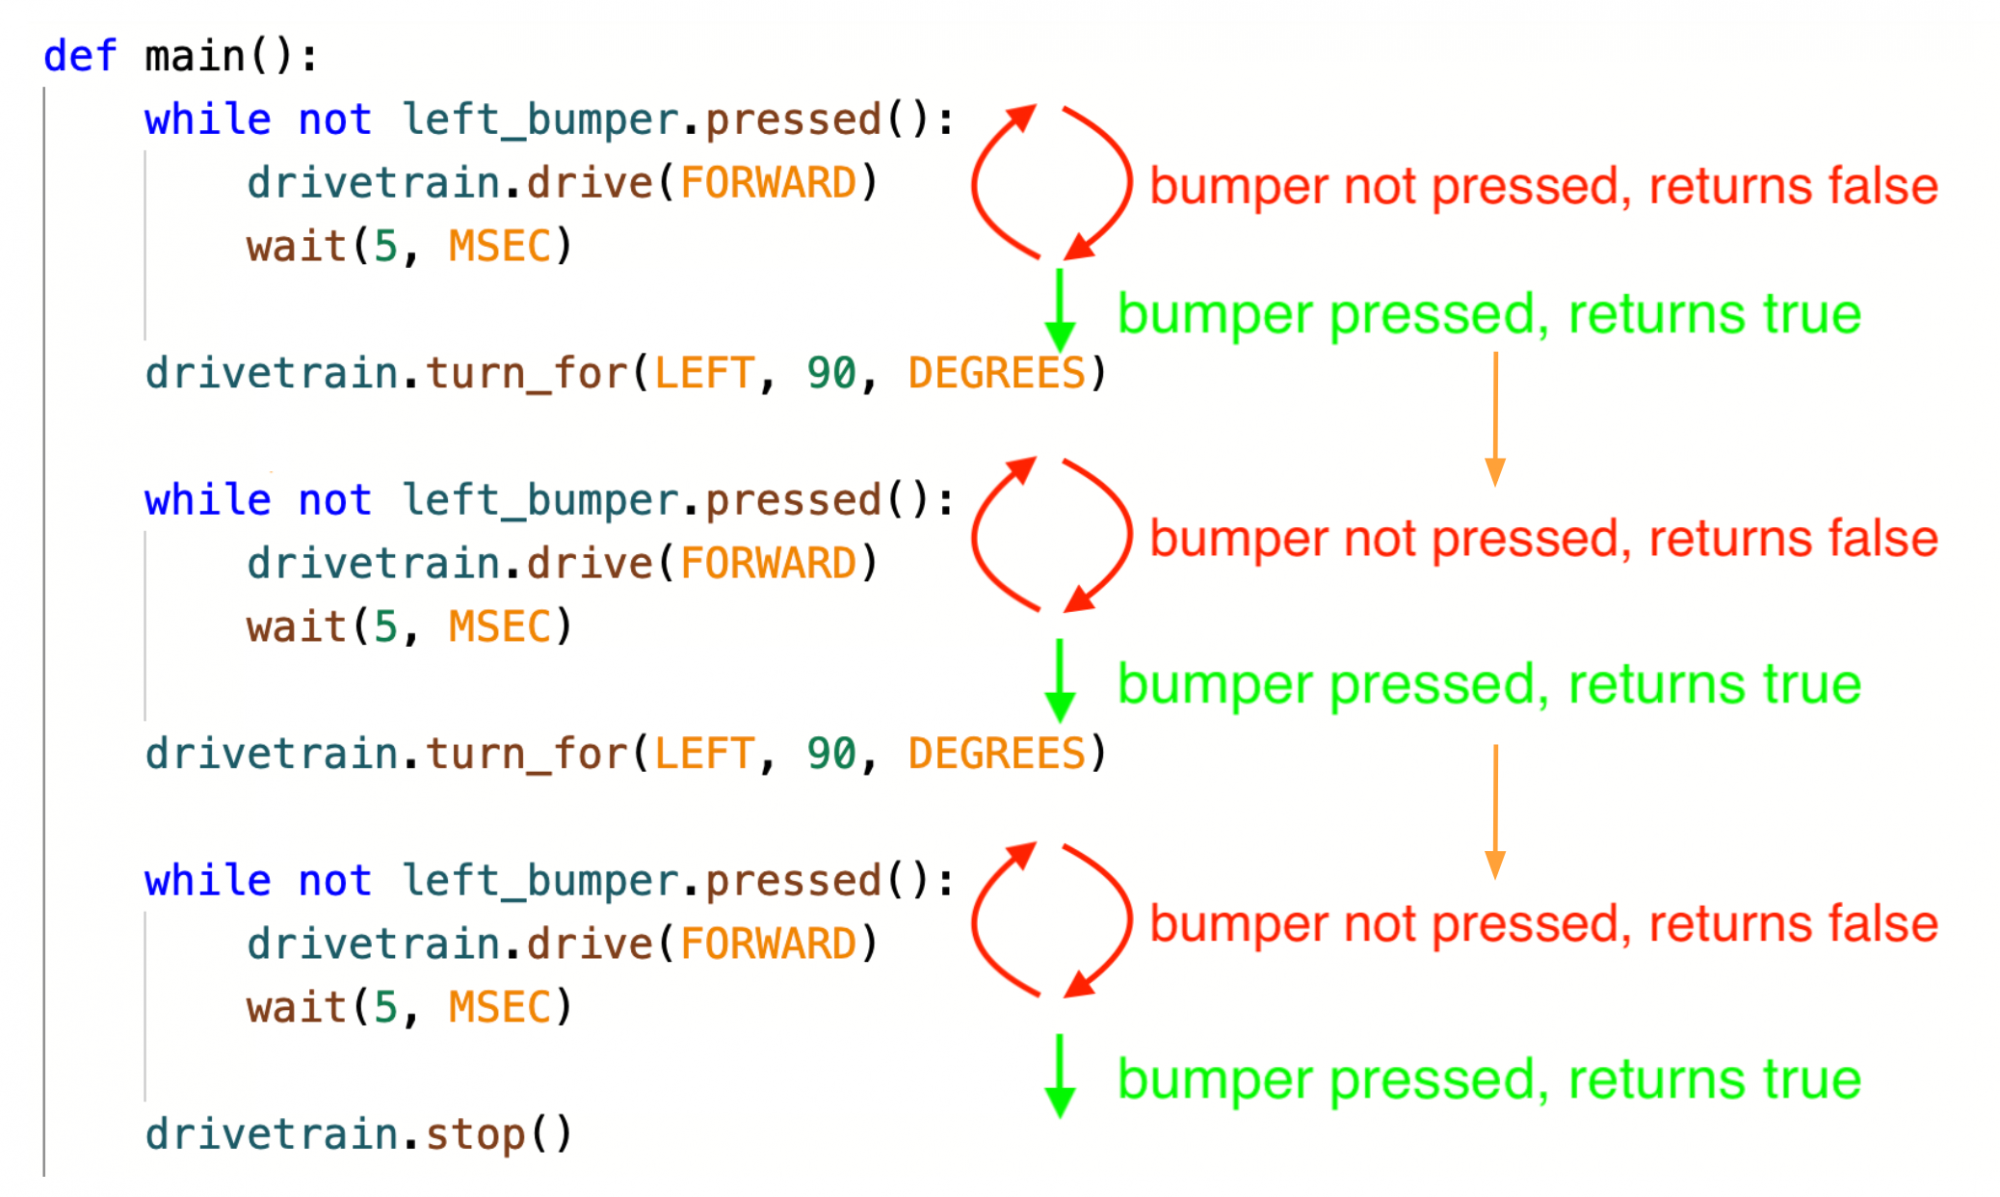
The behavior of the VR Robot shows how each while loop is being executed. Broken down alongside the movement of the VR Robot, we can clearly see where the VR Robot has driven to after each while loop in the project was executed.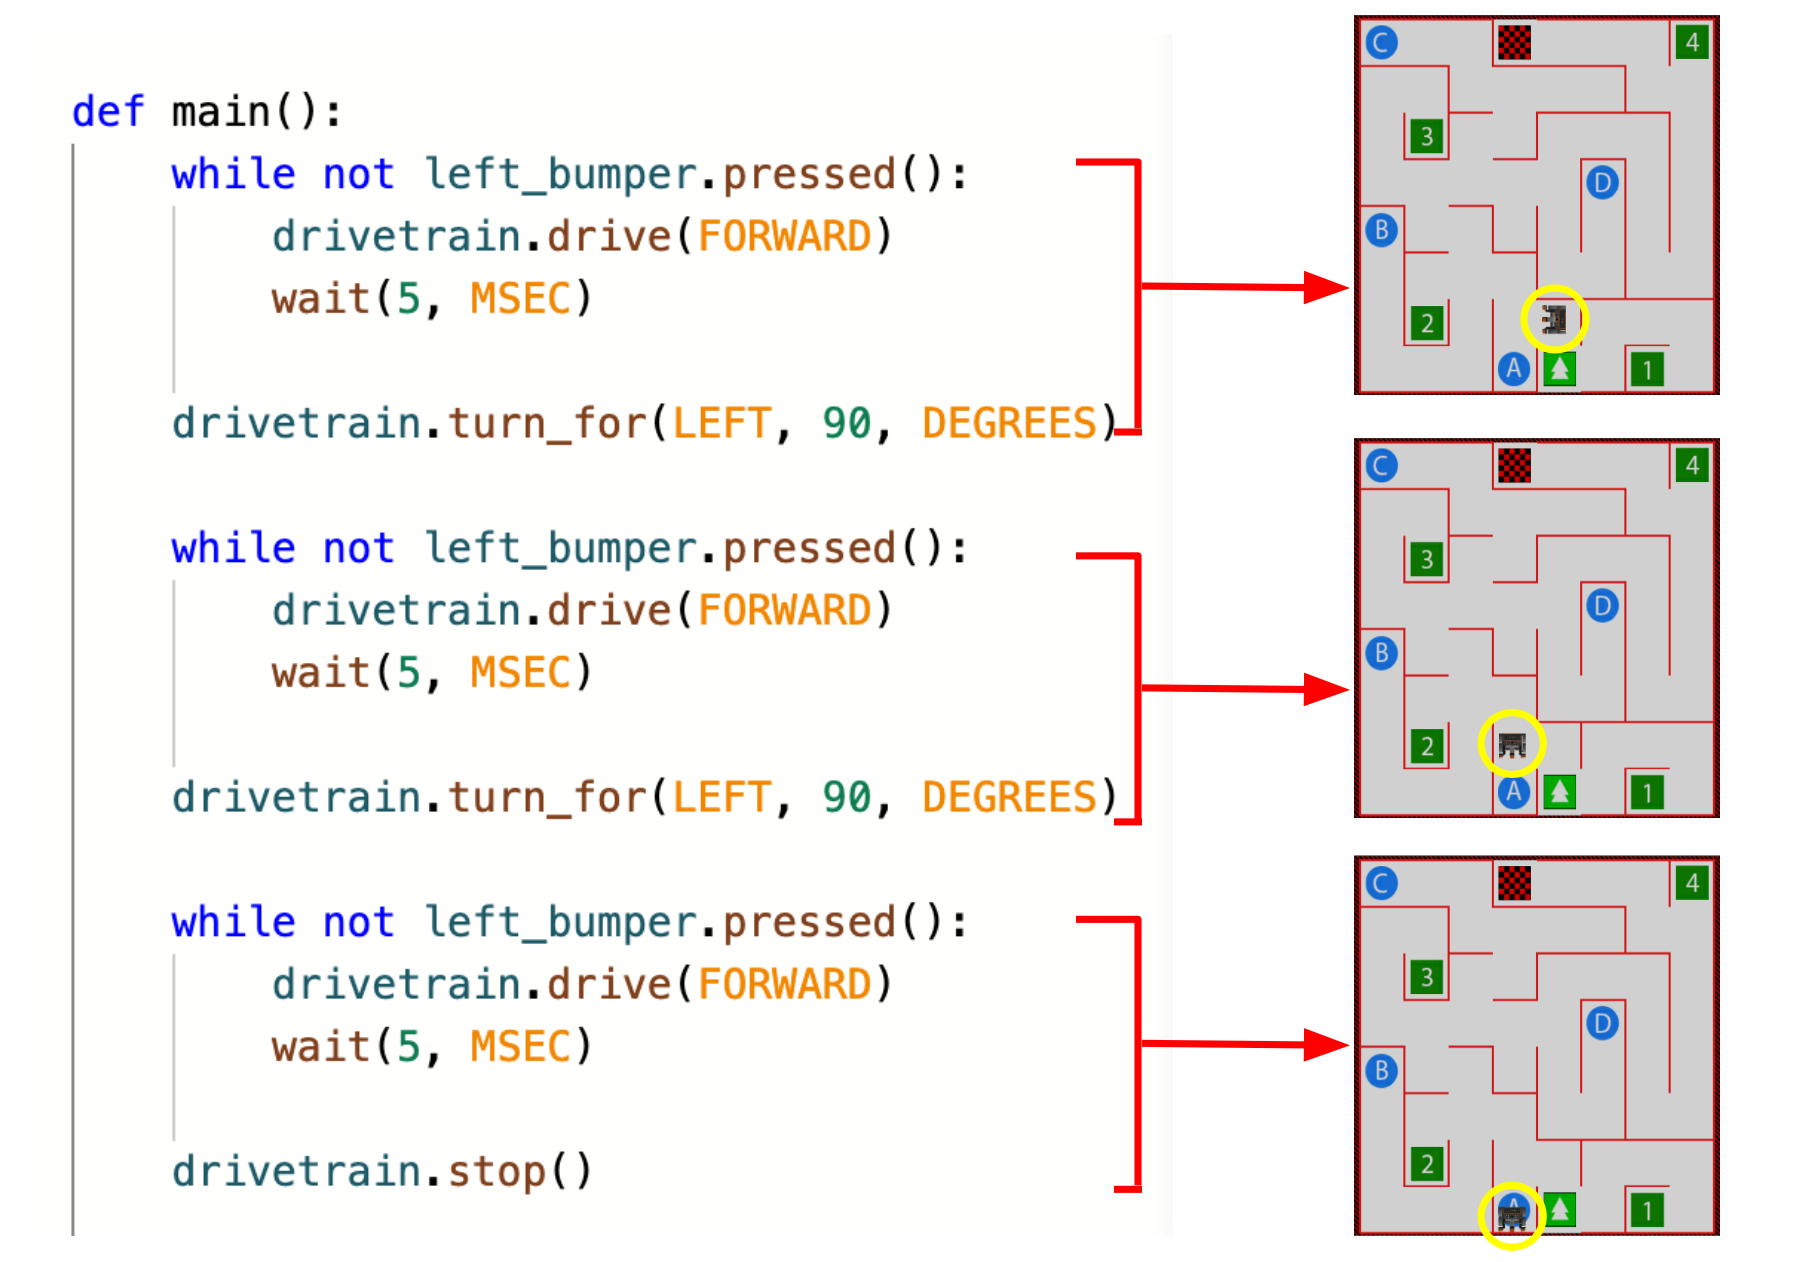
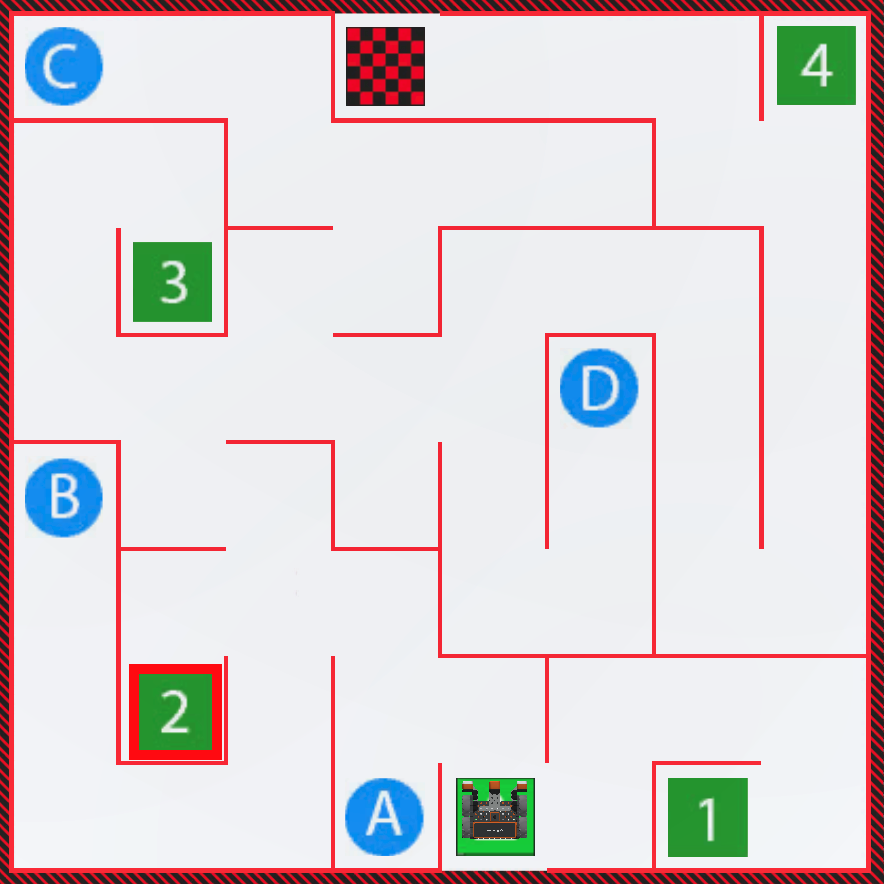
Drive to the Number '2'
In this Lesson, the project will be edited to have the VR Robot drive to the number ‘2’ on the Wall Maze Playground!
-
The project from Lesson 2 has the VR Robot turning left to drive to the letter ‘A.’ In order to navigate to the number ‘2,’ the VR Robot will have to turn right instead, drive forward, and then turn left.
-
Change the direction of the second turn_for command to right instead of left. Your project should now look like this:
def main(): while not left_bumper.pressed(): drivetrain.drive(FORWARD) wait(5, MSEC) drivetrain.turn_for(LEFT, 90, DEGREES) while not left_bumper.pressed(): drivetrain.drive(FORWARD) wait(5, MSEC) drivetrain.turn_for(RIGHT, 90, DEGREES) while not left_bumper.pressed(): drivetrain.drive(FORWARD) wait(5, MSEC) drivetrain.stop() - Launch the Wall Maze Playground if it is not already open and run the project.
-
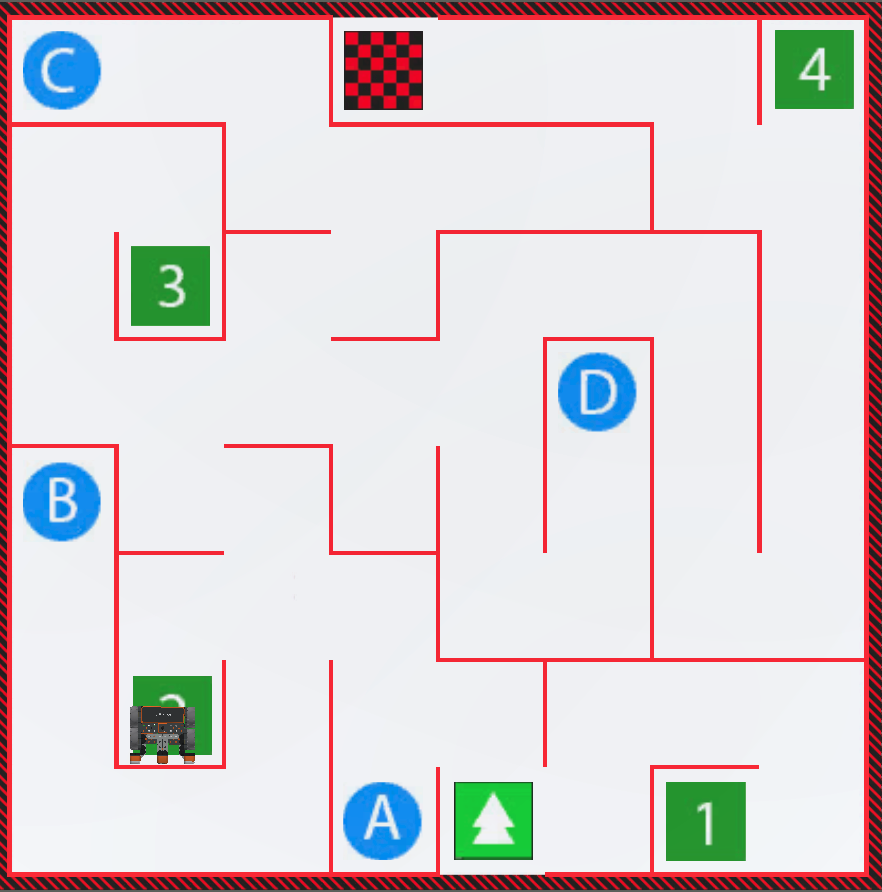
Watch the VR Robot begin to drive to the number ‘2,’ but stop at a wall. Thus, the VR Robot needs to turn left once it presses against the wall instead of stopping.
-
Select the “Reset” button to reset the Playground and move the VR Robot back to the starting position.
-
Edit the code by removing the stop command and replacing it with the following commands in order to drive the VR Robot to the number ‘2.’
def main(): while not left_bumper.pressed(): drivetrain.drive(FORWARD) wait(5, MSEC) drivetrain.turn_for(LEFT, 90, DEGREES) while not left_bumper.pressed(): drivetrain.drive(FORWARD) wait(5, MSEC) drivetrain.turn_for(RIGHT, 90, DEGREES) while not left_bumper.pressed(): drivetrain.drive(FORWARD) wait(5, MSEC) drivetrain.turn_for(LEFT, 90, DEGREES) while not left_bumper.pressed(): drivetrain.drive(FORWARD) wait(5, MSEC) drivetrain.turn_for(LEFT, 90, DEGREES) while not left_bumper.pressed(): drivetrain.drive(FORWARD) wait(5, MSEC) drivetrain.stop() - Launch the Wall Maze Playground if it is not already open and run the project.
-
Watch the VR Robot drive to the number ‘2’ on the Wall Maze Playground!
- Select the “Reset” button to reset the Playground and move the VR Robot back to the starting position.
Select the Next button to continue with the rest of this Lesson.