
Play
Part 1 - Step by Step
- InstructInstruct each group to plan for their VEXcode project by writing pseudocode. They will create pseudocode to have their Code Base robot and extension to drive in a square. Watch the animation below to see the Code Base move successfully. In the animation below, the Code Base starts in the lower left hand corner of a square, facing upwards. It drives forward along the first side of the square, then turns right, and repeats these two behaviors to drive around the entire square.
Video file
- ModelModel for students how to write out the pseudocode. Pseudocode is a shorthand notation for coding that combines verbal and written descriptions of code. Ensure each group has a piece of paper and pencil to write out their pseudocode.
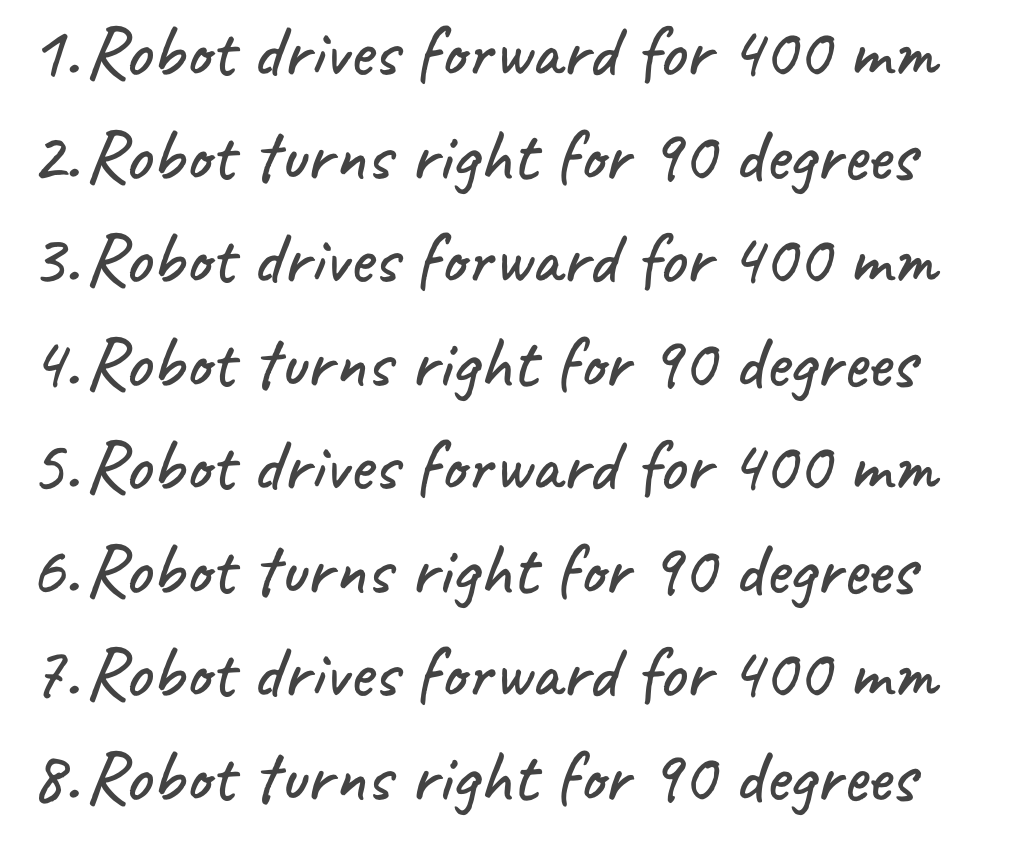
- Ask students to define the goal of their project. What do they want their Code Base to do? All students should be able to tell you that the Code Base should move in a square.
- Model how to be specific in pseudocode. Instead of “Drive forward,” students should be describing exactly how far forward using measurements and units.
Pseudocode
- FacilitateFacilitate a discussion about pseudocode with students as you walk around and assist groups. Ask students:
- What do you want their project to accomplish?
- How are you going to break down the intention or goal of the project into short specific statements?
- Describe characteristics of a square.
- How many corners does it have?
- Are the sides all the same length or are they different lengths?
- How do you know if your pseudocode is describing a square?

Writing Pseudocode - RemindRemind students to work as a group and listen to each other's ideas. They may need to try more than once to make sure their pseudocode describes the exact behaviors they want from their Code Base. It will take multiple rounds of trying and failing in order to succeed. That is okay!
- AskAsk students how planning pseudocode is similar to planning in other parts of their lives. How do they plan what they are going to pack before a trip? Have they ever forgotten something important because they skipped planning? (a shoe, a toy, a charger)
Mid-Play Break & Group Discussion
As soon as every group has finished writing their pseudocode, come together for a brief conversation.
- How do you think writing this pseudocode prepares you for coding your Code Base robot?
- Ask groups to describe the specific movements of the Code Base based on their pseudocode.
Part 2 - Step by Step
- InstructInstruct students that they will be transferring their pseudocode to code in VEXcode GO, then create a project to have the Code Base drive in a square. They will have three tries to test, revise, and re-test their project on their Code Base. Watch the video below to see the Code Base move successfully. In the animation below, the Code Base starts in the lower left hand corner of a square, facing upwards. It drives forward along the first side of the square, then turns right, and repeats these two behaviors to drive around the entire square.
Video file
- ModelModel for students how to first transfer their pseudocode to [Comment] blocks in VEXcode GO. Then, create and start their project to have the Code Base drive in a square.
- If students need assistance opening and saving a project, model the steps in the Open and Save a Project article for your device, and have them follow along.
- Have students name their project Drive in a Square.

Name Project - Once students have named their project, students will then need to connect their Code Base to their device. If necessary, model the steps in the Connect a VEX GO Brain VEX Library article for students.
- They will also need to configure VEXCode GO for the Code Base. Model the steps from the Configure a Code Base VEX Library article and ensure students can see the Drivetrain blocks in the Toolbox.
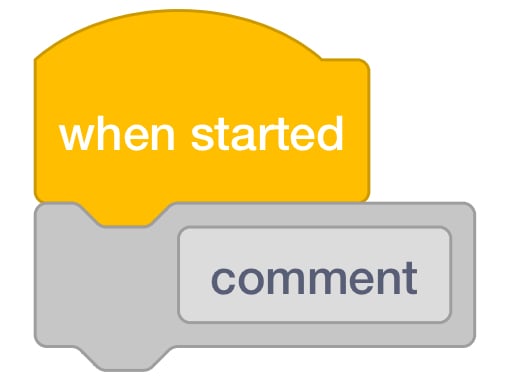
- Show how to drag a [Comment] block into the Workspace and place under the {When started} block. If necessary, see the Using Comments in VEXcode GO VEX Library article for information on how to use comments in a project.
Add [Comment] block to {When started} - Model adding the first line of pseudocode to the [Comment] block.
Add Pseudocode to [Comment] Block - Have students transfer all of their pseudocode to [Comment] blocks.
Note: Students will need 1 [Comment] block for each line of pseudocode. So, if they have 8 lines of pseudocode, they will need 8 [Comment] blocks.
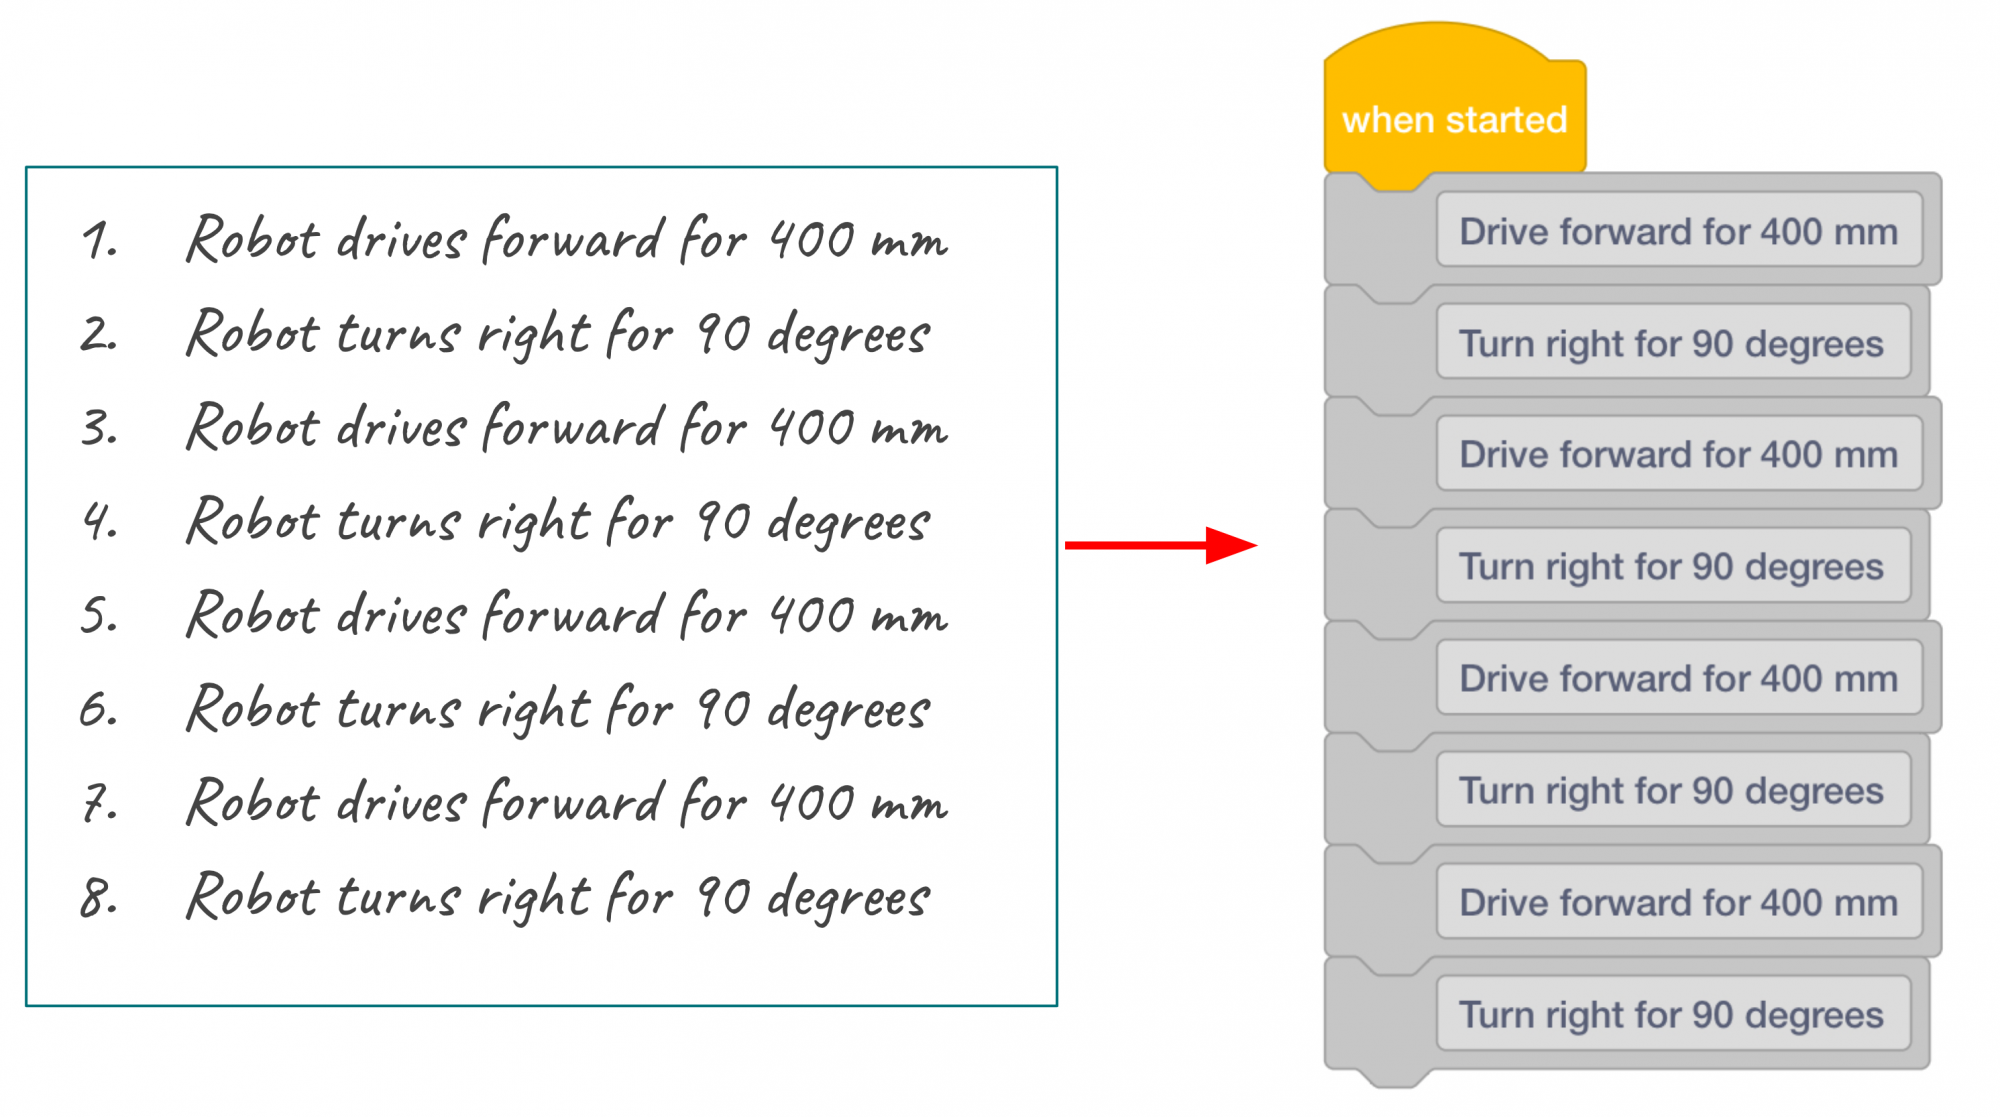
Pseudocode to [Comment] Blocks Once students have transferred their pseudocode, they will add Drivetrain blocks. Remind students that the [Comment] blocks are used to organize their projects and they will not execute behaviors. They will need to add Drivetrain blocks to make their Code Base move.
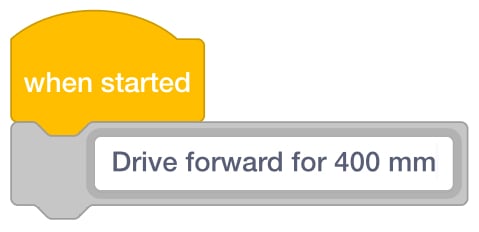
- Have students add a [Drive for] block under the first [Comment] block.
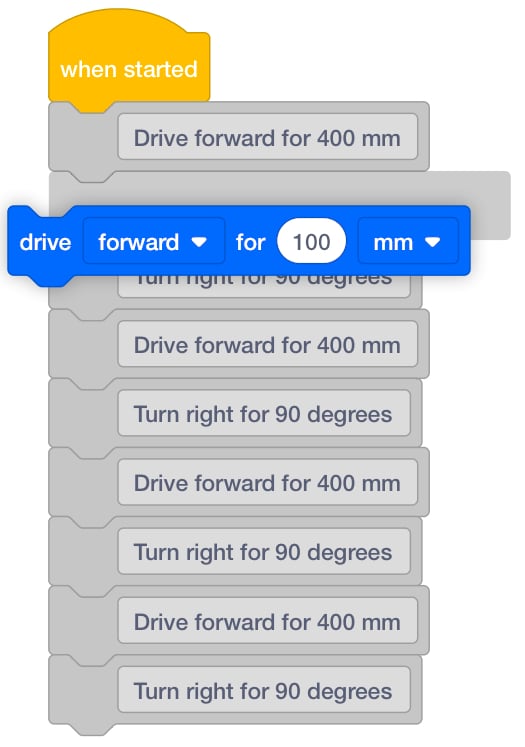
Add [Drive for] under first [Comment] block - Then, have students adjust the parameters to match what is called for in the [Comment] block. In this case, that is 400 millimeters (mm).
- Next, have students add a [Turn for] block, and check to make sure the parameters match the pseudocode in the [Comment] block.
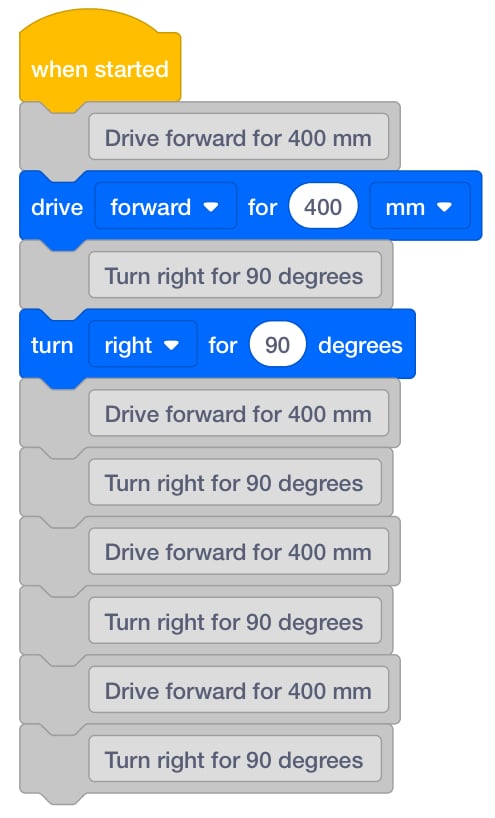
Add [Turn for] block -
Have students continue until they have added Drivetrain blocks for each of the [Comment] blocks.
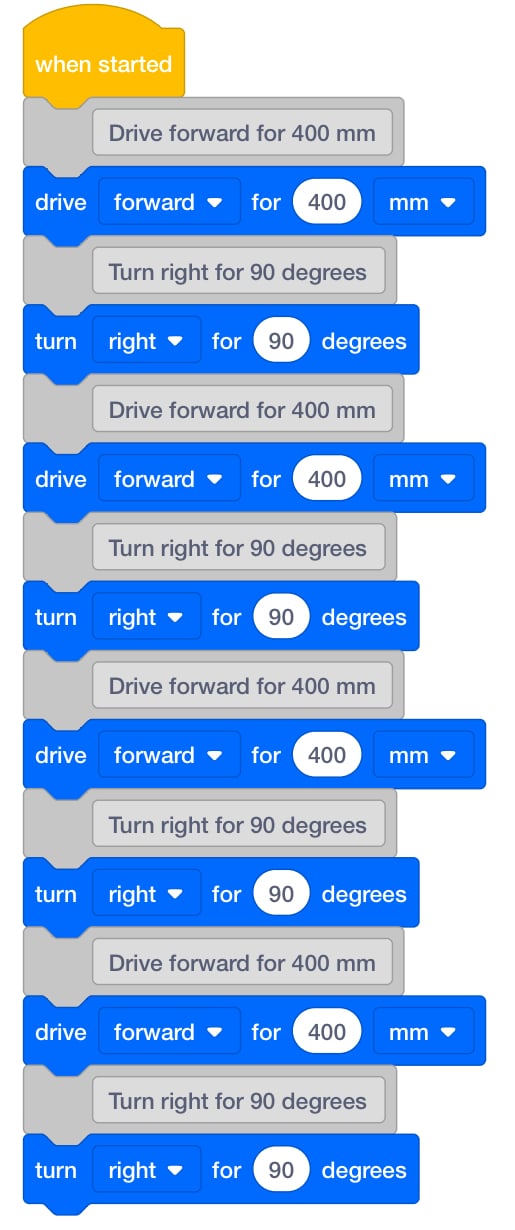
Drive in a Square Project - Once students have added all of the Drivetrain blocks, they are ready to start their project. Have students select the ‘Start’ button in the Toolbar to start the project, and observe the movements of the Code Base. If needed, review the steps from the Starting a Project in VEXcode GO VEX Library article, and model the steps to start a project for students.
- Have students run 3 test trials to test their Drive in a Square project and use the Data Collection sheet to document what worked and what changes need to be made.
- FacilitateFacilitate as students are building their projects by encouraging students to use directional language and reference their pseudocode if they get stuck. As you circle the room helping students, ask questions about their process.
- What commands are you using to make your Code Base move in a square?
- Describe your previous trials (if students have already been able to test)
- What worked in your project?
- What did not work?
- How are you going to adjust your project? Is there a specific command you need to change?
- How can you instruct the Code Base move in a perfect square? Are there any specific commands you need to change?
Collaborating on a project - RemindRemind teams that they have three tries to test, change, and re-test their plan. Their first try will most likely not work. They will need to try more than once to get their Code Base to successfully move in a square. Remind students to record the trials and changes on their Data Collection Sheet as they are testing.

Example of filled out Data Collection Sheet - AskAsk students if the pseudocode helped them with the challenge in Play Part 2. Planning is a huge part of other jobs too. Can they name jobs where they have to plan ahead? (Engineering, Coding, Teaching, etc).
Optional: Teams may deconstruct their Code Base robot if needed after this point in the experience. They will use the same build in the subsequent labs, so this is a teacher option.