Observing the X, Y, and Z-Axes
![]() Teacher Toolbox
-
Facilitating the Observing the X, Y, and Z-Axes page
Teacher Toolbox
-
Facilitating the Observing the X, Y, and Z-Axes page
What the Teacher Will Do:
- Bring groups up to your Workcell for a whole-class demonstration.

- Show students how to move the arm in each axis. This ensures they have a shared understanding of how to move the arm during the activity.
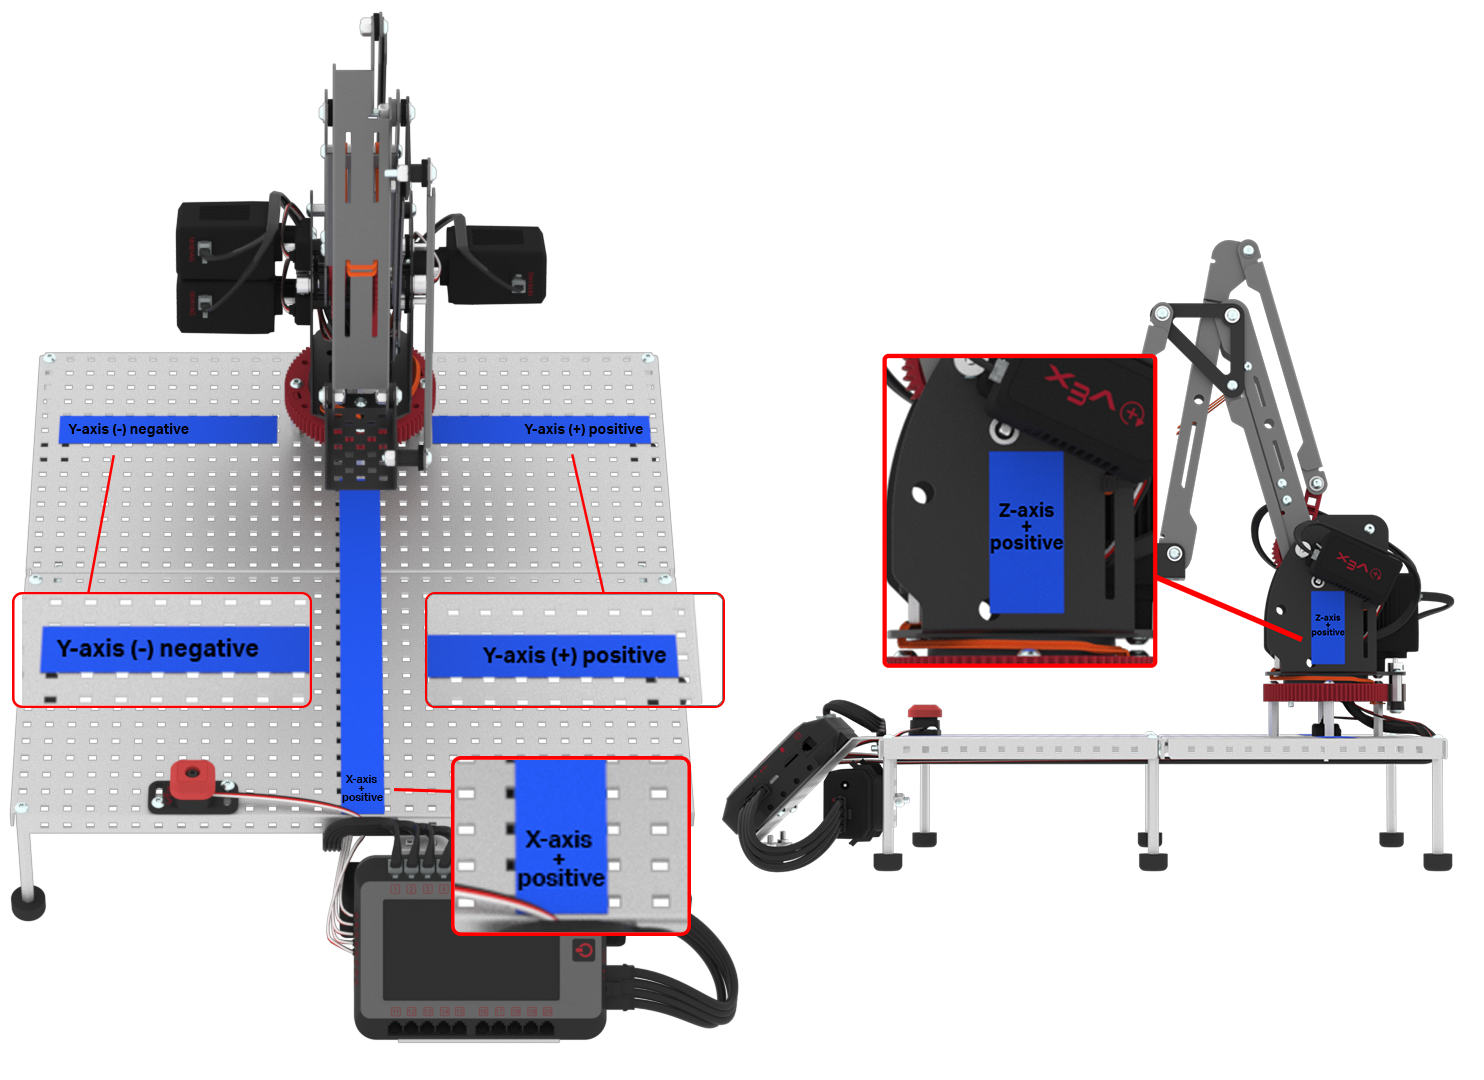
- X-axis: toward the Brain (extended) and away from the Brain (retracted).
- Y-axis: to the left and right of the Brain.
- Z-axis: down toward the base plate of the Workcell and then up away from the base plate of the Workcell.
- Demonstrate for students the steps for the activity:
- Move arm along the axis and observe: move the arm and note to students that they should be viewing the values on the Brain's screen as they are moving the arm.
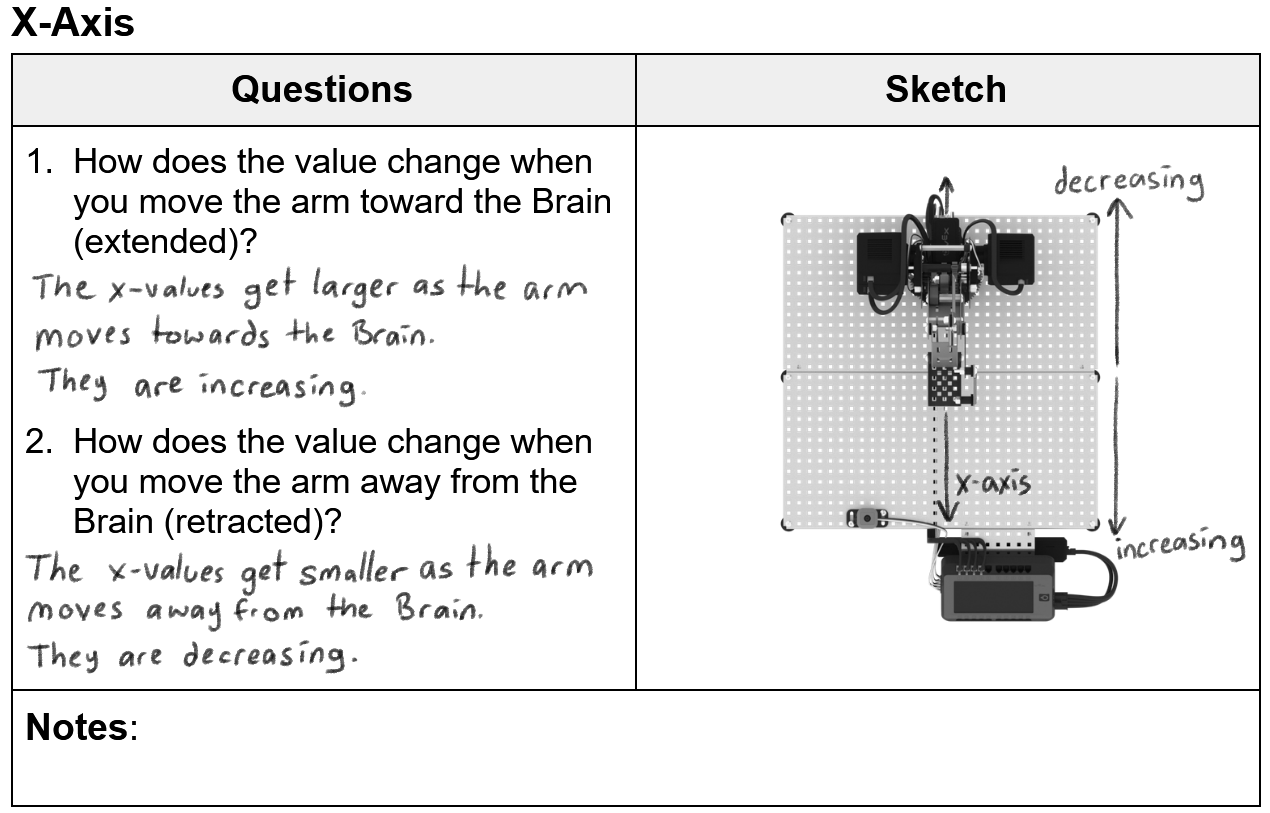
- Sketch the movement: sketch the axis along with labels of where the values are increasing and decreasing on the Play Checklist.
- Answer the axis questions on the Play Checklist.
- Instruct students to view these references on this page if they need assistance as they are completing the activity.
- Tell students to check in with you once they have completed the activity for all three axes.
- Break students off to work within their groups for the activity. Walk around the room as students are working to answer any questions if they arise.
- Once all groups have checked in, bring the class back together and lead a whole-class discussion about these values. Guidance for the discussion is provided in a Teacher Toolbox at the bottom of this page.
For additional information on how to facilitate this activity, go to the V5 Workcell Educator Certification.
Now that the 'Manual Movement' project is created, you will download and run the project on your Brain. You will use the project to see how the x, y, and z-values displayed on the Brain change as you move the arm on the Workcell.
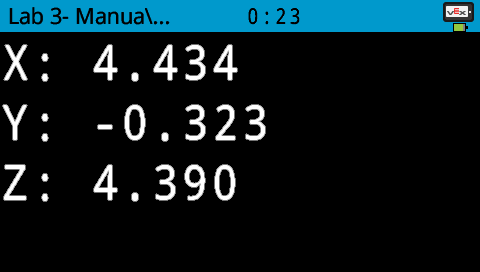
Download and run the project. (x, y, z) values will be displayed on the Brain's screen.


Move the arm of the Workcell along each of the three axes, and observe how the x, y, and z-values on the Brain's screen change as you move the arm.
The axes and the arm movements are shown in this video as reference.
Label each axis and answer the questions on your Play Checklist as you observe the arm's movement.
Once you have finished labeling each axis and answering the questions, stop the project.

The questions from the Play Checklist are also provided here as reference:
The x-axis:
- How does the value change when you move the arm toward the Brain (extended)?
- How does the value change when you move the arm away from the Brain (retracted)?
The y-axis:
-
How does the value change when you move the arm to the left of the Brain?
-
How does the value change when you move the arm to the right of the Brain?
The z-axis:
- How does the value change when you move the arm up away from the base plate of the Workcell?
- How does the value change when you move the arm down toward the base plate of the Workcell?
For Your Information
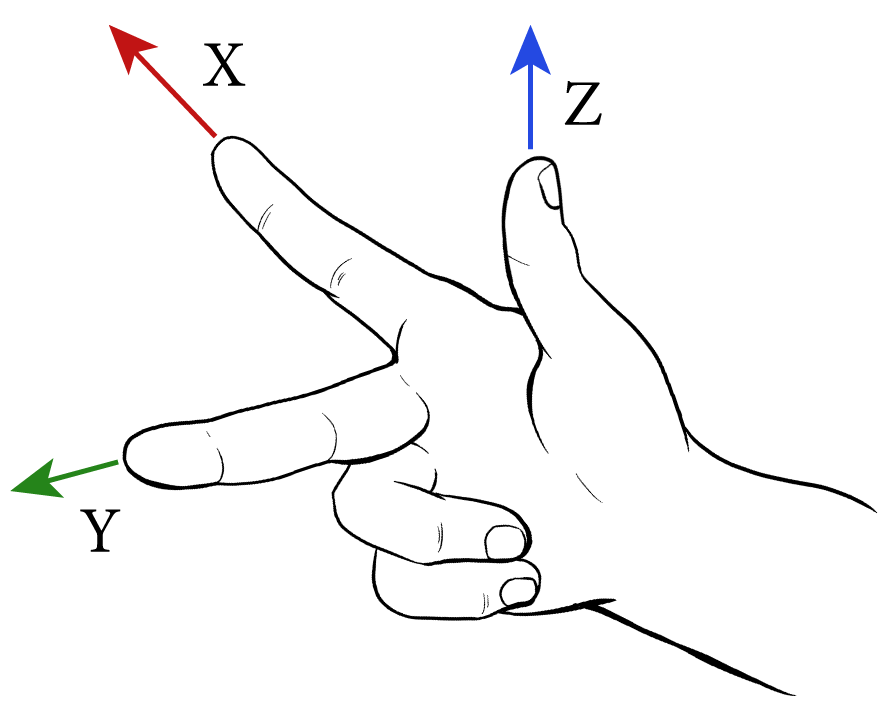
The right-hand rule is a way of remembering the orientation of the three axes. For the Workcell, orient yourself behind the arm of the Workcell, on the side that is furthest away from the Brain, to use the right-hand rule.

![]() Teacher Toolbox
-
The x, y, and z-axes
Teacher Toolbox
-
The x, y, and z-axes
After most groups have answered the above questions, engage the class in a discussion about their observations. Remind groups that have not finished that it is okay if they are not done, as the class will now discuss together.
- Provide a demonstration of moving the arm and seeing the values being displayed on the Brain's screen as you are discussing each axis.
- The x-axis: ask students to share their observations of moving the arm along the x-axis, and how the x-value changed as the arm was extended (moved towards the Brain) and retracted (moved away from Brain). Encourage students to show the sketches on their Play Checklist while sharing. After students share their experiences, explain to students that the x-value increased as the arm was extended, and decreased when the arm was retracted.
- The y-axis: ask students to share their observations of moving the arm along the y-axis, and how the y-value changed as they moved the it to the left and to the right of the Brain. Encourage students to show the sketches on their Play Checklist while sharing. After students have shared their experiences, explain that the y-value increased as the arm moves to the right of the Brain, and the y-value decreases when moved to the left of the Brain.
- The z-axis: ask students to share their observations of moving the arm along the z-axis, and how the z-value changed as they moved the arm up away from the base plate of the Workcell, and down toward the base plate of the Workcell. Encourage students to show the sketches on their Play Checklist while sharing. After students have shared their experiences, explain to students that the z-value increased as the arm moves up away from the base plate of the Workcell, and the z-value decreases when moved down toward the base plate of the Workcell.
- Explain to students that all three axes make up the Cartesian Coordinate System. On the Brain's screen, each x, y, and z-axis has a value associated with it. All three of these values together in one coordinate represent one point in 3D space. This allows the arm to move in 3D space to get to a specific location.
For additional information on how to facilitate this discussion with your students, go to the V5 Workcell Educator Certification.
![]() Teacher Tips
-
Labeling the Workcell
Teacher Tips
-
Labeling the Workcell
Now that the x, y, and z-axes has been established, students can use tape and a marker, or any other classroom materials to label their Workcell. If you want students to label their Workcell, encourage them to label it in a manner that works best for them.

If you do not want your students labeling the physical Workcell, students can label each axis on their Play Checklist.
