
In this lesson, you will go beyond basic takeoff and landing and begin using flight data to guide how you fly your VEX AIR Drone. You will open the Drone Dashboard on the VEX AIR Drone Controller and learn how the drone’s position is shown using coordinates on the screen.
As you fly, you’ll watch how the numbers change when you pitch the drone forward and backward. This helps you understand how your movements affect where the drone is in space.
Watch the video below to learn about:
- How to access the Drone Dashboard on the controller.
- How pitching the drone affects the y-coordinate.
Hover & Discover
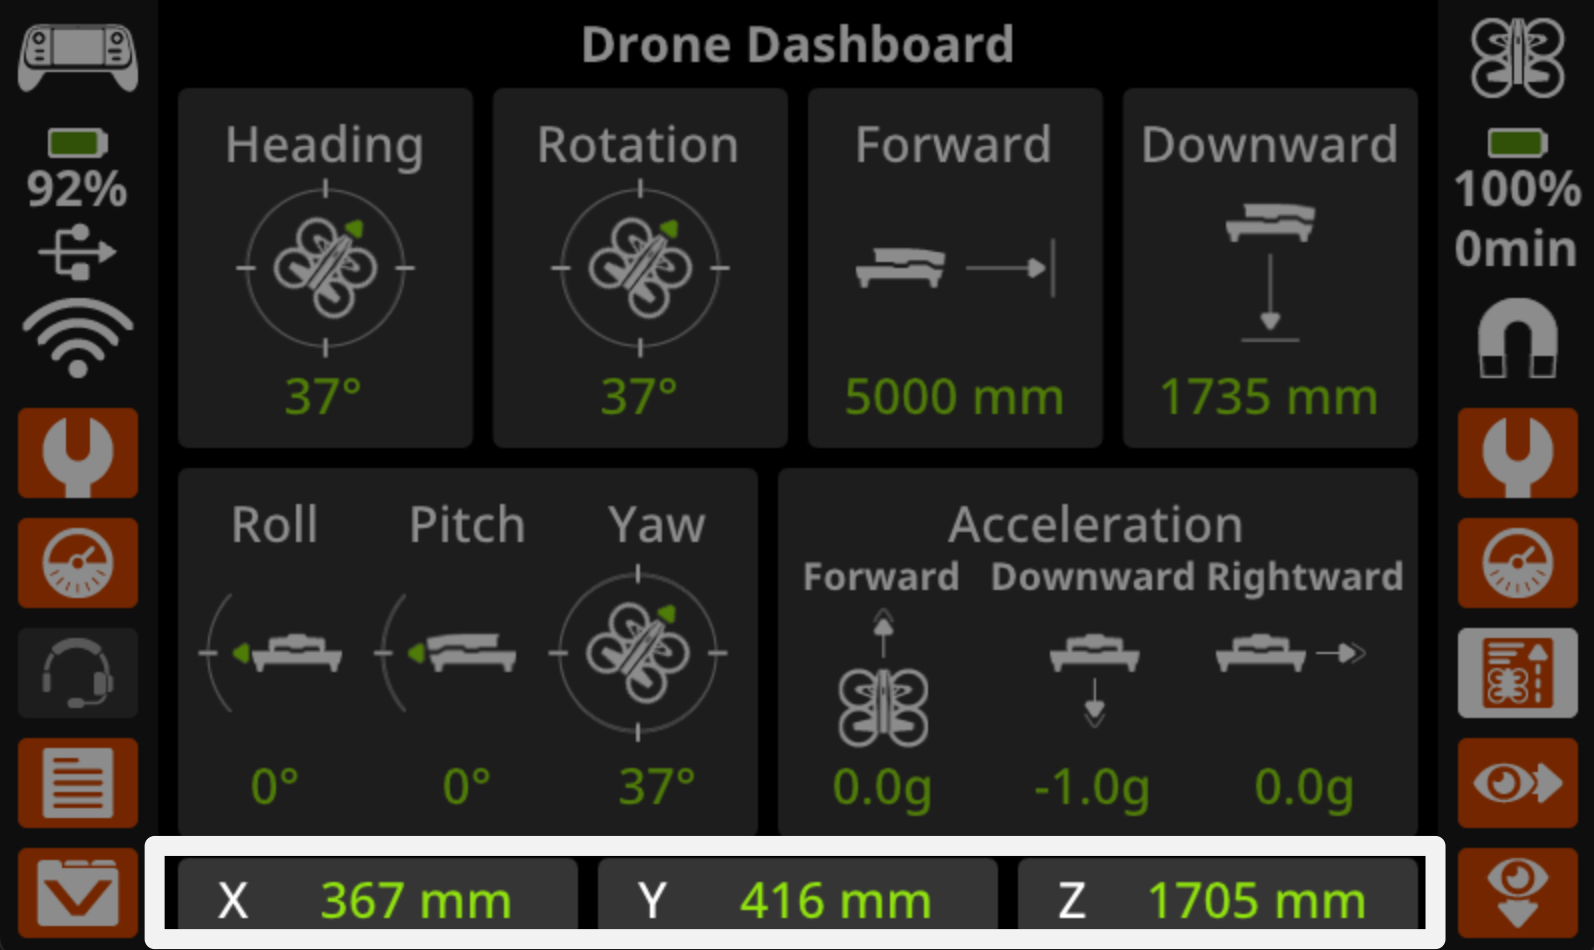
The Drone Dashboard shows live information about what the drone is doing while it’s flying. This information, called instrument data, includes values like the drone’s position, height, and movement. Instead of guessing where the drone is, pilots can use this data to fly more accurately and repeat the same movements each time. When you pitch the drone forward or backward, you’ll notice the coordinates at the very bottom of the dashboard change. Learning to use instrument data is an important step toward flying with intention instead of relying only on what you see.
Mission: Fly to Y
In this mission, you will fly the drone to different y-coordinates to see how the coordinates change as you pitch the drone forward and back. Follow these steps to complete your mission:
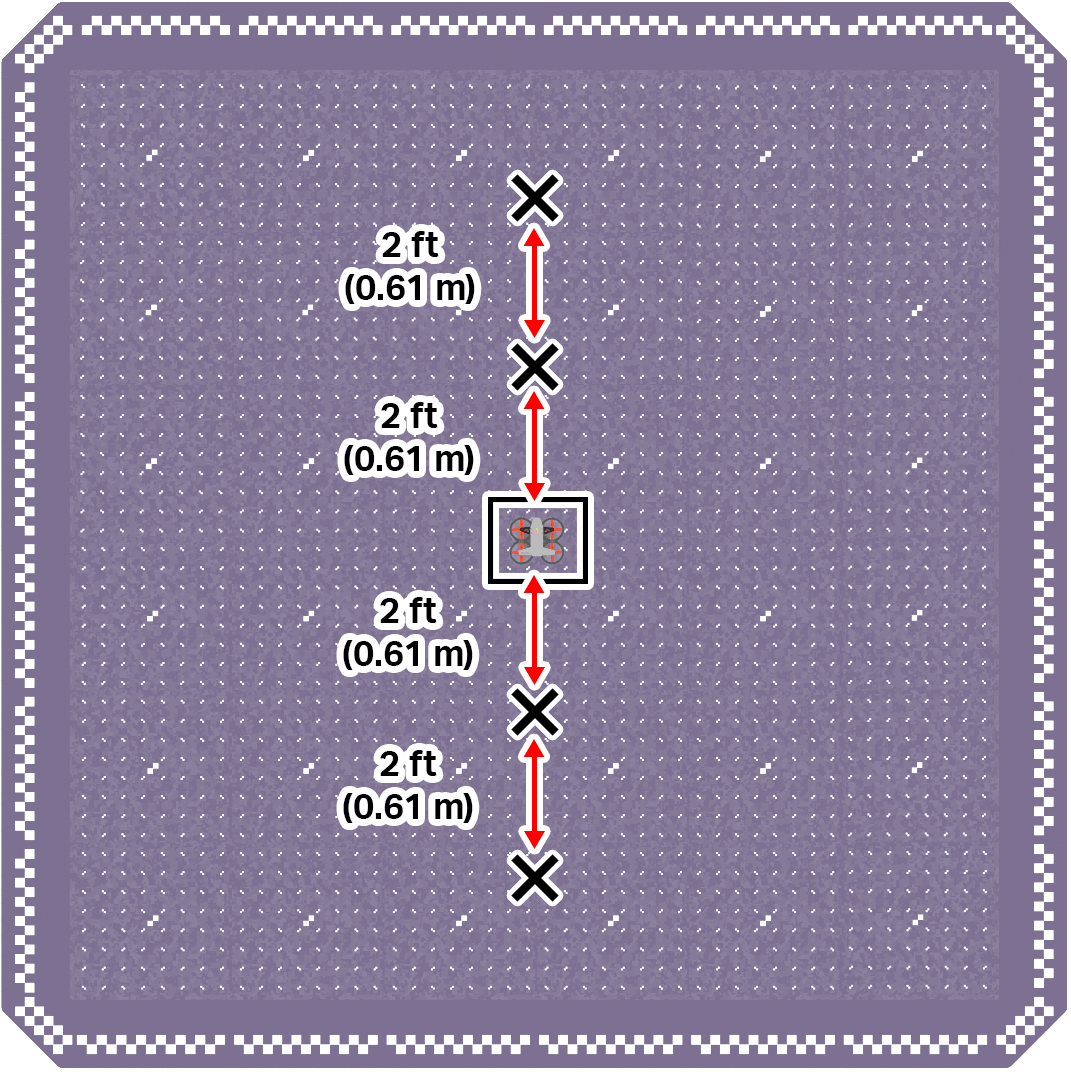
- Mark four locations on the ground in front of and behind the drone's takeoff zone, in the center of the field.
- Two should be directly in front of the drone. Each one should be 2 ft (0.61 m) apart.
- Two should be directly behind the drone. Each one should be 2 ft (0.61 m) apart.
Use the image below for reference as you set up your indoor flight area.
- Divide your flight team into starting roles to determine who will be the pilot and co-pilot(s). Review the responsibilities for before, during, and after a flight in this article.
- Use the pre-flight checklist in the Mission Log (Google Doc / .docx / .pdf) to ensure you, your indoor flight environment, and the drone itself are ready and safe for flight.
- Place the drone in the center of the flight area in the takeoff zone.
- Take off and pitch the drone forward until it is above one of the marked locations.
- Record the y-coordinate from the Drone Dashboard on your Mission Log when the drone is above the marked location.
- Continue to pitch the drone forward and backward to all marked locations, and note the y-coordinate of each in your Mission Log.
Pro Tip: Use different camera views from the drone to ensure you are well aligned with the marked location before opening the Drone Dashboard to gather the coordinate information.
Check Your Understanding
Before moving on, ensure that you understand the concepts in this lesson by answering the questions here (Google Doc / .docx / .pdf).
Select Next > to move to the next lesson.