
Lesson 4: Switch Mode
In this Lesson, you will learn about Switch blocks, a type of coding block designed to help you transition from block-based to text-based coding using the Python coding language. Throughout this Course, you can use a mixture of VEXcode blocks and Switch blocks as you become more comfortable with new Python commands.
For Your Information
You must have a VEXcode VR Premium account to use Switch blocks. To learn more about VEXcode VR account options, view this page: Expanding the VEXcode VR Universe.
Learning Outcomes
- Explain the difference between VEXcode blocks and Switch blocks.
- Identify how to convert a VEXcode block into a Switch block.
- Identify where to find Switch blocks inside the VEXcode VR Blocks Toolbox.
Switch blocks are designed to help you transition from block-based coding to text-based coding using the Python coding language. These blocks contain Python commands that control behaviors. You can easily convert VEXcode blocks into Switch blocks, and you can build projects using Switch blocks by dragging these blocks from the Switch section of the blocks Toolbox into the workspace. You can even type Python commands directly into the Switch blocks as you become more comfortable with coding in Python.
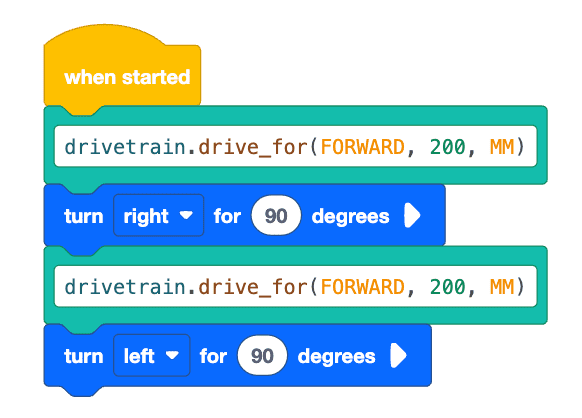
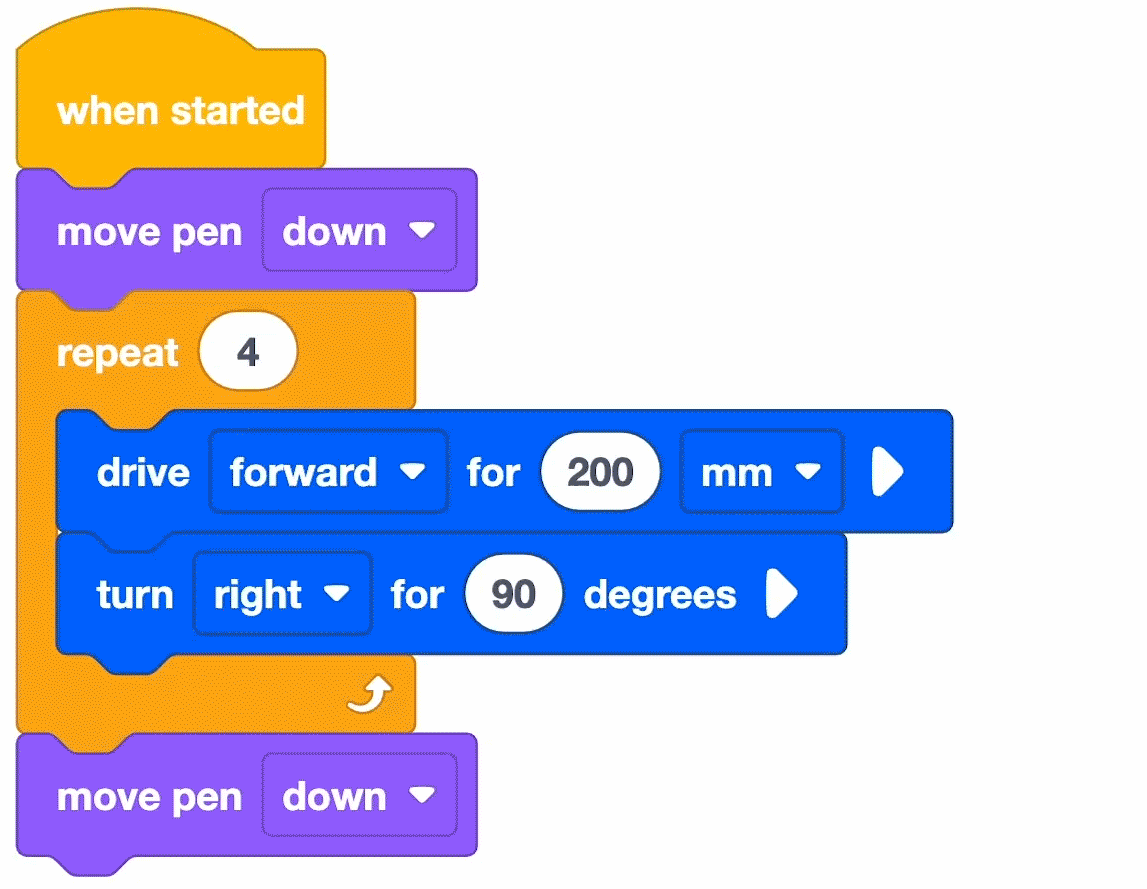
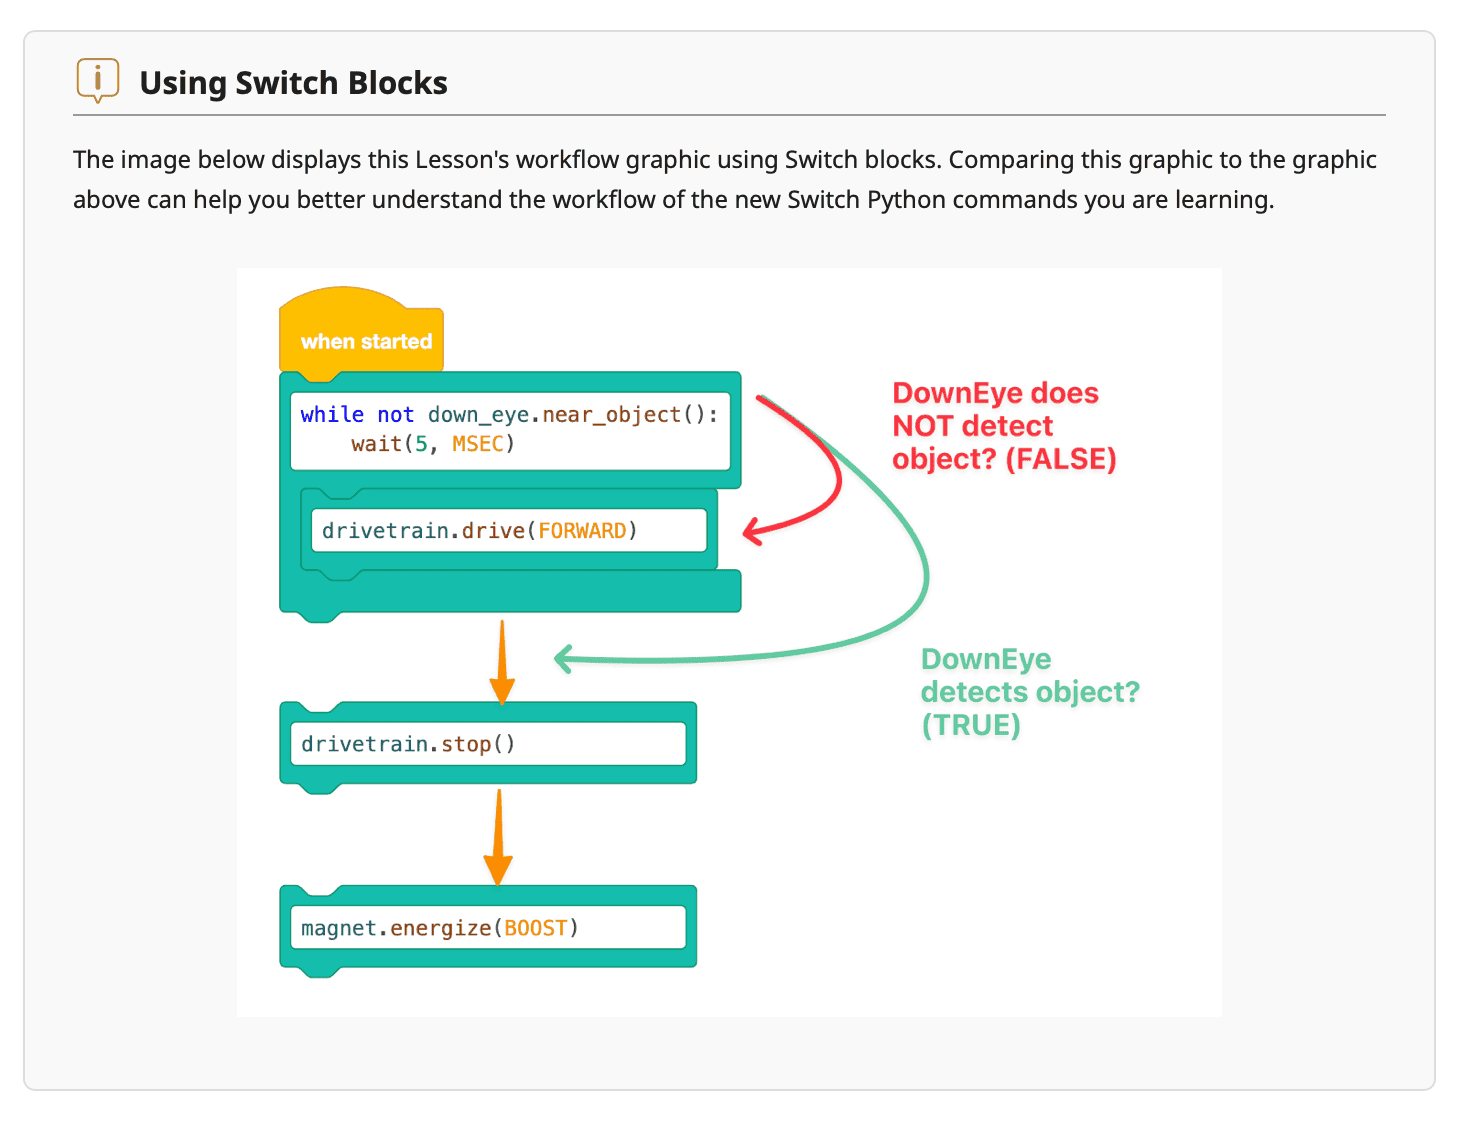
The example project below includes two Switch blocks that each contain a Python command. Both Switch blocks command the robot to drive forward for 200 mm.
Converting VEXcode Blocks to Switch Blocks
You can convert a VEXcode block to a Switch block by selecting the block and choosing, Convert Block to Switch Block.
You can also convert a stack of VEXcode Blocks into a Switch block by selecting the block and choosing, Convert Stack to Switch Block. The VEXcode blocks are converted into individual Python commands within a single Switch block.
Control blocks that nest behaviors inside are called Wrappers. You can convert a VEXcode block Wrapper into a Switch block by selecting the Wrapper and choosing, Convert Wrapper to Switch block.
You can convert both a Wrapper and its contents by selecting the Wrapper and choosing, Convert Wrapper and Contents to Switch block.
Typing Python Commands Inside Switch Blocks
Switch blocks are located inside the Switch section of the blocks Toolbox. You can drag a Switch block into the workspace and type Python commands inside the block to begin coding.
As you type in commands, suggestions for commands and behaviors appear. You may click on these suggestions to complete the command, or simply press the enter or tab key to select these suggestions to complete the command.
Additional Resources
Watch the following video to learn more about using Switch blocks in VEXcode VR.
The article, Using VEXcode VR Switch, provides an in-depth overview of how to use Switch blocks, how to use the Help feature to learn more about Switch Python commands, how to type Python commands inside of a Switch block, and how to convert an entire stack of VEXcode blocks into a Switch block. Read this article and save it for reference as you complete coding challenges throughout the course.
Throughout the course, you will see informational boxes that highlight how to use the Switch blocks that are relevant to each lesson. By reading these boxes, you will learn how each block functions and the syntax of the Python commands inside each block. You will also be able to view specific project workflows using the Switch blocks.
Select the Next button to continue with the rest of this Lesson.