
In the previous Lesson, you learned how to use data from the Optical Sensor in a project to sort a Disk by color. In this Lesson, you will build on what you learned to explore options in VEXcode that enable the project to make a decision no matter what color is detected by the Optical Sensor. You will learn about:
- Why optimizing decision making is important in an industrial setting.
- The difference between the If then, If then else, and Else if blocks.
Checking Multiple Conditions
In the previous Lesson you created a project that could sort a Disk by color to a red pallet or a green pallet. While this is effective, the project could only sort one Disk at a time. In a factory setting, many objects need to be sorted and palletized repeatedly. In order to do this effectively, the 6-Axis Arm needs to be able to repeatedly make a decision on how to move the objects, or if human intervention is needed. Consider the Cubes you moved in the Introduction to the 6-Axis Arm course.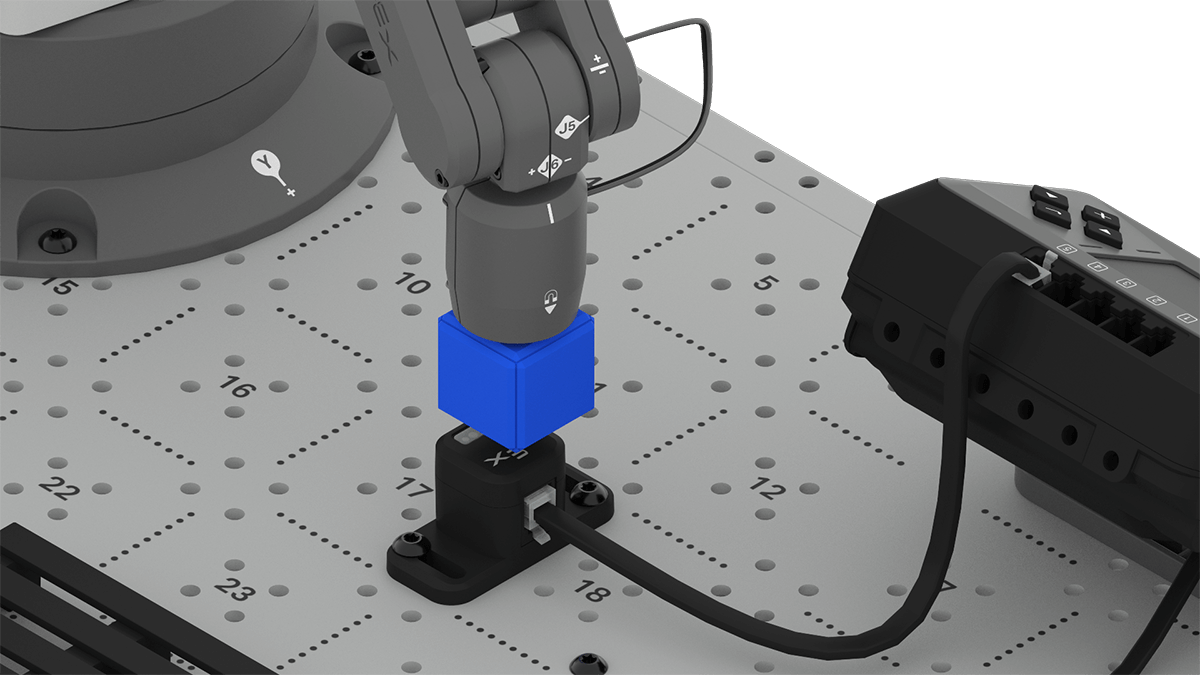
What if a blue Cube was in the loading zone? What would happen in the project from the previous Lesson? In an industrial setting, all of the possible conditions need to be considered. If an errant object is mixed into the objects to be sorted, human intervention would likely be needed to ensure that the workcell and the workers around it stay safe and functioning effectively.
Sequential If then blocks
In the previous Lesson, you used two If then blocks in sequence to check two separate conditions one after the other, essentially asking two questions within the project.
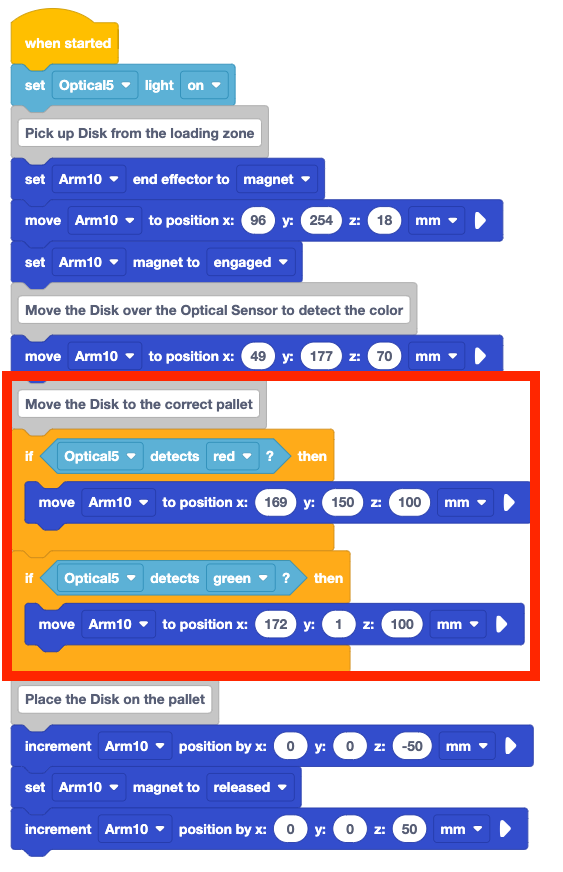
First, Is the object red?, then, Is the object green?. Each condition is checked every time the project is run, regardless of what is detected by the Optical Sensor. While this structure enabled you to sort one Disk at a time effectively, it is not the most efficient way to do so. A red Disk could be sorted, but the Optical Sensor could also detect green from something else in the environment, and vice versa. There is also no consideration given for an object that is neither red nor green, like an unexpected object that could cause a safety issue.
Project Flow Images
Throughout this Lesson, images explaining the flow of VEXcode projects are shared. You can recreate these images in your engineering notebook as well as you move through the Lesson.
Use tools in Google Slides or Microsoft PowerPoint like arrows, boxes, or flowcharts to help create visualizations that work best for you in your notebook.
Sequential If then else blocks
There is a different block that could be used to enable us to both check for the red and green conditions and account for a different color. The If then else block is a C block that runs the blocks inside either the if branch or the else branch, based on the Boolean value reported.
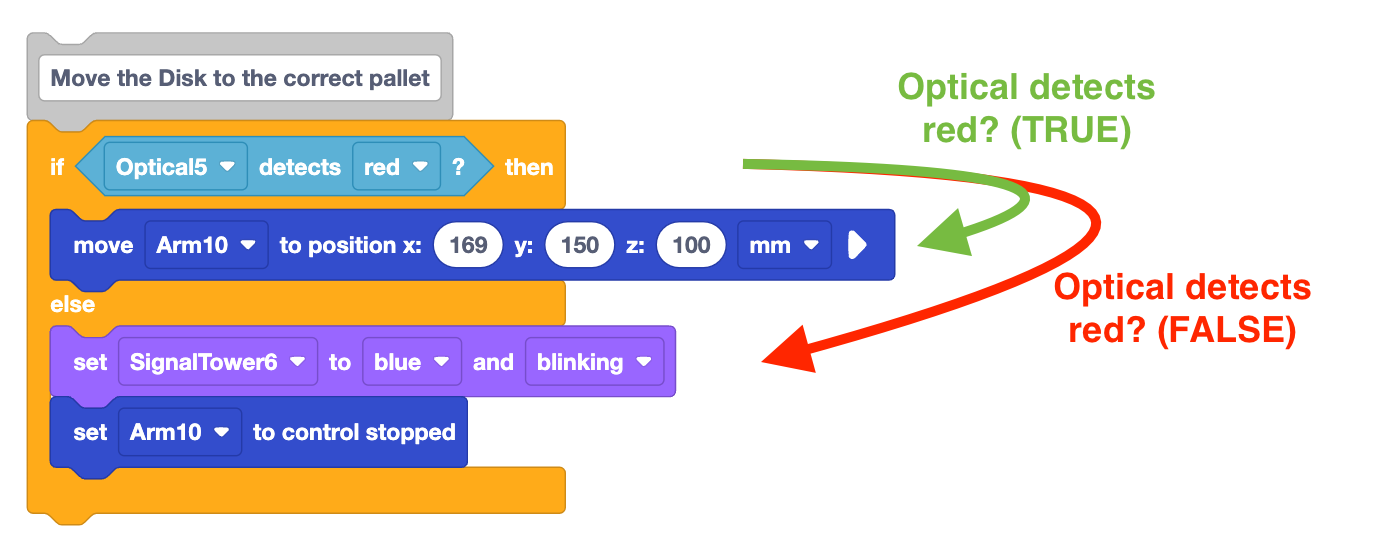
After running either the if branch or the else branch, the project will move to the next block in the stack. The project flow of If then else blocks can also be shown to make the branches more visible.
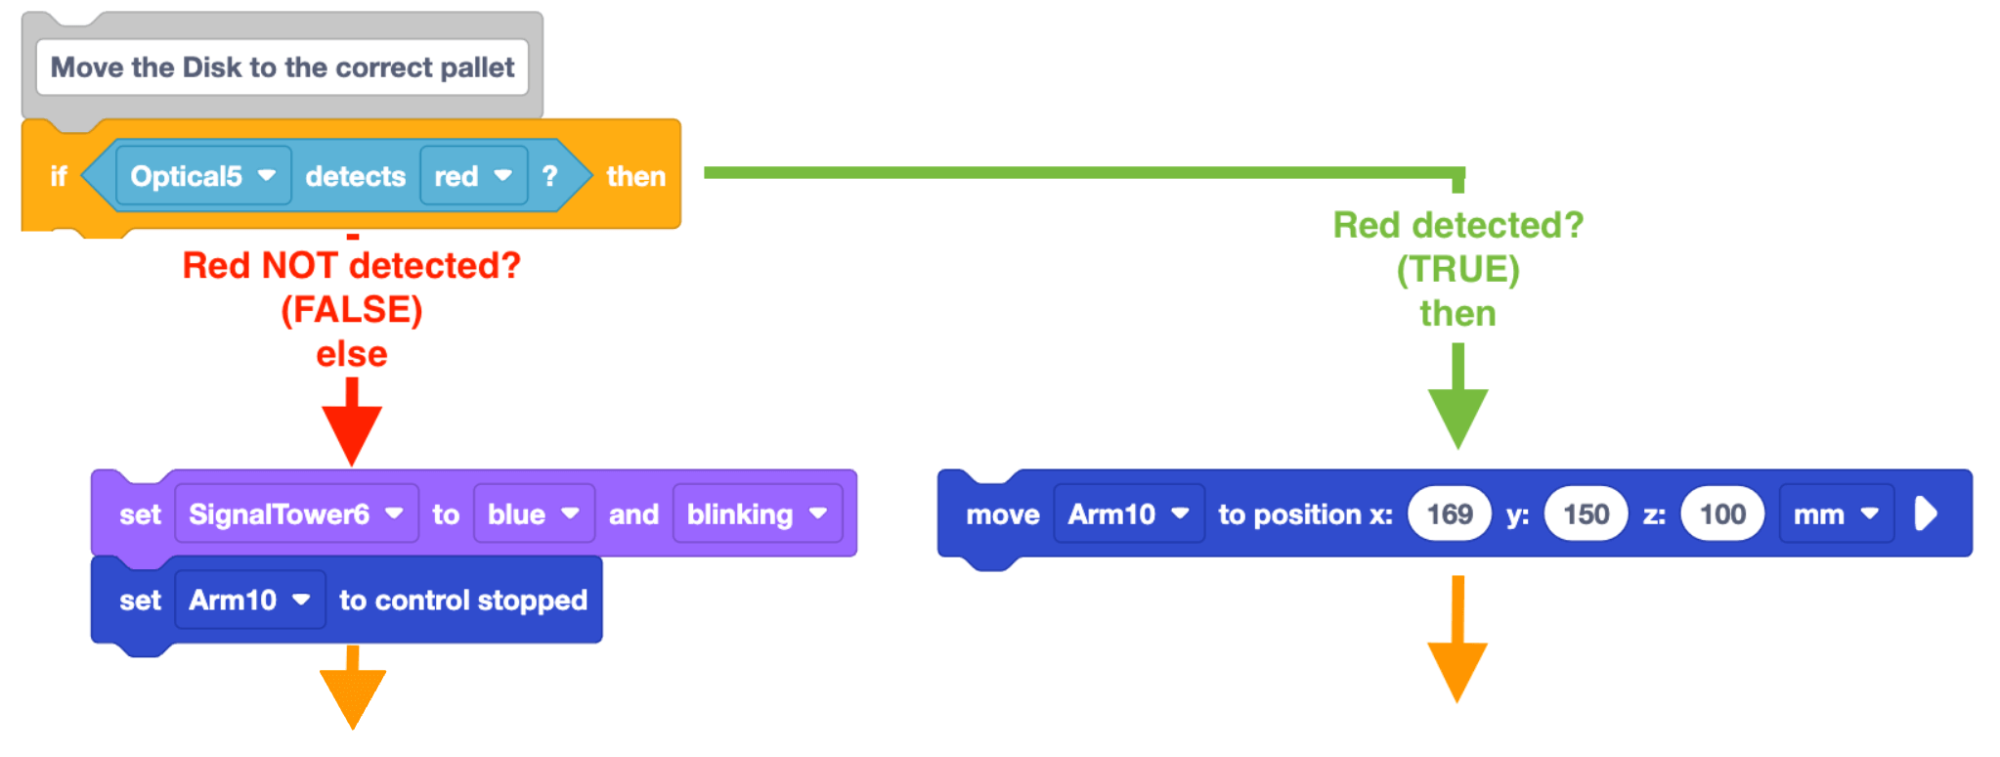
Note that in these examples, the else branch is used to handle the condition of an object being neither red nor green. In that case, human intervention would be needed. Previously you learned that the blue light on the Signal Tower is used to indicate human intervention needed. Additionally, a controlled stop will stop the motion of the 6-Axis Arm in order to keep people and machinery safe. A Set signal tower block and a Set control stop block can be added to the else branch, so that an object that was not red or not green would trigger these safety features.
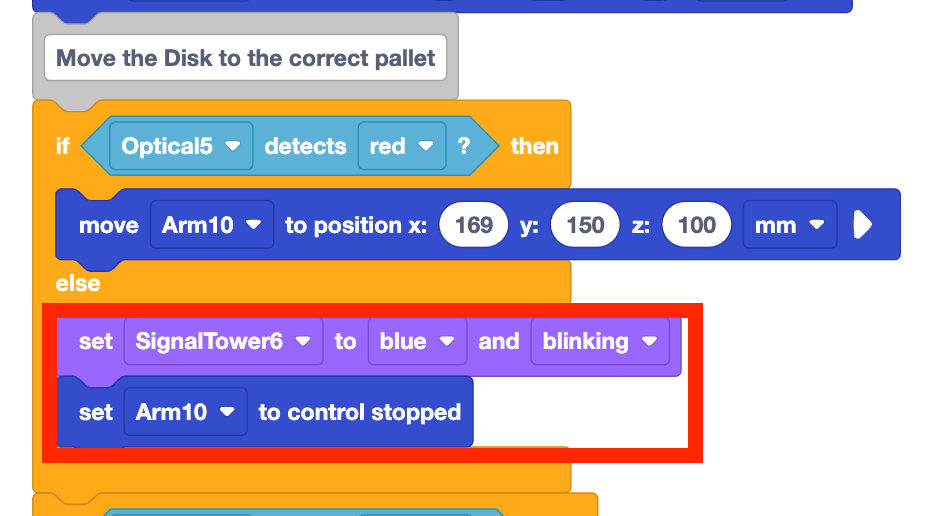
The images so far have only shown how to handle the condition of the object being red. Another If then else is needed to check the condition of the object being green.
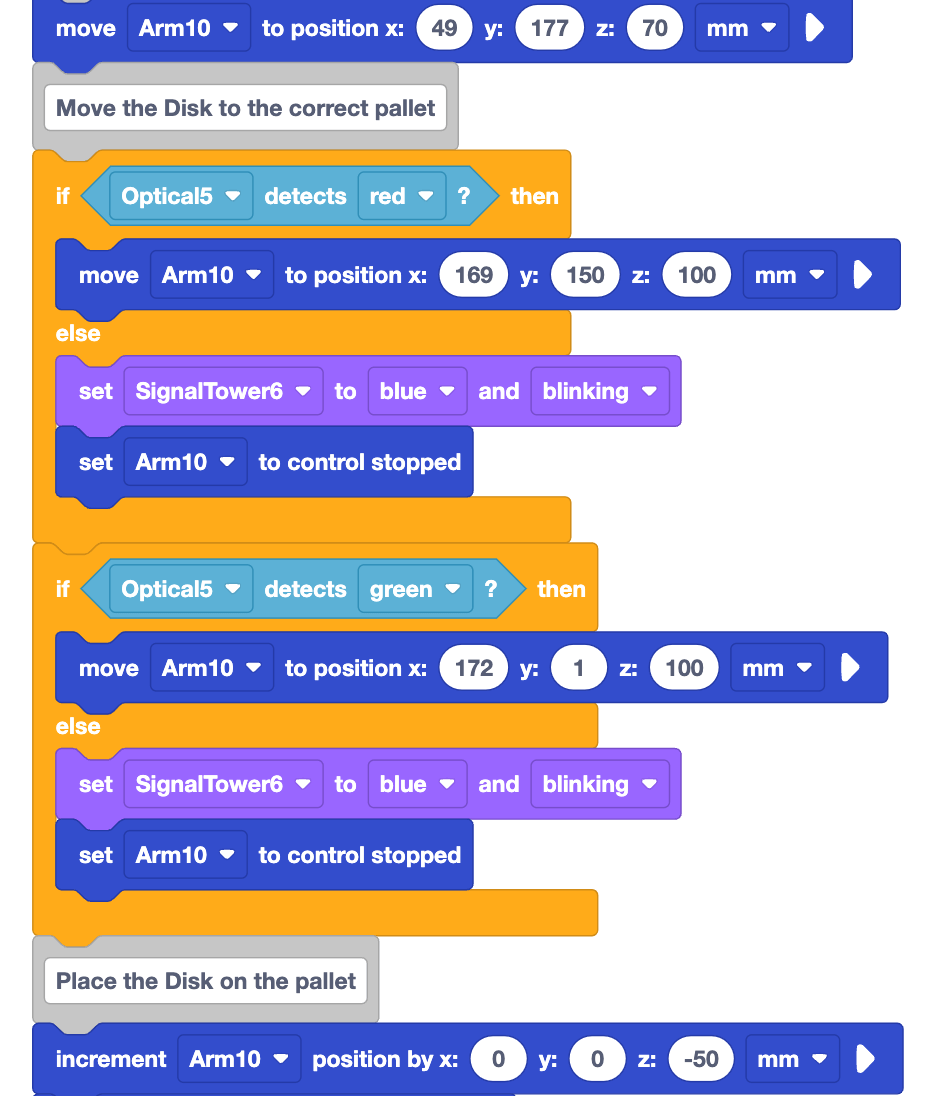
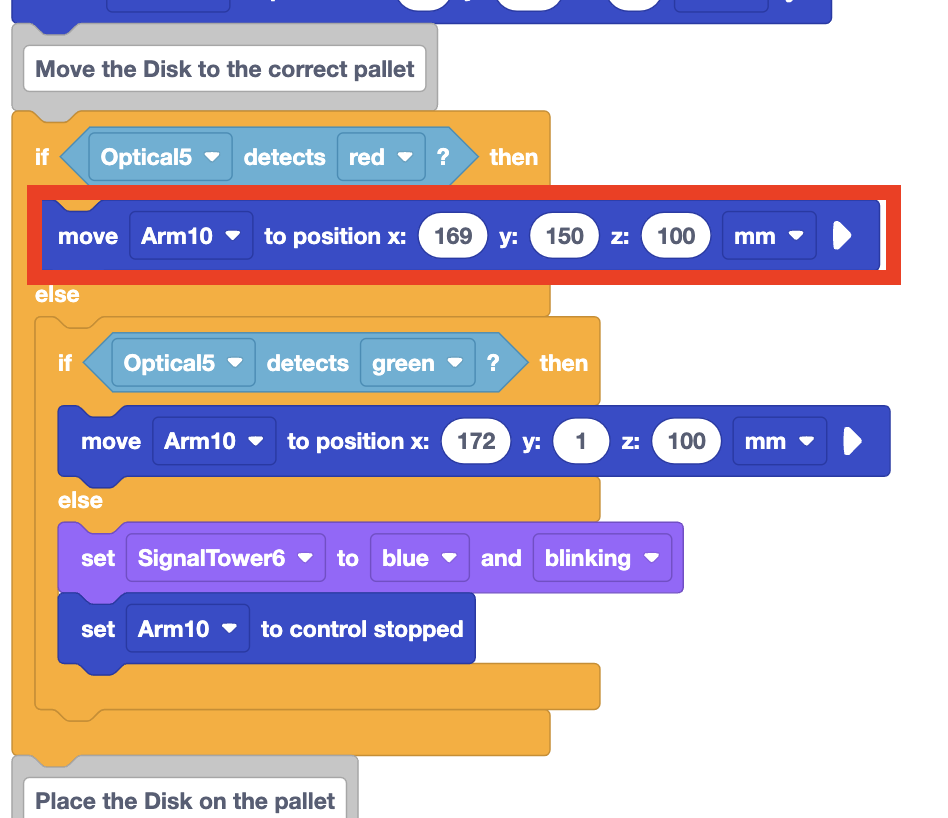
Let's think about the project flow with this structure. Each time the project is run, multiple branches will be run, no matter what color is detected by the Optical Sensor.
Let's think about this with a red Disk as an example. If the Optical Sensor detects red, the condition of the first If then else block would report as true. The block inside of the if branch would run, moving the 6-Axis Arm over the red pallet. However, the condition inside of the second If then else block would report as false. This means the block inside of its else branch would run, putting the 6-Axis Arm into a controlled stop and flashing blue on the Signal Tower. Because the 6-Axis Arm would be in a controlled stop state, no other blocks in the project could run, and that would cease all operations until it was resolved.

While we can now account for an unexpected object (like a blue Cube), but the 6-Axis Arm will never reach the point in the project of releasing the Disk onto the pallet. Instead of checking the red and green conditions one after the other, there is a way to check if an object is green only if the object is not red.
Nested If then else blocks
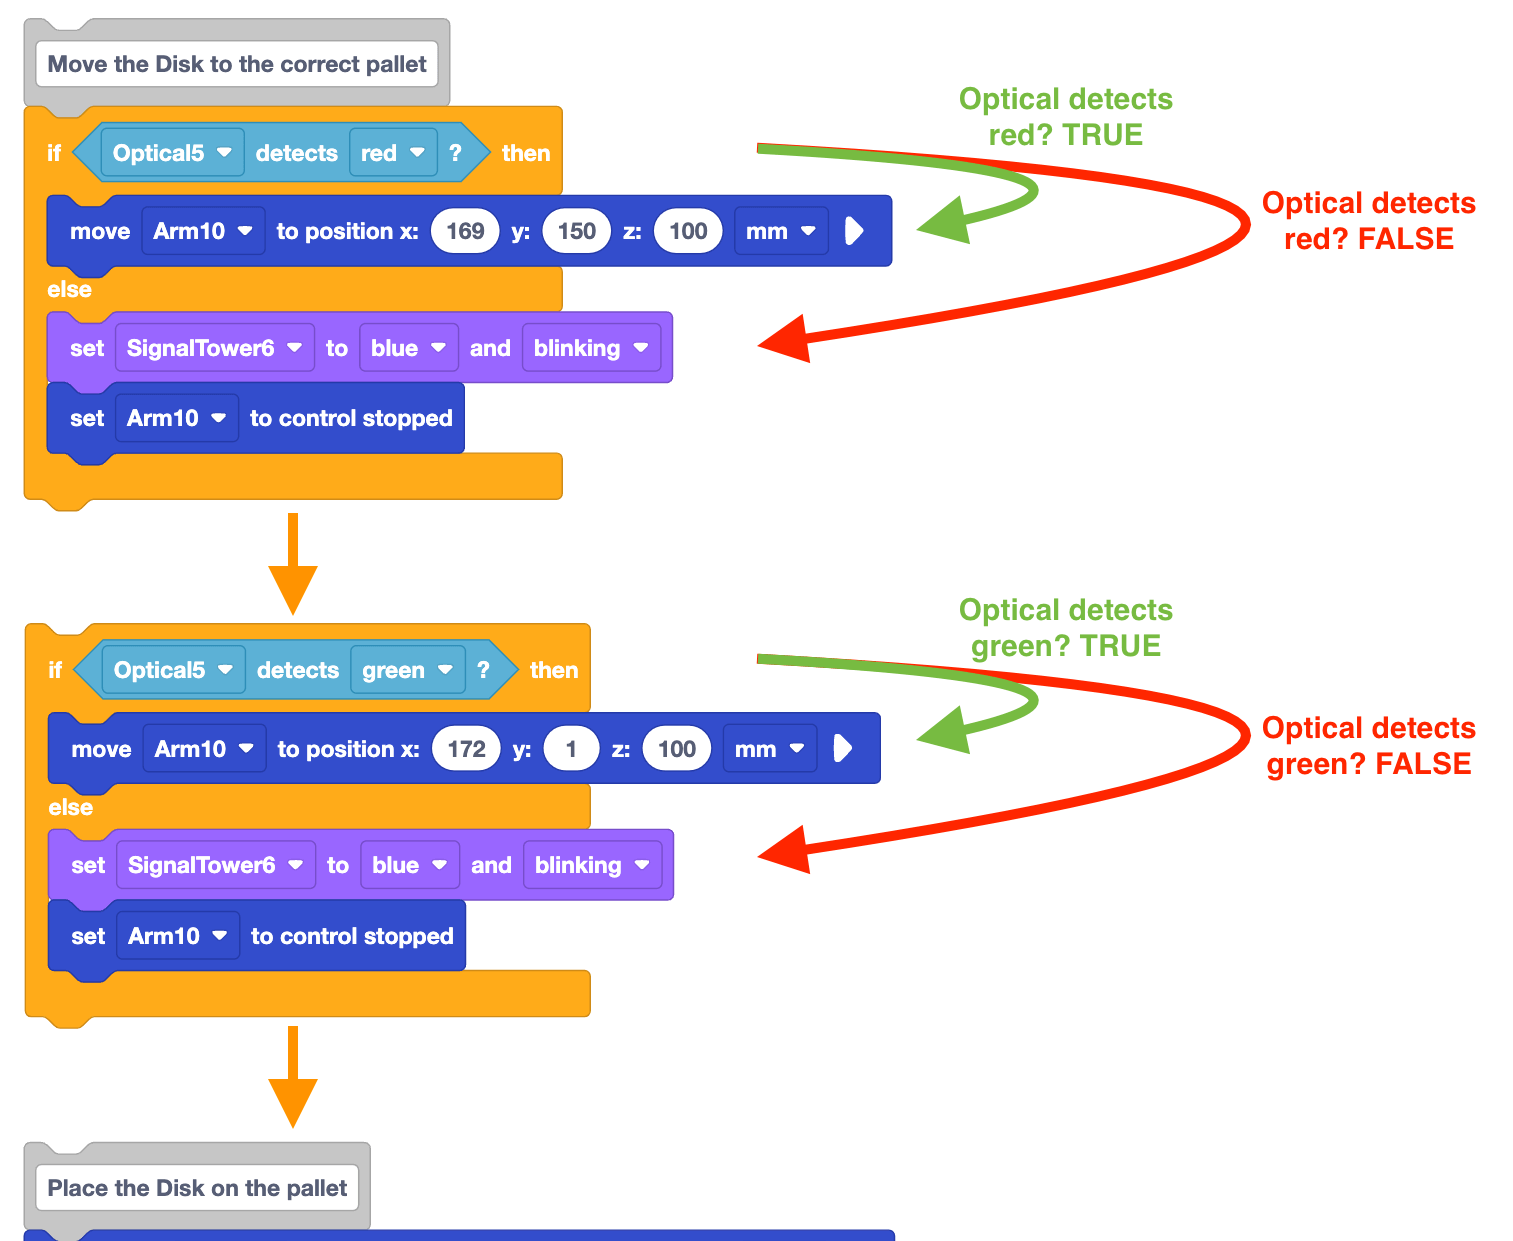
Each of the branches of the If then else block can accept other C blocks within them. This is called 'nesting'. This means that the second If then else block can be nested within the else branch of the first, like this.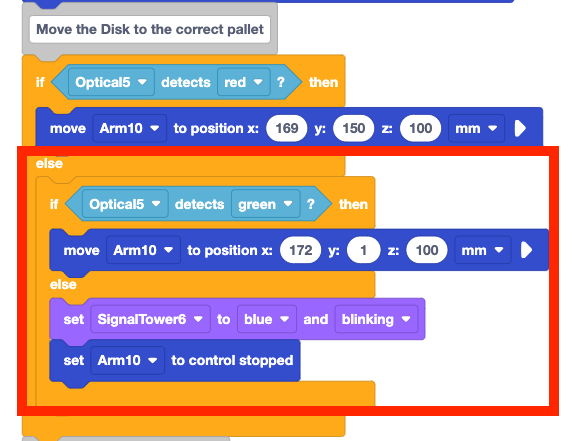
Now the condition of the Optical Sensor detecting green will only be checked when the previous condition (Optical Sensor detects red) reports as false. So when the Optical Sensor detects red, only the first if branch would run, moving the Disk above the red pallet.
If the Optical Sensor detects green, the condition of the first if branch (Optical detects red) would report false, and so the else branch would run. The condition of the nested If then else block would be checked to see if the Optical Sensor detects green. That condition would report as true, so the block inside the second if branch would run, moving the Disk over the green pallet.
If neither red nor green were detected by the Optical Sensor (like the case of a blue Cube being picked up), both of the conditions would report as false, and so the else branch of the nested If then else block would run, triggering a controlled stop and alerting workers to the need for human intervention. These project flows can also be visualized as a flow chart, like the one seen here.
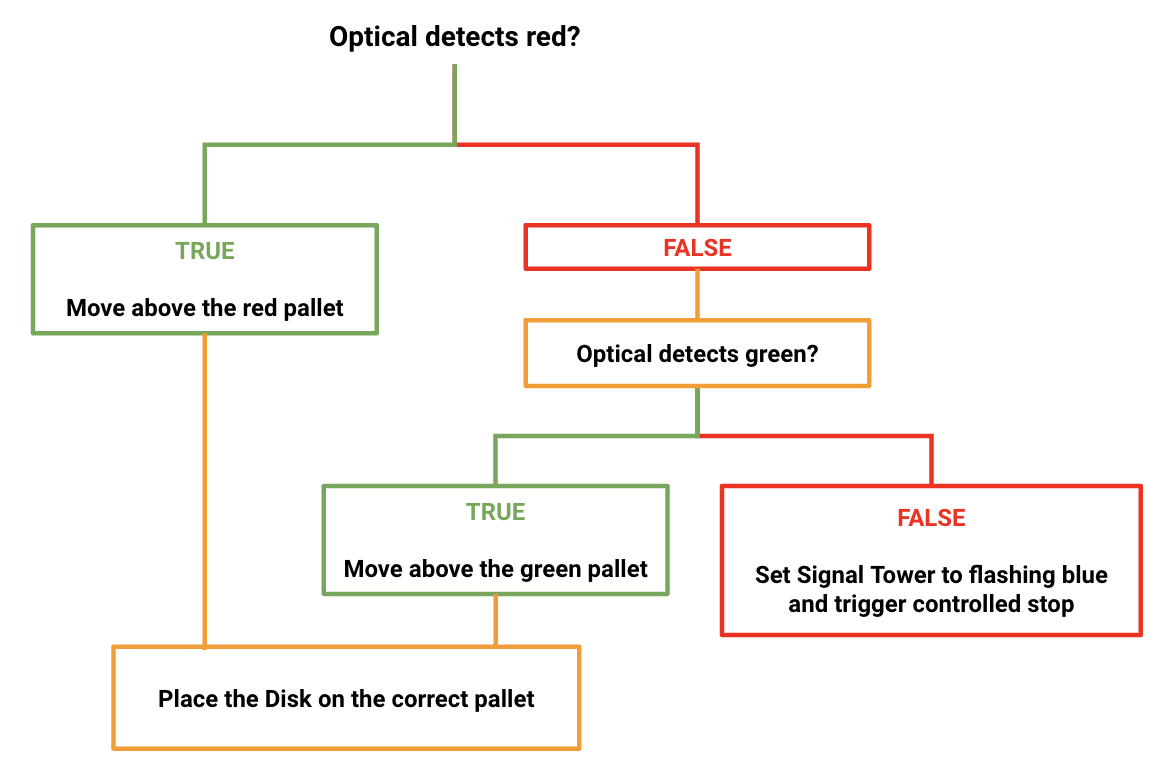
Nested If then else blocks can be viewed as a cascading list of questions. Here the questions are as follows:
- Is the object red?
- Yes? Move over the red pallet and stop asking questions.
- No? Ask another question.
- Is the object green?
- Yes? Move over the green pallet and stop asking questions.
- No? Then the object is not red or green. Change the Signal Tower colors and trigger a controlled stop.
- Is the object green?
Notice that the questions are only asked if the previous question is answered negatively.
While this handles all of the conditions we want to check, there is another block that will check the conditions in the same way, but is easier to build than nesting blocks.
Else if Block
The Else if block enables you to check multiple conditions within the same block. Each of the conditions in this block will be checked sequentially, only if the preceding condition reports as false. If all the Boolean conditions for the else if branches are false, the blocks inside of else section will be run.
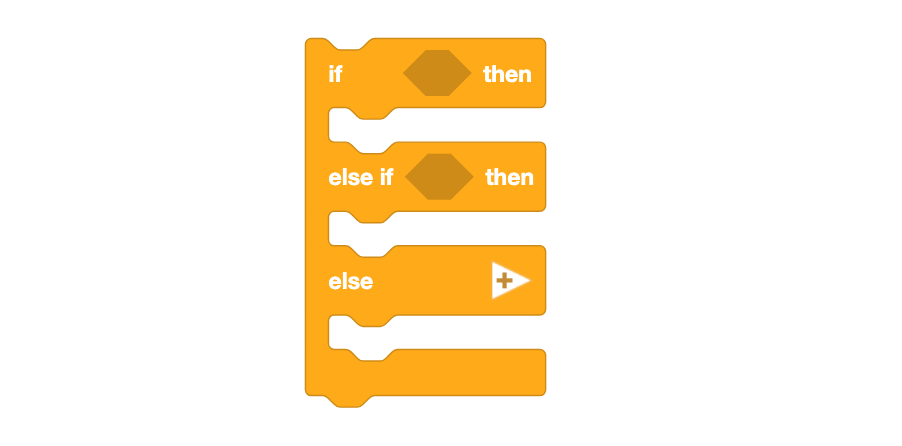
This block has the same project flow as the nested If then else blocks, but is easier to build because there is no need to nest blocks. You will learn more about coding with the Else if block in the following Lesson.
Check Your Understanding
Before moving on to the next Lesson, ensure that you understand the concepts in this Lesson by answering the following questions in your engineering notebook.
Check Your Understanding questions > (Google Doc / .docx / .pdf )
Select Next > to apply the Else if block in a project.