Sensors Example
In this section, you will be introduced to using sensors on a conveyor system.
You will build a VEXcode V5 project using My Blocks and sensor feedback to divert red disks off of the conveyor system and move a green disk through the conveyor system and to it's designated drop off location with the arm on the Workcell. This video shows how the conveyors, diverter, and arm on the Workcell will move when you complete the project.

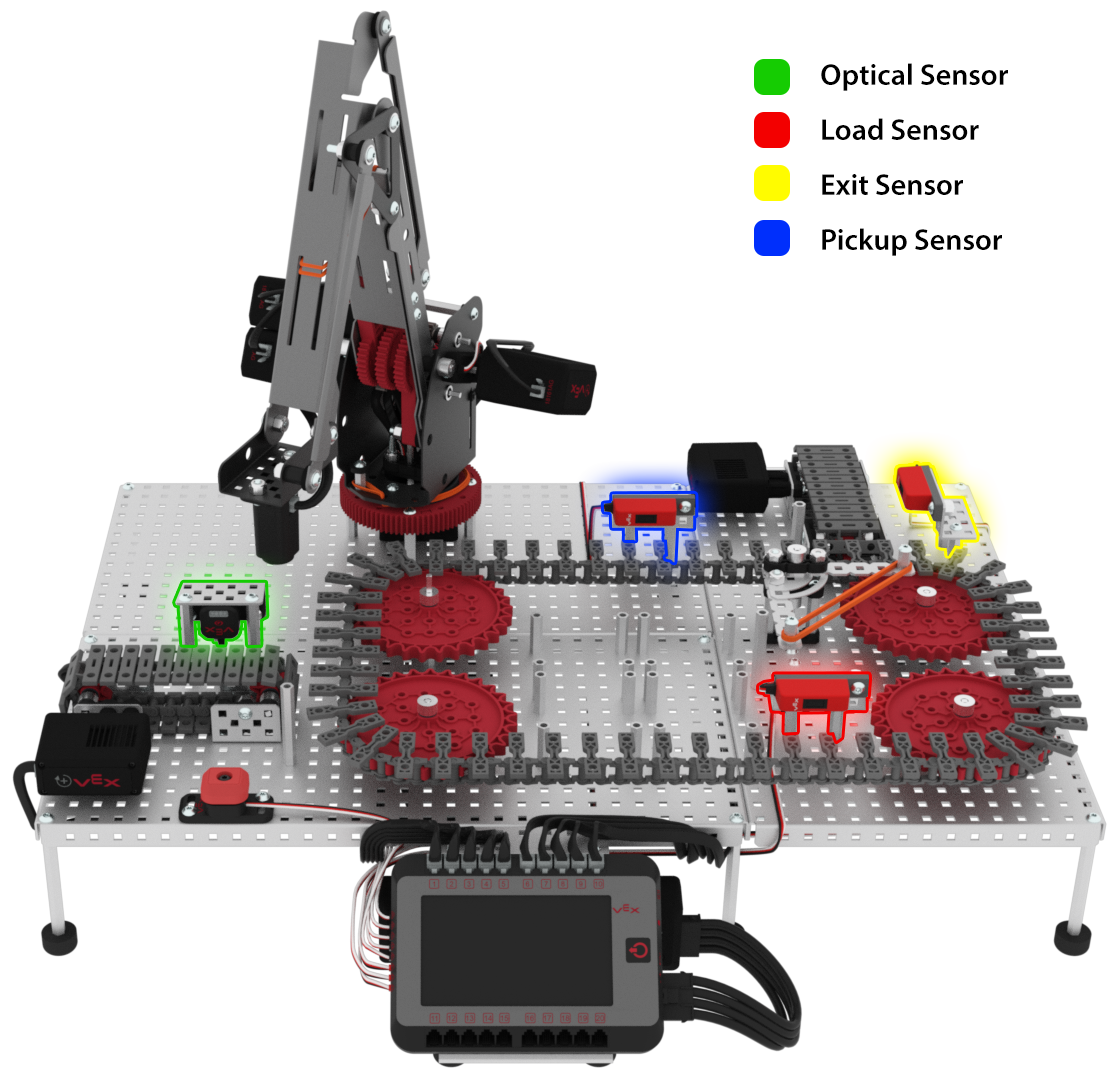
In the Seek section, sensors were added to the Workcell in order to trigger the different movements of the diverter, conveyors, and the arm on the Workcell. There are three Line Trackers as well as an Optical Sensor added to the Workcell. The names of these additions are the following:
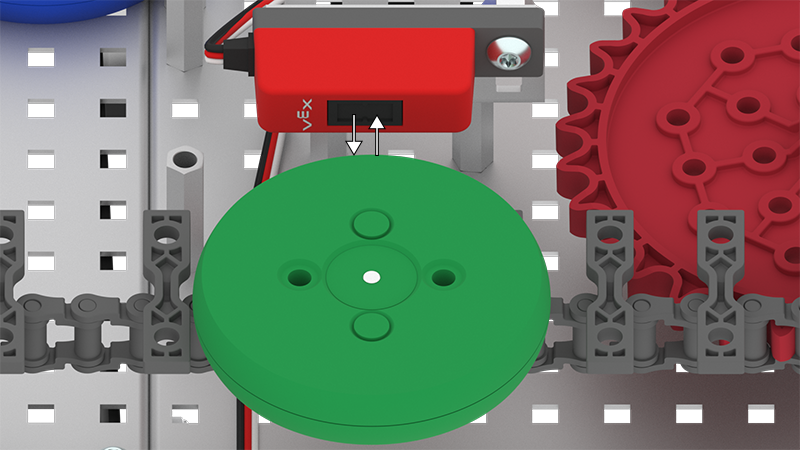
- Optical Sensor: Optical Sensor to determine the presence and color of a disk.
- Load Sensor: Line Tracker to determine if a disk has been successfully loaded onto the transport conveyor.
- Pickup Sensor: Line Tracker to determine if a disk has passed the diverter on the transport conveyor and is ready for pickup with the arm on the Workcell.
- Exit Sensor: Line Tracker to determine if a disk has been discarded off of the Workcell via the exit conveyor.
| Quantity | Materials Needed |
|---|---|
| 1 per group |
V5 Workcell |
| 1 per group | |
| 1 per group |
Engineering Notebook |
| 1 per group |
Device to run VEXcode V5 |
| 1 per group |
Micro-USB cable |
| 3 per group |
Colored Disks (1x red, 1x green, 1x blue) |
For Your Information
The Line Tracker is an analog sensor which means the infrared sensor will return a value anywhere between 0% and 100% light reflectivity.
There are two main components inside of the Line Tracker, an emitter and a receiver. The emitter dispenses infrared light and the receiver records the amount of infrared light received back once it has been emitted.
For more information about Line Trackers, view this article from the Knowledge Base.
In order to code the arm to divert the red disk off of the exit conveyor and sort the green disk, you first need to build the 'Lab 10- Sensors' project.
In VEXcode V5, follow the steps in this video to open the 'Arm Workcell - With Sensors' example project, input your mastering values, name, and then save the project as 'Lab 10- Sensors'.
Ensure you are using your mastering values, and not the ones displayed in this video.
My Blocks are used for the first time in the 'Lab 10- Sensors' project. Watch this tutorial video on My Blocks. This video explains how and why My Blocks are used in a project.
For more information on My Blocks, view this article from the Knowledge Base.
Look through the 'Lab 10- Sensors' project. My Blocks are used to create a sequence of blocks that can be used multiple times throughout a project. Using My Blocks helps to organize a project as well as better understand project flow.
In our project, My Blocks will be used to define how the conveyors should move in the Workcell once a particular color of disk is detected by the Optical Sensor.
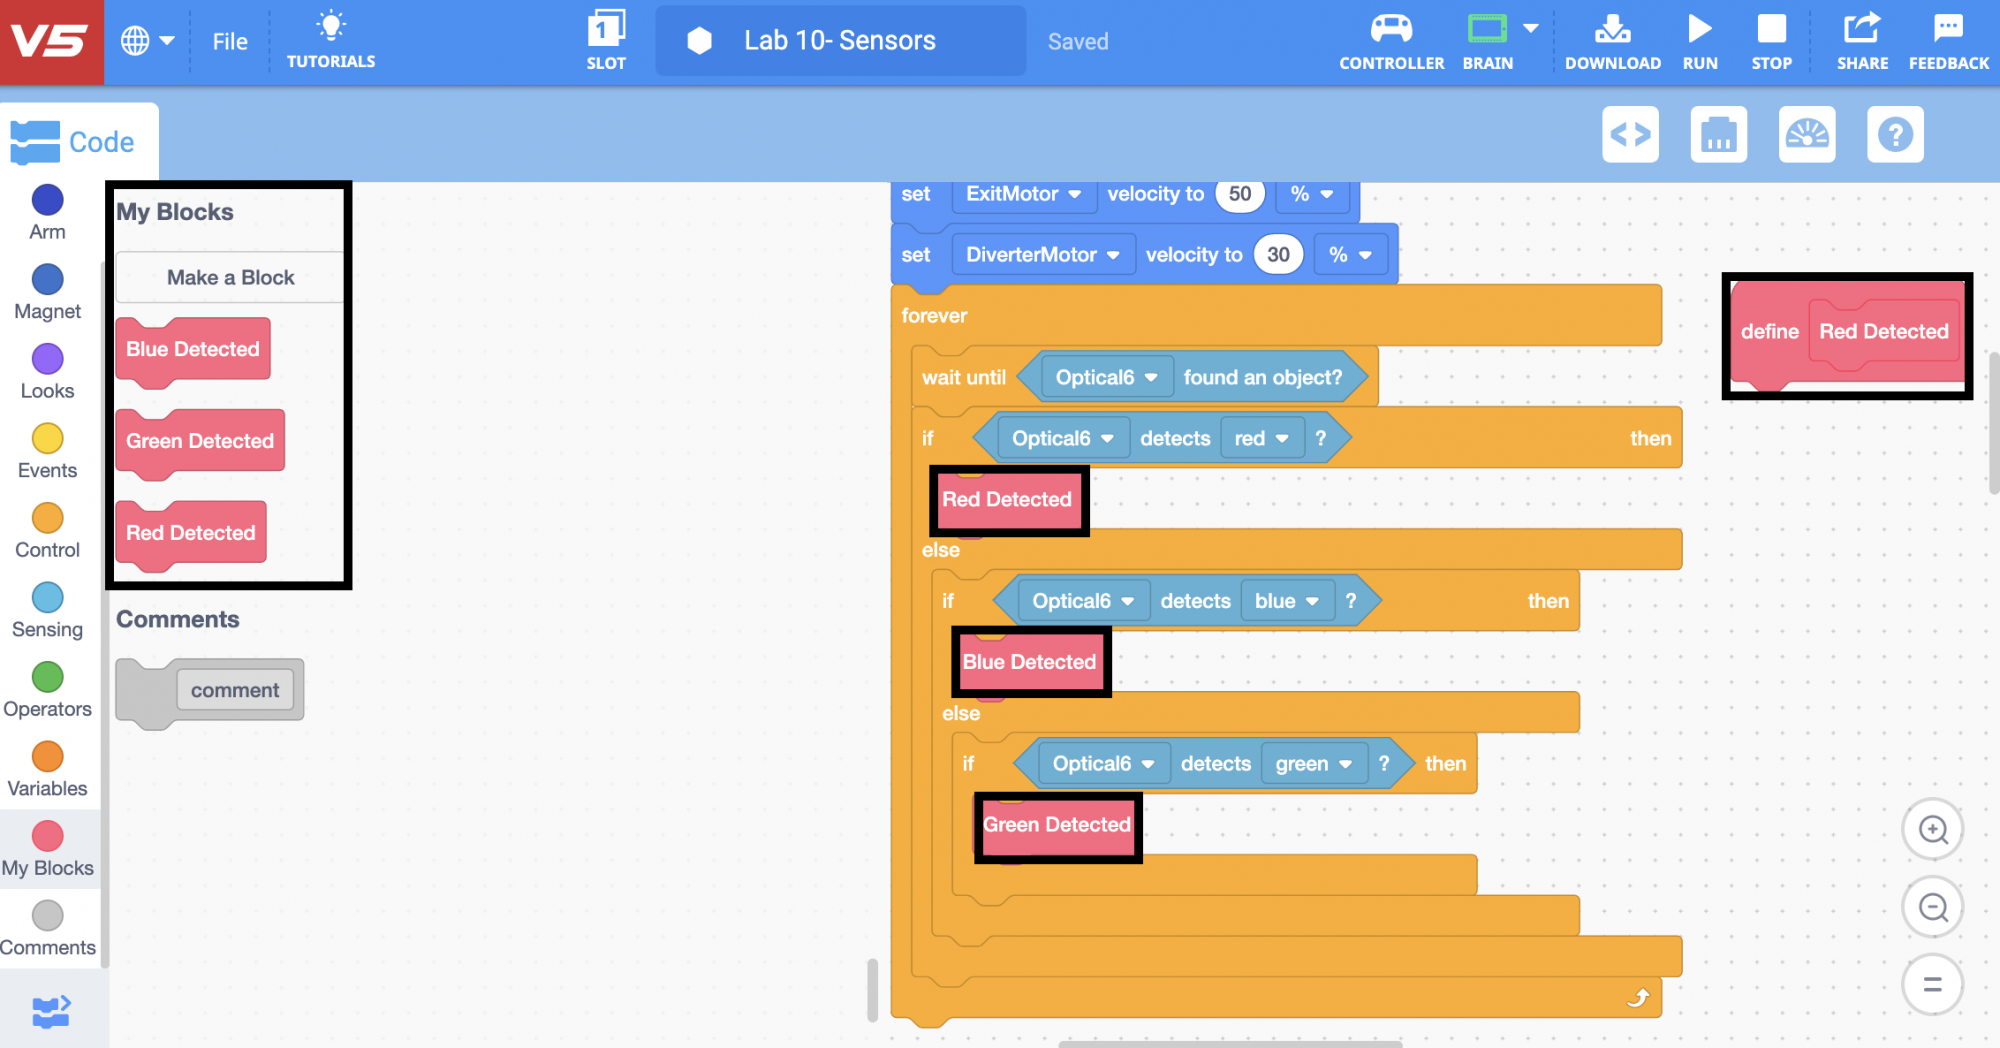
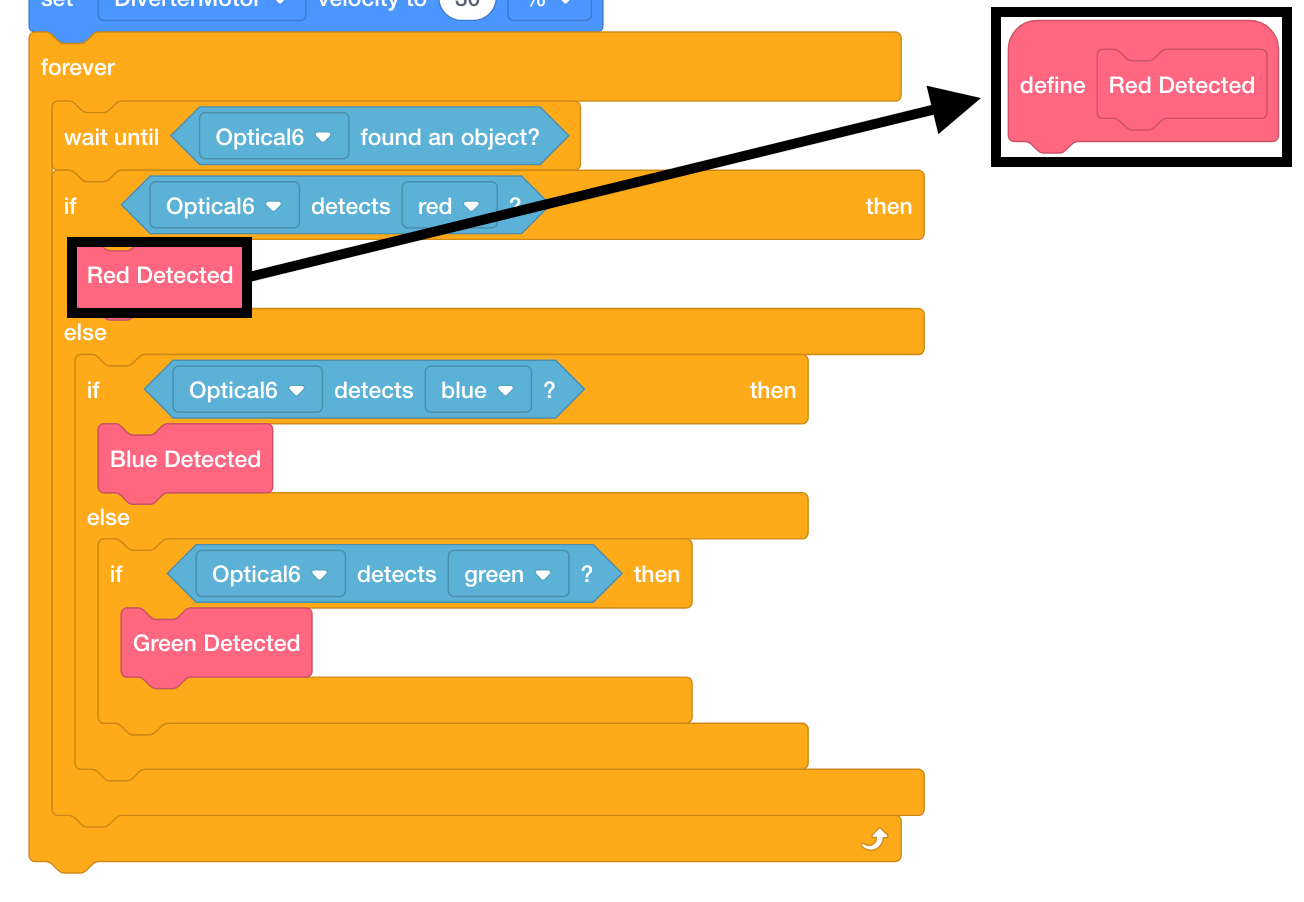
Find the My Blocks labeled 'Red Detected.' These blocks are used so that when the Optical Sensor detects a red disk, the {Define Red Detected} hat block will be executed.
This helps to better organize the project.