Disk Feeder Example
In this section, you will be introduced to the Disk Feeder on the Workcell's conveyor system.
You will build a VEXcode V5 project to dispense and move three green disks through the conveyors using the Disk Feeder, sensor feedback from the Optical Sensor, and the Line Trackers.
You will code the first green disk to be accepted and stop in front of the pickup sensor, and the second and third green disk will be rejected and diverted off of the exit conveyor.
You will be introduced to using Boolean variables in your VEXcode V5 project to track if a green disk has already been accepted. This allows any other green disks introduced via the Disk Feeder to be rejected.
This video shows how the disks in the Disk Feeder, conveyors, and diverter will move when you complete the project.

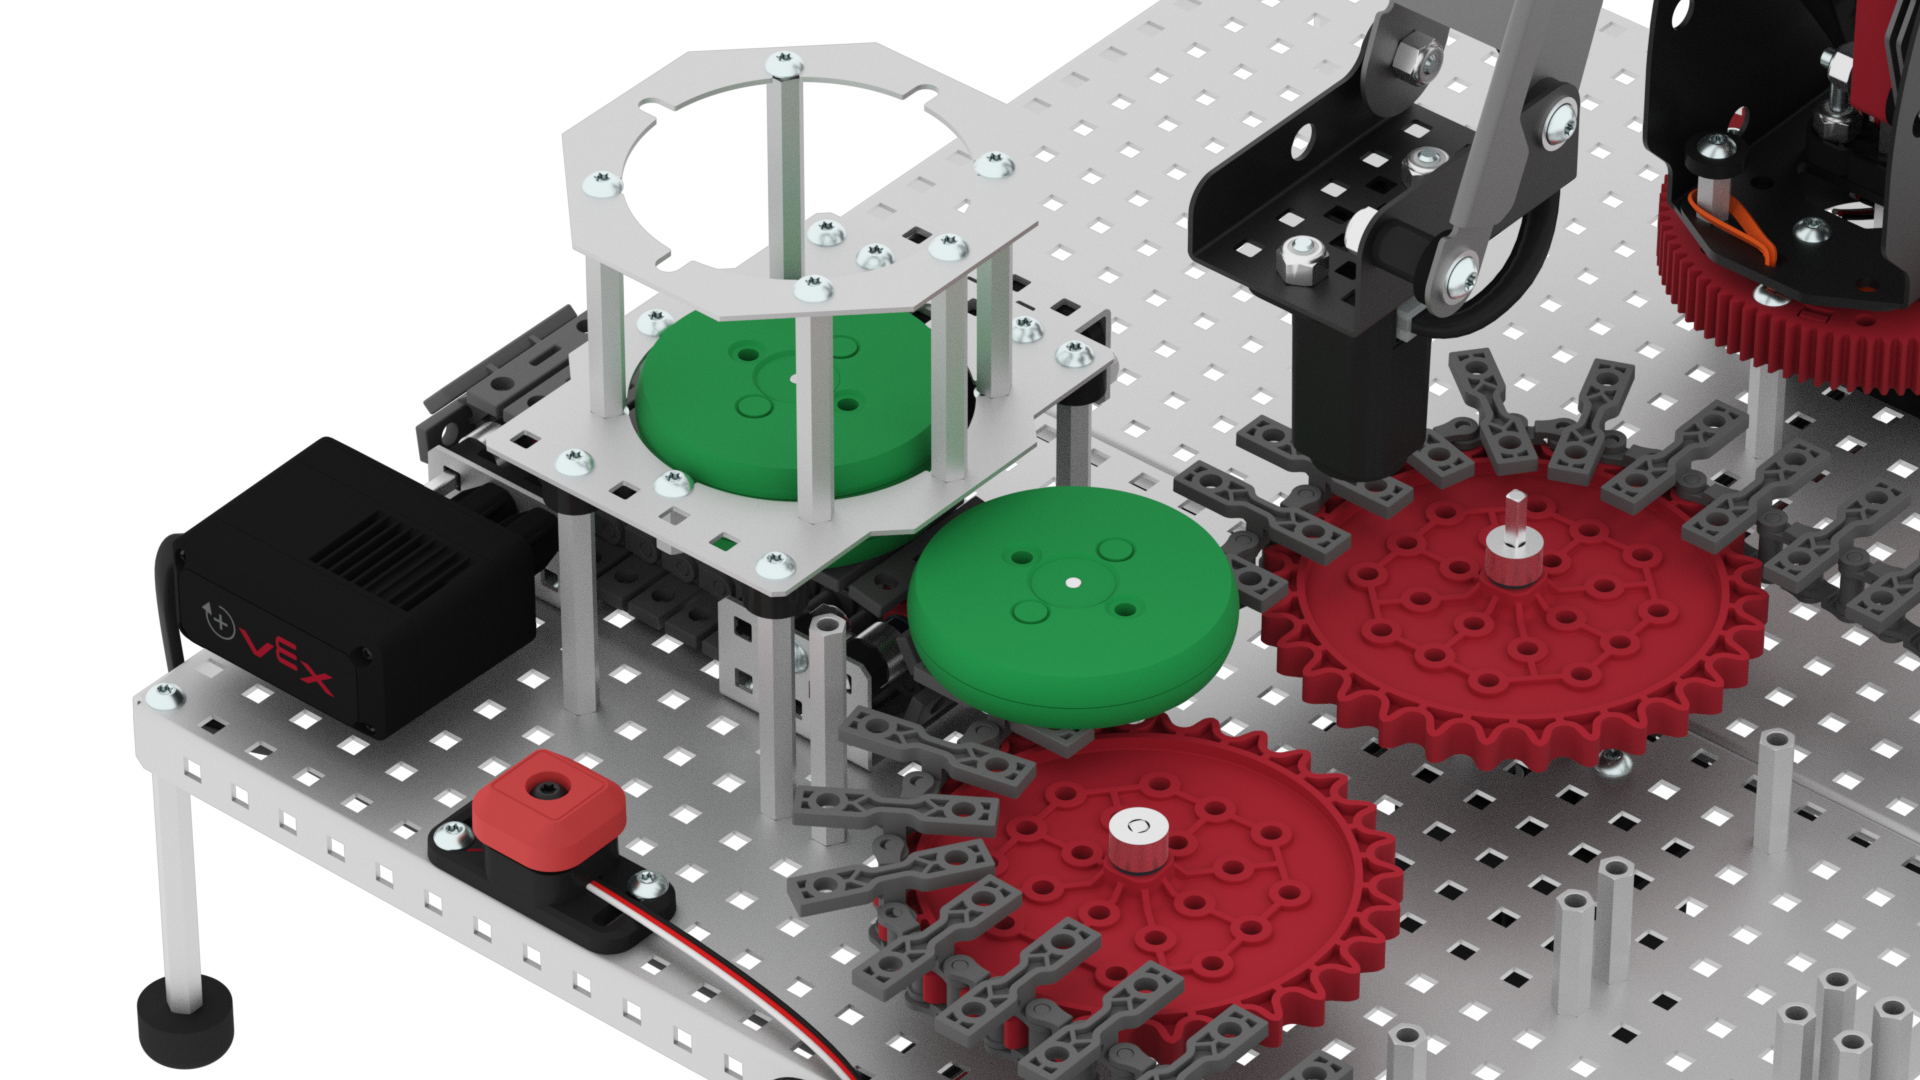
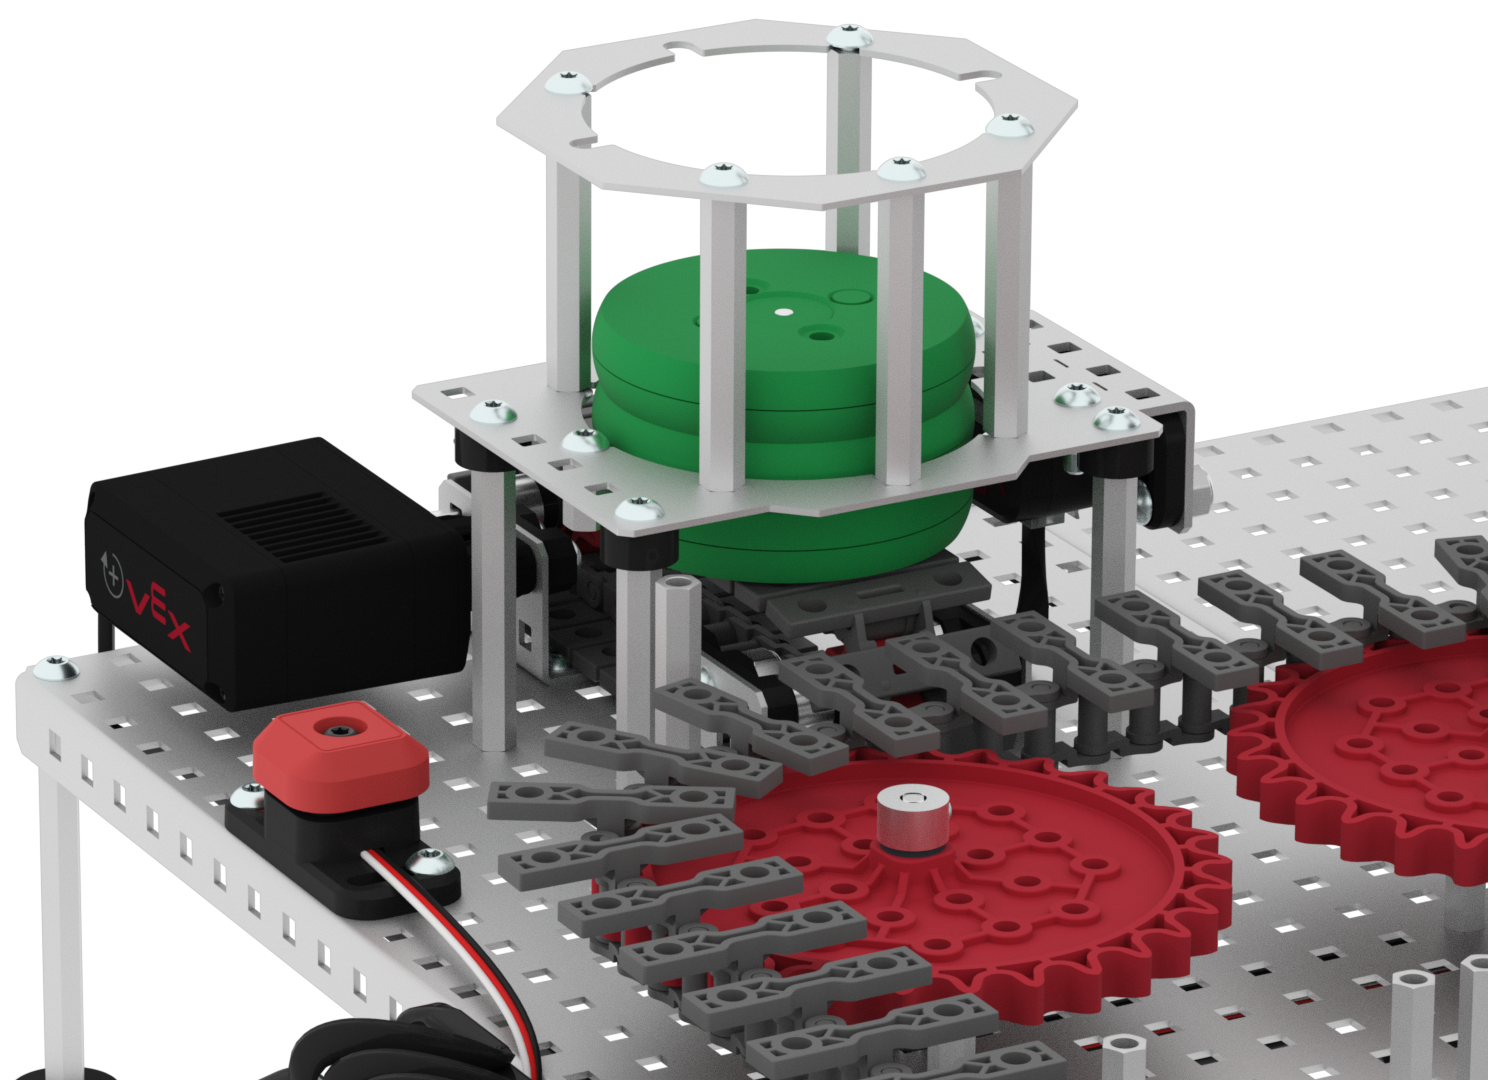
In the Seek section, the Disk Feeder was added to the Workcell. The Disk Feeder is used to dispense one disk at a time onto the entry conveyor in the Workcell.
Using the Disk Feeder allows multiple disks to be dispensed onto the Workcell in an autonomous fashion, so that a disk does not need to be manually placed onto the entry conveyor each time.

The Disk Feeder rests above the Optical Sensor. The Optical Sensor detects if an object is present, and if so, the color of that object. Used with the Disk Feeder, the Optical Sensor detects the color of the disk present on the entry conveyor, or the disk at the bottom of the Disk Feeder stack.

| Quantity | Materials Needed |
|---|---|
| 1 per group |
V5 Workcell |
| 1 per group | |
| 1 per group |
Engineering Notebook |
| 1 per group |
Device to run VEXcode V5 |
| 1 per group |
Micro-USB cable |
| 3 per group |
Colored Disks (3x green) |
In order to code the first green disk to be accepted, and any additional green disks to be rejected, you first need to build the 'Lab 11- Disk Feeder' project and test the functionality of the Disk Feeder.
This will give you experience adjusting the speed and duration of the entry conveyor for the Disk Feeder, as well as a visual example of how the disks are dispensed from the Disk Feeder onto the transport conveyor.
In VEXcode V5, follow the steps in this video to open the 'Arm Workcell - With Sensors' example project, input your mastering values, name, and then save the project as 'Lab 11- Disk Feeder'.
Ensure you are using your mastering values, and not the ones displayed in this video.

In the previous Lab, you have already coded a green disk to move from the entry conveyor to the transport conveyor.
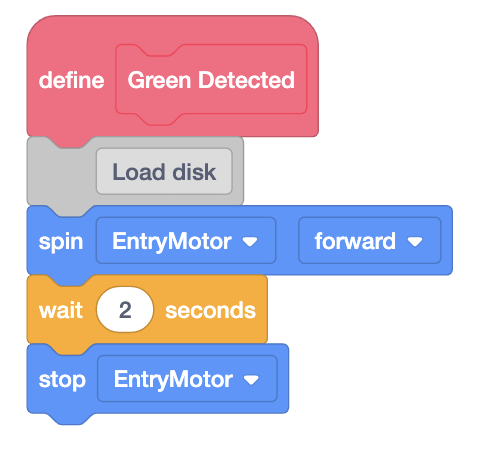
Add blocks to the {Define Green Detected} hat block to create the stack of blocks shown in this image.
These blocks will code a green disk to be dispensed from the Disk Feeder on the entry conveyor onto the transport conveyor.
Load three green disks into the Disk Feeder and download and run the project.
Observe the Disk Feeder in action.
The speed and duration that the entry conveyor spins will need adjusted to dispense one disk correctly.
Once you have observed the Disk Feeder in action, stop the project.
Adjust the parameters of the [Set motor velocity] block and the [Wait] block that control the entry conveyor.
The velocity and duration that the entry conveyor spins may currently be too fast and need to be lowered.
Once the parameters have been adjusted, download and run the project again to test how well the Disk Feeder dispenses one disk using the new parameters.
Once you have observed the Disk Feeder in action, stop the project.

Continue to adjust the parameters of the entry conveyor as needed until the Disk Feeder dispenses one disk properly from the entry conveyor to the transport conveyor.
Once you have dispensed one disk properly from the Disk Feeder, stop the project and check in with your teacher.