
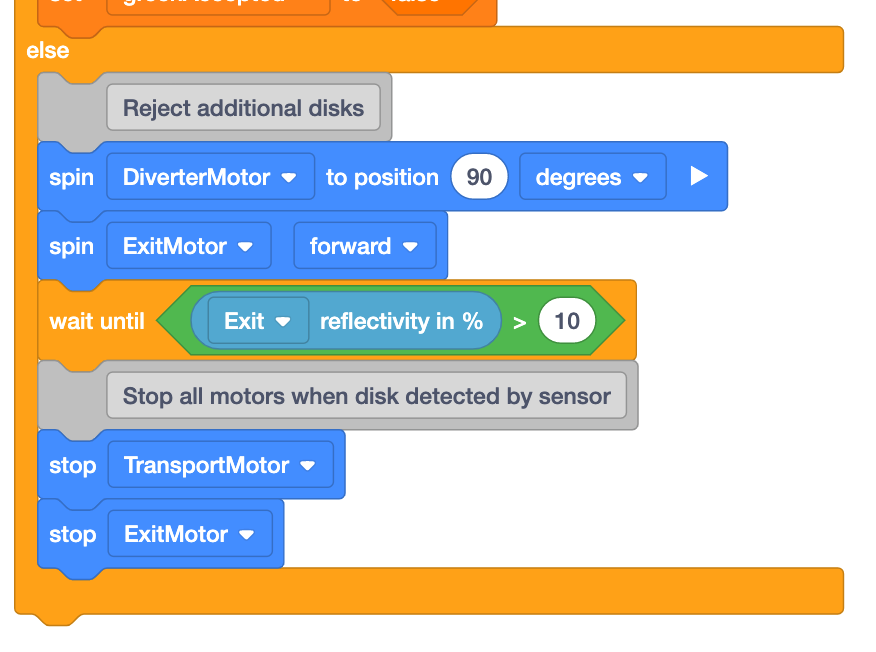
Reject Additional Disks
Now that you have passed the first green disk through the diverter, you will now divert any additional green disks off of the exit conveyor.
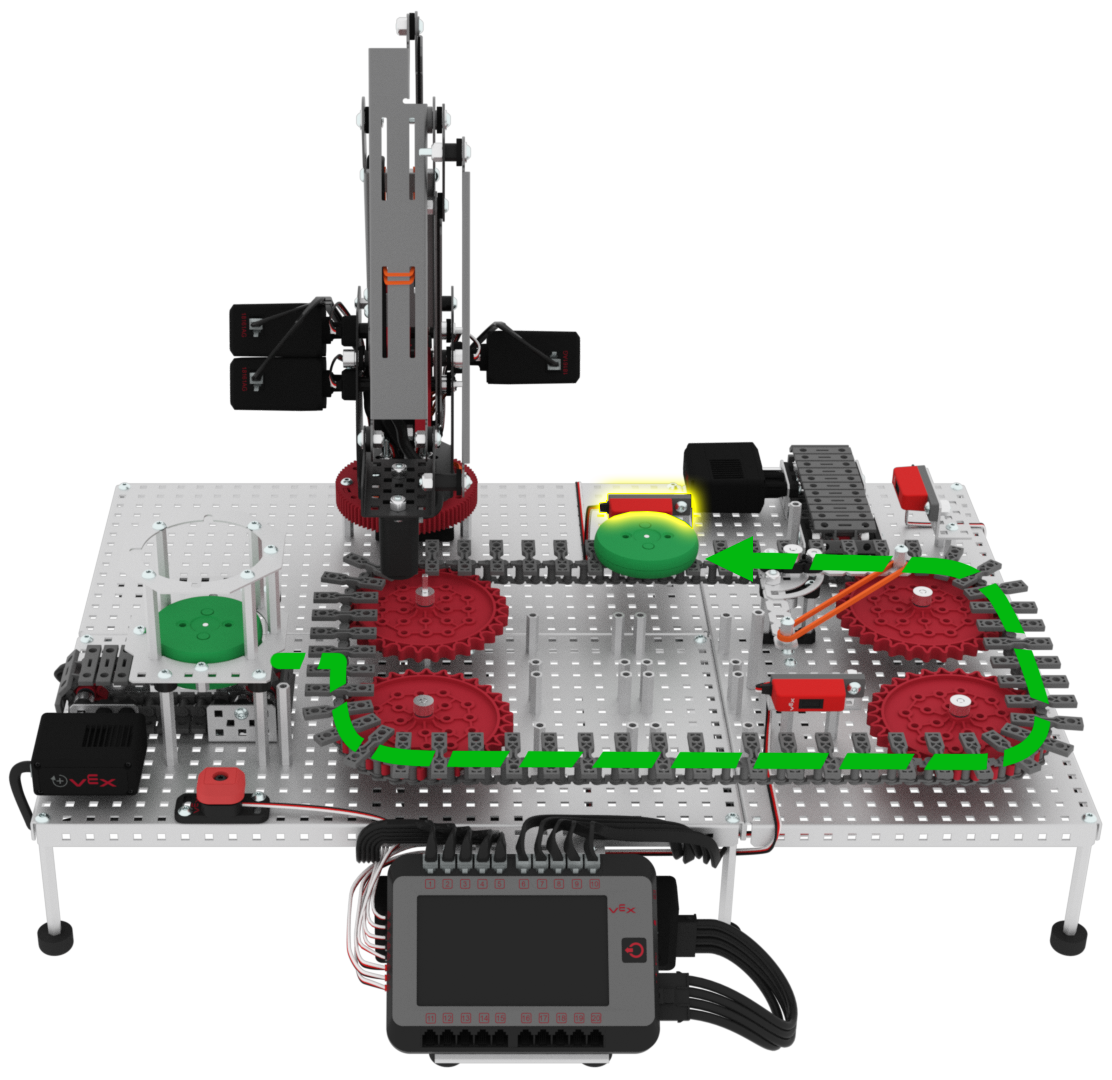
All three green disks will move through the following path.
The first green disk will be accepted and will stop in front of the pickup sensor.
Two additional green disks will begin in the Disk Feeder on the entry conveyor in front of the Optical Sensor after the first green disk has already been passed through the diverter.
The first accepted disk has been removed from the transport conveyor.
Once the second green disk is loaded onto the transport conveyor from the entry conveyor, it will pass in front of the load sensor.
When the green disk passes in front of the load sensor, the diverter needs to be set to the 90 degree position in order to reject the disk and divert it off of the exit conveyor.
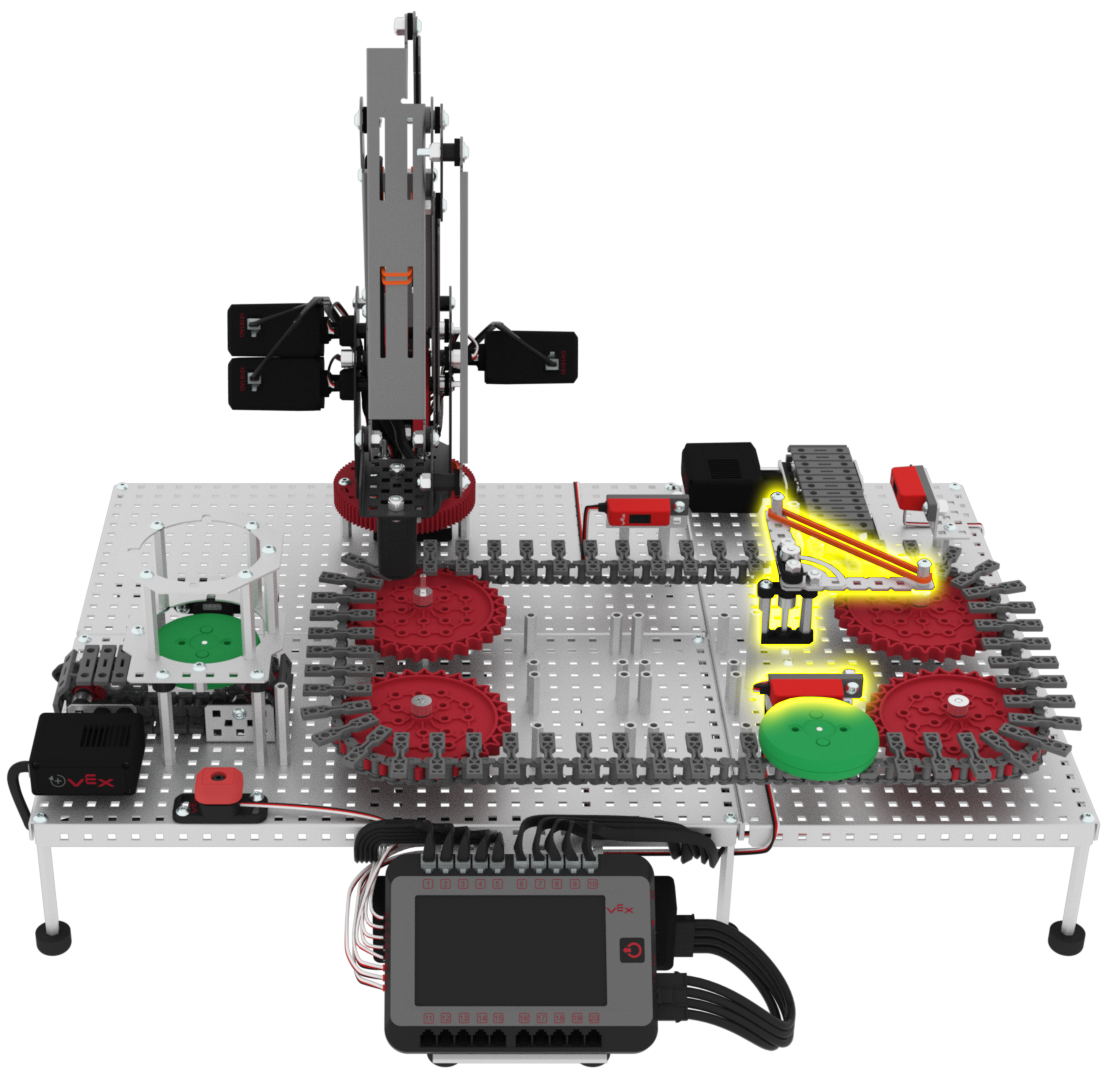
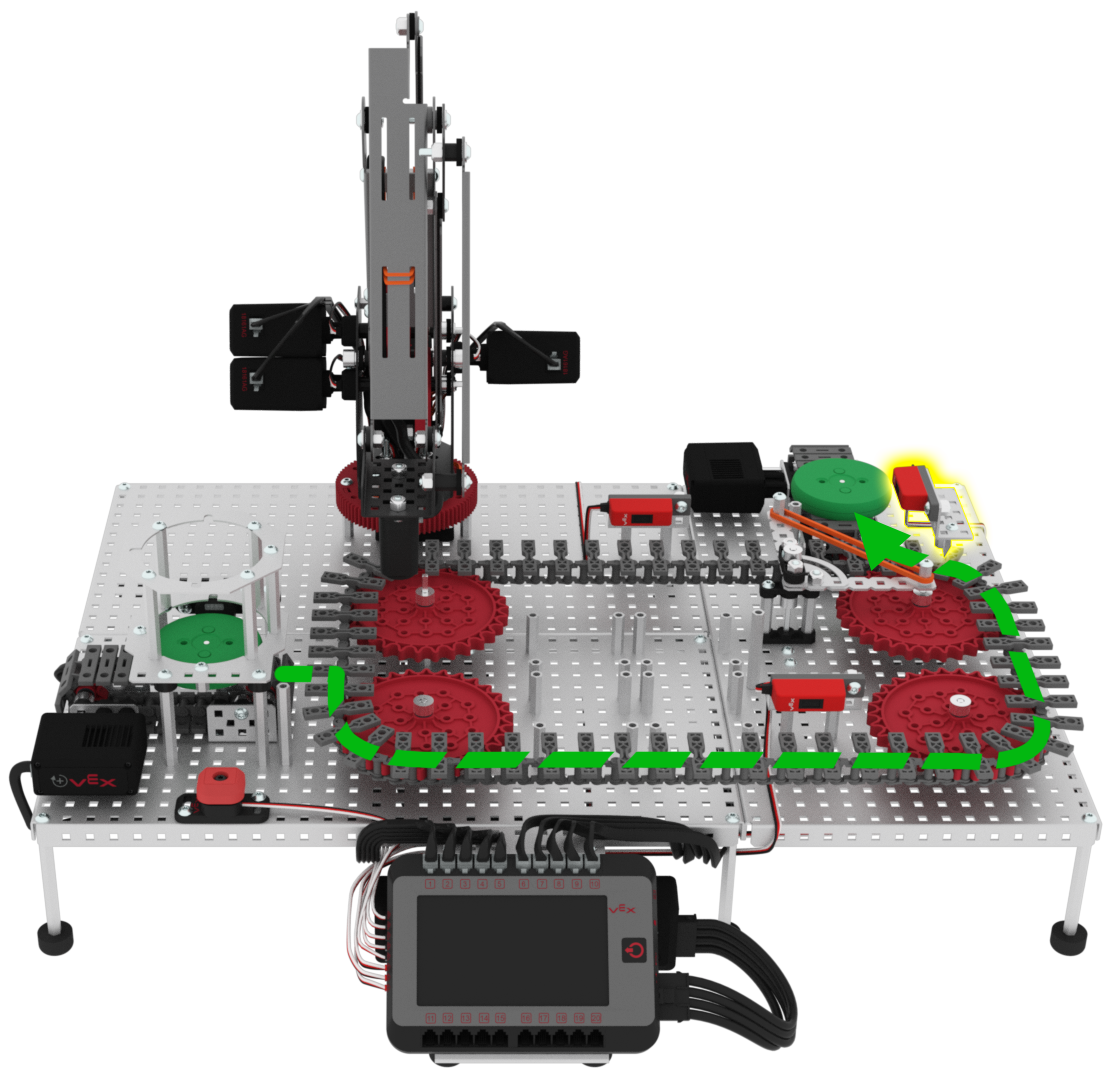
Once the green disk is rejected, it will pass in front of the exit sensor.
When the green disk passes in front of the exit sensor, all conveyors will stop.
Any additional disks, including the third disk, will follow this path to be rejected.
The second rejected disk has been removed from the exit conveyor.
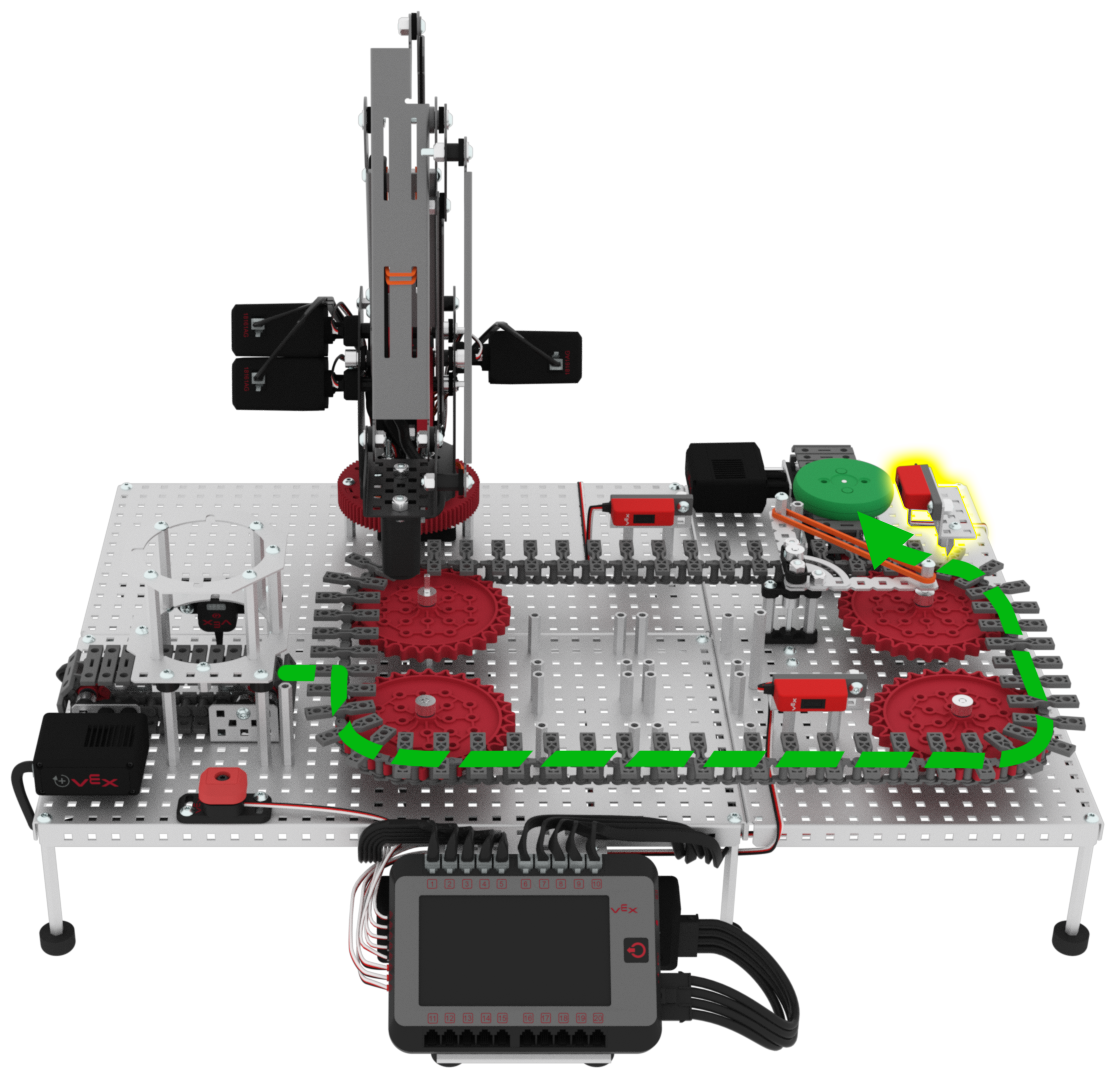
All three disks will have followed the path shown in this video to either be accepted or rejected.

Now that you have coded the first green disk to be accepted, you will now code the second and third green disk to be rejected.
In VEXcode V5, add blocks to the project to create the stack of blocks shown.
These blocks will code the diverter to spin to the 90 degree position to divert the second and third green disk off of the exit conveyor, and then stop all of the conveyors once the exit sensor detects the disk.
Use your low values for the exit sensor that were recorded in your engineering notebook from previous Labs, and not the ones shown in this image.
Place three green disks into the Disk Feeder onto the entry conveyor and then download and run the project.
Pick up each disk off of the conveyors as they stop in front of the sensors.
- The first green disk will be accepted and stop in front of the pickup sensor.
- Once the second disk has been rejected and stopped in front of the exit conveyor.
- Once the third disk has been rejected and stopped in front of the exit conveyor, stop the project and check in with your teacher.
If any of the three disks have not followed the path shown in this video, notify your teacher during the check in.