
Lesson 2: Using the [Wait until] Block
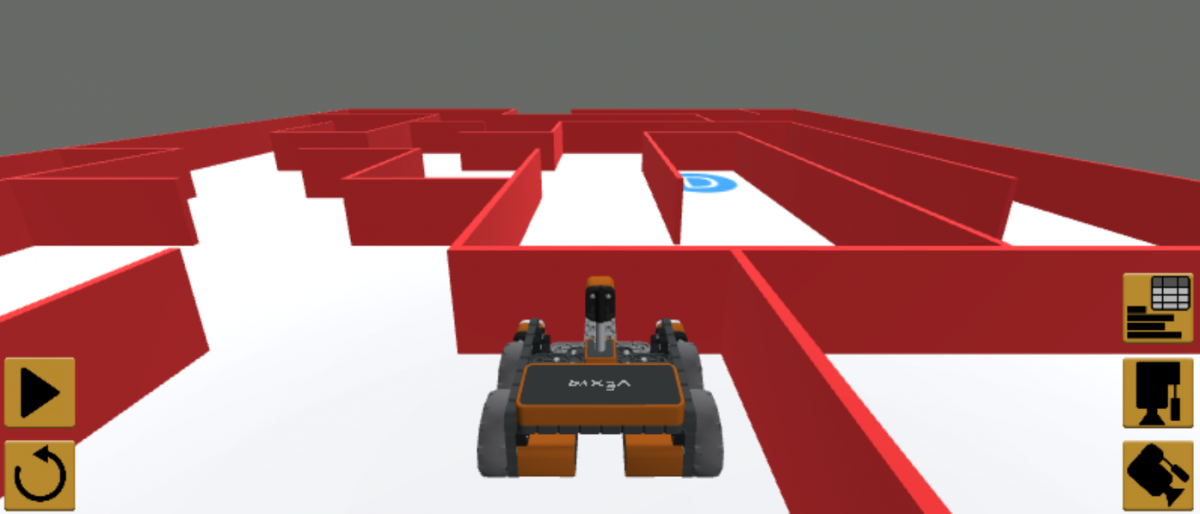
In this Lesson, you will create a project using the Bumper Sensor and [Wait until] block. In the mini-challenge, you will apply these skills to navigate from the beginning of the Wall Maze to the letter ‘A.’
Learning Outcomes
- Identify that non-waiting blocks have the stack continue even if the block's behavior is not yet complete.
- Identify that a waiting block pauses the stack until that block's behavior has been completed.
- Identify that the highlighting of the project's execution visualizes waiting vs non-waiting blocks.
- Identify that the [Wait until] block is a Control block that accepts Boolean values.
- Identify that the [Wait until] block will repeatedly check a Boolean condition and will not move to the next block until the condition reports TRUE.
- Identify that the [Wait until] block is used with a non-waiting block (e.g. Drive) in order to check the sensor condition.
- Identify that the <Pressing bumper> block reports a TRUE or FALSE value in a [Wait until] block.
- Identify how the [Drive for] and [Turn for] blocks are special blocks that can be either waiting or non-waiting.
- Describe how to create a project that has a VR Robot drive forward until the Bumper Sensor is pressed.
Name and Save the Project
- Start a new project in VEXcode VR and name the project Unit4Lesson2.

[Wait until] Blocks
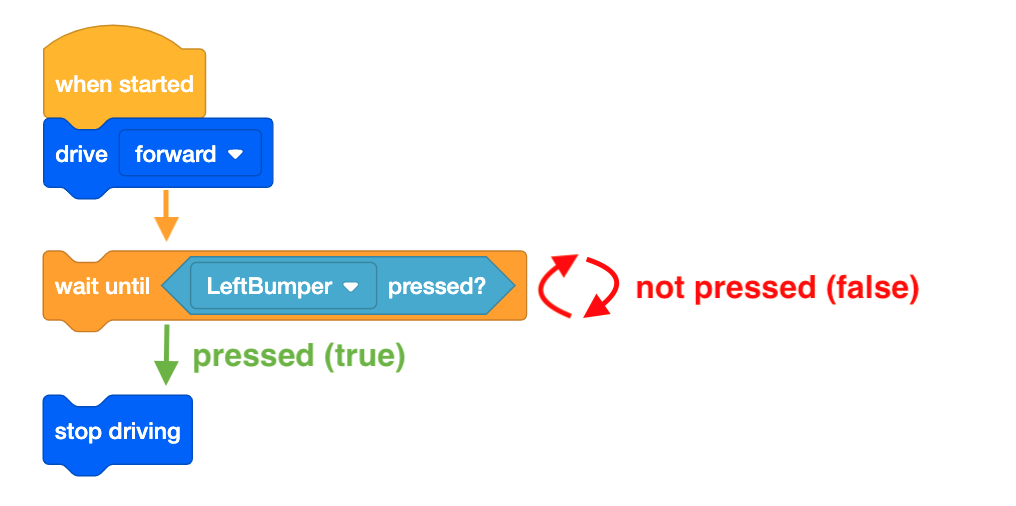
The [Wait until] block is a Control block that accepts Boolean conditions. [Wait until] blocks repeatedly check a Boolean condition and control the project flow. A project will not move to the next block in the stack until the condition in the [Wait until] block reports as TRUE. The [Wait until] blocks are used in conjunction with non-waiting blocks such as [Drive] or [Turn].
For Your Information
Non-waiting and waiting blocks determine when the next block begins a behavior. Waiting blocks, like [Drive for] and [Turn for], complete their behaviors before moving onto the next block in the stack. Non-waiting blocks, such as [Drive] and [Turn], continue to move to the next block in the stack even if the behavior of the non-waiting block is not complete.
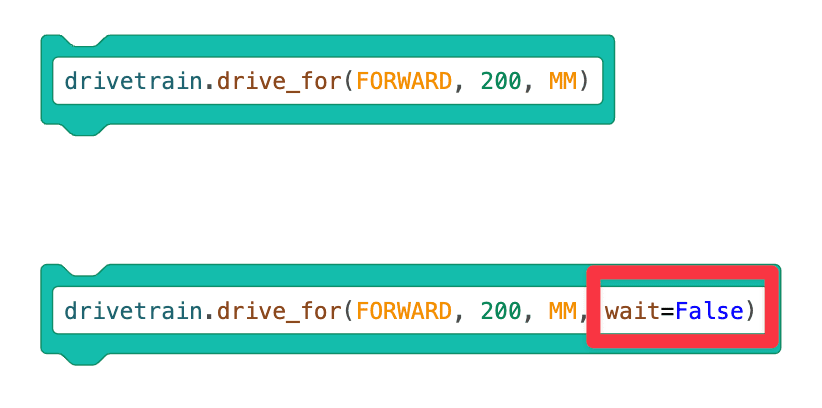
Certain blocks, like [Drive for] and [Turn for] can be waiting or non-waiting blocks. Selecting the arrow on the block will turn the block from waiting into a non-waiting block.

Using Switch Blocks
The Switch non-waiting block adds a "wait=False" parameter at the end of the block. "wait=False" is the Python command that tells the block not to wait and to continue to move to the next blocks in the stack.
-
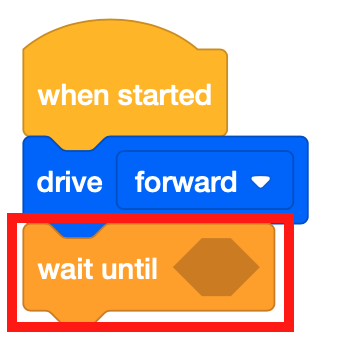
Drag the [Drive] non-waiting block into the workspace.

-
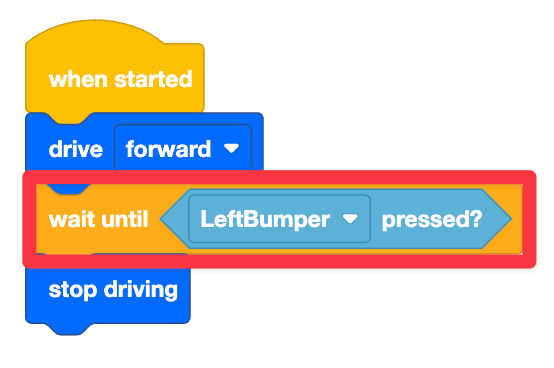
Attach a [Wait until] block beneath the [Drive] block.
-
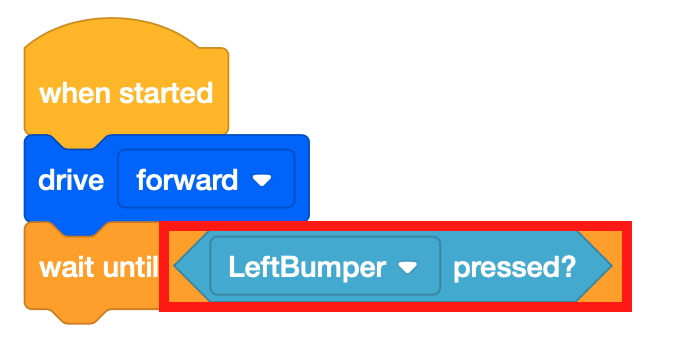
The [Wait until] block accepts Boolean conditions. This project will use the Bumper Sensor to drive through the Wall Maze Playground. Drag the <Pressing bumper> Boolean block into the [Wait until] block.
-
Drag in a [Stop driving] block and add it to the project.

- Launch the Wall Maze Playground if it is not already open and run the project.
- Watch the VR Robot drive from the start of the Wall Maze and stop when the Bumper Sensor is pressed by the wall.
-
The [Drive] block allows the VR Robot to keep driving forward while checking the condition of the Bumper Sensor with the <Pressing bumper> block. Once the <Pressing bumper> reports as TRUE, the VR Robot will move to the next block in the stack and stop driving.
For Your Information
To follow a visualization of waiting versus non-waiting blocks, watch the code execution highlighting function in VEXcode VR. At the beginning of this project, the green highlight will appear around the [Wait until] block until the condition is met. This is because the [Wait until] block is a waiting block. The green highlight will appear to skip the non-waiting blocks because these commands are quickly executed.
Using Switch Blocks
This is the Switch block containing the [Wait until] command with the <Bumper pressed>
Boolean reporter. 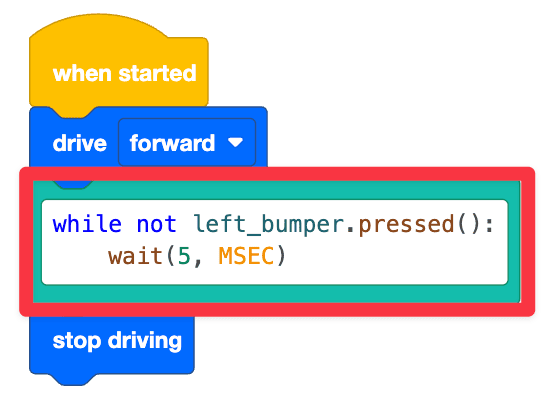
while not left_bumper.pressed(): is the Python command that checks whether the left bumper is currently being pressed. wait (5, MSEC) is a Python command that pauses the execution of the check for 5 milliseconds (MSEC), so the project checks whether or not the left bumper is pressed every 5 MSEC. This line of code is indented underneath the first line of code because this command is the behavior that will repeat until the condition (in this case, the left bumper pressed) is met. In VEXcode VR, a wait command is always added with a conditional loop. The purpose of the wait command is to ensure that VEXcode VR can properly run the project as intended, due to the web-based nature of the VEXcode VR platform. The wait command should never be deleted when using a conditional loop, because your project may not run as intended. Once the left bumper is pressed, the robot will stop driving.
Select the Next button to continue with the rest of this Lesson.