
Lesson 3: Using Drivetrain Commands to Navigate the Wall Maze
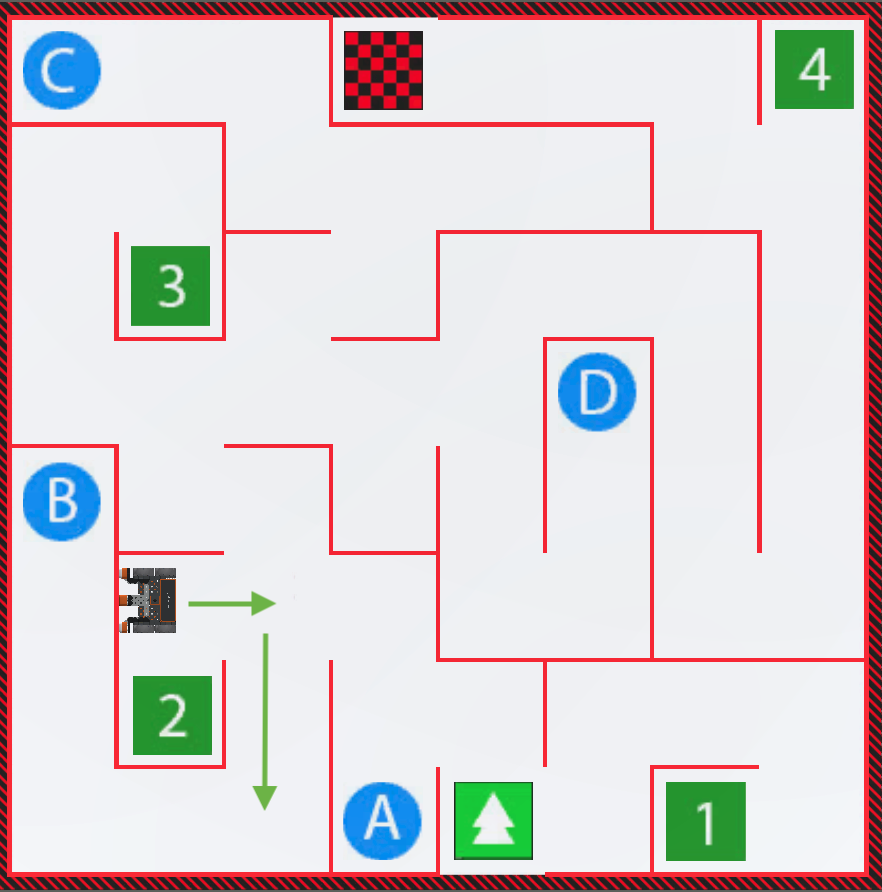
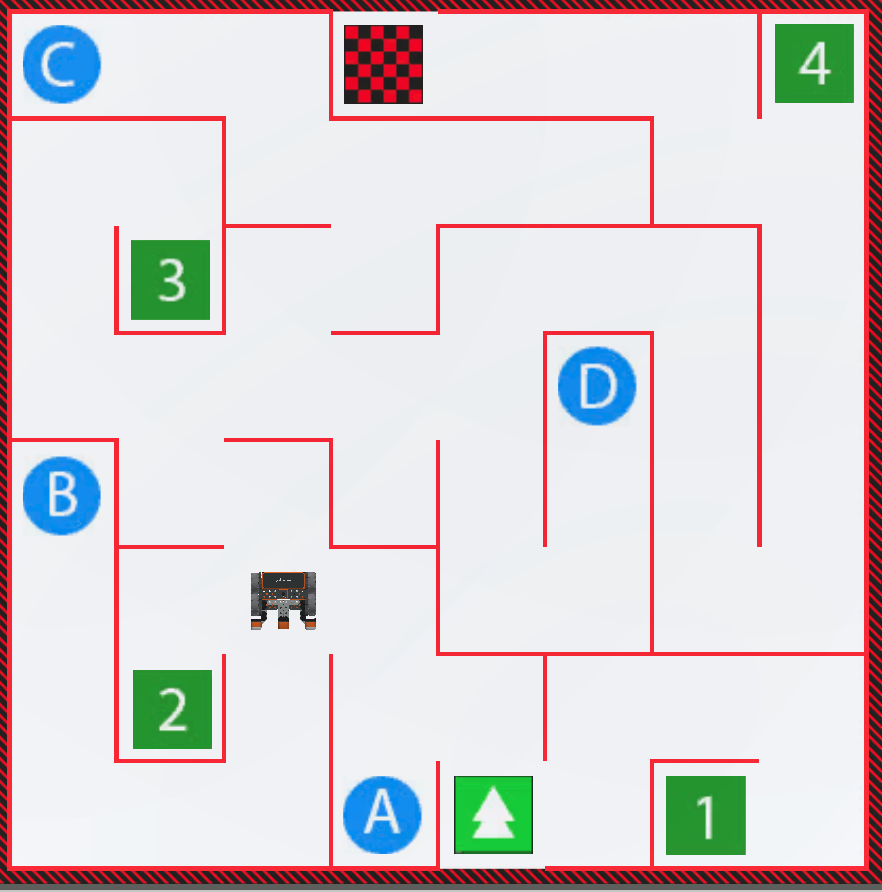
Now that the VR Robot has driven to the letter ‘A’ as well as to the number ‘2’ on the Maze Wall Playground, how would you create a project where the VR Robot drives to other locations, such as to the letter ‘B?’
-
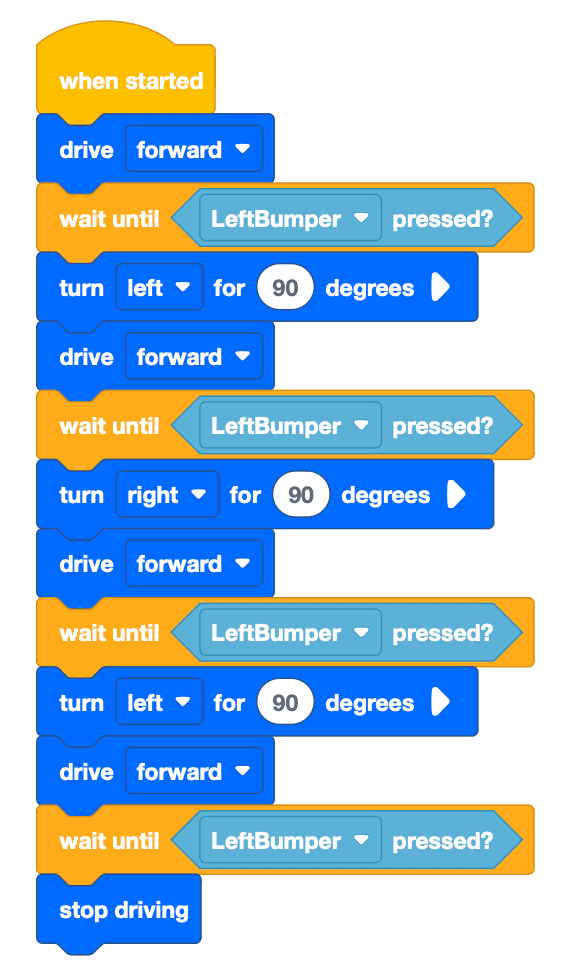
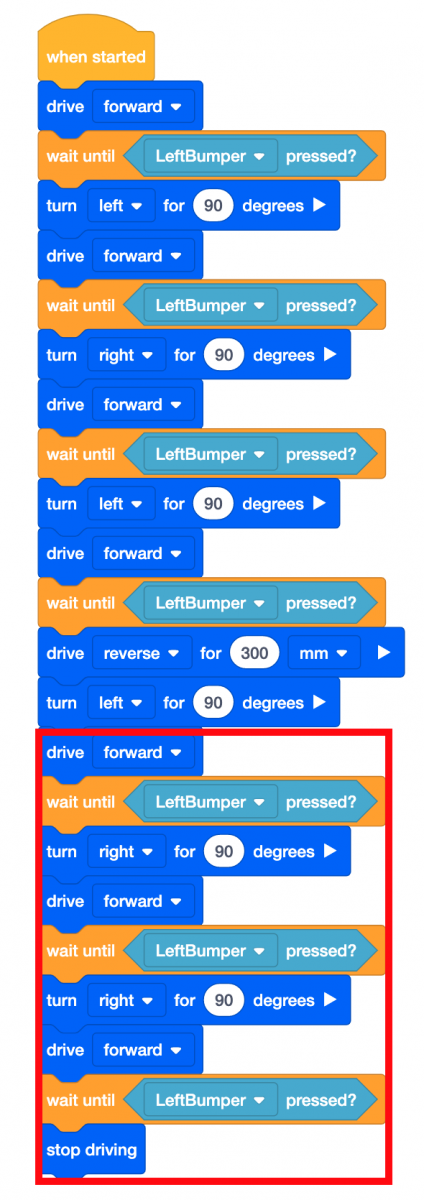
Begin by modifying your previous project or create a new project to match this base project. You can use VEXcode blocks, Switch blocks, or a combination of both block types.
-
The project above begins to drive the VR Robot to the letter ‘B,’ however, in order for the VR Robot to do so, it would first need to back up and then turn left.
-
If the code only contained [Drive] and [Turn for] blocks, the VR Robot would be “stuck” in the ‘2’ section of the Wall Maze, because it would continue to turn left or right without ever backing up.
-
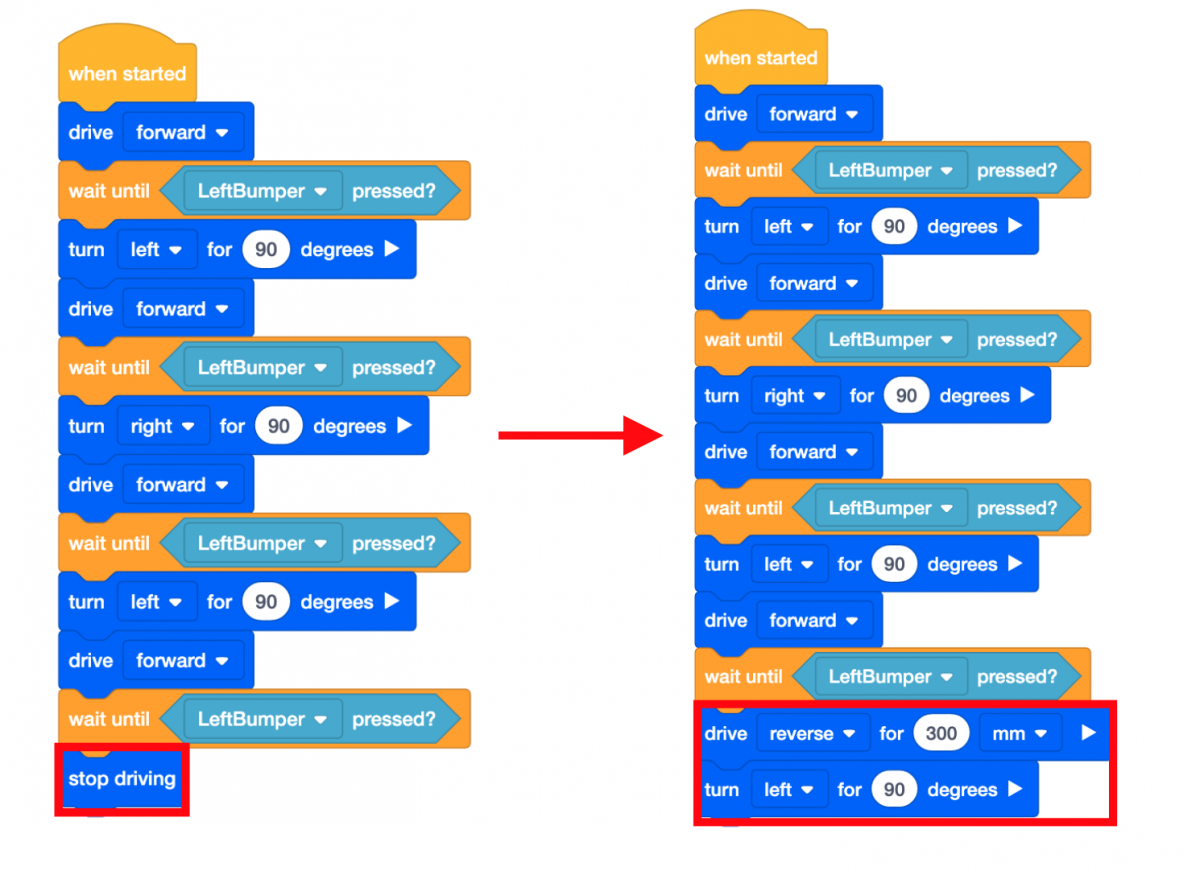
Edit the code by removing the [Stop driving] block and replacing it with the [Drive for] and [Turn for] blocks. Set the parameters of the [Drive for] block to “reverse” for 300 millimeters (mm) and set the parameters of the [Turn for] block to “left” 90 degrees.
- Launch the Wall Maze Playground if it is not already open and run the project.
-
Adding these blocks will orient the VR Robot in the right direction to drive the letter ‘B.’
- Select the “Reset” button to reset the Playground and move the VR Robot back to the starting position.
-
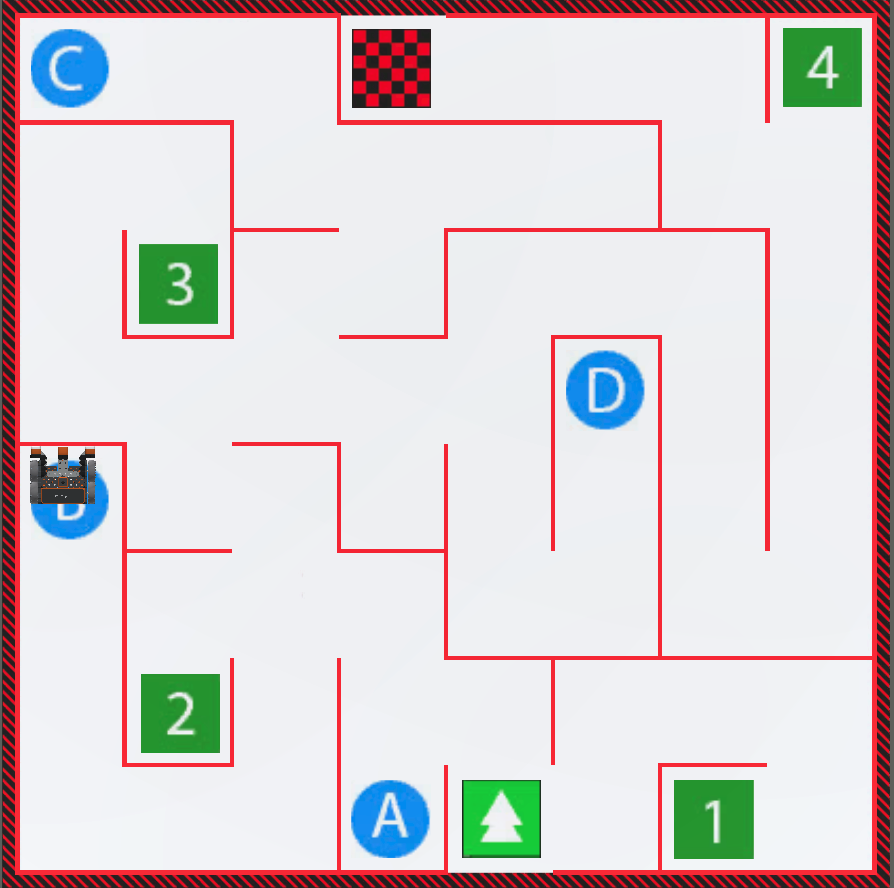
Now that the VR Robot is oriented in the correct direction, add the following blocks to drive the VR Robot to the letter 'B' on the Wall Maze Playground!
- Launch the Wall Maze Playground if it is not already open and run the project.
-
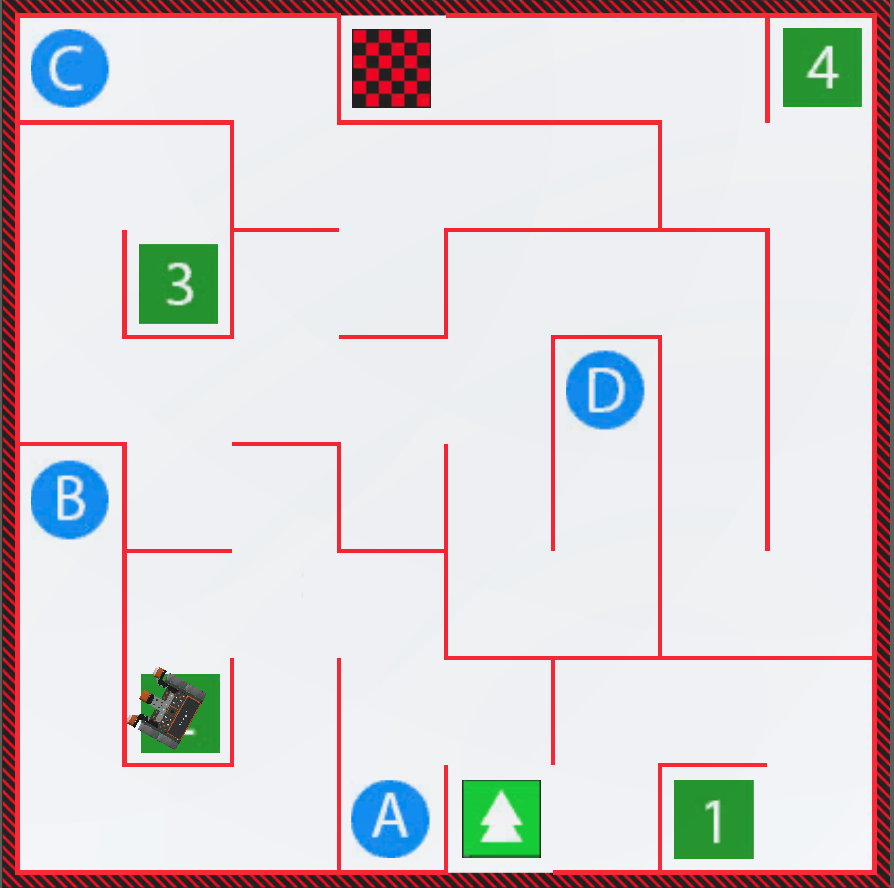
The VR Robot will now drive to the letter ‘B’ on the Wall Maze Playground!
Mini Challenge
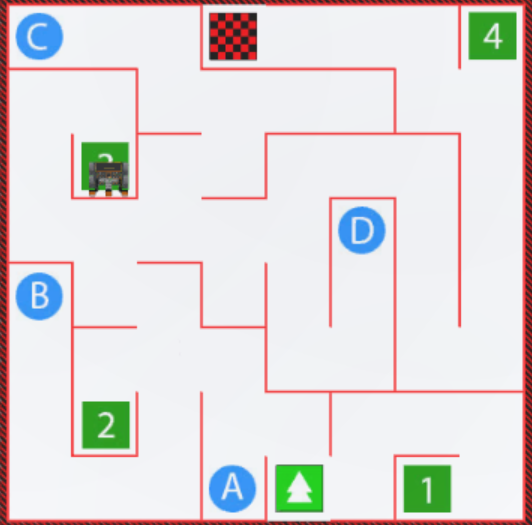
In this challenge, the VR Robot should navigate to the number ‘3’ in the Wall Maze Playground using the [Wait until] block and the Bumper Sensor.
Follow these steps to complete the mini challenge:
-
Watch the solution video below and review how the VR Robot should drive in order to complete the mini challenge. In the video clip below, the VR Robot begins in the starting location and follows the same pattern of driving to a wall until the bumper is pressed then turning. The robot drives the same path to start, that it did to drive to the letter B. At the turning point away from the wall, the robot turns right to continue on to number 3. From that point it drives forward and turns left twice to get around the next set of walls, past the letter B. Finally, the robot drives forward and turns right twice to get around the final walls to reach number 3.
- Create a project by adding or removing the necessary blocks to the Unit4Lesson3 project to drive the VR Robot to the number ‘3’ on the Wall Maze Playground.
- Start the project to test if it works.
- If the project is not successful, edit and try again. Continue this process until the challenge is complete.
- Once the VR Robot successfully drives to the number ‘3’ on the Wall Maze Playground, save the project.
Congratulations! You have successfully completed the Wall Maze Challenge!