
Lesson 3: Driving Until Pressed
Now that you have created a VEXcode VR project to navigate the VR Robot to the letter ‘A’ on the Wall Maze Playground, you will expand your skills using conditionals and sensor values. In this Lesson, you will navigate the VR Robot to the number ‘2’ in the Wall Maze Playground, then explore why additional blocks are needed to drive to the letter ‘B.’ In the mini-challenge, you will apply these skills to navigate from the beginning of the Wall Maze to the number ‘3.’

Learning Outcomes
- Identify that a condition always reports a TRUE or FALSE value.
- Describe the program flow in a project that has a VR Robot drive forward until the Bumper Sensor is pressed.
- Describe why conditions are used in projects.
- Identify how to use the Step feature to highlight program execution.
- Explain why using the Step feature is helpful in troubleshooting and tracing the flow of a project.
Rename the Project
- If the previous Lesson’s project is not already loaded, load the Unit4Lesson2 project.
- Rename the project Unit4Lesson3.

Flow of the Project to Drive to the Letter ‘A’
In the previous lesson, the VR Robot drove to the letter ‘A’ on the Wall Maze Playground.
-
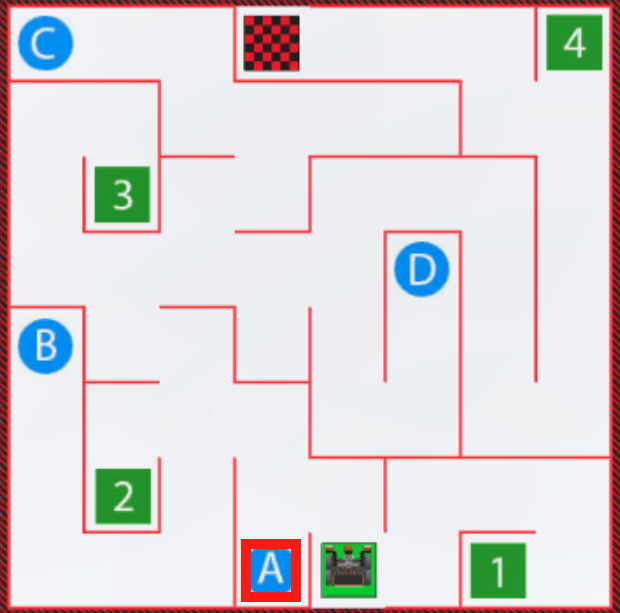
To better understand the project flow for driving to the letter ‘A’ on the Wall Maze Playground, begin by modifying your previous project or create a new project to match this base project.
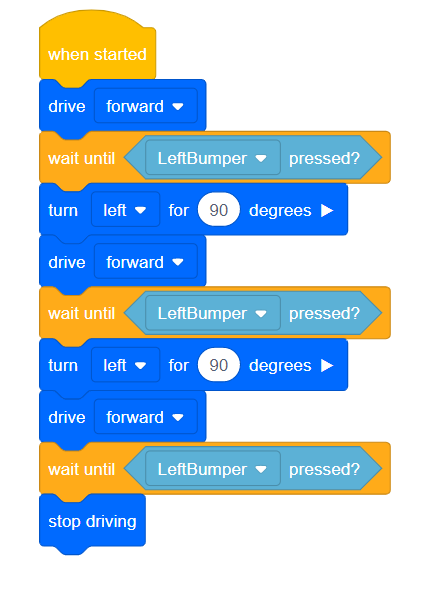
When a project uses a [Wait until] block, the program flow of the project still follows the same top-to-bottom sequence. The [Wait until] block allows the program flow to "pause" at a certain point, until the condition inside of the [Wait until] is met (reports TRUE).
Conditions inside of blocks, such as [Wait until] blocks, allows the user to "control" the program flow. For example, with the [Wait until] block, the program flow will pause and "wait until" the condition is met and reports TRUE, before moving on to the next block.
In this code for driving the VR Robot to the letter ‘A,’ the VR Robot will drive forward until the condition of the Left Bumper being pressed, is TRUE. A condition, such as the Left Bumper being pressed in this example, always reports a TRUE or FALSE value.
For Your Information
The Project Stepping Feature provides you with a visual representation of the flow of the commands as they are being executed within a project. This can provide you with important visual cues when you are trying to troubleshoot or design a VEXcode VR project.

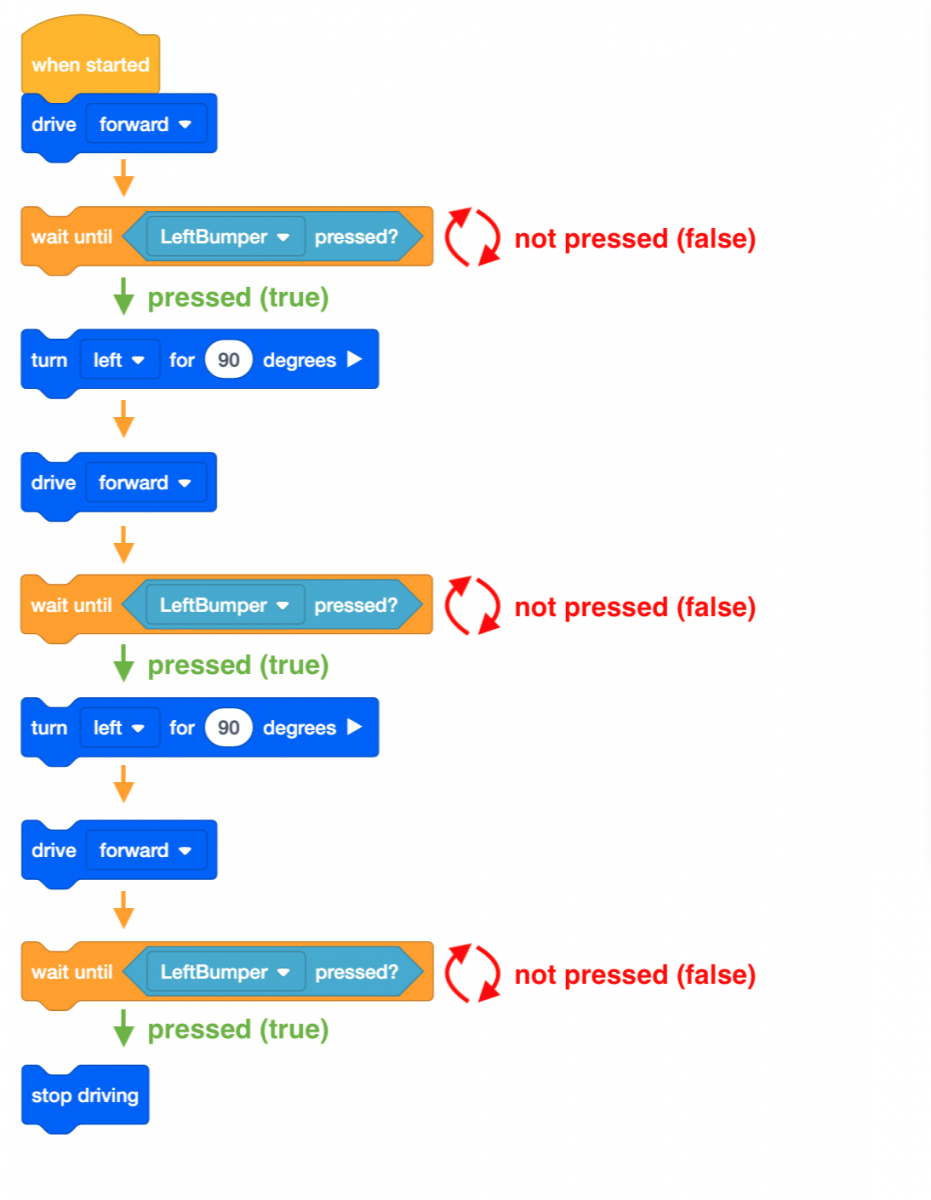
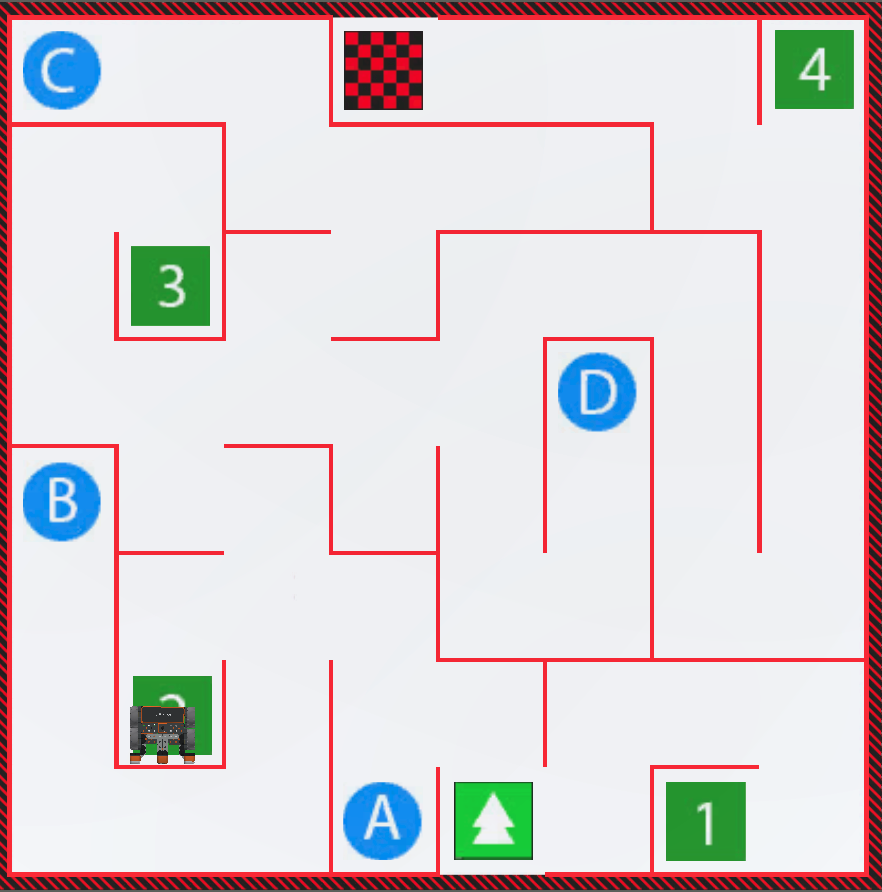
Drive to the Number '2'
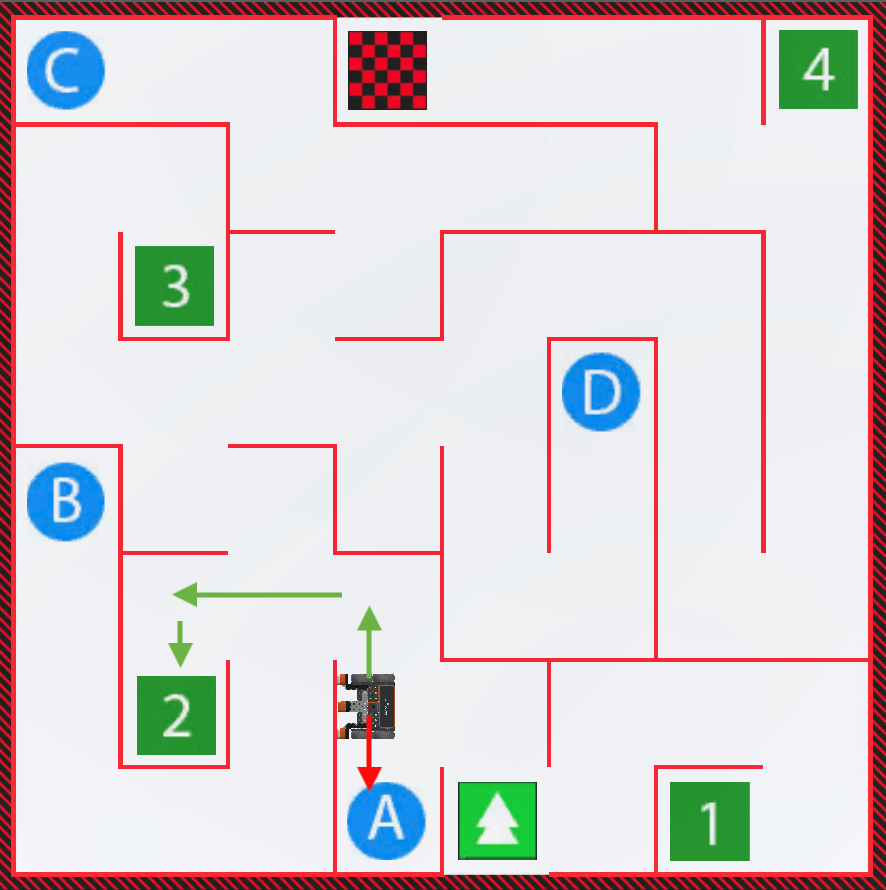
In this Lesson, the project will be edited to have the VR Robot drive to the number ‘2’ on the Wall Maze Playground!
-
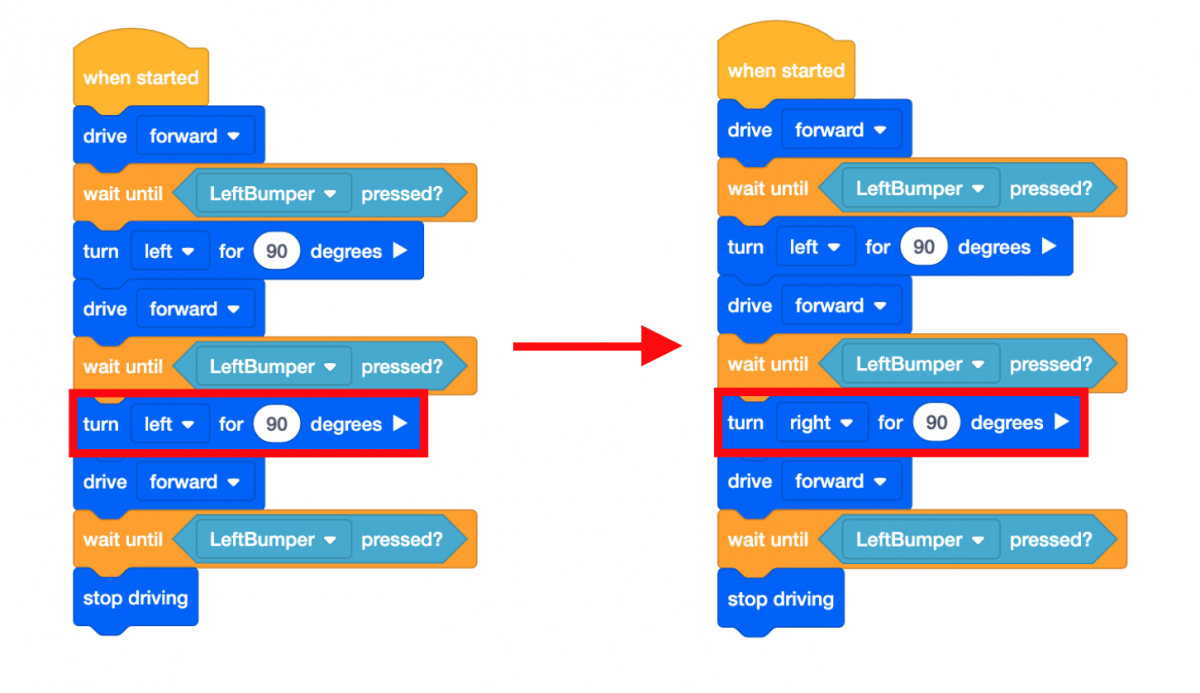
The project from Lesson 2 has the VR Robot turning left to drive to the letter ‘A.’ In order to navigate to the number ‘2,’ the VR Robot will have to turn right instead, drive forward, and then turn left.
-
Change the direction of the second [Turn for] block to right instead of left.
- Launch the Wall Maze Playground if it is not already open and run the project.
-
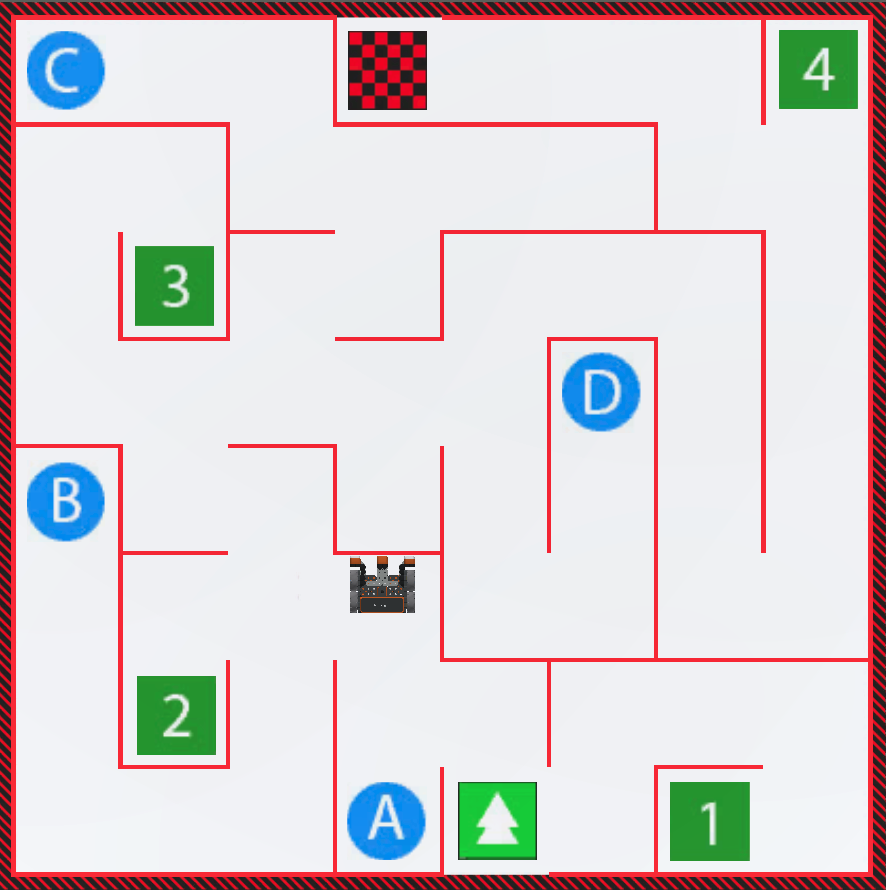
Watch the VR Robot begin to drive to the number ‘2,’ but stop at a wall. Thus, the VR Robot needs to turn left once it presses against the wall instead of stopping.
-
Select the “Reset” button to reset the Playground and move the VR Robot back to the starting position.

-
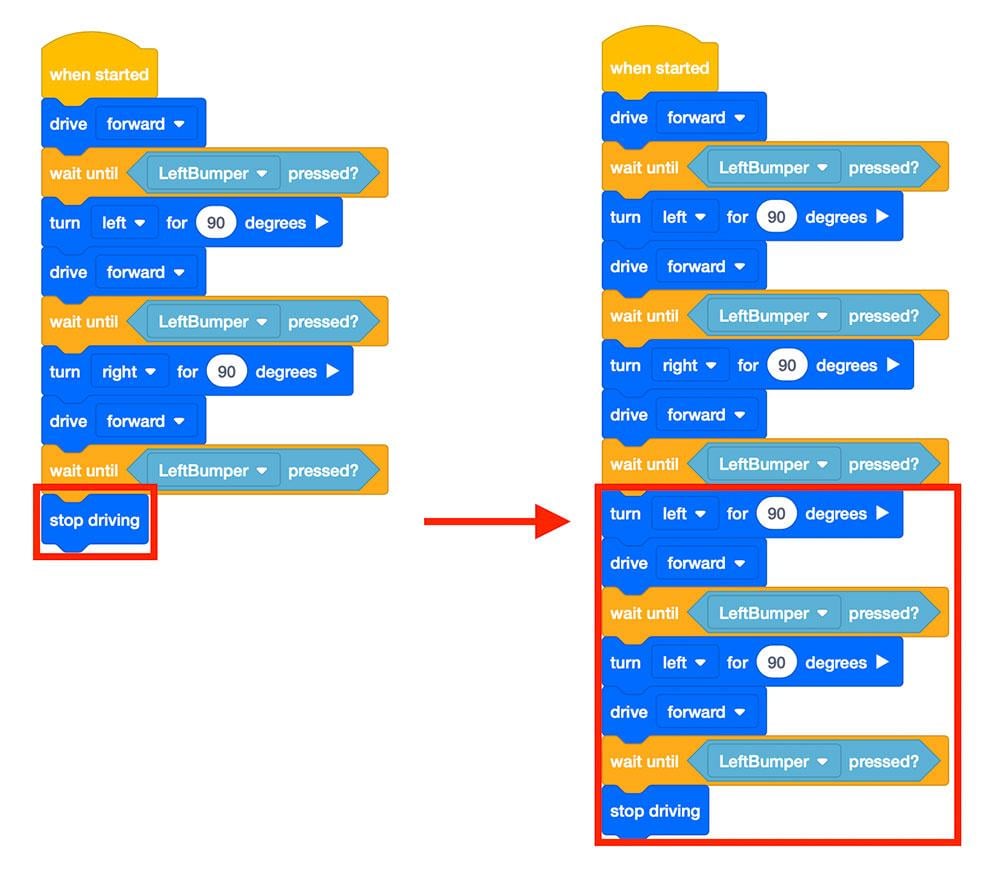
Edit the code by removing the [Stop driving] block and replacing it with the following commands in order to drive the VR Robot to the number ‘2.’
- Launch the Wall Maze Playground if it is not already open and run the project.
-
Watch the VR Robot drive to the number ‘2’ on the Wall Maze Playground!
- Select the “Reset” button to reset the Playground and move the VR Robot back to the starting position.
Select the Next button to continue with the rest of this Lesson.