
Lesson 2: Using Multiple [Wait until] Blocks
-
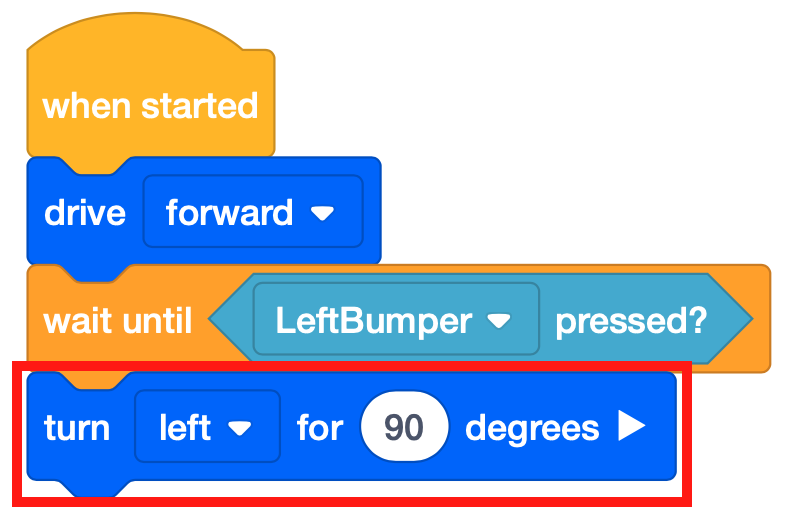
To drive through the Wall Maze Playground, the VR Robot will need to turn and keep driving when there is a collision with a wall. Remove the [Stop driving] block and replace it with a [Turn for] block. Change the [Turn for] parameter to “left.”
- Launch the Wall Maze Playground if it is not already open and run the project.
-
Watch the VR Robot drive from the start of the Wall Maze, stop when the Bumper Sensor is pressed by the wall, and turn left 90 degrees.

-
Multiple [Wait until] blocks can be used in the same project. Starting from the current position of this VR Robot, the next step in solving the Wall Maze would be to drive forward to the next wall and turn right 90 degrees. The existing stack of blocks can be duplicated and added to the bottom of the stack. Remember to change the second [Turn for] block from left to right.

- Reset the Wall Maze Playground and run the project again.
-
Watch the VR Robot drive from the start of the Wall Maze, stop when the Bumper Sensor is pressed by the wall, turn left 90 degrees, drive forward until the Bumper Sensor is again pressed by a wall, then turn right 90 degrees and stop.
Mini Challenge
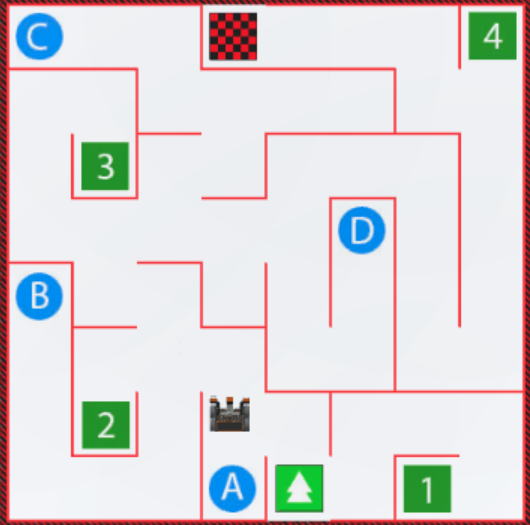
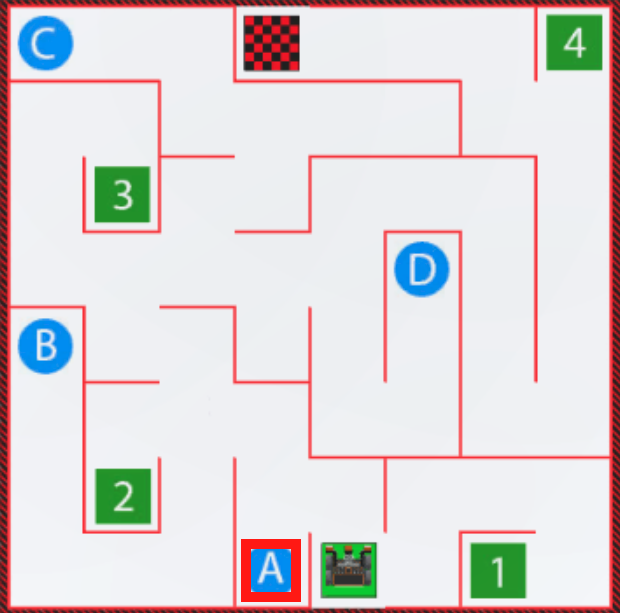
For this mini challenge, create a project where the VR Robot drives from start to the letter ‘A’ on the Wall Maze Playground using multiple [Wait until] blocks and the Bumper Sensor!
Follow these steps to complete the mini challenge:
-
Watch the solution video below to see how the VR Robot should drive in order to complete the mini challenge. In this video clip, the VR Robot begins at the start in the bottom center of the Playground. It drives forward until the Bumper Sensor is pressed by the wall opposite, then turns left, and drives to the next wall in front of it. When the Bumper is pressed at that wall, the robot turns left again and drives forward until it reaches the final wall and the letter A.
- Create a project by adding or removing the necessary blocks to the Unit4Lesson2 project. Remember that you can use VEXcode blocks, Switch blocks, or a combination of both block types to create your project.
- Start the project to test it.
- If the project is not successful, edit and try again. Continue to revise and run the project until the VR Robot successfully drives from start to the letter ‘A.’
- Save the project once the VR Robot successfully drives from start to the letter ‘A.’
Congratulations! You solved the mini challenge!