
Lesson 2: Flow of a Project with a [Repeat] Block
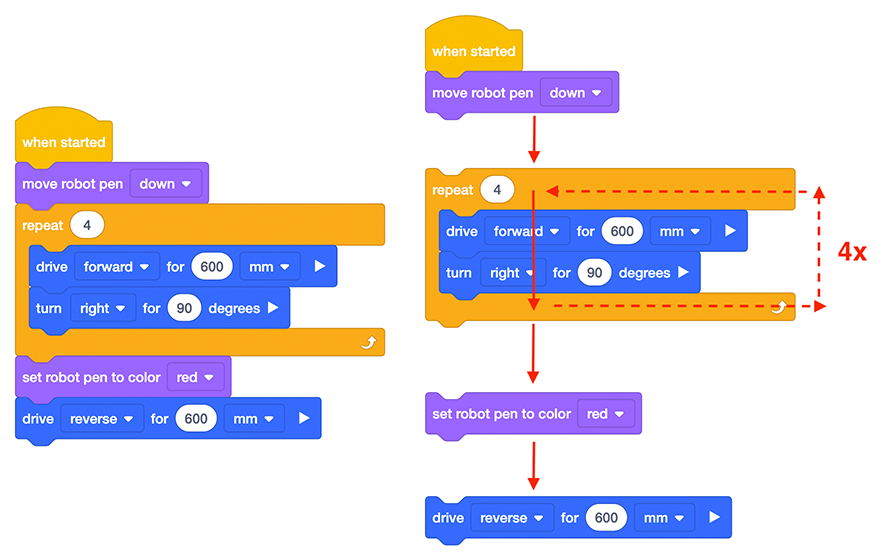
When a project uses a [Repeat] block, it still follows the same logic while executing the commands. These two stacks of blocks will execute the same behaviors. The only difference is that the stack of blocks on the right utilize a [Repeat] block.

The VR Robot will move through the commands from the [When Started] block to the bottom of the stack. The [Repeat] block indicates that the VR Robot should repeat the actions inside of the block the specified number of times before moving on to the next block in the stack after the [Repeat] block.
The specified number of times that the [Repeat] block is set to execute creates a ‘condition.’ Conditions allow the user to control the flow of a project. The condition of the [Repeat] block must be met before the project will move on to the next block in the stack. The condition created in the following example is to ‘repeat the [Drive for] and [Turn for] commands four times.’
Mini Challenge
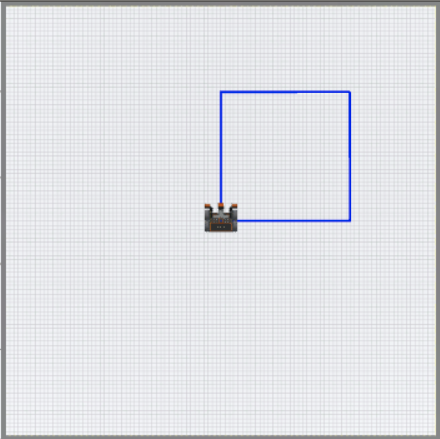
In this project, the VR Robot should draw a blue square on the Art Canvas Playground, but there are errors in the project. Edit the project to solve the mini challenge!
Follow these steps to complete the mini challenge:
- The robot starts in the middle of the playground and draws the four sides of a large blue square.
-
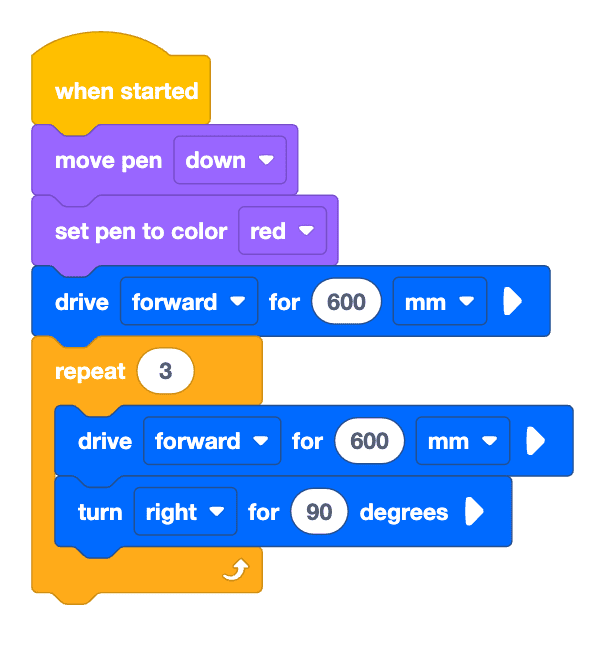
Modify the Unit3Lesson2 project to match this image. Remember that you can use VEXcode blocks, Switch blocks, or a combination of both block types with a VR Premium account.
- Start the project and identify where the VR Robot does not complete the expected behaviors.
- Modify the project and run the project again. See if the VR Robot completes the expected behaviors.
- If the VR Robot does not draw a blue square, repeat the previous step and try again. Continue to modify and run your project until the VR Robot draws a blue square.
- Once the VR Robot successfully draws a blue square on the Art Canvas Playground, save the project.
Congratulations! You solved the mini challenge!