Lesson 2: Build and Test the Project
Continuing to Build the Project
-
Now the condition of the if else statement needs to be set. To use the Distance Sensor to detect castles, the found_object command can be used. Add the found_object command to the condition. Your project should now look like this:
def main(): # Does the Distance Sensor detect a castle? if front_distance.found_object(): # Crash castle detected by a Distance Sensor pass else: # Turn to find a castle using the Distance Sensor pass -
If the Distance Sensor finds an object, the VR Robot should drive forward to knock over the castle. Add a drive command into the 'if' branch of the if else statement, and set the parameter to drive the VR Robot forward. (This command should replace the 'pass').
def main(): # Does the Distance Sensor detect a castle? if front_distance.found_object(): # Crash castle detected by a Distance Sensor drivetrain.drive(FORWARD) else: # Turn to find a castle using the Distance Sensor pass -
When the found_object command reports False, the 'else' branch will run, so the VR Robot will need to turn to find a castle on the Playground. Add a turn command inside the 'else' branch, and set the parameters to turn the VR Robot to the right.
def main():
	# Does the Distance Sensor detect a castle?

	if front_distance.found_object():
		# Crash castle detected by a Distance Sensor
		drivetrain.drive(FORWARD)

	else:
		# Turn to find a castle using the Distance Sensor
		drivetrain.turn(RIGHT)
For Your Information
The 'else' branch of the if else statement only functions in a project as part of an if else statement. While you can have an if statement stand alone, there is not an 'else' statement in VEXcode VR Python. The 'else' branch is run when the condition of the 'if' branch is not met. Without a defined condition (the 'if' branch), the 'else' branch would never run. 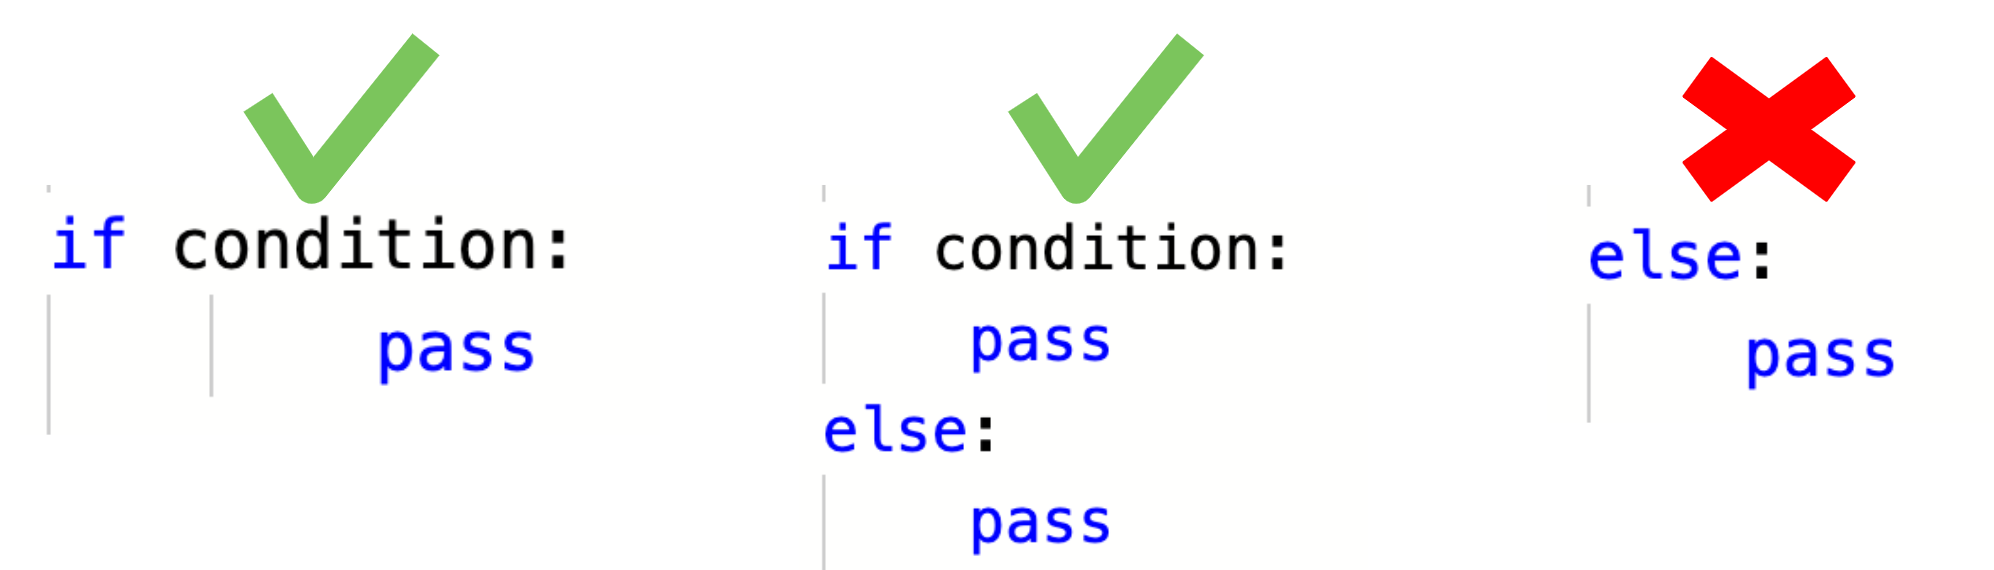
Add a Loop and Test the Project
- Before the project is tested, one more command needs to be added. If else statements will only check the condition once before moving to the next command outside the statement. In Unit 7, an infinite while loop was added to the project to instruct the VR Robot to repeatedly check the condition of the Down Eye Sensor. To ensure the Distance Sensor condition is being checked repeatedly, drag in or type an infinite while loop, then copy the if else statement inside the infinite while loop. Your project should now look like this:
-
Remember to be mindful of indentation when copying and pasting commands into a loop, so that the project works as intended when it is run.
def main():

	while True:
		# Does the Distance Sensor detect a castle?

		if front_distance.found_object():
			# Crash castle detected by a Distance Sensor
			drivetrain.drive(FORWARD)

		else:
			# Turn to find a castle using the Distance Sensor
			drivetrain.turn(RIGHT)

		wait(5, MSEC)
-
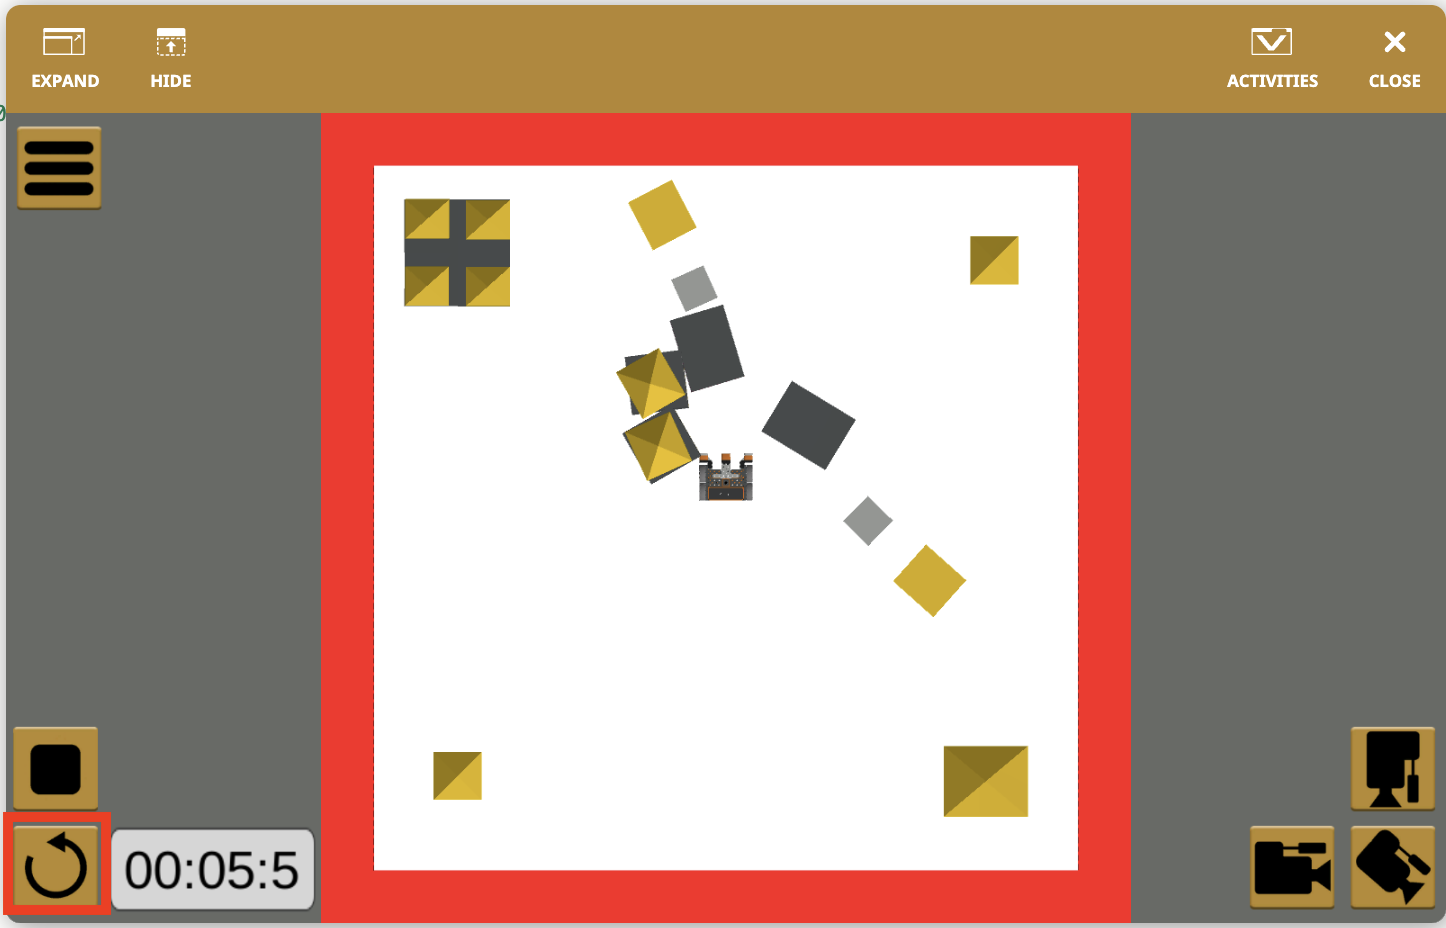
- Open the Playground Window if it is not already open. Be sure the Dynamic Castle Crasher Playground opens, and run the project.

- Once the VR Robot has knocked over at least two castles, reload the Playground and run the project on another layout of the Dynamic Castle Crasher Playground.
- On each run of the project, the VR Robot will turn until a castle is detected by the Distance Sensor, then drive towards that building to knock it over.
- During the run of the project, the VR Robot may push a castle piece all the way to the edge and fall off the Playground. This is because the found_object command is still reporting that there is an object in front of the VR Robot. When this command reports True, the VR Robot drives forward, leading the VR Robot to fall off the Playground.
Project Flow with an If Else Statement
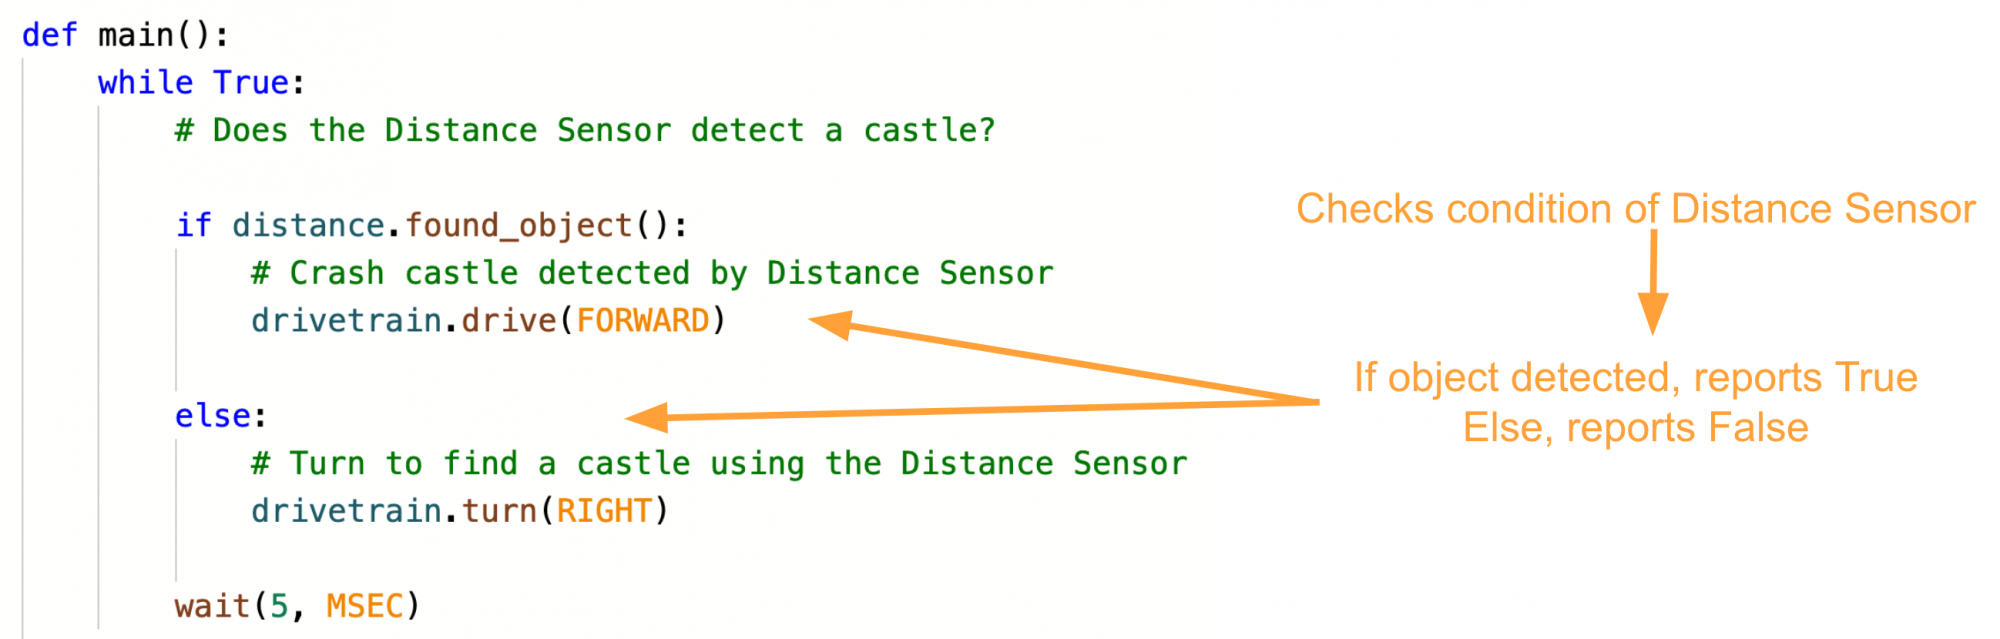
The if else statement is used so the VR Robot can make a decision. If the Boolean condition is True, then the commands inside of the 'if' branch will run. If the Boolean condition is False, then the commands inside of the 'else' branch will run.
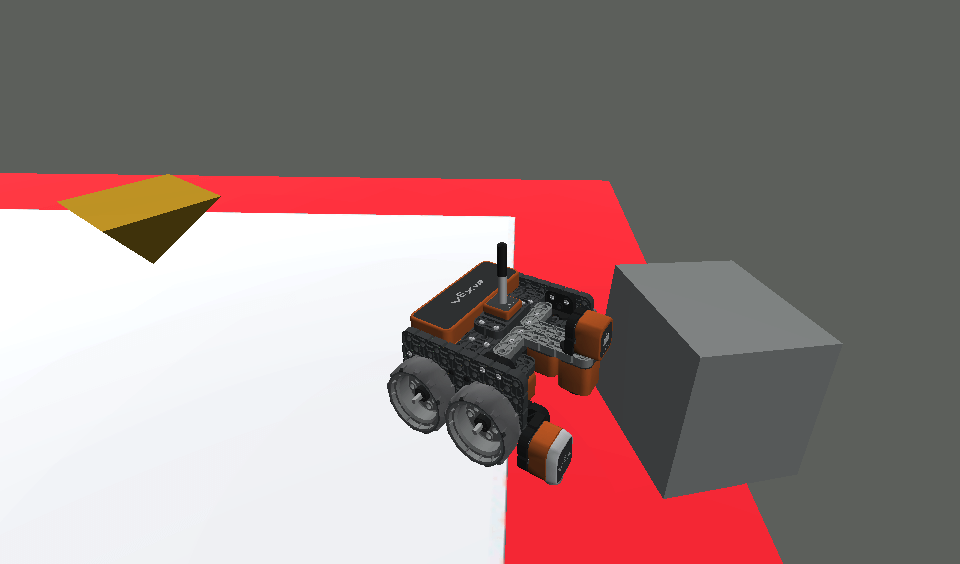
For instance, in this iteration of the Dynamic Castle Crasher Playground, when the project is started the Distance Sensor detects an object – the condition of the found_object command reports True. Now the 'if' branch of the project will run, and the VR Robot will drive forward. The VR Robot will skip the 'else' branch of the project.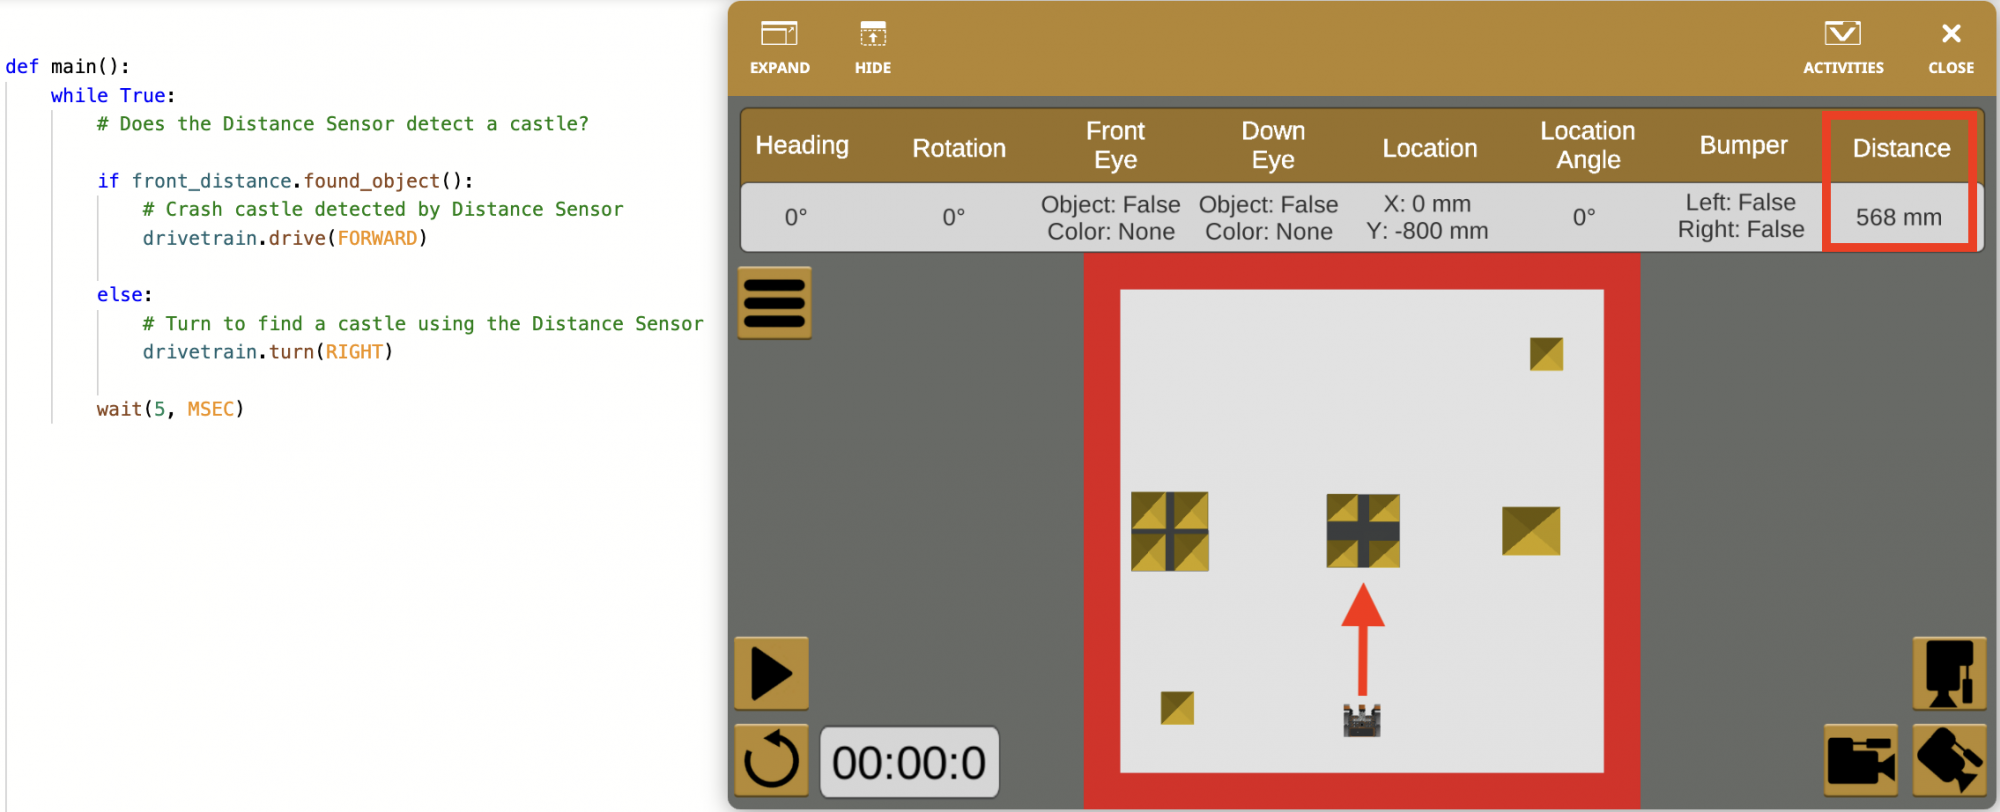
- Notice that the Distance Sensor data is also reported in the Dashboard. When an object is detected, the distance value will be displayed.
However, in this iteration of the Dynamic Castle Crasher Playground, when the project is started the Distance Sensor does NOT detect an object – the condition of the found_object command reports False. Now the VR Robot will skip the 'if' branch of the project, and the 'else' branch of the project will run, so the VR Robot will turn right.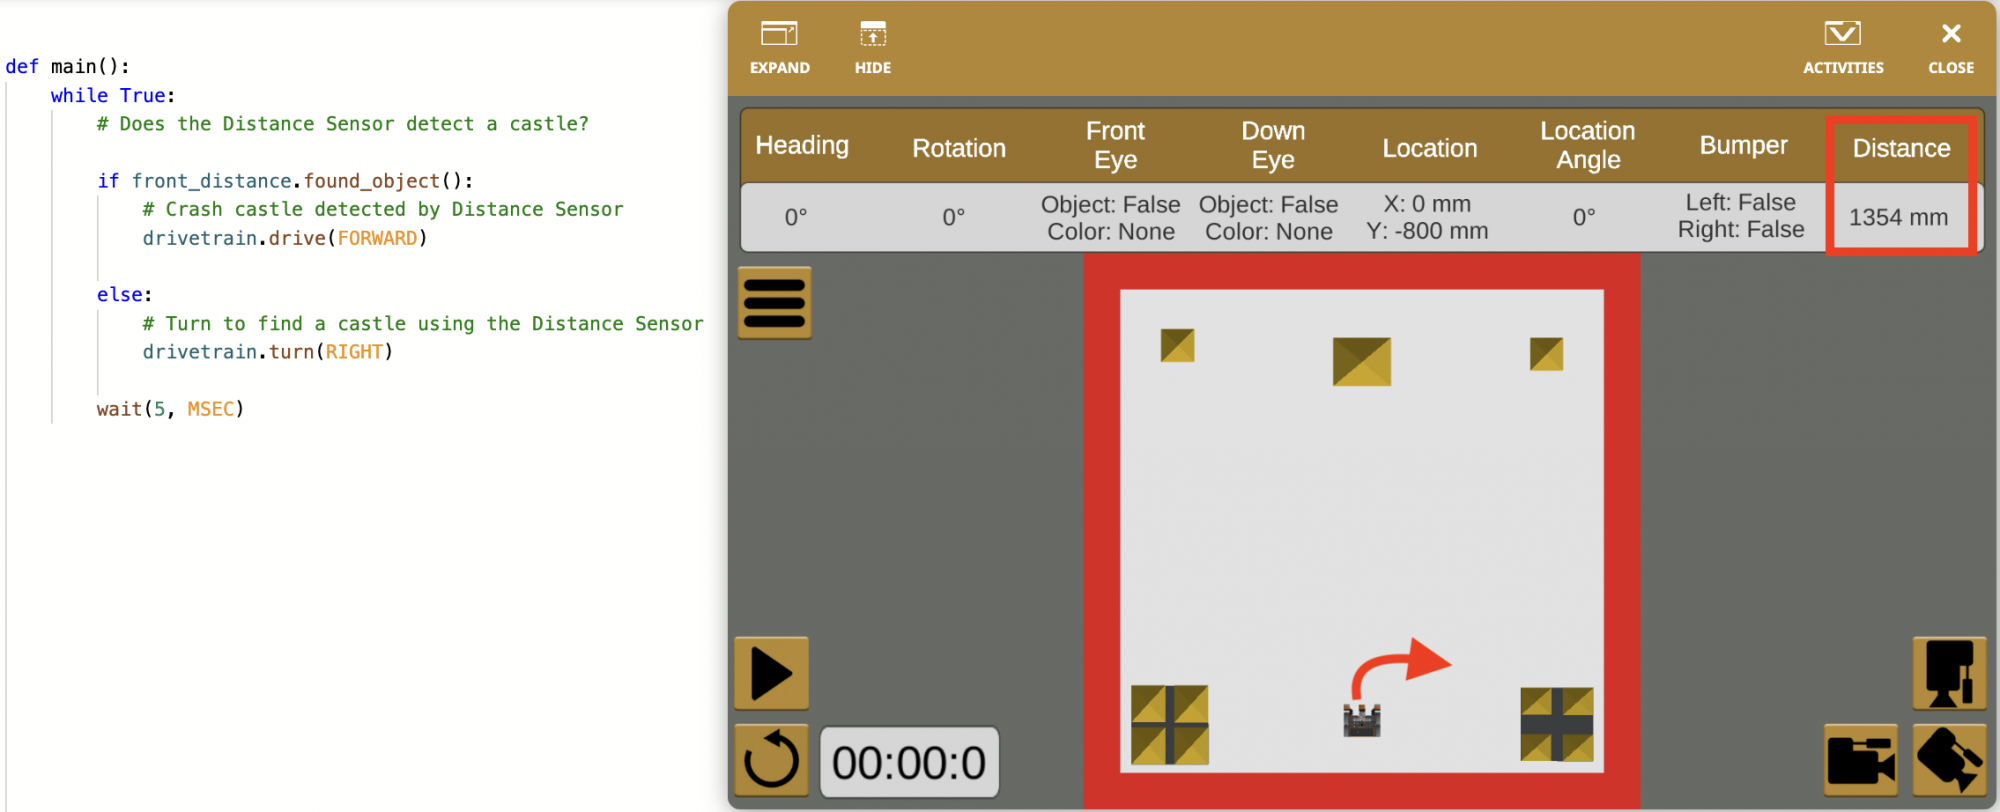
- Notice that the Distance Sensor value in the Dashboard is reported as > 3000 mm. The Distance Sensor can detect objects within a 3000 millimeter (mm) range, so when an object is not detected, the value is reported as greater than (>) 3000 mm.
Because the if else statement is inside of an infinite while loop, the project loops back to the top of the infinite while loop to check the condition of the if else statement repeatedly. This loop will continue forever, instructing the VR Robot to continually check the if else condition hundreds of times per second.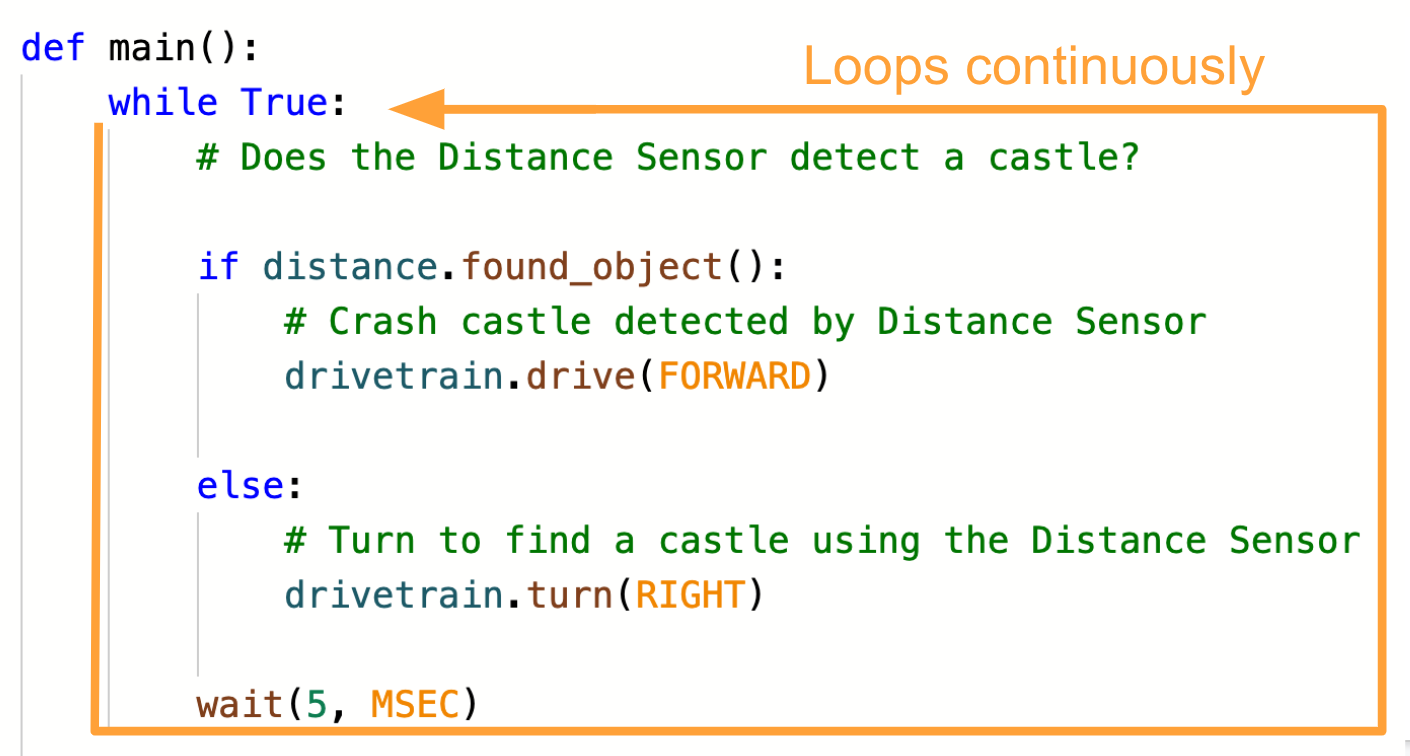
- Note that the drive and turn commands inside the if else statement are non-waiting commands. Non-waiting commands do not stop the flow of a project while they are running. A non-waiting behavior that is executed in an if else statement (such as 'drive forward if object is detected') will continue while the condition is checked, and will only change when the condition changes.
For Your Information
An if else statement is used to ensure that only one branch in the project is run when the condition is checked. Only one instance or condition can be true at any time. This makes the project more efficient.
Compare the current project with the project created in Unit 7. The Unit 7 project uses four if statements.
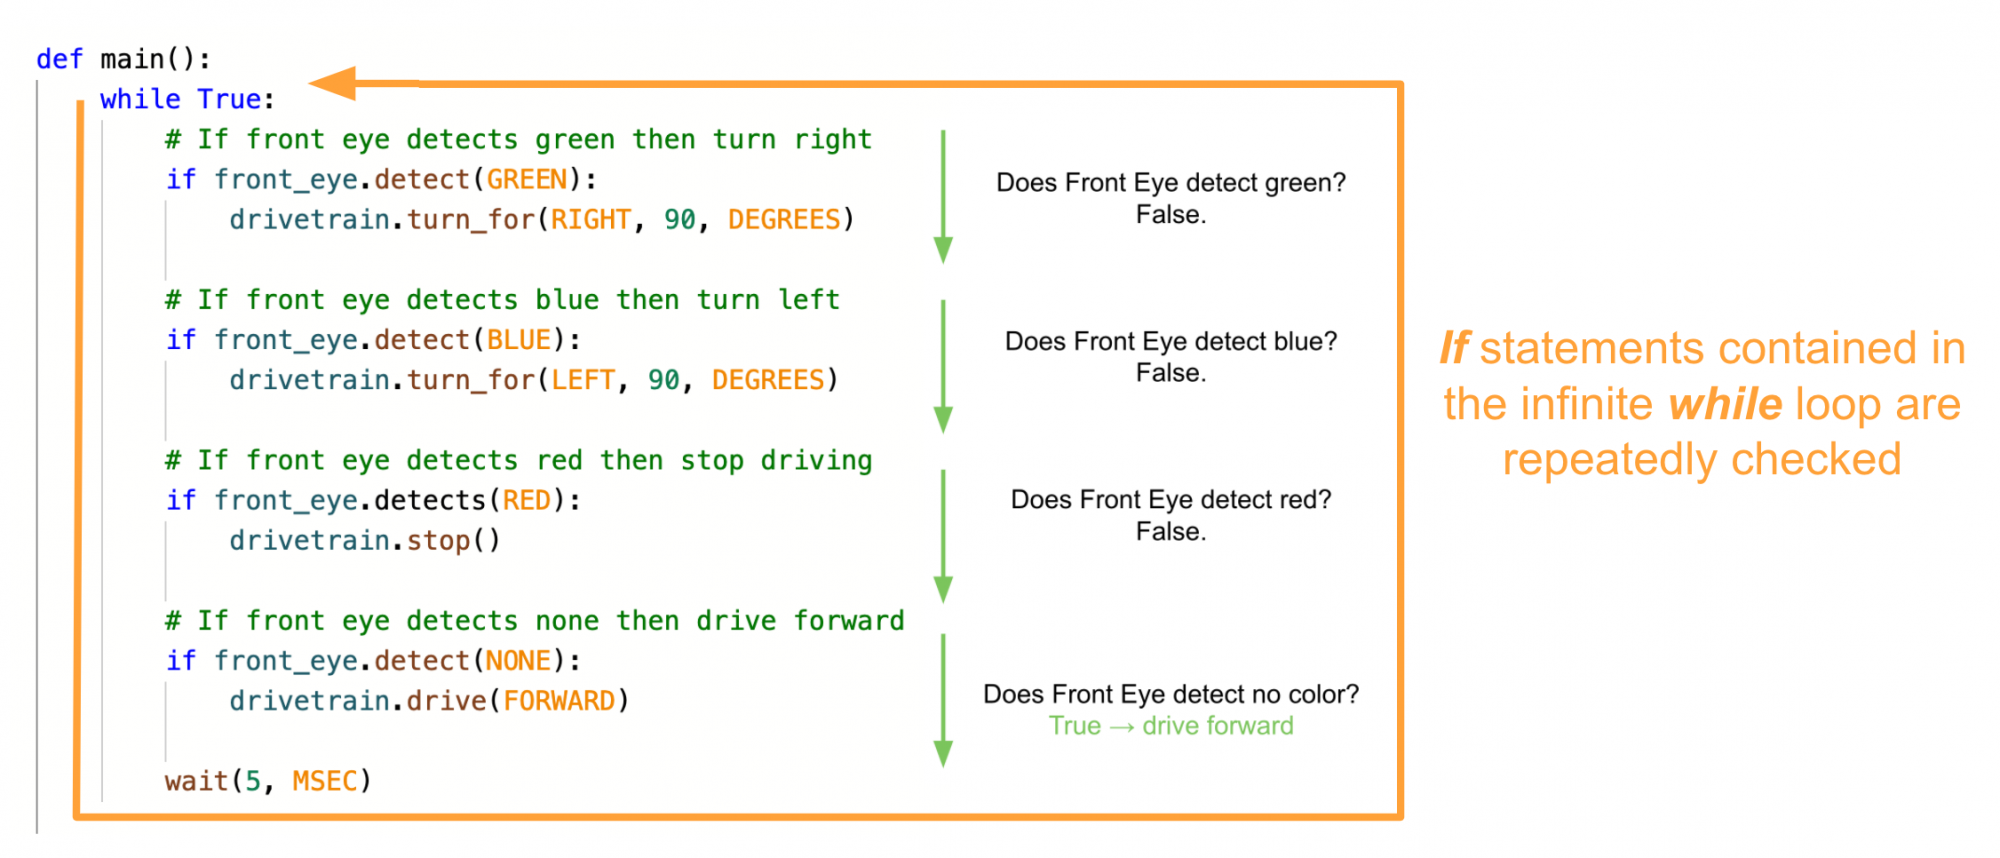
When running through a project with multiple if statements, it could be possible that multiple conditions would report True (or False) as the project runs through the commands in the infinite while loop. Conflicts like this could cause the project to stop running or run more slowly.
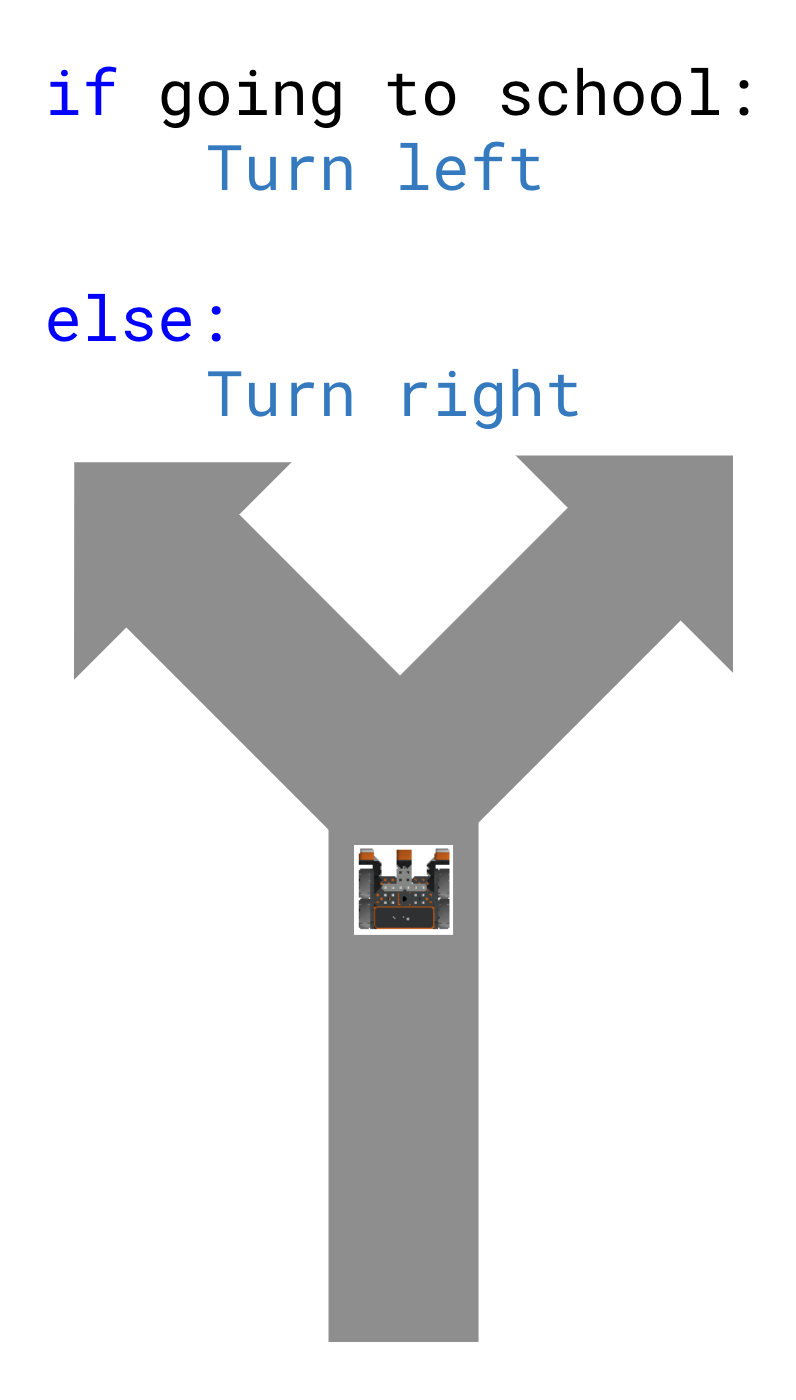
In other words, multiple if statements in a project is like traveling down a road with multiple exit ramps. Depending on where you are trying to go, you would turn at different places. For instance, if you were going to school, you would turn left; if you were going to the store, you would turn right. But what if you weren't going to school or the store? Both conditions would report False, and you would stay on the straight path. Or what if you were going to both school and the store? Both conditions would report True, but you cannot turn at two locations at the same time. 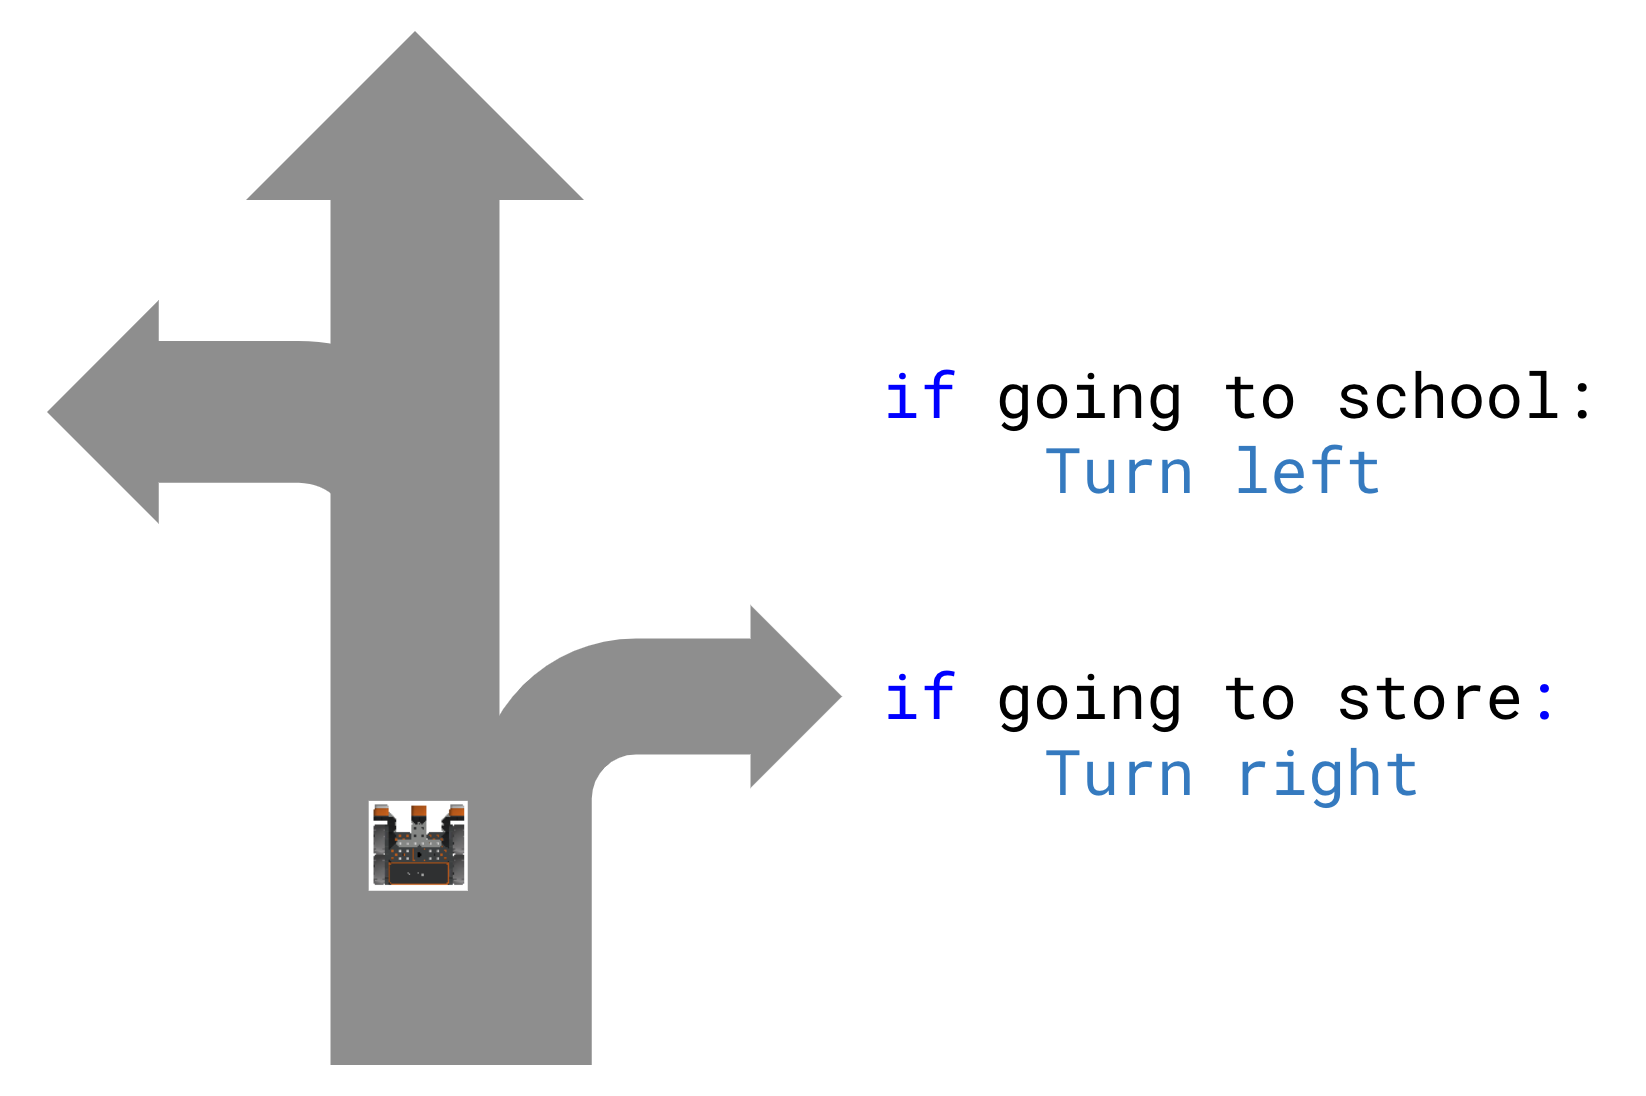
To continue the analogy, an if else statement is like traveling to a fork in the road – it forces you to make a decision. If you are going to school, turn left; else, turn right. No matter where you are going, you either turn left or right. Using an if else statement would avoid bugs like those above, because it would force you to make a decision, as only one condition can be True at a given moment.