
Introduction
In this Lesson, you will learn how to add and use a Bumper Switch with your BaseBot. You will also learn how to print to the Brain's screen, and configure your Controller using VEXcode EXP. Then, you will apply these skills to compete in the Freeze Tag Challenge, where you will play a game of one-on-one Freeze Tag.
In this video, the BaseBot on the left presses the Bumper Switch of the BaseBot on the right, causing it to freeze and stop driving, while the Brain turns red. While the second robot is frozen, the first robot drives away, demonstrating how one robot can tag another BaseBot using a Bumper Switch.
Add the Bumper Switch
For this Lesson, you will be learning about the Bumper Switch and printing to the Brain's screen. But first, the Bumper Switch needs to be added to your BaseBot.
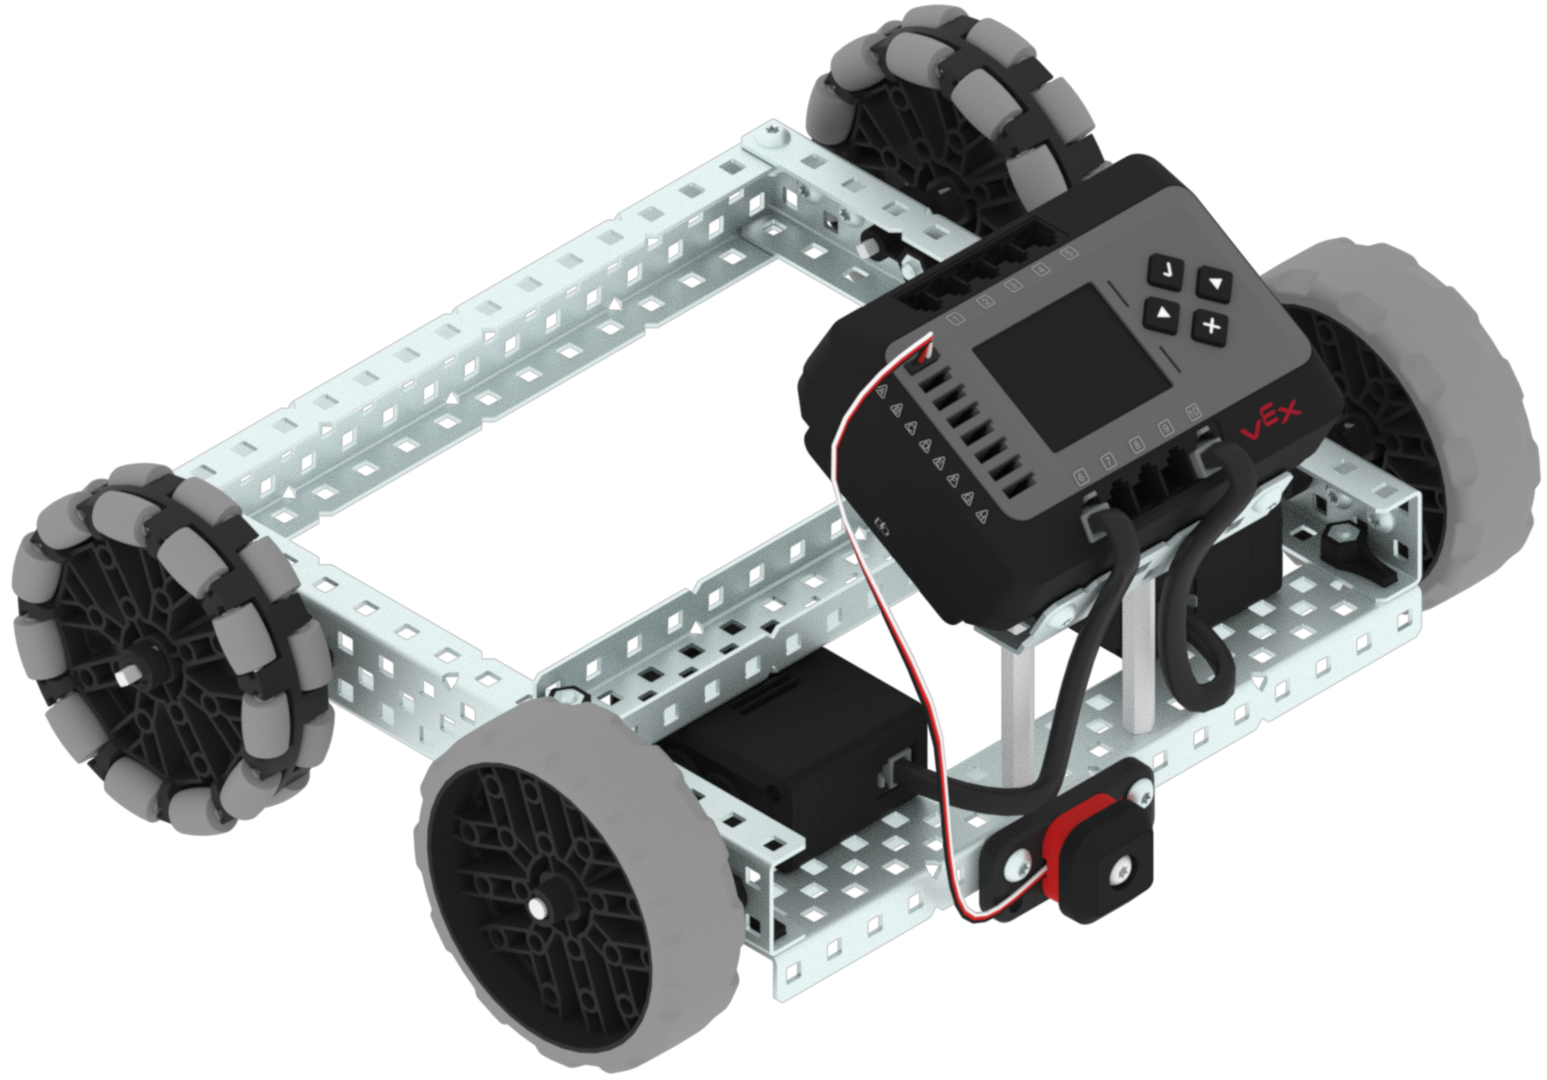
Add a Bumper Switch to your BaseBot as shown in this image.
- Attach the Bumper Switch to the C-Channel directly below the brain
- The Bumper Switch should be plugged into Port A
Add a 1x2x1x16 C-Channel to the front of the BaseBot as shown.
Select Next > to learn about using the Bumper Switch and printing to the robot's Brain screen.