
Play
Part 1 - Step by Step
- InstructInstruct students to attach their float to the Code Base robot ensuring that all materials stay on the Code Base robot. Students may need to use more tokens to gather extra materials for this.

Tokens can be classroom items such as buttons or sticky notes - ModelModel using a group’s setup, how to put the float on top of or around the Code Base robot. Let students know that the float might need to be removed from the Code Base robot at the end of the Lab. They will need to reattach their float at the beginning of Lab 3.
- Encourage students to use pins, standoffs and connectors from the VEX GO Kit to secure the float. See the Pieces of the VEX GO Kit VEX Library article for information on the various categories and functions of the Kit pieces.

Design a Float that Attaches to the Code Base - FacilitateFacilitate the attachment process by walking around and helping students who are struggling.
Encourage students to work together and use spatial language to help attach the float. For example, encourage discussion and explanation by asking the students:
- Why did you attach that piece to the side/top/back of your Code Base robot?
- What would happen if you moved this piece to the other side or even on top of the float?
- How would you describe attaching the float to the Code Base robot? What words would you use such as on top of, next to, or behind?
- RemindRemind groups that frustration happens. Ultimately trial and error is a part of life, and there is enough time for both.
- AskAsk students to help other groups once they are done with their float attachment.
Mid-Play Break & Group Discussion
As soon as every group has accomplished attaching their float to the Code Base robot, come together for a brief conversation.
- What problems did you come across while attaching your float?
- How did you solve this problem?
- What solutions did your group use when you found problems in your design?
Part 2 - Step by Step
- InstructInstruct students to create a project using VEXcode GO so that their Code Base float moves around the parade route. Let students know that they will work with their groups to create pseudocode and a project to drive their float through a short parade route.
Example Parade Route - ModelModel for students how to begin writing pseudocode to plan for their movements around the parade route.
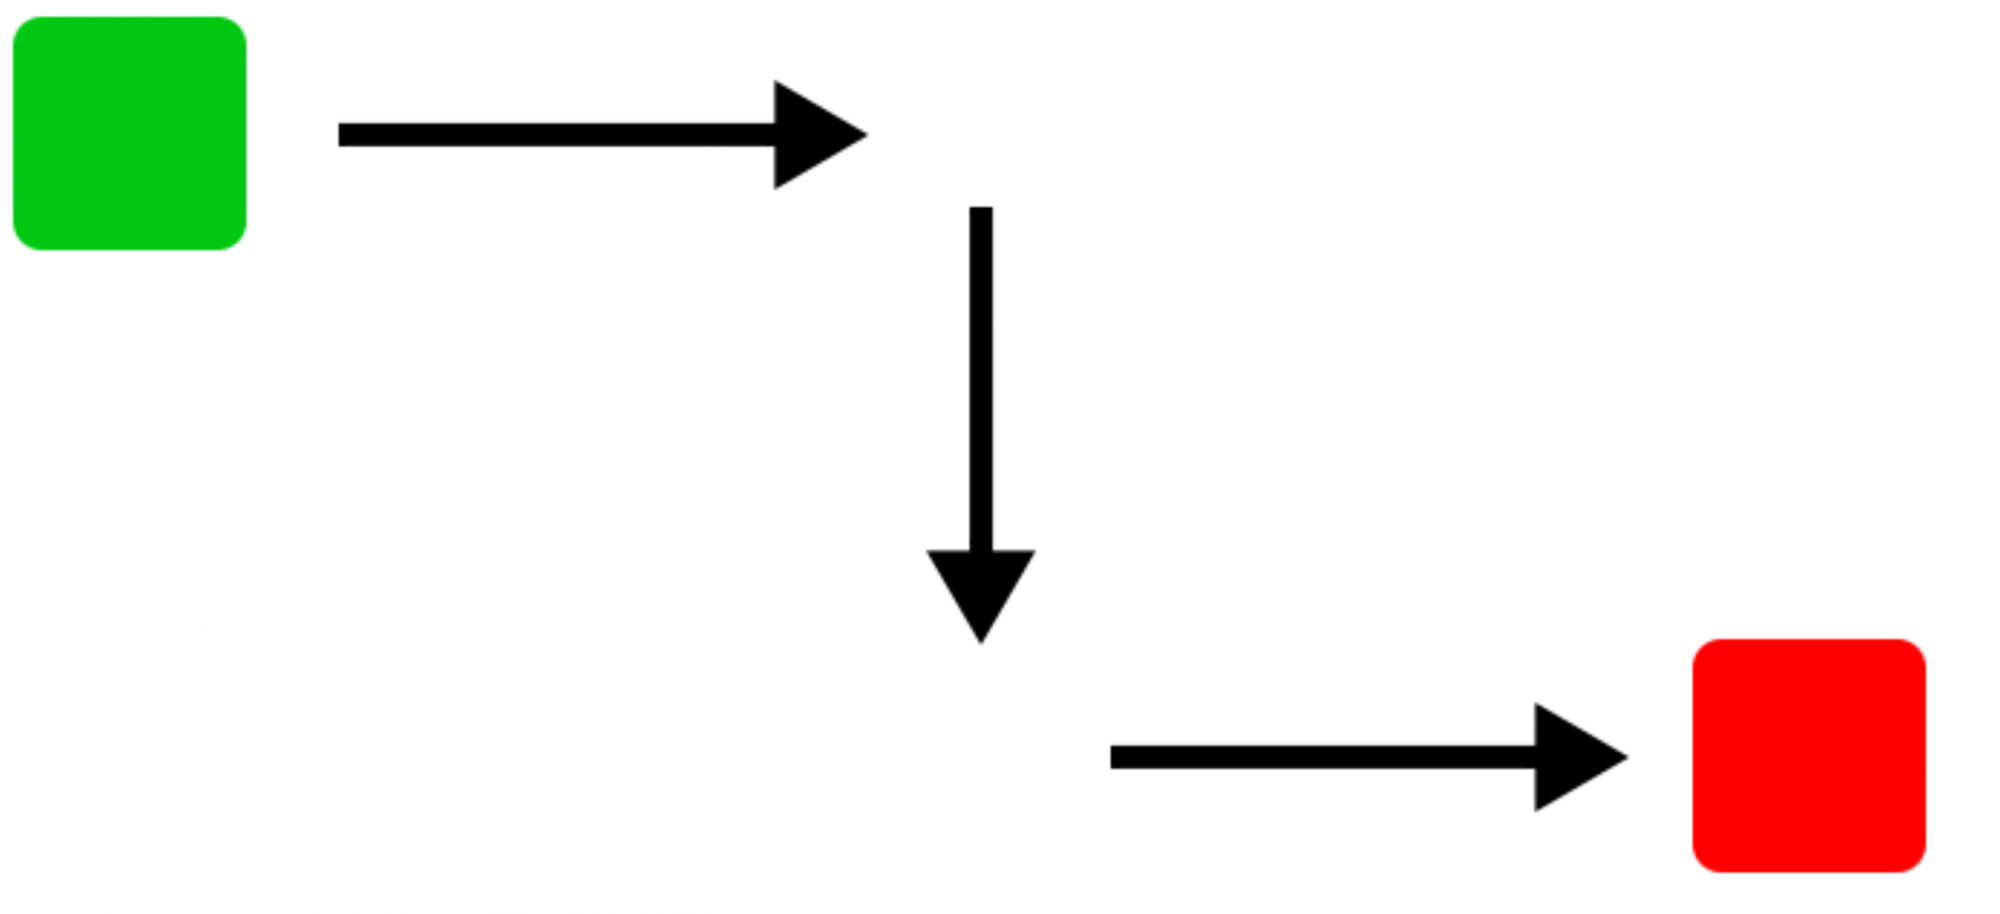
- Demonstrate how a float will move through the route. Physically move a Code Base through the parade route course, and have the students provide the spatial language for how the robot is moving. (i.e. moving forward 200 millimeters (mm), turning right 90 degrees.)
- Once students understand how to navigate the parade route, they will create pseudocode to plan the path of their Code Base through the route. Show students the animation below and walk them through this process. In the animation the Code Base follows directions as they appear onscreen in a list. The directions read Robot drives forward for 21cm, Robot stops, Robot rotates right for 90 degrees, Robot drives forward for 20cm, Robot stops, Robot rotates left for 90 degrees, and finally Robot drives forward for 20cm.
Video file- Show students how to begin writing pseudocode to plan for their movements around the parade route. Remind them that pseudocode is a step-by-step outline written by hand. Encourage students to be exact with their pseudocode to include driving distances and degrees of turns.
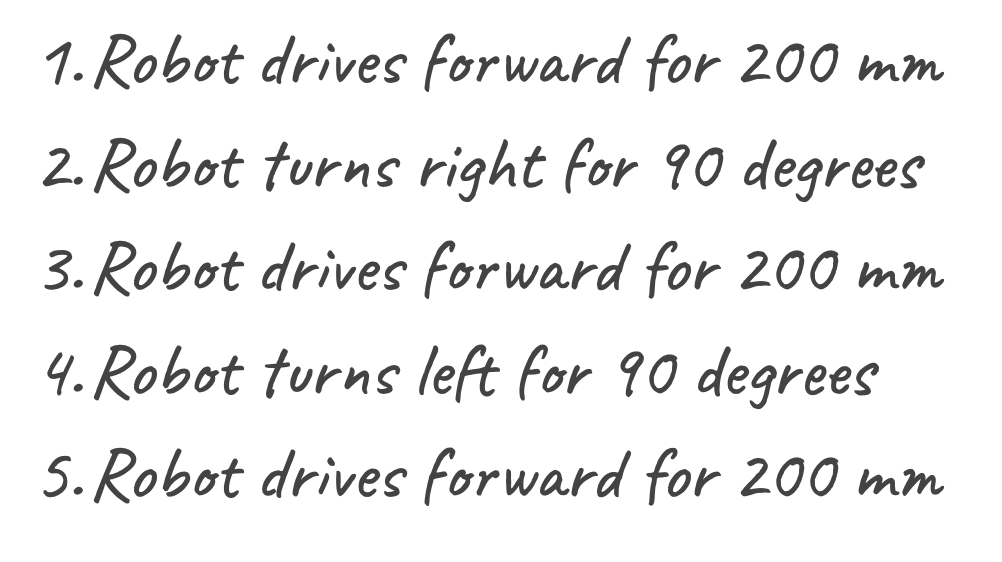
Example of Pseudocode - Have students work with their group to write pseudocode.
Once the students have completed their pseudocode, they will need to transfer their pseudocode into [Comment] blocks in VEXcode GO. Ensure students have completed the following steps. If necessary, model the steps outlined in the attached VEX Library articles:
- Launch VEXcode GO
- Connected their GO Brain to their device
Note: When you first connect your Code Base to your device, the Gyro built into the Brain may calibrate, causing the Code Base to move on its own for a moment. This is an expected behavior, do not touch the Code Base while it's calibrating.
- Named the project, Parade 1
- Save the project
- Configure a Code Base
Model for students how to add [Comment] blocks into the project. Students will need one [Comment] block for each line of pseudocode. So, if they have eight lines of pseudocode, they will need eight [Comment] blocks. Model for students the first three lines of the example.
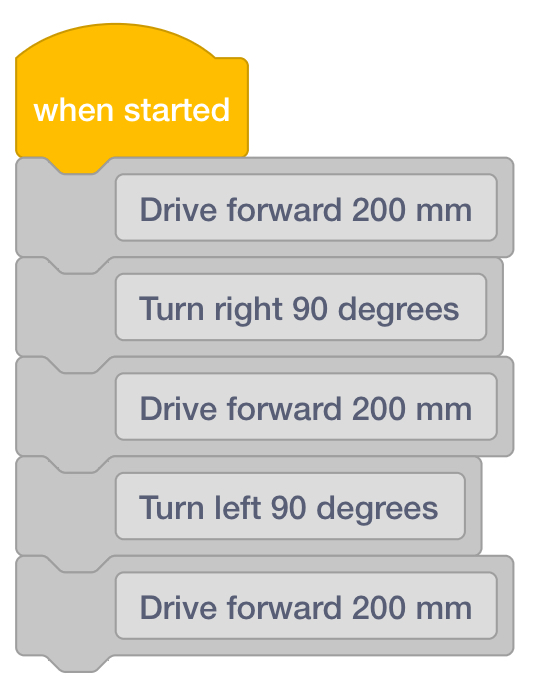
Pseudocode Transferred to [Comment] Blocks Once students have transferred their pseudocode, they will add Drivetrain blocks. Remind students that the [Comment] blocks are used to organize their projects and they will not execute behaviors. They will need to add Drivetrain blocks to make their Code Base move.
- Have students add a [Drive for] block under the first [Comment] block.
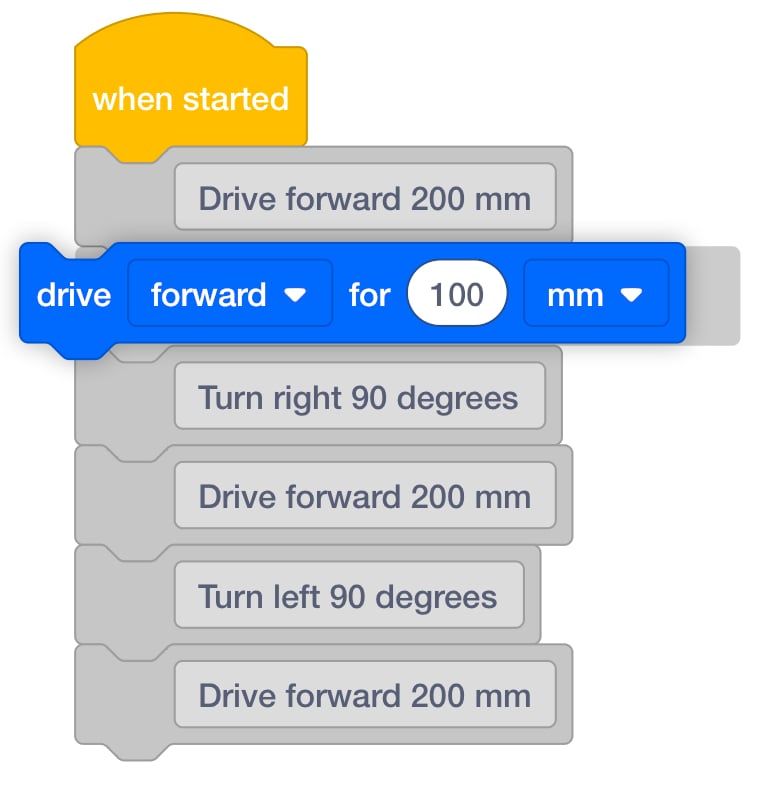
Add [Drive for] Block - Then, have students adjust the parameters to match what is called for in the [Comment] block. In this case, that is 200 millimeters (mm).
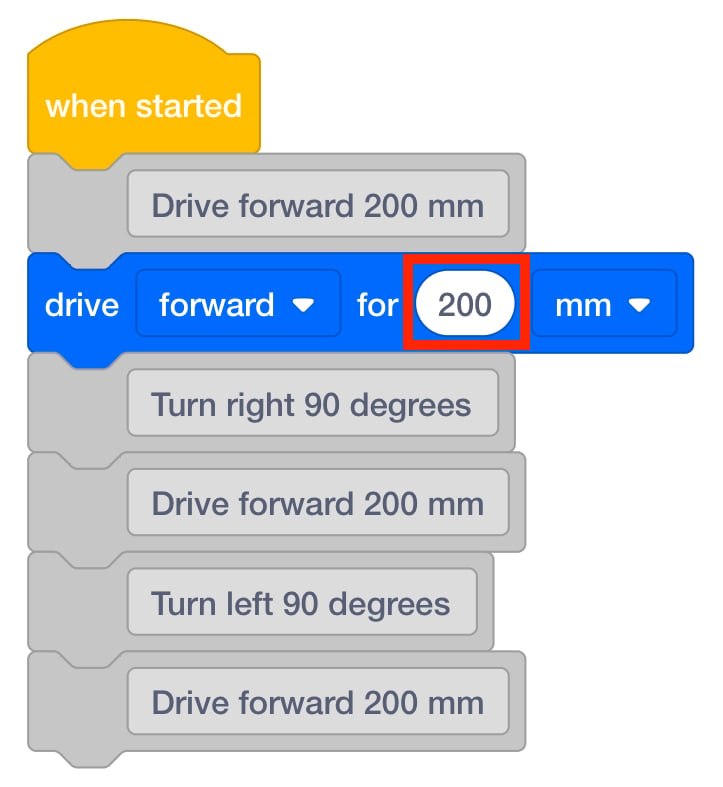
Adjust Parameters - Instruct students to continue adding the matching blocks throughout their pseudocode.
- As students complete their projects, have them start their projects and test their code on the test parade route setup.
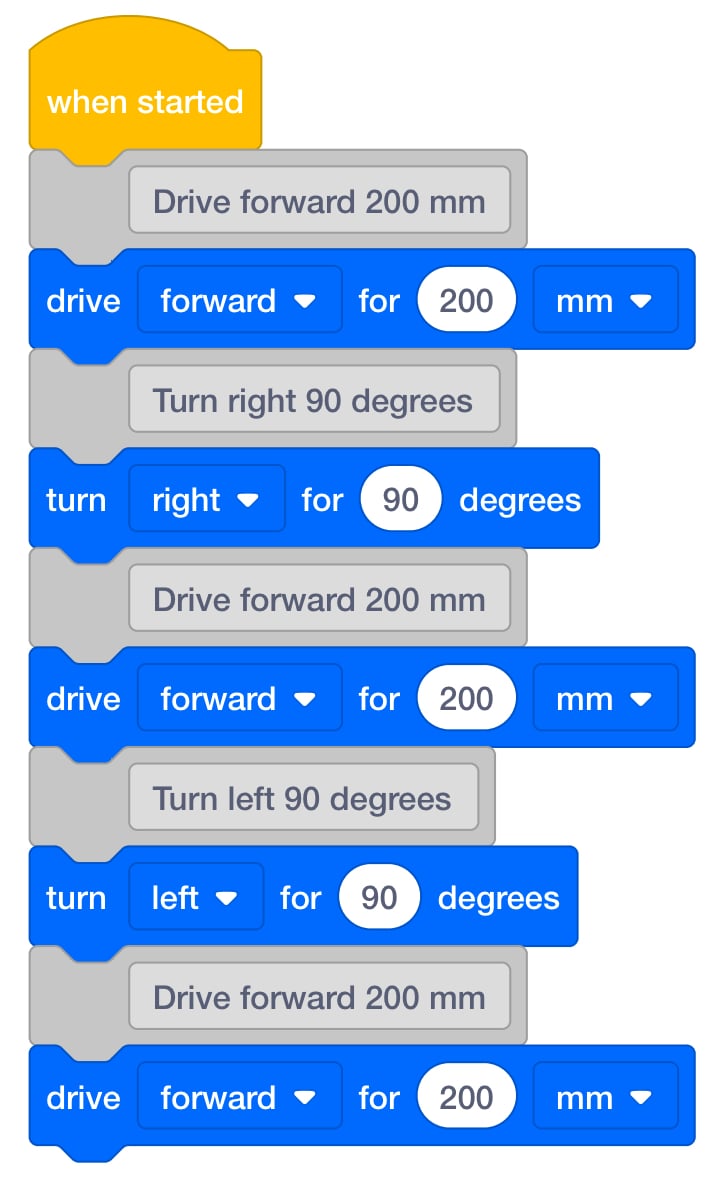
Example Project with Pseudocode - FacilitateFacilitate a discussion with the students by asking the following questions:
- How many turns are in the parade route? What direction are they?
- How far does your Code Base robot have to move for the entire parade route?
- Can you use your hands to explain how the robot needs to move through the course?
- RemindRemind students that each step in their pseudocode is a behavior that their Code Base robot will complete. Behaviors should be as specific as possible.
- AskAsk what types of jobs require coding? Can they ever see themselves working at a job that requires coding? What is fun about coding?