Design, Develop, and Iterate on your Project - Blocks-based
Answer the following questions in your engineering notebook as you design your project.
-
What do you want to program the robot to do? Explain with details.
-
How many conditions will your project need to check in the [If then else] blocks?
Remember that the LeftOrRight project only needed one more condition after a press of the screen was detected.
This project uses four buttons: left upper, left lower, right upper, and right lower. How many conditions will the project need to check after detecting that the screen has been pressed? Explain with details.
Hint: The project can check if the screen is pressed by using an [If then] block. Then you will need to nest three [If then else] blocks within the [If then] block, with some nested inside of each other.
Follow the steps below as you create your project:
![]() Teacher Tips
Teacher Tips
-
Before moving on to the next step of programming, have students review and evaluate their pseudocode by following the steps in the context of pressing the screen's buttons. Click one of the following links (Google Doc/.docx/.pdf) for an example of what the pseudocode might look like for this challenge. You can download a pseudocode rubric by clicking one of the following links (Google Doc/.docx/.pdf).
-
Remind students that they can use the Help feature inside of VEXcode V5 to learn more about any block.
![]() Teacher Toolbox
Teacher Toolbox
-
The objective is to program the Clawbot to open or close the claw when either of two respective buttons is pressed on the brain's screen (i.e., one button for opening the claw and another for closing the claw). Additionally, the project should also have the Clawbot raise or lower the claw arm when either of two other buttons are pressed (one button for raising the arm and another for lowering the arm). This means that the project should create four buttons in total on the brain's screen. Those buttons should be clearly visible to the user to improve the User Experience. So events and drawing blocks will be needed to have the buttons drawn on screen.
-
This question is intended to get the students thinking about the conditions needed inside the [If then else] blocks. The four buttons will require three conditions to be checked after detecting that the screen has been pressed. The screen being pressed is technically the first condition checked but is not included in the tally of three conditions. The three conditions that need to be checked depend on how the programmer wants to organize the project but no matter which, both x- and y-value coordinates need to be checked. However, one axis only needs to be checked once and the other needs to be checked twice.
-
Plan out the conditions that your project needs to check using drawings and pseudocode (Google Doc/.docx/.pdf)
Also, plan for the part of your project that will draw the four buttons on the screen. Decide on their colors.
-
Use the pseudocode you created to develop your project.
-
Test your project often and iterate on it using what you learned from your testing.
-
What could you add to your project to better control the Claw and Arm Motors? Explain with details.
-
Share your final project with your teacher.
![]() Teacher Tips
Teacher Tips
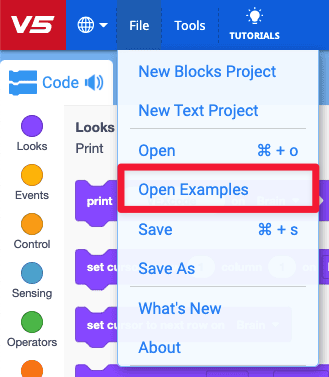
Encourage students who are having trouble programming to review the Creating a Stop Button Example Project and the if then else tutorial in VEXcode V5. They should also use their LeftOrRight projects from Play as guidance. Students have been provided with a list of potentially helpful examples to use as references.
If you're having trouble getting started, review the following in VEXcode V5:
- Creating a Stop Button example project

- If then else tutorial
- Previous versions of your project (LeftOrRight)
- The Help feature to learn more about the blocks