
Lesson 2: Repeating Actions
Now that the VR Robot has drawn a square on the Art Canvas Playground using the Pen, you will learn to use for loops and simplify your project. This Lesson will walk you through the steps to draw a square on the Art Canvas Playground using a for loop.

Learning Outcomes
- Identify how to use a for loop to repeat the commands inside of it for a set number of times.
- Identify that the for loop includes a 'value' variable and a range function to identify the number of repeats.
- Identify that the range function of a for loop identifies how many times the loop should repeat.
- Identify that the range function of a for loop can accept integers as parameters.
- Describe why a for loop would be used in a project.
- Describe the flow of a project that contains a for loop.
Rename the Project
- If the previous Lesson’s project is not already loaded, load the Unit3Lesson1 project.
- Rename the project by selecting the project name box.

- Enter the new project name Unit3Lesson2, and select “Save.”

Repeating Actions
The for loop is used to repeat the commands within it a set number of times. The for loop saves time and effort while creating projects where commands repeat. Rather than taking the time to drag or type additional commands or duplicate existing commands in the workspace, the for loop can be used to save space and time.
This project will use a for loop to drive the VR Robot to draw the four sides of a square by repeating the commands to draw one side, four times.
- Begin by modifying the previous project, copying the project below, or create a new project to match this base project.
def main():
	pen.move(DOWN)
	drivetrain.drive_for(FORWARD, 600, MM)
	drivetrain.turn_for(RIGHT, 90, DEGREES)
	drivetrain.drive_for(FORWARD, 600, MM)
	drivetrain.turn_for(RIGHT, 90, DEGREES)
	drivetrain.drive_for(FORWARD, 600, MM)
	drivetrain.turn_for(RIGHT, 90, DEGREES)
	drivetrain.drive_for(FORWARD, 600, MM)
	drivetrain.turn_for(RIGHT, 90, DEGREES)
-
The repeated commands in this project are the drive_for and the turn_for commands. Remove the bottom six commands in the project, so only one drive_for and one turn_for command is left beneath the move command, and the project looks like this:
def main(): pen.move(DOWN) drivetrain.drive_for(FORWARD, 600, MM) drivetrain.turn_for(RIGHT, 90, DEGREES) -
Drag in a for loop to the end of the main function, so that your project looks like this. Notice that the for loop will automatically populate a wait command inside. Do not remove the wait command, it will ensure the VR Robot behaves correctly.
def main(): pen.move(DOWN) drivetrain.drive_for(FORWARD, 600, MM) drivetrain.turn_for(RIGHT, 90, DEGREES) for repeat_count in range(10): wait(5, MSEC) - In order for the for loop to repeat the Drivetrain commands to draw a side of the square, those commands need to be within the for loop, which is indicated by indentation. Add two lines between the for loop and the wait command to make space for the Drivetrain commands.

- Next, to move the Drivetrain commands inside the for loop, copy and paste the commands underneath the for loop header, highlight the commands and drag the drive_for and turn_for commands between the loop header and the wait command, or copy and paste them from the project below.
def main():
	pen.move(DOWN)

	for value in range(10):
		drivetrain.drive_for(FORWARD, 600, MM)
		drivetrain.turn_for(RIGHT, 90, DEGREES)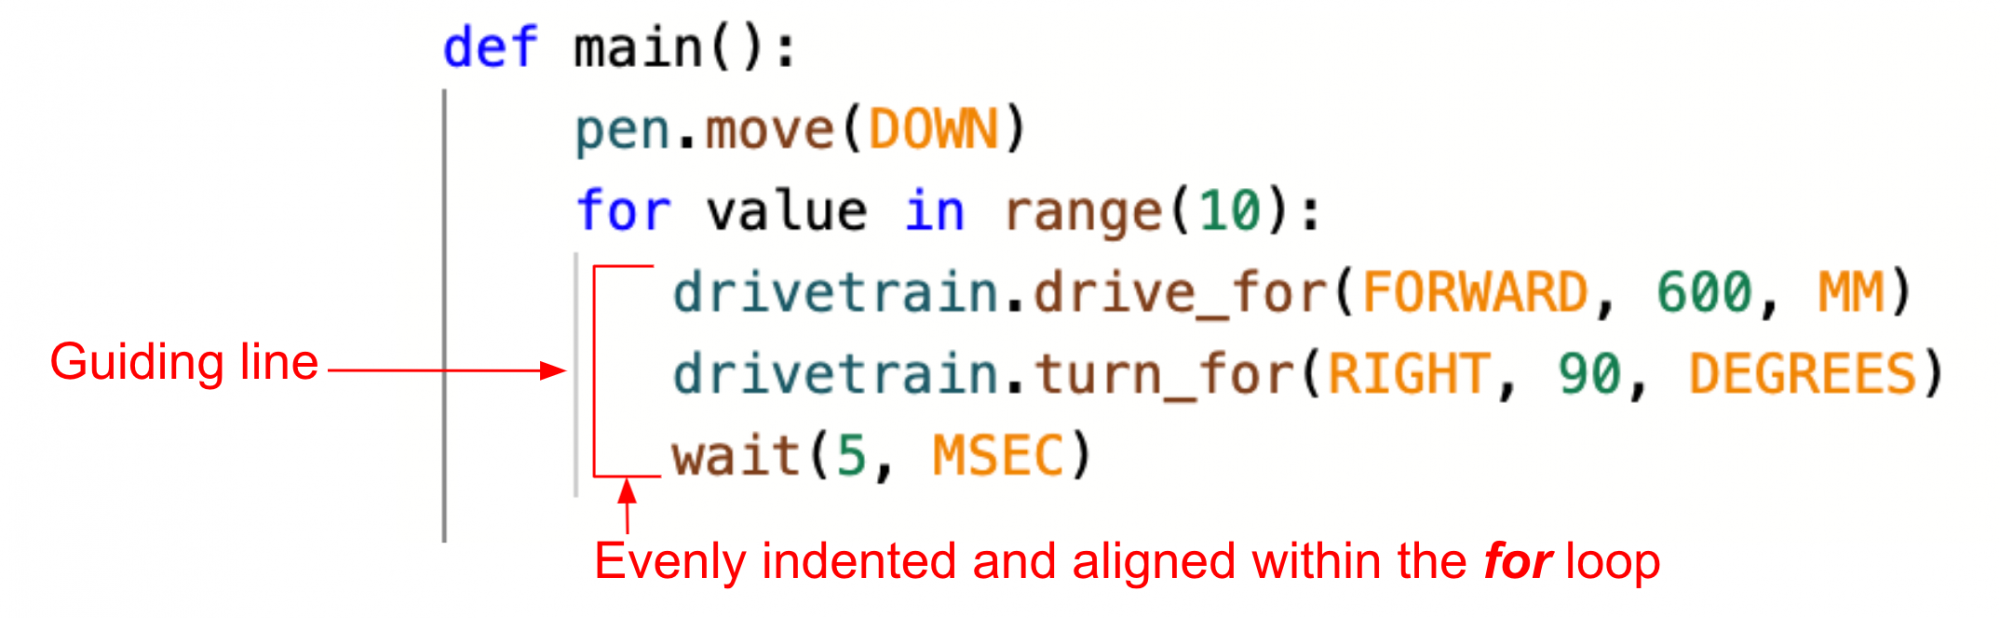
wait(5, MSEC)- Ensure that the commands inside the for loop are properly indented, using the gray line on the left as a guide that indicates what commands are within the for loop
For Your Information
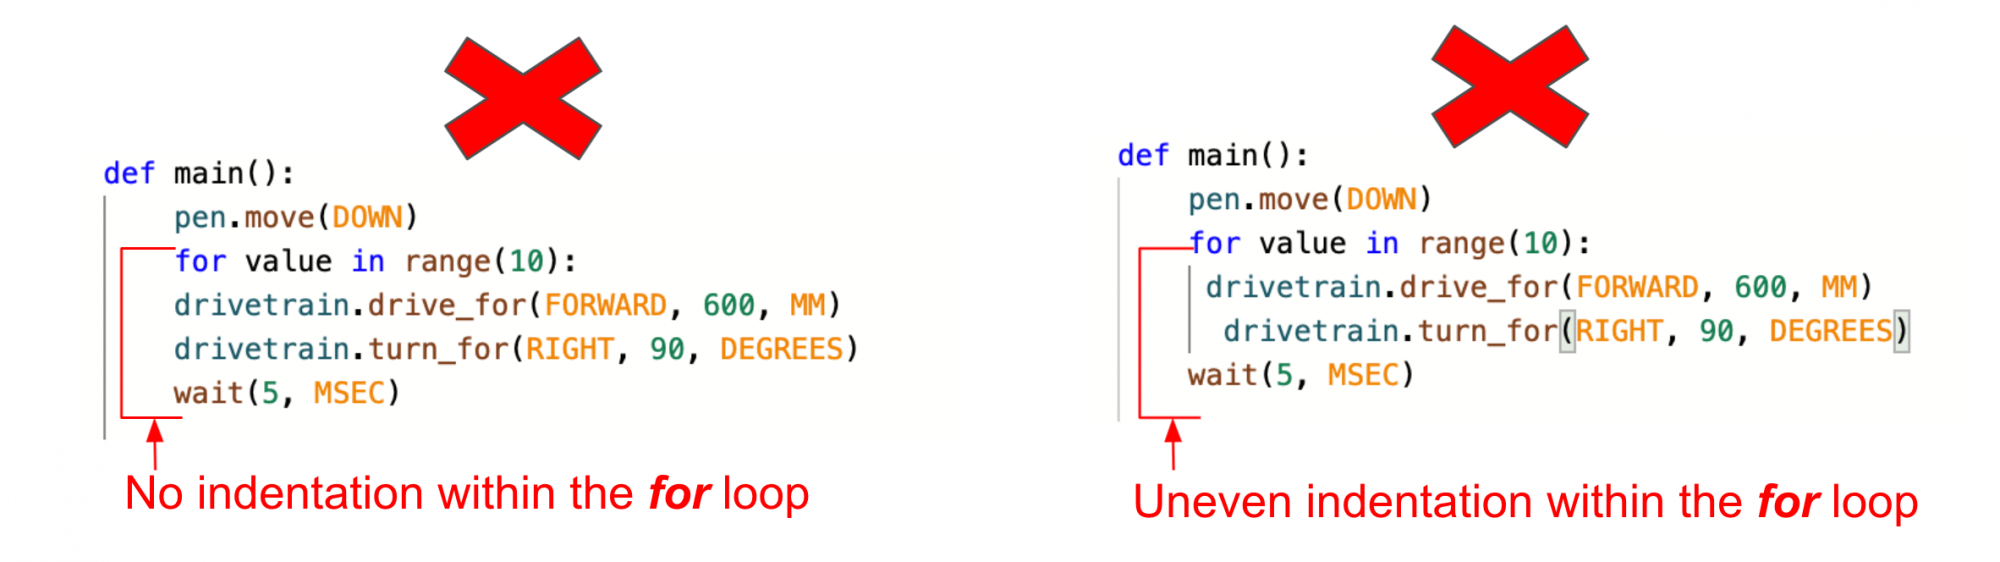
Indentation is very important in Python. The indentation of commands determines how a project is executed. In the case of a for loop, the commands indented within it will be run as part of the loop. You can use the lines to the left of the commands, as visual guides for how commands are being grouped within a loop.
Errors in indentation can affect your project flow, and make your project not run as intended. A lack of indentation, or uneven indentation, as shown here, should be avoided in order to have your code function as intended.
VEXcode VR may prompt you to resolve indentation errors prior to being able to run your project. These errors can be identified in the Print Console, so that you can easily resolve the issue and run your project.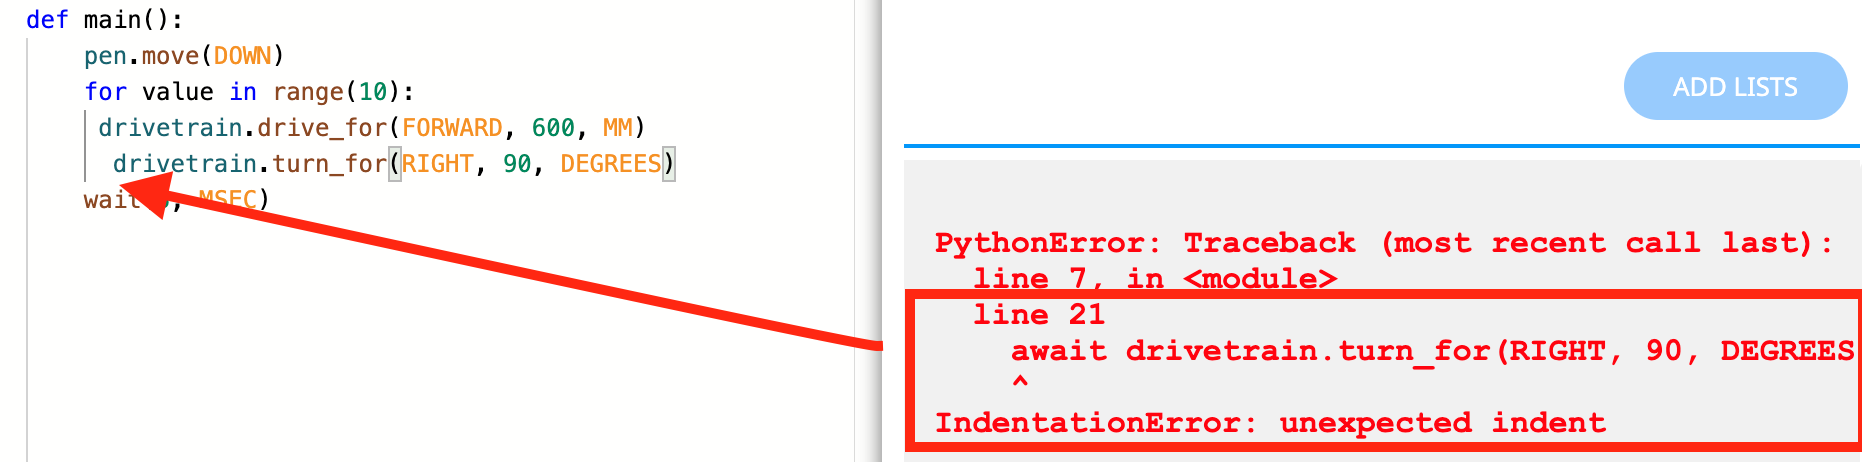
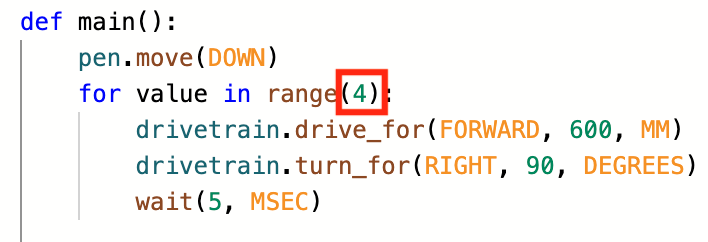
- Now that the Drivetrain commands to draw one side of the square are within the loop, the parameter of the range function can be set. In order to draw a square, four sides must be drawn. To repeat the commands four times, set the parameter of the range function in the for loop header to “4” so a VR Robot draws all four sides of a square.
For Your Information
The range function in the for loop header can accept integers. Decimals (or floats) will not work as a parameter for a for loop. The default parameter for the range function is '10'.

- Select the “Open Playground” button to open the Art Canvas Playground if it is not already open and start the project.

-
Watch the VR Robot drive forward and turn right four times on the Art Canvas Playground to draw a square with the Pen.

Select the Next button to continue with the rest of this Lesson.