
Background
The VEX GO Intro to Building Unit will familiarize you and your students with the VEX GO Kit. Students will work to prepare for a scientific voyage to explore Mars! They will experiment with VEX GO pieces and explore how they function in a STEM "build" to gain spatial reasoning and foundational building skills.
Pieces in the VEX GO Kit
Children are fascinated with building things and taking them apart. VEX GO builds are student-made, creative, physical structures for STEM investigations. Students will be introduced to the pieces of the VEX GO Kit throughout the Intro to Building Unit.
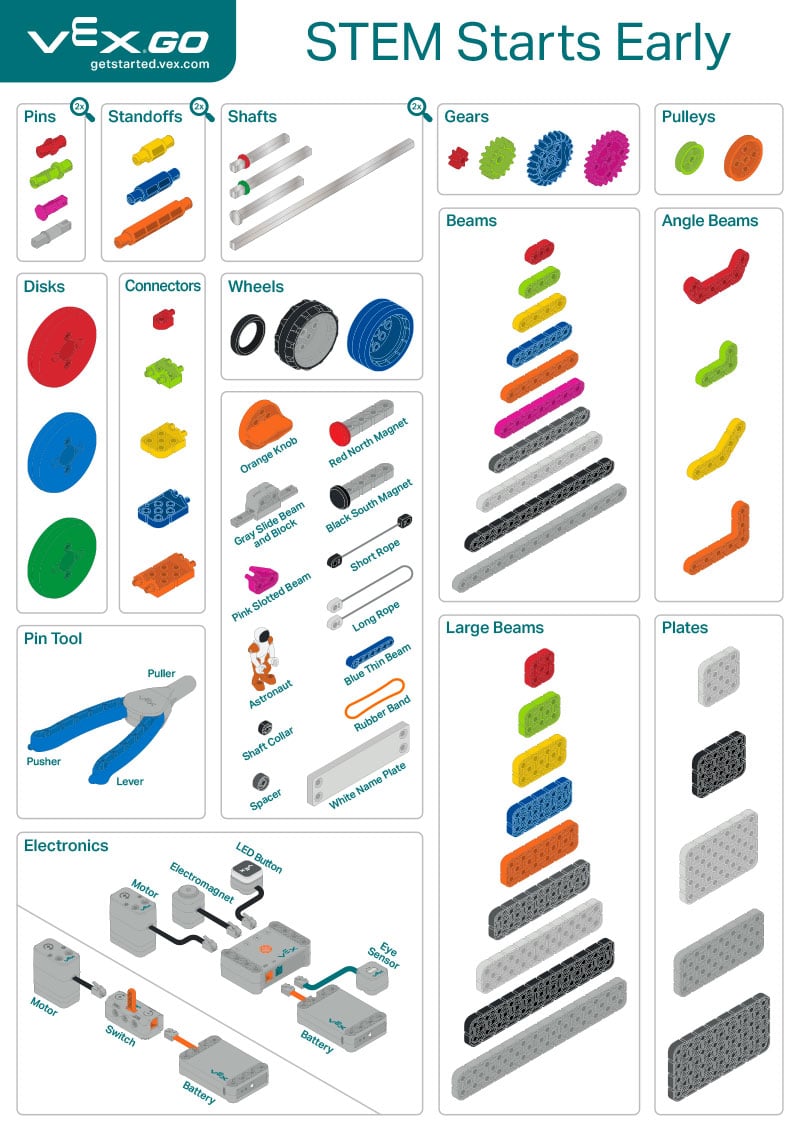
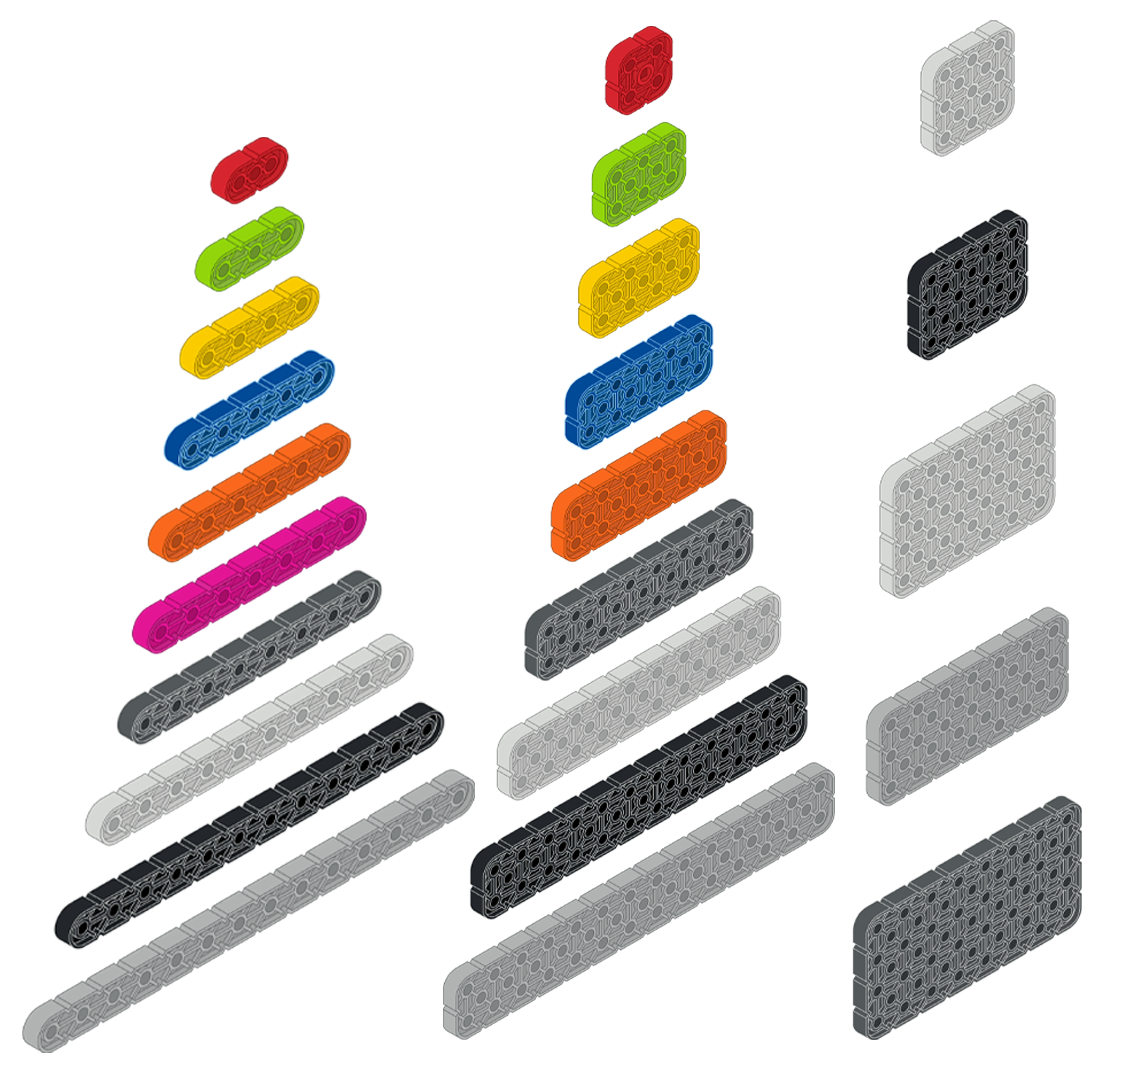
The VEX GO Kit poster lists the major categories of parts: pins, standoffs, shafts, gears, pulleys, disks, connectors, wheels, beams, angle beams, large beams, plates, and electronics. The poster also calls out the Pin Tool and the other pieces included in the kit.
Understanding
Here are the basics to building, which hold true in almost everything VEX related, as well as the real world.
Orientation
Try for yourself, as well as ask your students, to find a piece shown in the poster and orient it in the same manner in your hand as shown. Learning to do this while building ensures that pieces are getting connected in the correct locations, as well as it enhances your spatial reasoning for future builds. Being able to visualize a part in a “glass box” is a huge concept in engineering as it depends on the image you are creating in your mind. VEX Build Instructions are created with these views in mind, so challenge yourself and reorient the part in your hand to see the best optimal view when creating your robot.
Part Categories
VEX Robotics uses four main categories of parts. Starting off in the STEM Lab, guided instructions are used to facilitate your spatial reasoning before you take on free-building, or building without guided instructions for the purpose of fitting your needs. All you need to remember at this point is that any build you can imagine is absolutely possible, as it simply consists of a certain order of these categories. Try rearranging this order in the future, and you are now free-building like the pros!
- Electronics: provide life and intelligence to your robot.
- Structural Components: used to fasten parts together, and contain the overall shape of the build
- Fasteners: used to connect the structural components.
- Motion Components: provide motion and additional capabilities to your robot.
Can you and your students determine what parts belong to each category?
Building
Building with VEX GO is designed with simplicity in mind. Connecting pieces should be thought of as connecting your phone to a charger. You do not have to apply exorbitant amounts of pressure, but you cannot just whimsically rest it on another part. Try this yourself! Use a pin and connect it to any beam. You should be able to feel or hear a distinct click when the part becomes fully inserted. Not fully connecting pieces together may result in structural failure at a later point, something engineers try to avoid.
Pins and Standoffs
Because pins and standoffs connect other pieces together, students may confuse their uses. Standoffs connect two pieces but leave a space in between. Each kind of standoff has a different width gap that will be created by its use.
Pins connect two or more pieces so that they lay flush with one another. The Red Pin can connect with one piece on each side. In contrast, the Green Pin can connect one piece on one side and with two pieces on the other side.
 |
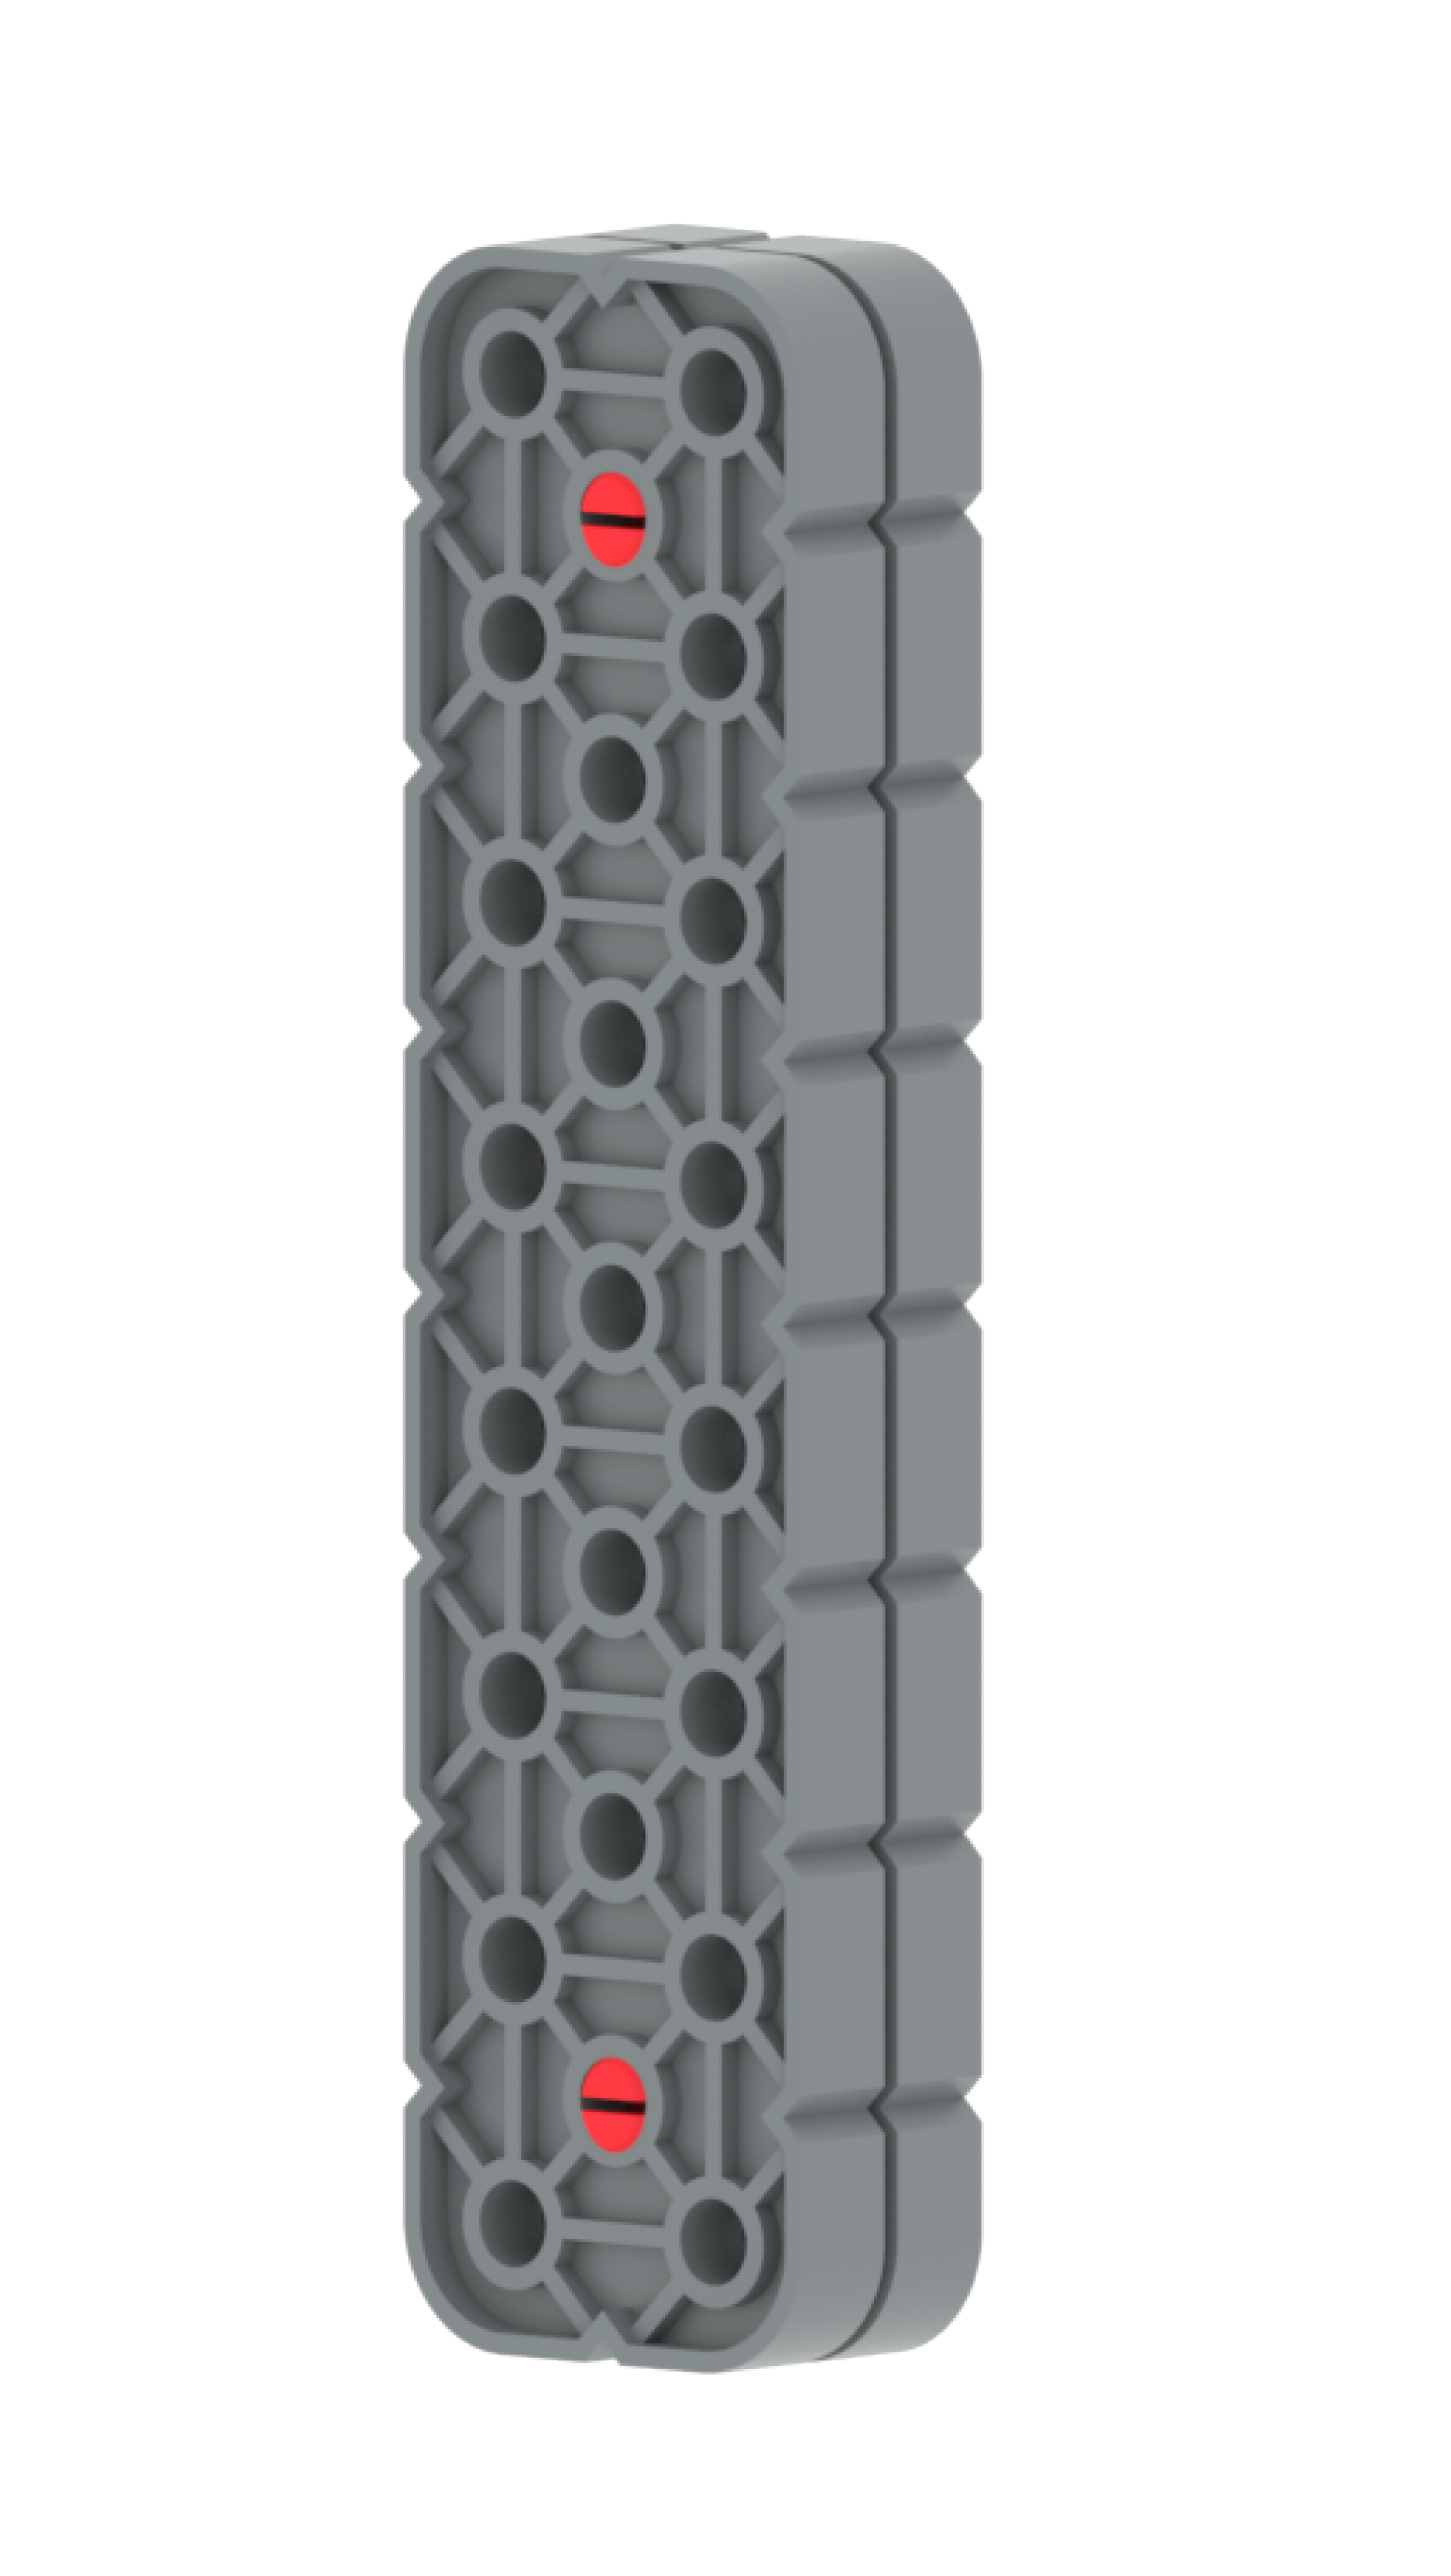
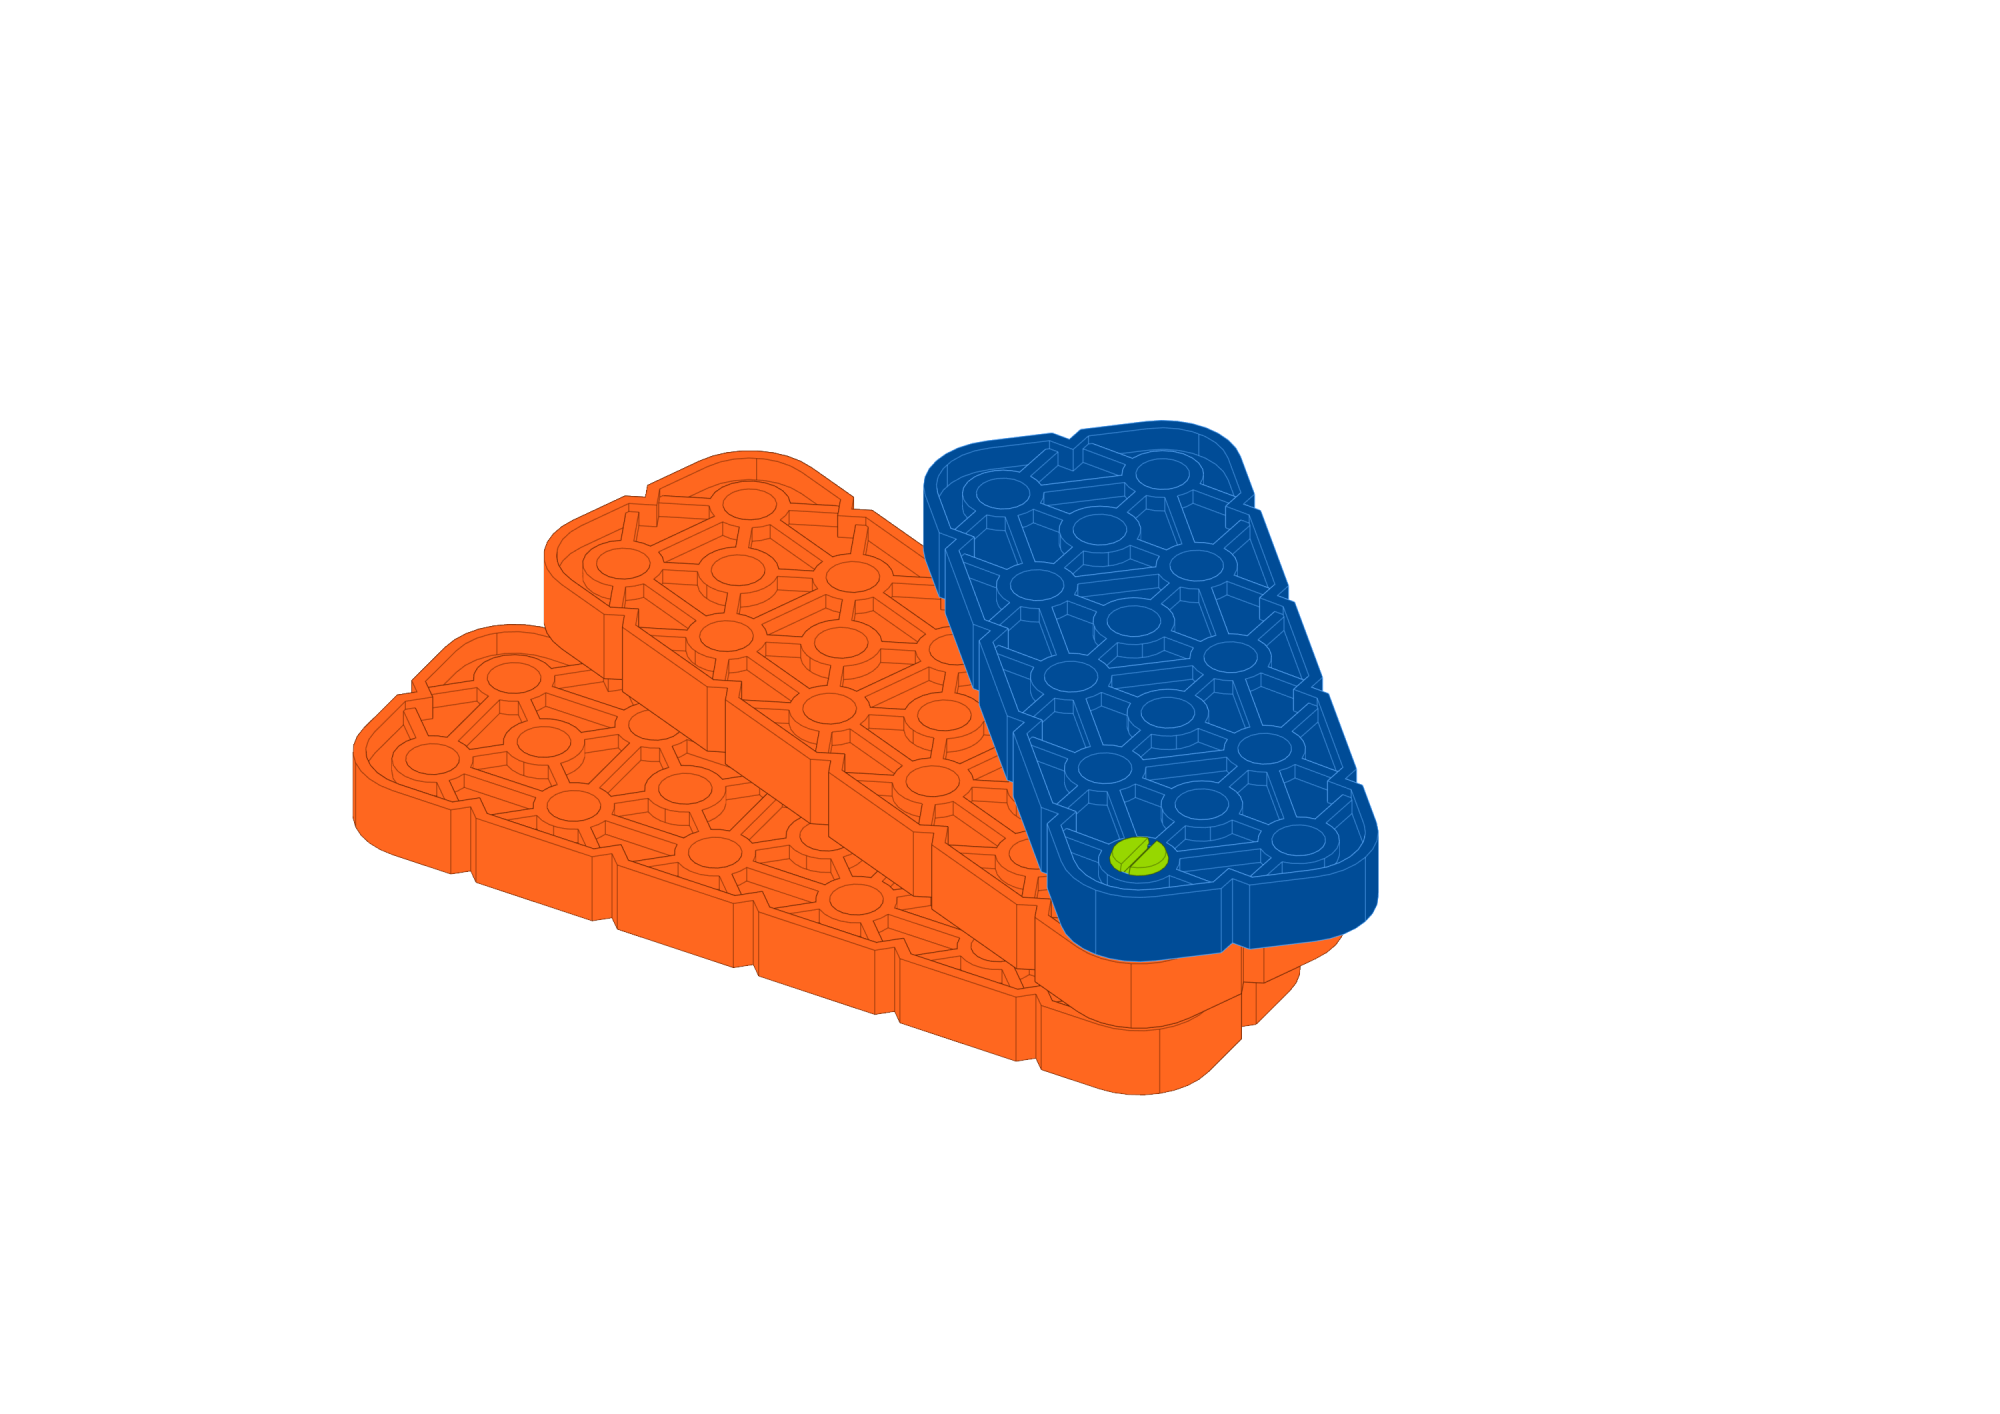
The benefit to using a standoff versus a pin depends entirely on the situation. In the first image to the left, the standoff highlighted offers much greater structural integrity than a pin would in this situation. |
 |
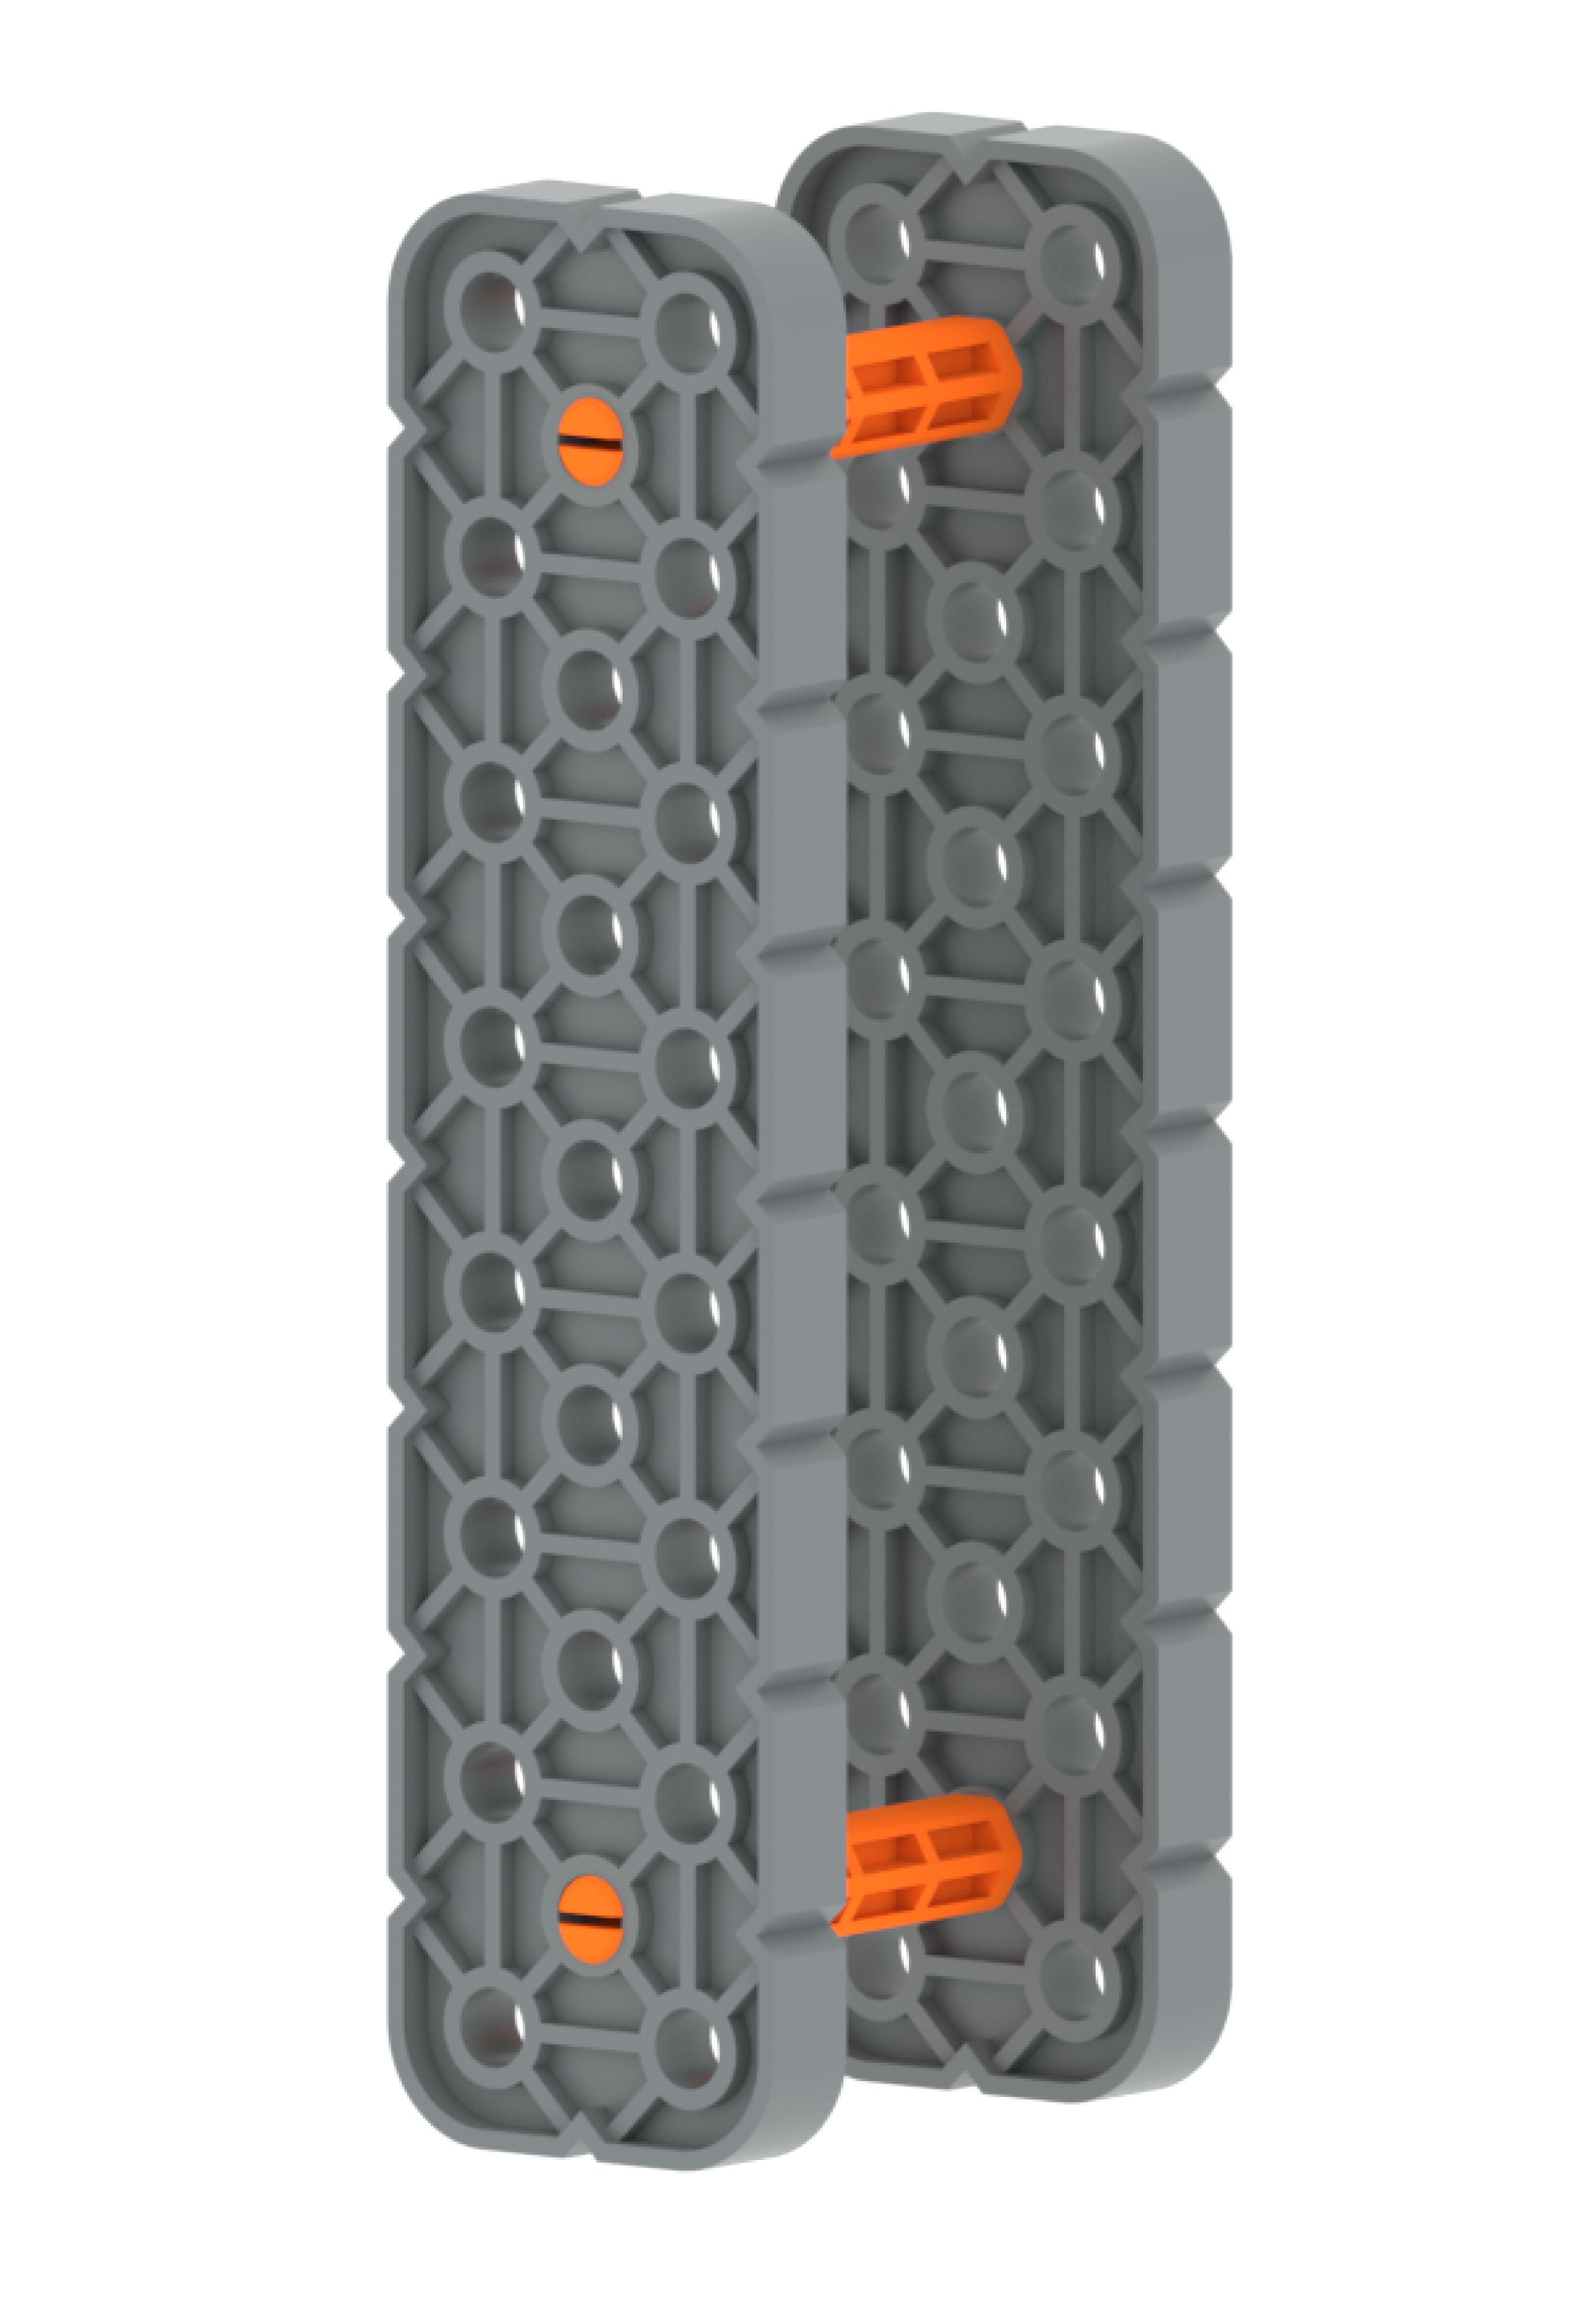
Here is an example in which the red pins would work better than standoffs. Used to secure a beam securely with no space in between to another beam. |
 |
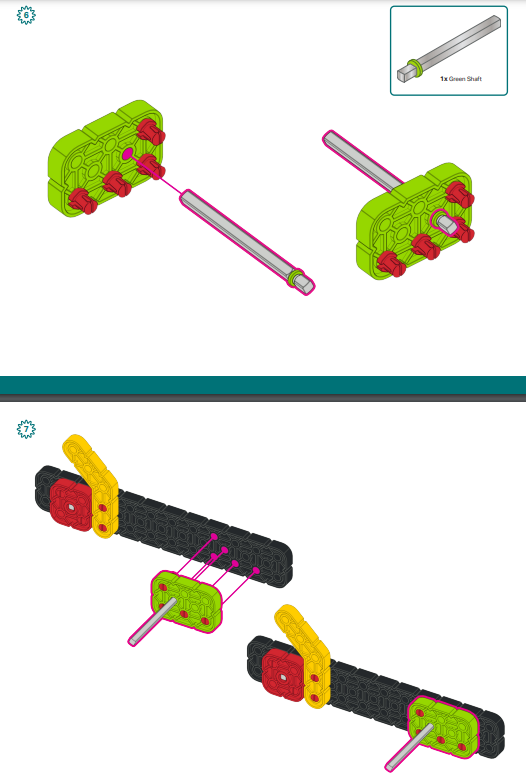
Here is an example of a green pin securing three beams together. This build technique could be utilized when space is not a given. |
Connectors
Pins and standoffs create connections between pieces that are in parallel to each other. However, connectors create connections at a 90 degree, right angle. The Green Connector and Orange Connector allow for the right angle connections as well as parallel connections.
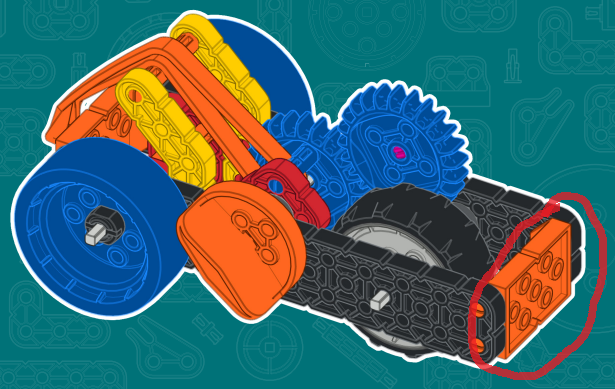 |
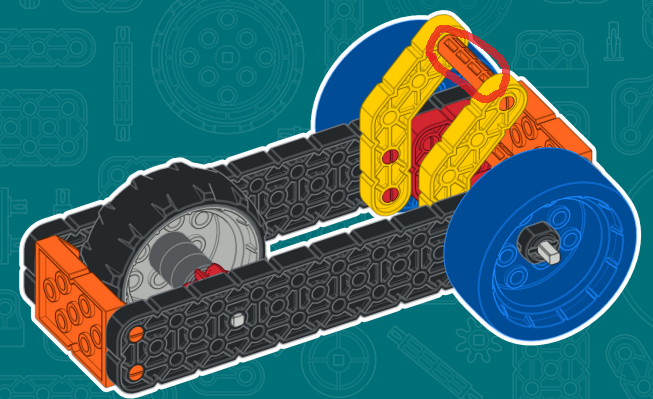
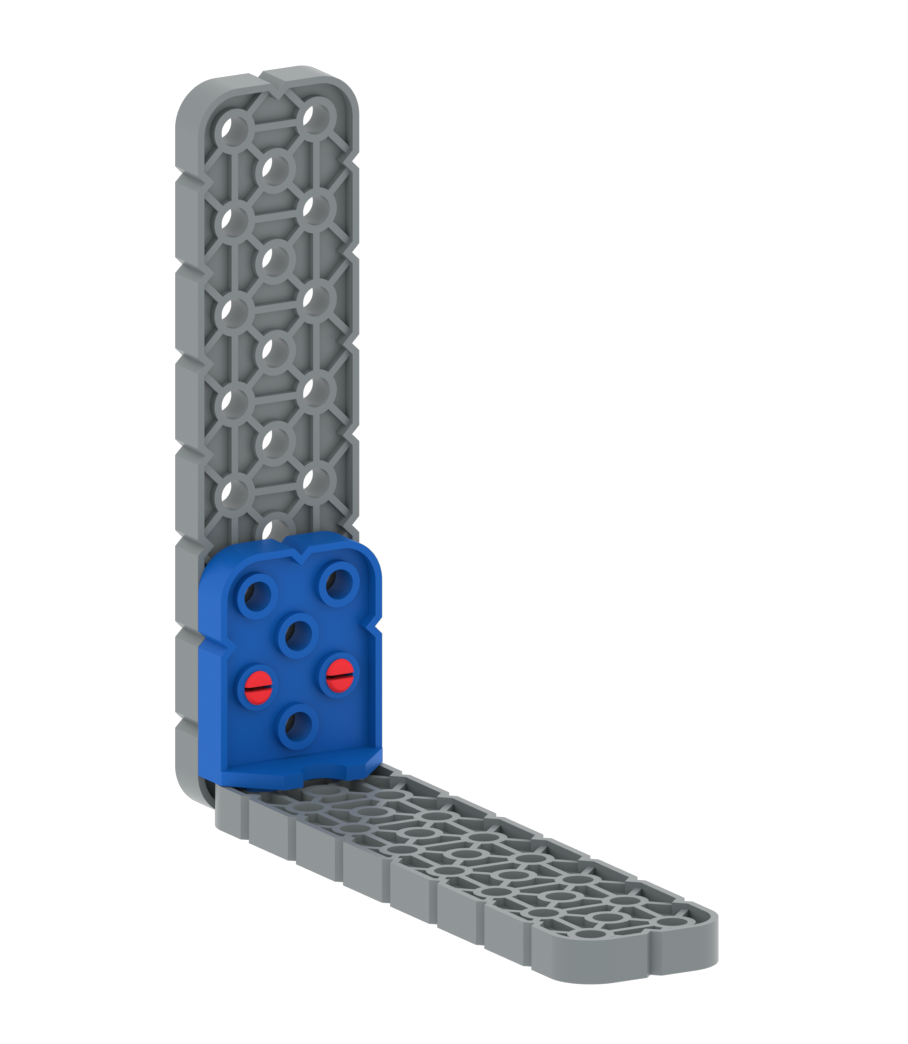
Here is an example of a connector being utilized, circled in red. This connector fastens two beams together. Connectors are extremely important when trying to build in different axes. |
Beams and Plates
Beams and plates are used to create the structural base of most builds. These are flat pieces with varying widths and lengths. The width and length of a beam or plate can be measured by the number of holes on the piece. Students will learn as they begin to build that beams (one hole in width) are not as stable as large beams (2 hole width) or plates (3 or more hole widths).
Gears and Wheels
Students will also learn to use a combination of gears and wheels through the Unit. Gears are used to transfer force from one position to another. This can be done with gears of the same size to transfer the same force or by using gears of varying sizes to create a speed or power advantage as the force is transferred. The Pink Pin can be used to connect gears to beams or plates while still allowing the gear to freely spin.
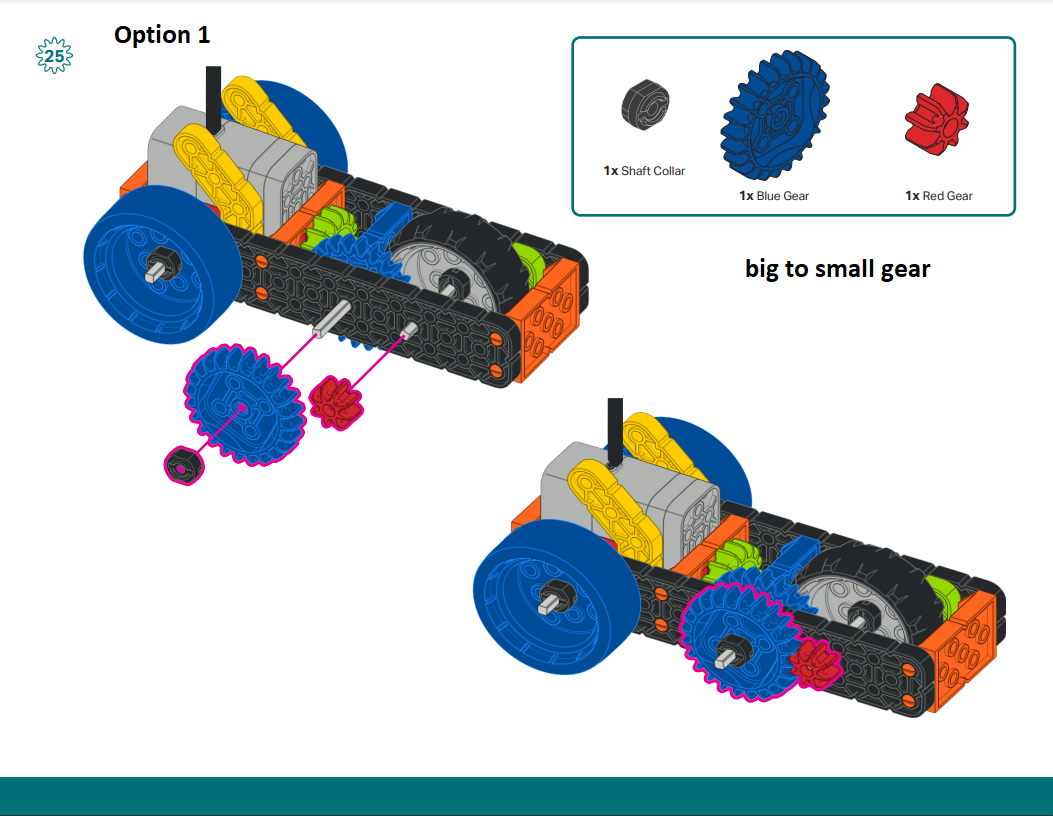
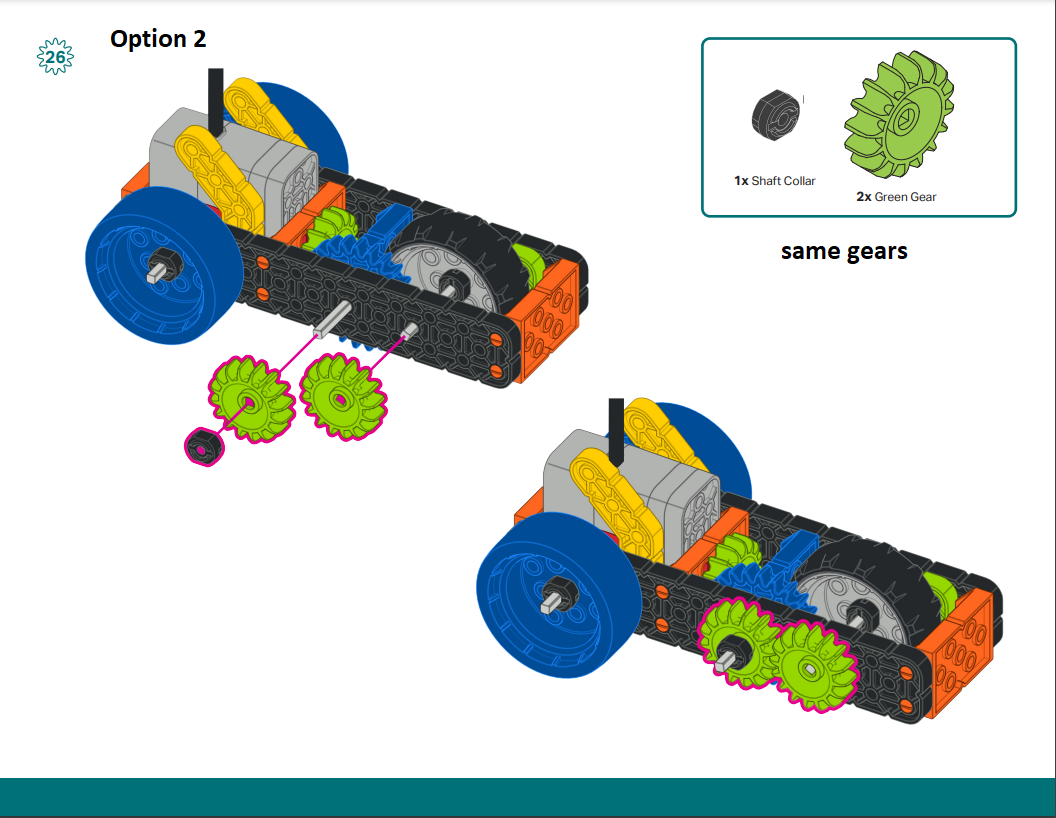
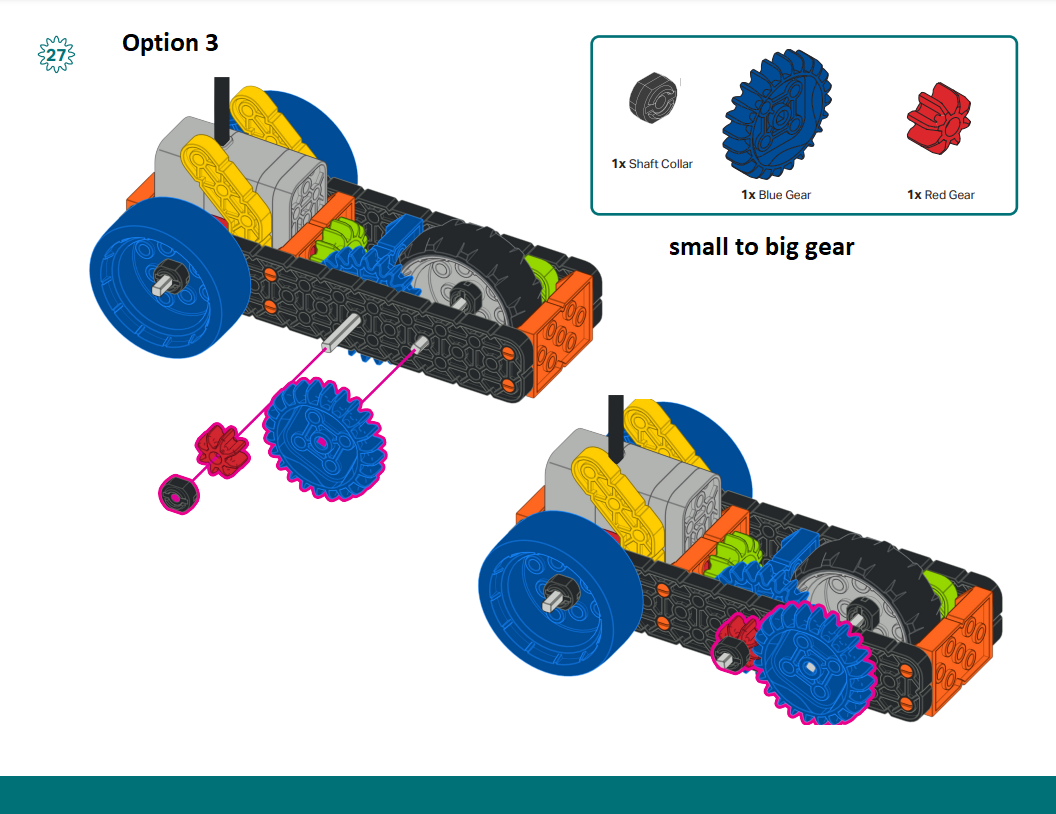
Three examples of gear usage can be seen in building the motorized super car. Students will learn in the accompanying STEM Lab the difference that gear sizes can make.
Pin Tool
While students become familiar with the VEX GO Kit, they will inevitably need help separating pieces. The Pin Tool helps students to separate pieces through three different functions: the Puller, the Lever, and the Pusher. The Puller is best suited for removing pins that have one end free.
To use the Puller, insert the pin into the slot at the nose, squeeze the Pin Tool, and pull back. The pin should be easily removed from the hole. In the case that a pin is not partially exposed, the Pusher can be used to push part of the pin free. The Lever is most appropriate when attempting to disconnect two beams or plates that are flush with one another. The Lever can be inserted between the two pieces and used to separate the connected pieces. Watch the video below to see an example of each use of the pin tool.
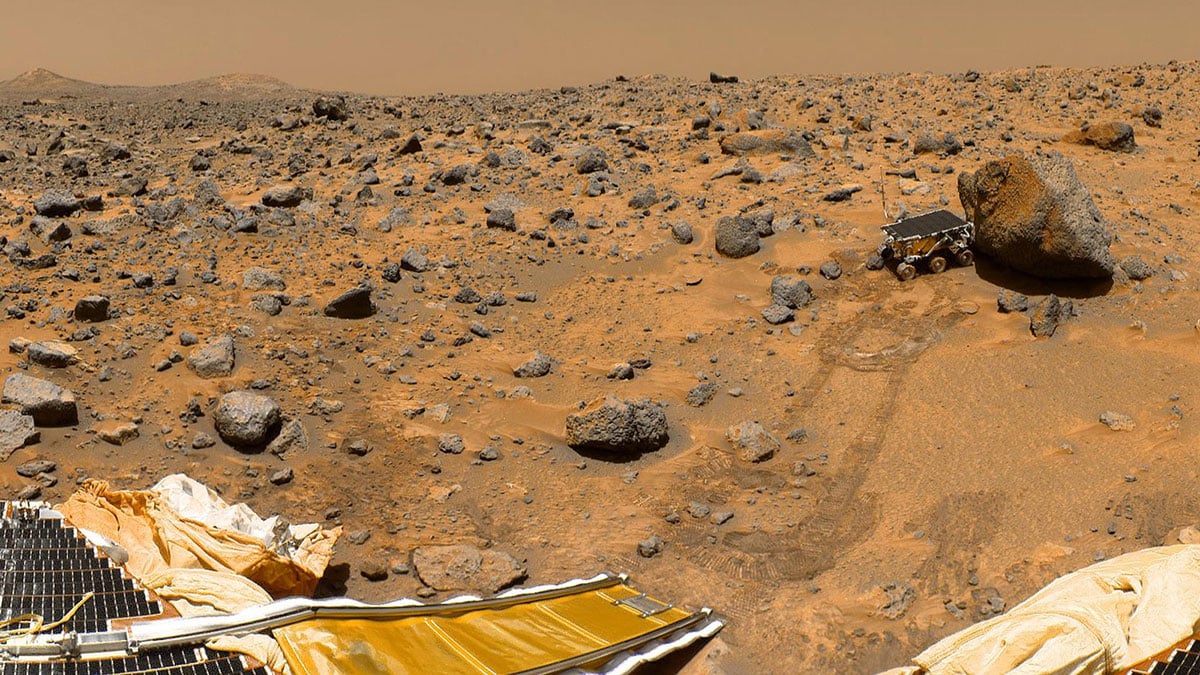
Mission to Mars
How do scientists and engineers gather information from places in the solar system that are far away and difficult to reach?
It would be unthinkable to send humans to the Moon or Mars without the technology needed to travel, investigate, and maintain life in outer space. Space and the surface of Mars are harsh environments for humans. Engineers have to design and build the tools to protect Astronauts and facilitate scientific inquiry in the harsh atmosphere of Mars.
Fun facts about Mars to consider when designing for the Intro to Building Unit:
- The surface of Mars is very cold and dry; in most places, it is too cold or dry to permit the growth and reproduction of Earth organisms.
- The average temperatures on Mars are well below -60°C (-83°F).
- There are high levels of solar radiation, which can damage body tissues.
- There is little or no atmosphere.
- There are no sources of food or water.
Current Initiatives
Current Mars initiatives include NASA’s Mars 2020 and NASA’s Moon to Mars program. NASA’s Mars 2020 Mission is currently planning a long-term project for robotic exploration of the surface and atmosphere of Mars. Mars 2020 rover mission addresses high-priority science goals for Mars exploration, including the potential for life on Mars.The mission also provides opportunities to gather knowledge and demonstrate technologies that address the challenges of future human expeditions to Mars. NASA’s Moon to Mars program explores human expansion through the solar system through commercial and international partners.
Exciting new breakthroughs in space initiatives happen every day. Teachers and students can keep up to date on NASA’s Teachable Moments blog. Teachable Moments is an interactive resource that includes Astronaut interviews, current videos and photos, and STEM challenges that are engaging for adults and children alike.
Stability & Balance
Stability
In Lab 3, students will be asked to build a launch pad that is stable and balanced. A stable structure is one that will not topple, slide, or collapse when acted upon by outside forces such as pushes or pulls. Stability is the resistance of a structure to undesirable movement like sliding, tipping or collapsing. The shape and materials used in a build determine its resistance to these forces, and influence its stability. Typically, structures with a wide base are more stable.
Balance
Engineers are interested in how objects balance so that they can build safe structures (auditoriums, Ferris wheels, and launch pads). A balanced structure has a strong center of gravity, and does not move easily. It is designed and built in a way to balance the forces acting upon it, such as gravity. Balance is especially important in cases where a structure may be impacted by heavy loads or unpredictable natural phenomena, such as space travel.
The Engineering Design Process
Students will use the the Engineering Design Process (EDP) to design and build a spaceship and a Mars base. The EDP is a series of steps that engineers follow to come up with solutions to problems. Often, the solution involves designing a product that meets certain criteria or accomplishes a certain task.
Next Generation Science Standards breaks down the EDP into the following steps: DEFINE → DEVELOP SOLUTIONS → OPTIMIZE.
- Defining engineering problems involves stating the problem to be solved as clearly as possible in terms of criteria for success, and constraints or limits.
- Designing solutions to engineering problems begins with generating a number of different possible solutions, then evaluating potential solutions to see which ones best meet the criteria and constraints of the problem.
- Optimizing the design solution involves a process in which solutions are systematically tested and refined and the final design is improved by trading off less important features for those that are more important.
The EDP is cyclic or iterative in nature. It is a process of making, testing and analyzing, and refining a product or process. Based on the results of testing, new iterations are created, and continue to be modified until the design team is satisfied with the results.
In this unit, students will use the EDP to dream up, plan, and build a Mars base. After an initial build, groups will test and improve their base design to meet design criteria and constraints.