Teacher Portal

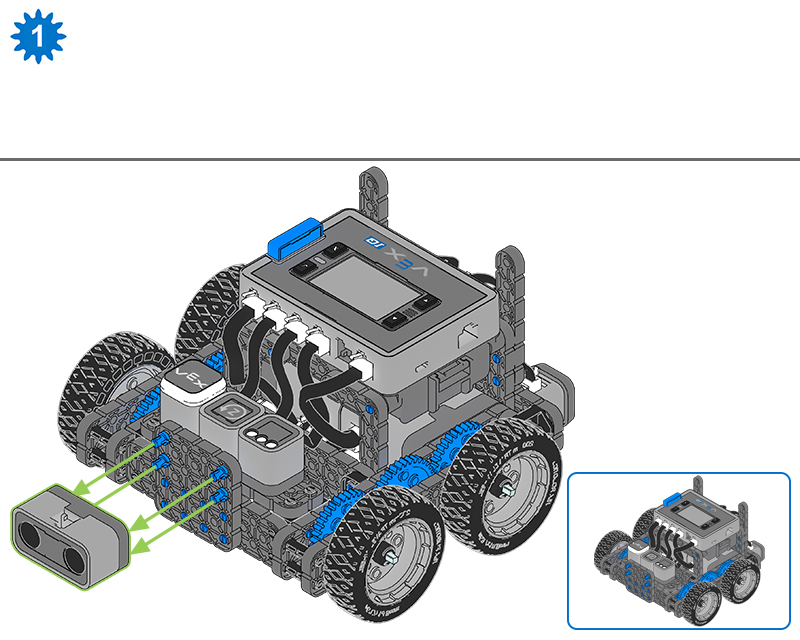
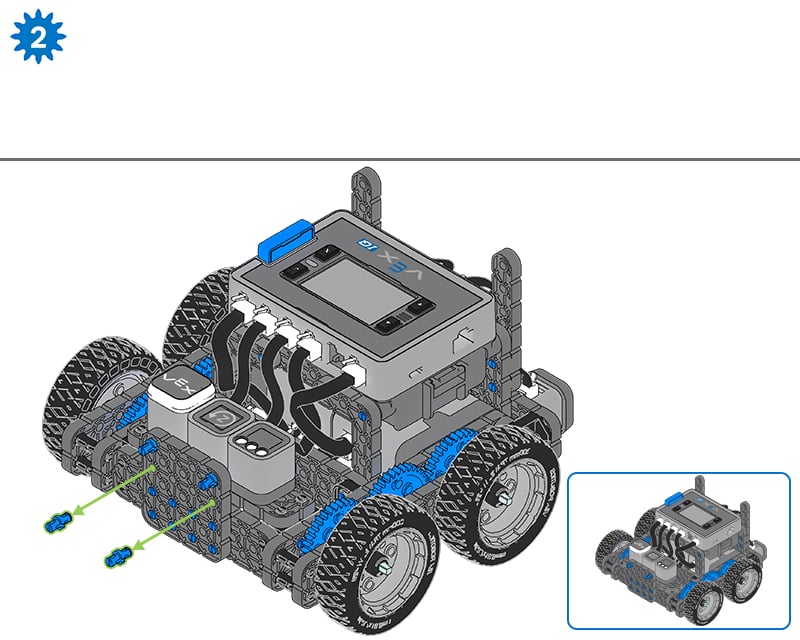
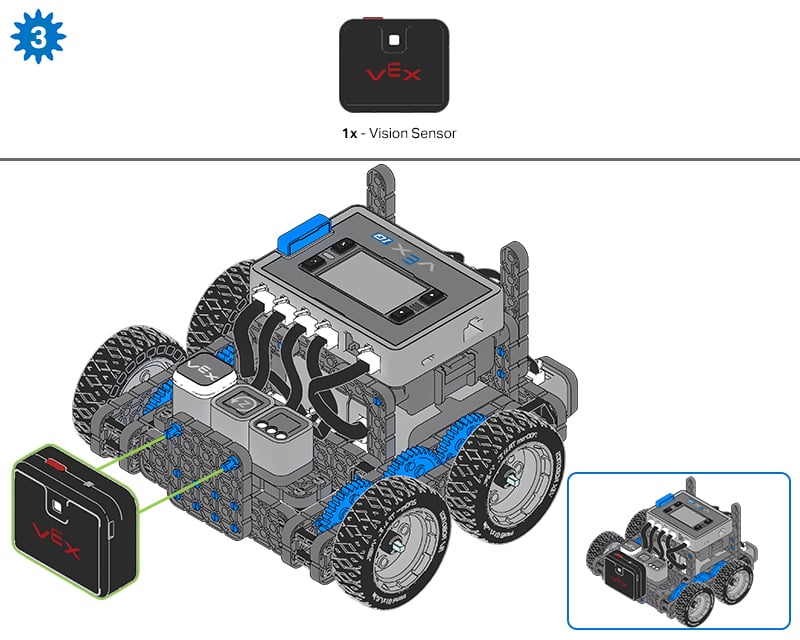
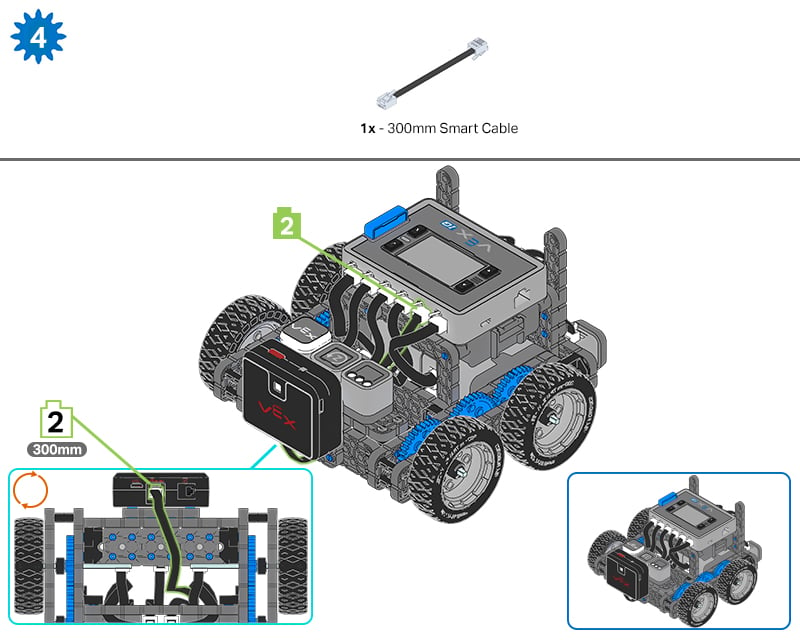
Adding the Vision Sensor

After the Autopilot has been assembled, use the building instructions below to add the Vision Sensor.

Step 1 remove the Distance sensor from the front of the robot. In a small image in the bottom right corner, the completed step shows the front of the robot with a plate with 4 pins sticking out without a sensor on it.

Step 2 removing the bottom two pins from the front plate. The completed step shows the front of the robot with the plate with only 2 pins sticking out in the top corners.

Step 3 shows a Vision Sensor at the top, and indicates to connect the Vision Sensor to the two pins on the front of the robot. The completed step shows the robot with a vision sensor attached to the front.

Step 4 shows a 300mm smart cable at the top. The instructions indicate the smart cable should be connected to port 2 on the robot brain and that the robot will need to be turned over to plug the smart cable into the Vision sensor.