Arm Mechanical Limits
![]() Teacher Toolbox
-
Introduce the Play Section
Teacher Toolbox
-
Introduce the Play Section
In this Play section, students will be introduced to different concepts that will prepare them for designing their own Workcell for the Capstone Project Competition.
What the Teacher Will Do:
- Bring students together for whole class instruction.
- Introduce the Lab to the students.
- In this Play section, students will learn about Workcell design by analyzing why the build in Lab 11 is laid out in a specific way. By going through and understanding the design of the Lab, they will learn about concepts such as the Workcell arm’s mechanical limits, how and why conveyors are placed in certain locations, and the importance of pick up and drop off locations.
- Throughout the Play section, students will also explore how moving the location of the arm affects its X, Y, and Z-coordinates, how to mechanically move the location of the arm on the Workcell, and the option to create custom V5 Smart Cables.
- Tell students that these concepts can be applied when they design their own Workcell in the Rethink section.
- Explain to students that there is no prescribed build for this Lab. There is an example Lab 13 build pictured in this Lab, but there are no associated build instructions. Students can design and build any type of Workcell that they want for this Lab, as long as it adheres to the rules for the competition.
- Tell students that they will begin by analyzing the build in Lab 11 to explore the arm's mechanical limits.
![]() Teacher Toolbox
-
Facilitating the Arm Mechanical Limits page
Teacher Toolbox
-
Facilitating the Arm Mechanical Limits page
What the Teacher Will Do:
- Keep students together for a whole-class discussion about the Play section.
- Instruct students that they will be working together in their groups to read the information on this page.
- Groups should be discussing the contents of this page with each other, but each student should be individually reading in order to contribute.
- Ensure each student has their device to view this page in the Lab.
- Break students off to work within their groups. Walk around the room as students are reading to answer any questions if they arise.
- Tell students to check in with you at the end of the page.
- Once all groups have checked in, bring the class back together and lead a whole-class discussion to wrap up the page before moving on. Guidance for the discussion is provided in a Teacher Toolbox at the bottom of this page.
For more information about how to facilitate this Play page, go to the V5 Workcell Educator Certification.
| Quantity | Materials Needed |
|---|---|
| 1 per group |
V5 Workcell |
| 1 per group | |
| 1 per group |
Engineering Notebook |
| 1 per group |
Device to run VEXcode V5 |
| 1 per group |
Micro-USB cable |
| 1 per group |
In this section, you will be introduced to different concepts that will prepare you to design your own Workcell for the Capstone Project Competition.
You will learn about Workcell design by analyzing why the build in Lab 11 is laid out in a specific way. By going through and understanding the design of the Lab, you will learn about concepts such as the Workcell arm’s mechanical limits, how and why conveyors are placed in certain locations, and the importance of pick up and drop off locations. These concepts can be applied when you design your own Workcell in the Rethink section.
Throughout the Play section, you will also explore how moving the location of the arm affects its X, Y, and Z-coordinates, how to mechanically move the location of the arm on the Workcell, and the option to create custom V5 Smart Cables.
First, you will explore the arm’s mechanical limits and why this information is important when considering how to lay out your Workcell. A mechanical limit is the point at which the linkages in a system should move no further to avoid strain or potential damage. Understanding the mechanical limits of the arm will help you answer questions about the flow of disks.
- Where will the disks be picked up?
- Can the arm reach the disks on the conveyor?
- Where will the disks be dropped off?
- Can the arm physically reach the drop off location(s)?
Arm Mechanical Limits
The V5 Workcell’s arm has mechanical limits. This means that the arm itself can only extend so far. Overextending the arm could result in damage.
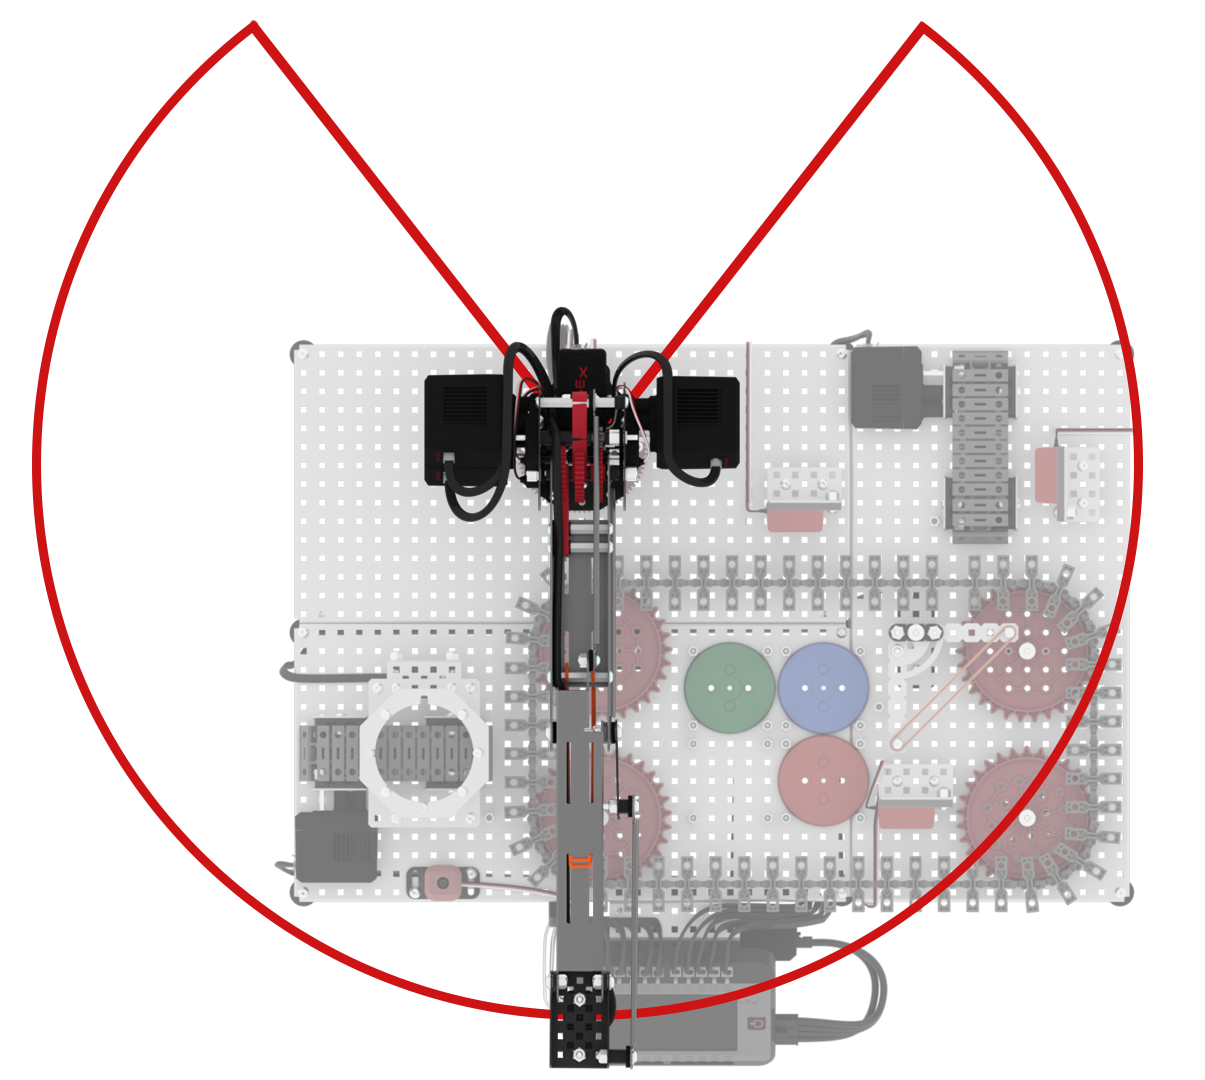
The image on the left shows the maximum range of the arm, fully extended without any end effectors (such as the marker attachment or the Electromagnet). Without any end effectors on the arm, the max reach is 13.87 inches.
Adding certain end effectors like the marker attachment or Electromagnet will decrease the max reach, as adding an end effector will adjust the z-axis of the arm, causing it to not extend as far.
For more information about the Workcell’s dimensions, view this article.

Notice that there is a dead zone behind the arm. Due to the potentiometer used with Joint 1 (connected under the turntable), there is a dead zone behind the arm of 75 degrees. This means that the arm can only rotate so far in the left and right directions.
This is important to keep in mind when determining where to place the arm on the Workcell. For example, I would not place a pick up location for disks directly behind the arm, because it will not be able to turn 360 degrees to reach it.

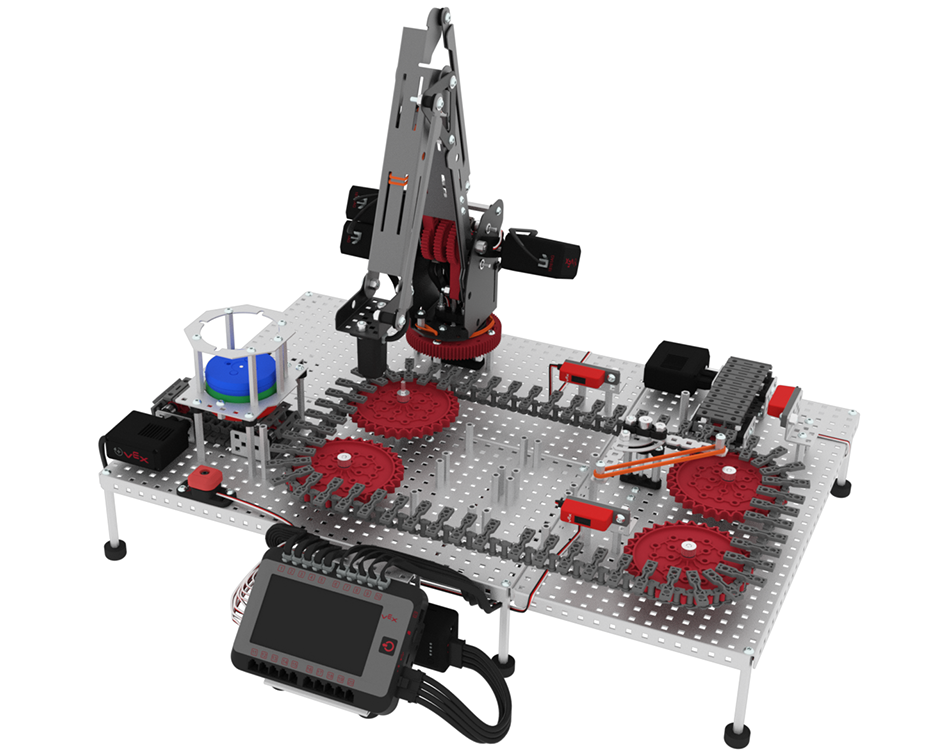
Viewing an example Lab 13 build, notice how the arm is mounted facing the V5 Brain. This allows the arm to rotate to either side, picking up and placing disks from the conveyors, or moving them to the End Zone locations.

Understanding the Layout of a Build
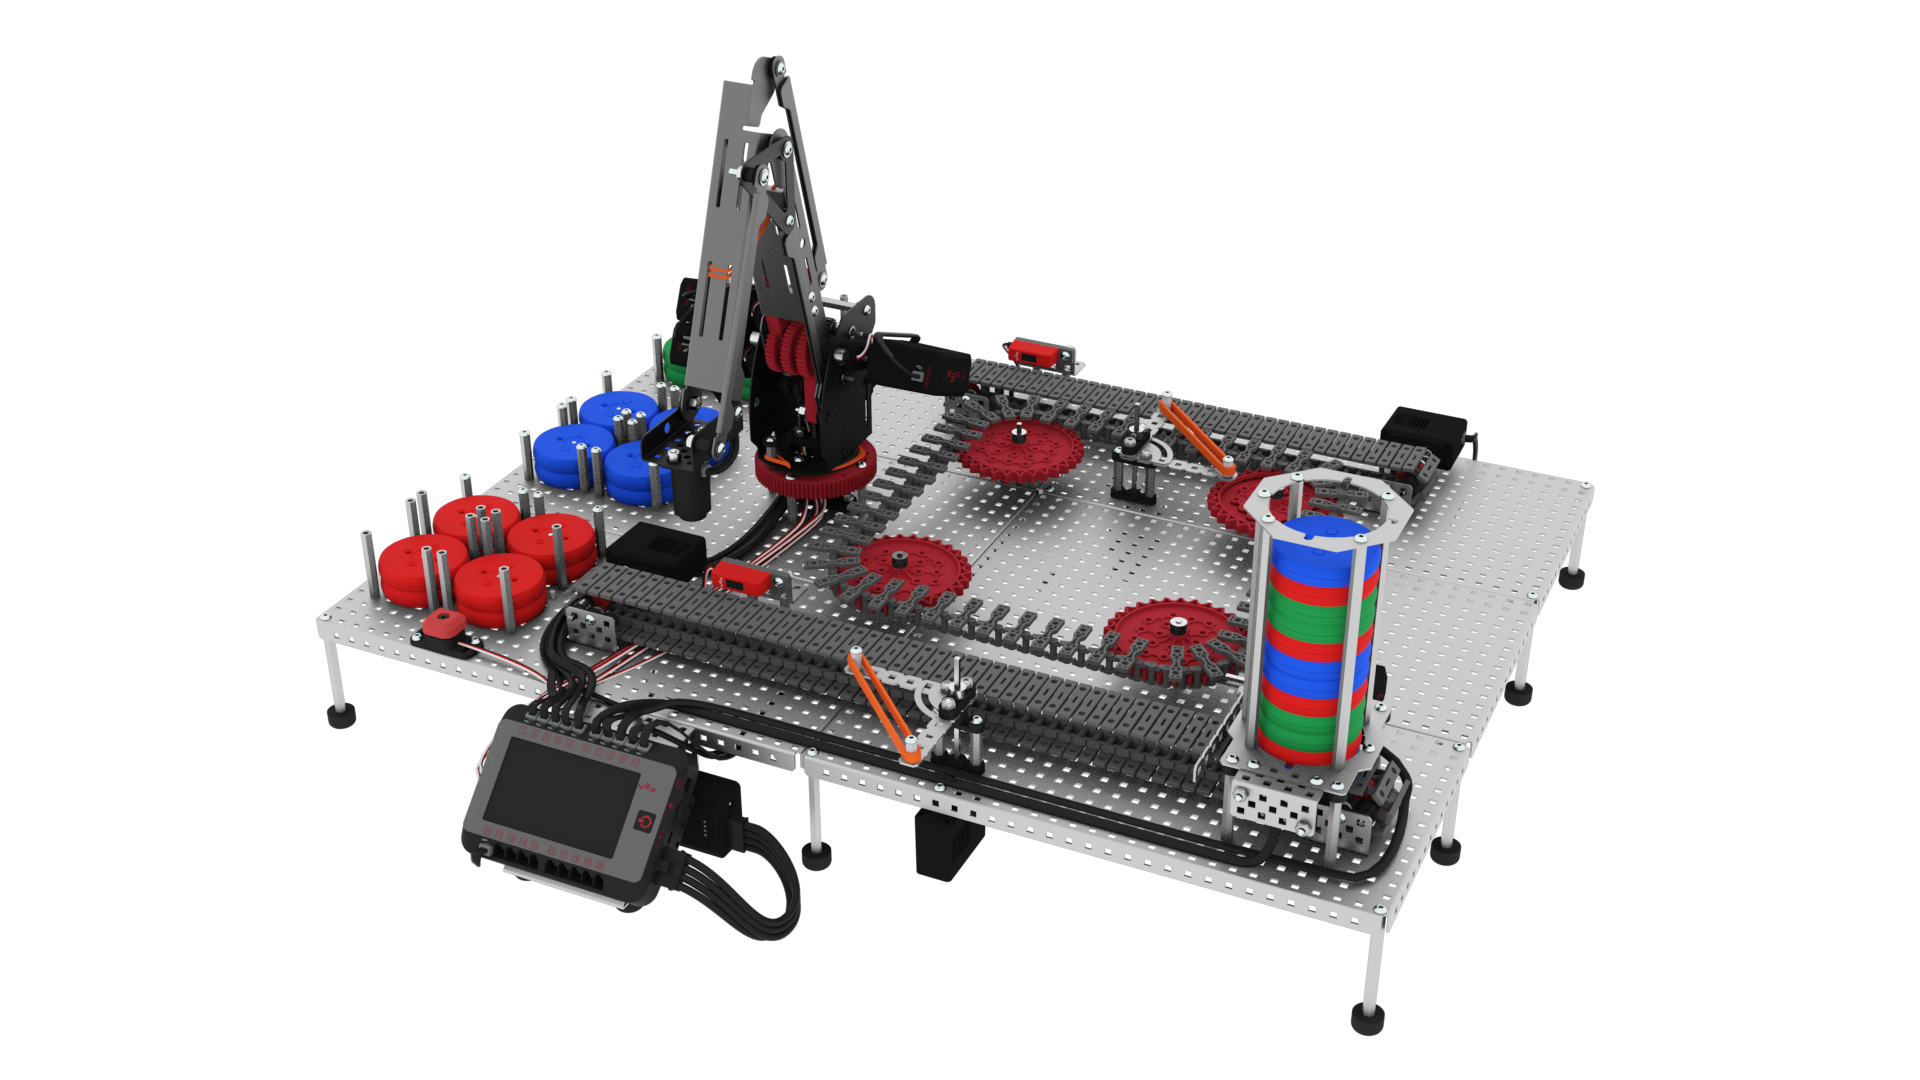
The Lab 11 build shown here is designed in order for the arm to be able to extend and reach certain points using the arm’s end effector. This design considers the mounting placement of the arm that affects important locations for the arm to reach:
- Pick up location
- Drop off locations

In Lab 11, the arm’s task is to pick up the disk from the Transport Conveyor, and place it in the appropriate drop off location based on the color of the disk.
Note that the arm will not be able to reach the entirety of the Transport Conveyor. However, it can mechanically reach the set pick up location along the conveyor.

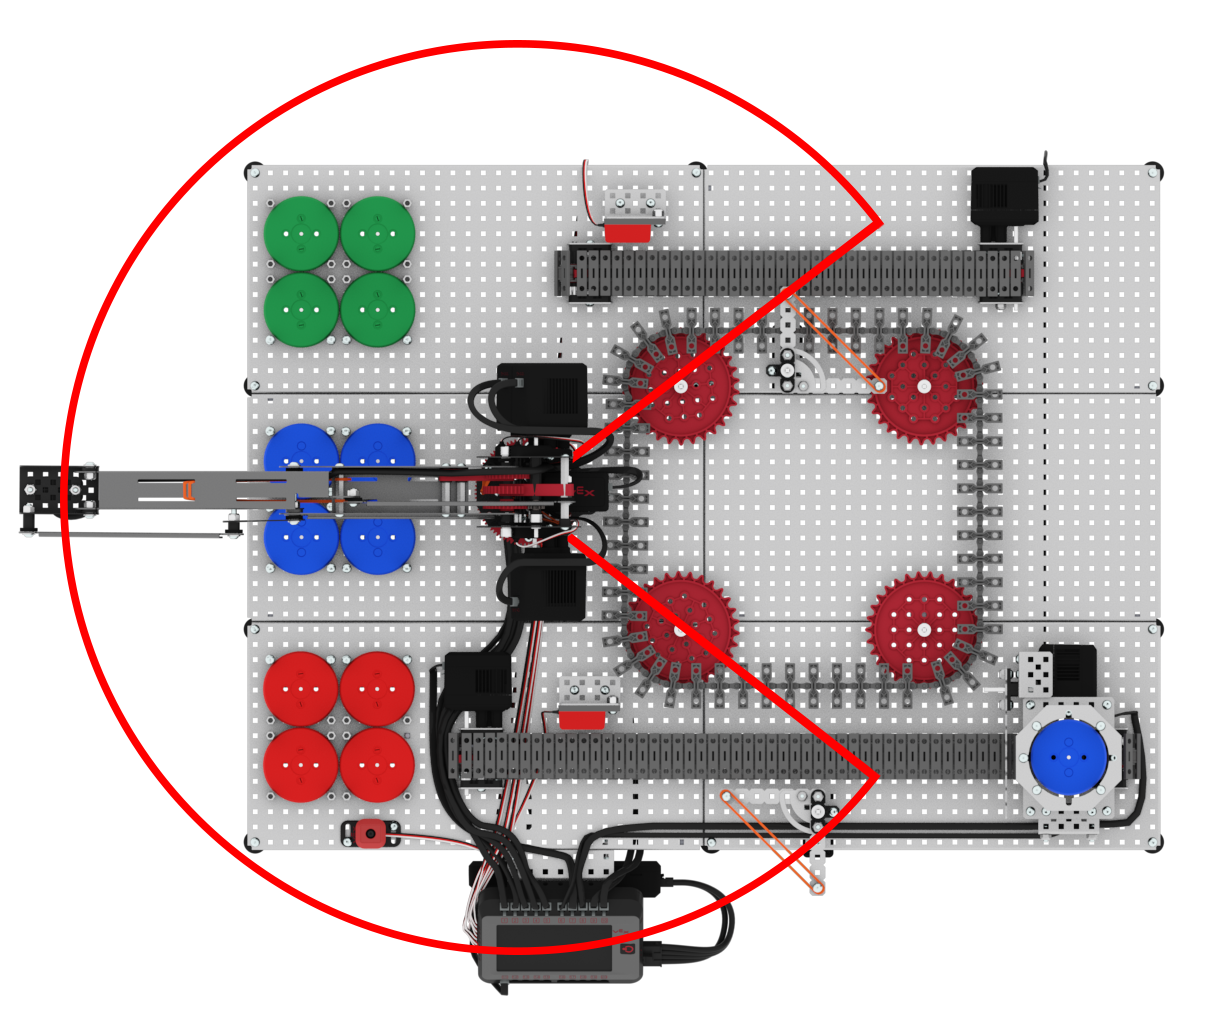
Looking at an example Lab 13 build, you can see when the arm is rotated 90 degrees, the dead zone now faces the circular conveyor.
The arm can easily reach all End Zones and the linear conveyors on the top and bottom of the Workcell.
These tradeoffs are important to consider when designing the layout of your Workcell.

![]() Teacher Tips
Teacher Tips
- Remind students that the approximate reachability of the arm is 13 inches without an end effector. They can use this information to plan out where certain components should be placed on their Workcell to ensure the arm can reach them.
- Students may have misconceptions about the dead zone behind the arm on the Workcell because when powered off, the arm can physically turn 360 degrees, but cannot be coded to autonomously turn 360 degrees because of the dead zone.
- Suggest that students start to sketch ideas for how their Workcell should be laid out taking notes along the way as they learn more through the Play pages.
![]() Teacher Toolbox
-
Check in
Teacher Toolbox
-
Check in
After students have reviewed the entire page, bring the groups together for a discussion.
- Ask students if the arm can physically rotate 360 degrees and why.
- Due to the dead zone on the back of the arm that occurs with the potentiometer associated with Joint 1, the arm cannot be coded to autonomously turn 360 degrees.
- Ask students why understanding that there is a dead zone behind the arm and where it is located is important.
- Students should respond that the location and orientation of the arm is important because the dead zone prevents the arm from reaching any materials directly behind it. This means that any pick up or drop off locations placed directly behind the arm will not be accessible.
- Have groups share any questions, thoughts, initial ideas, and sketches with the entire class. Being able to see how other groups are already thinking about their Workcell design can help students see different perspectives and gain inspiration from others.