Lesson 4: Project Flow with Nested Loops
Collect the next two disks
-
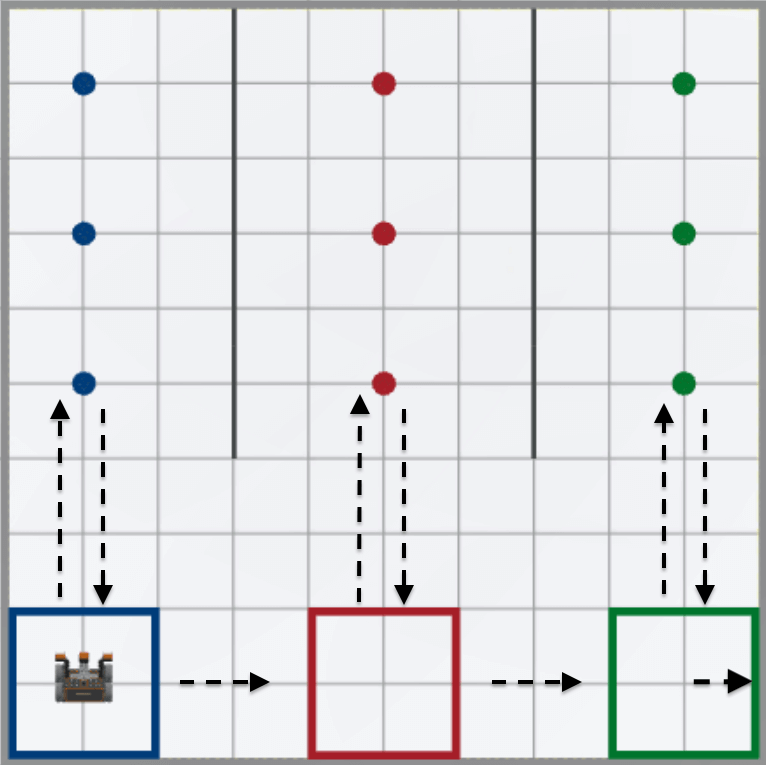
Now that the VR Robot is facing the red disks, the VR Robot will need to repeat the same behaviors that were used to collect the blue disk, in order to pick up and move the red disk. The behaviors of driving forward to pick up the disk, turn around, and drive back to the same colored goal to drop off the disk.

-
Once the first red disk is moved, the VR Robot will then need to drive to the green goal and perform the same actions that were used to move the blue and red disk, to move the first green disk.
- In order to repeat behaviors multiple times, a for loop can be used.
-
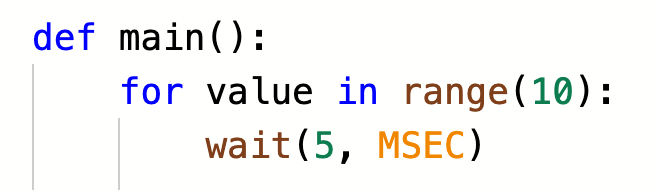
Add a for loop to the top of the project, above the first comment, and set the range function parameter to ‘3’. Be sure the for loop is indented within the main definition.
def main(): for repeat_count in range(3): wait(5, MSEC) -
To copy the code into the for loop, careful attention will need to paid to the indentation. First, add space before the wait command, so the loop looks like this:
def main(): for repeat_count in range(3): wait(5, MSEC) - Next, select the commands to put into the for loop, and copy and paste them above the wait command. Notice that the indentation will be incorrect after simply copying and pasting. The gray indicator line of the for loop is broken, and disconnected from the wait command. This is a visual cue that your project will not execute as intended.
-
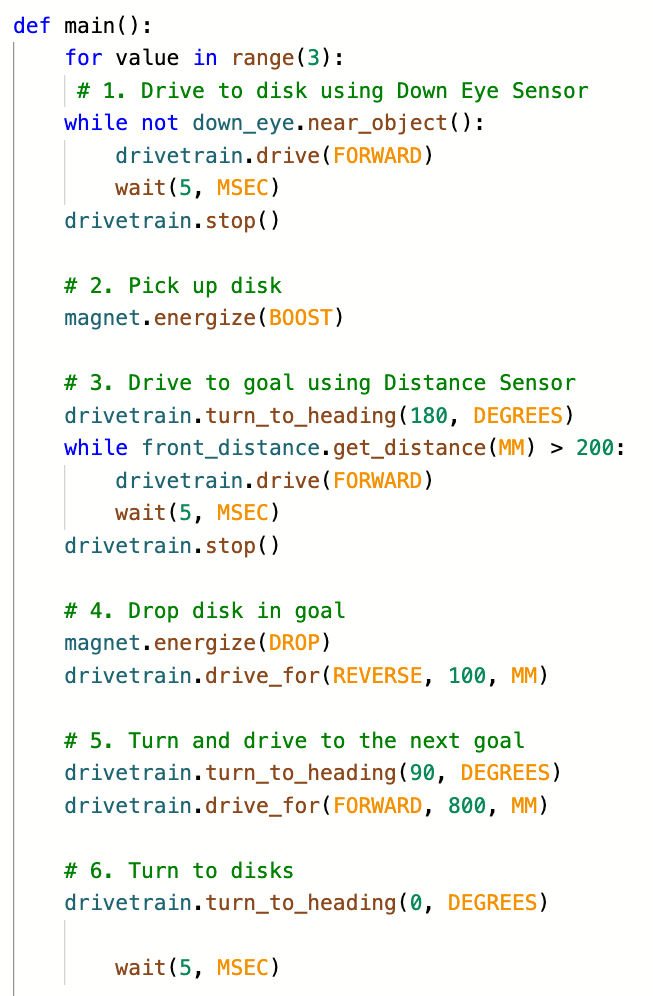
Select the commands inside the for loop, and use 'Tab' to correctly indent the commands within the loop. When correctly indented, the gray indicator line should connect the for loop with the wait command to show the bounds of the outer loop. When complete, your project should look like this:
def main(): for repeat_count in range(3): # 1. Drive to disk using Down Eye Sensor while not down_eye.near_object(): drivetrain.drive(FORWARD) wait(5, MSEC) drivetrain.stop() # 2. Pick up disk magnet.energize(BOOST) # 3. Drive to goal using Distance Sensor drivetrain.turn_to_heading(180, DEGREES) while front_distance.get_distance(MM) > 200: drivetrain.drive(FORWARD) wait(5, MSEC) drivetrain. stop() # 4. Drop disk in goal magnet.energize(DROP) drivetrain.drive_for(REVERSE, 100, MM) # 5. Turn and drive to next goal drivetrain.turn_to_heading(90, DEGREES) drivetrain.drive_for(FORWARD, 800, MM) # 6. Turn to disks drivetrain.turn_to_heading(0, DEGREES) wait(5, MSEC) - Watch the video below to see how to move the commands and adjust indentation as described above. In the video clip, the six comment sections of the project are highlighted, and the Context Menu is opened. The ‘Cut’ option is selected, and then the cursor is placed below the for loop command. The Context Menu is opened again, and ‘Paste’ is selected. The commands are then within the for loop, but incorrectly indented. The six comment sections are highlighted again and ‘Tab’ on the keyboard is pressed to correctly indent the project within the loop.
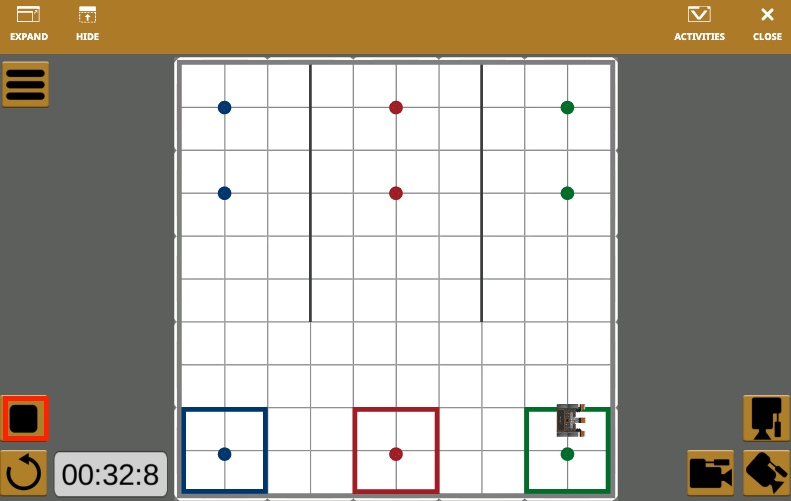
- Open the Disk Mover Playground if it is not already open, and run the project.
-
When this project is run, the VR Robot picks up and drops one disk of each color into its corresponding colored goal.
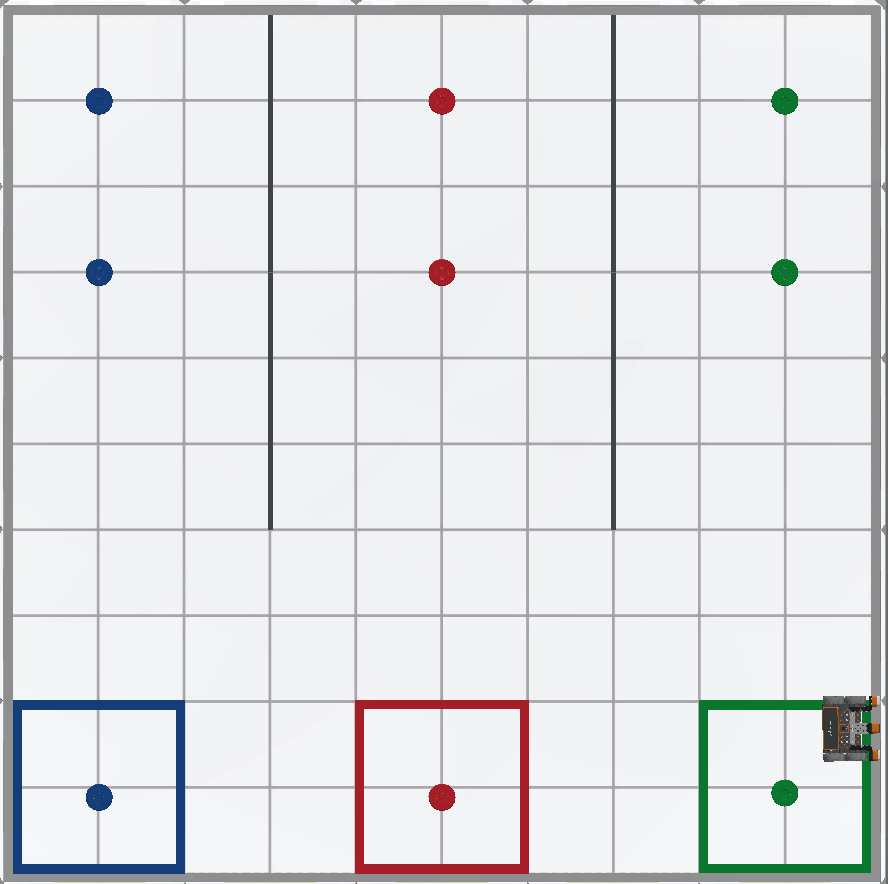
For Your Information
Note that the VR Robot continued to drive into the wall. This behavior is expected since the project instructed the VR Robot to turn right and drive toward the next goal, three times. The first time is driving from blue to red. The second is from red to green, and the third is from green into the wall, since there is not another colored goal. Stop the project once the VR Robot hits the wall. The project could be improved so that the VR Robot stops after it picks up and moves the green disk, but this would increase the overall complexity of the project.