
Lesson 4: Build the Project
Organize the project and get started
- Start a new text project and select the Disk Mover Playground when prompted.
-
Name the project Unit8Lesson4.

-
Using the behaviors that were just identified, add the following comments to organize the project.
def main(): # 1. Drive to disk using Down Eye Sensor # 2. Pick up disk # 3. Drive to goal using Distance Sensor # 4. Drop disk in goal # 5. Turn and drive to next goal -
Build the following code that instructs the VR Robot to complete the first four behaviors listed above. This project will use the same commands that were used in the previous lesson to move disks using sensor feedback. Your project should look like this:
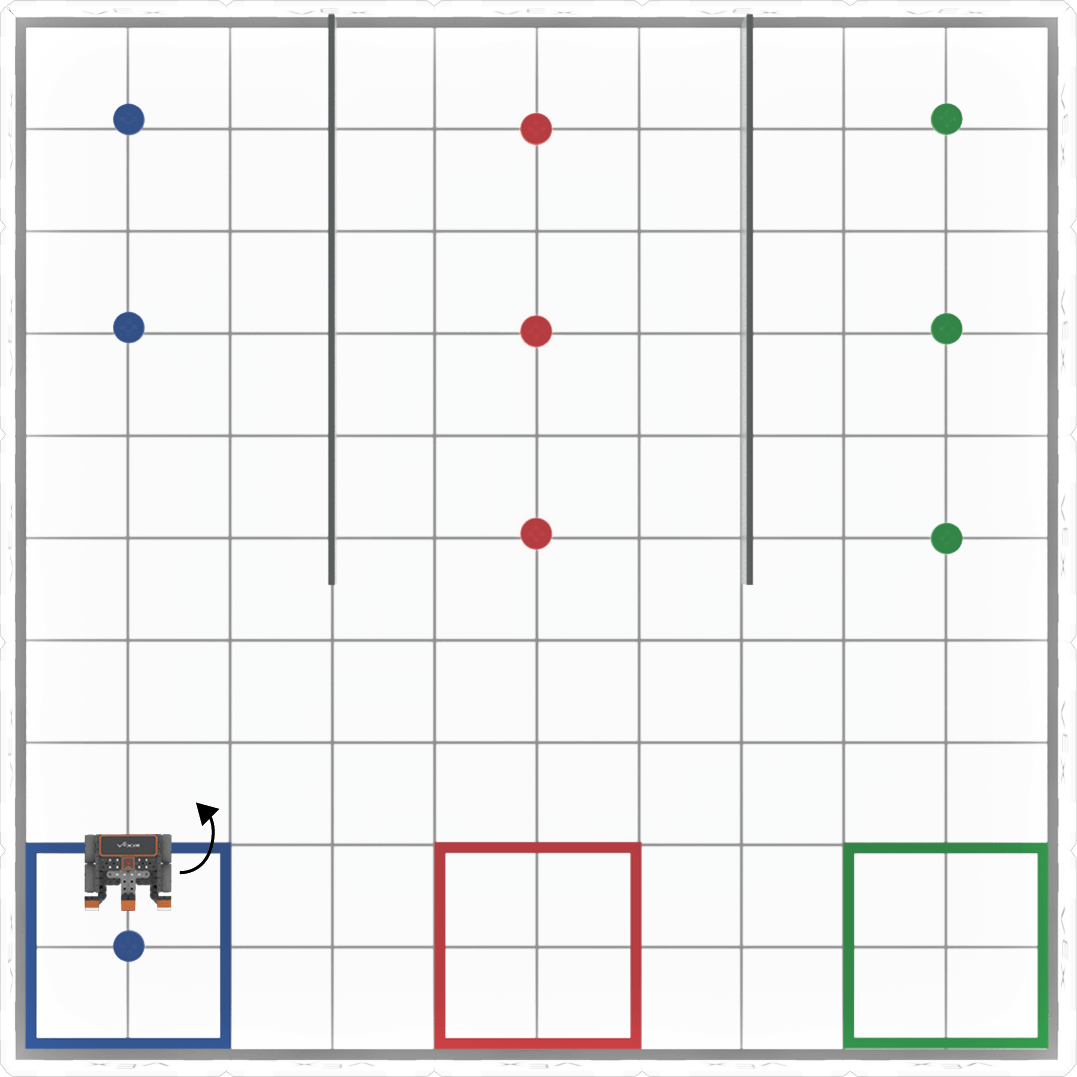
def main(): # 1. Drive to disk using Down Eye Sensor while not down_eye.near_object(): drivetrain.drive(FORWARD) wait(5, MSEC) drivetrain.stop() # 2. Pick up disk magnet.energize(BOOST) # 3. Drive to goal using Distance Sensor drivetrain.turn_to_heading(180, DEGREES) while front_distance.get_distance(MM) > 200: drivetrain.drive(FORWARD) wait(5, MSEC) drivetrain. stop() # 4. Drop disk in goal magnet.energize(DROP) # 5. Turn and drive to next goal - Open the Playground Window if it is not already open. Be sure the Disk Mover Playground opens, and run the project.
-
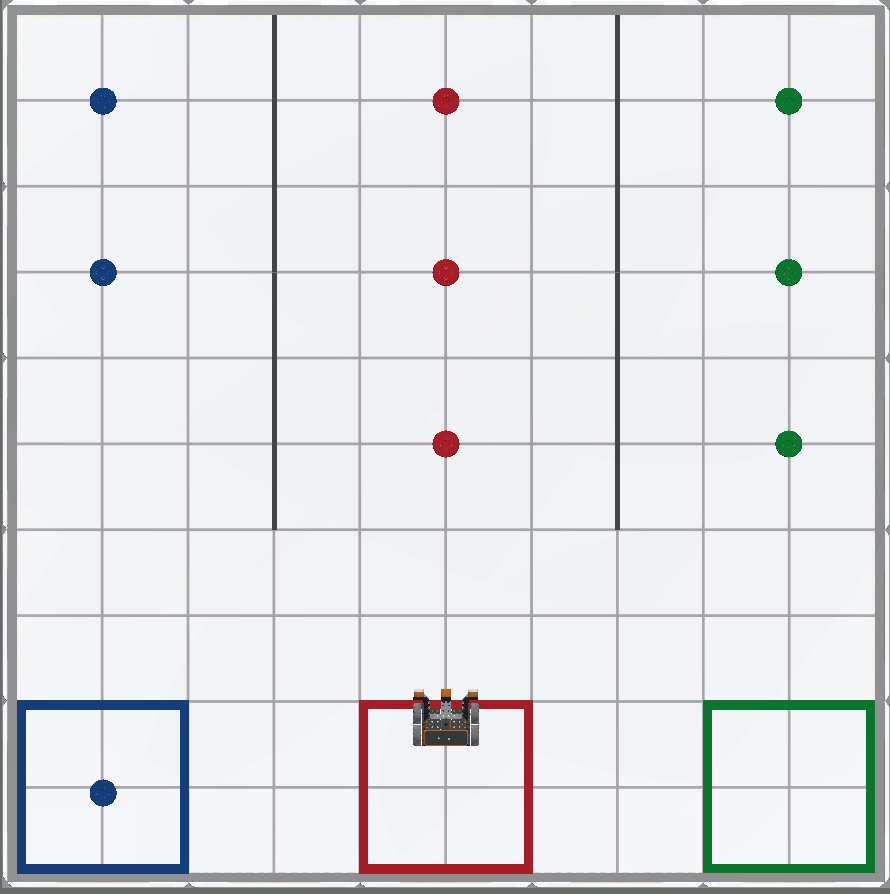
When this project is run, the VR Robot will drive and pick up the first blue disk, turn around, drive to the blue goal, and drop the disk.

Turn and drive to the next set of disks
-
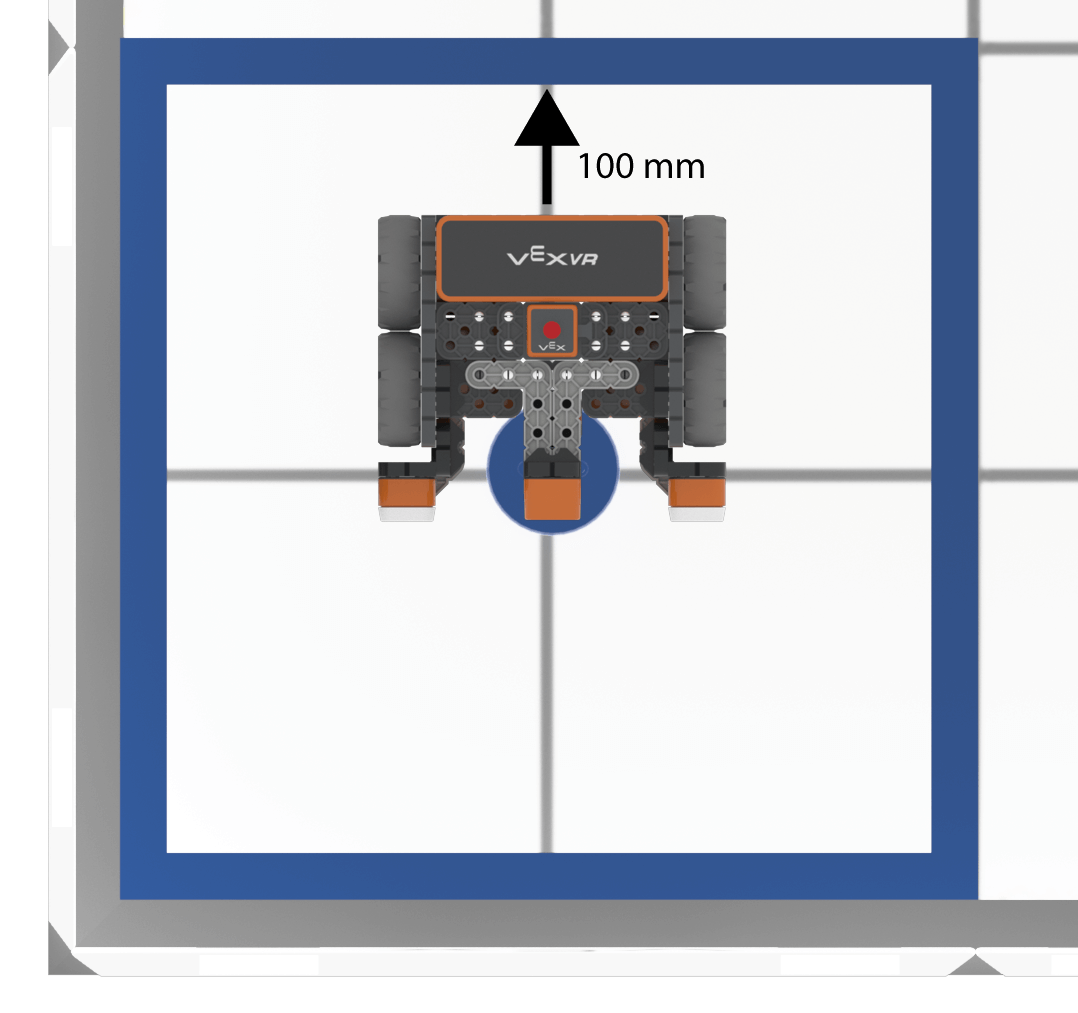
In order to collect the next colored disk, the VR Robot will need to turn and drive toward the next colored goal. Using what we learned in the previous lesson, in order to prevent colliding with the disk in the goal, the VR Robot will now need to move out of the way of the disk. To do this, the VR Robot will need to reverse 100 millimeters (mm), or half of the length of a grid square on the Playground.
-
Add a drive_for command below the energize command, and set the parameter to “REVERSE” for 100 millimeters (mm), so the fourth comment section of the project looks like this:
# 4. Drop disk in goal magnet.energize(DROP) drivetrain.drive_for(REVERSE, 100, MM) - The VR Robot will now need to turn left to face the next colored goal.
-
Add a turn_to_heading command beneath the fifth comment and set the parameter to 90 degrees in order for the VR Robot to face the next goal, so the fifth section of the project looks like this:
# 5. Turn and drive to next goal drivetrain.turn_to_heading(90, DEGREES) -
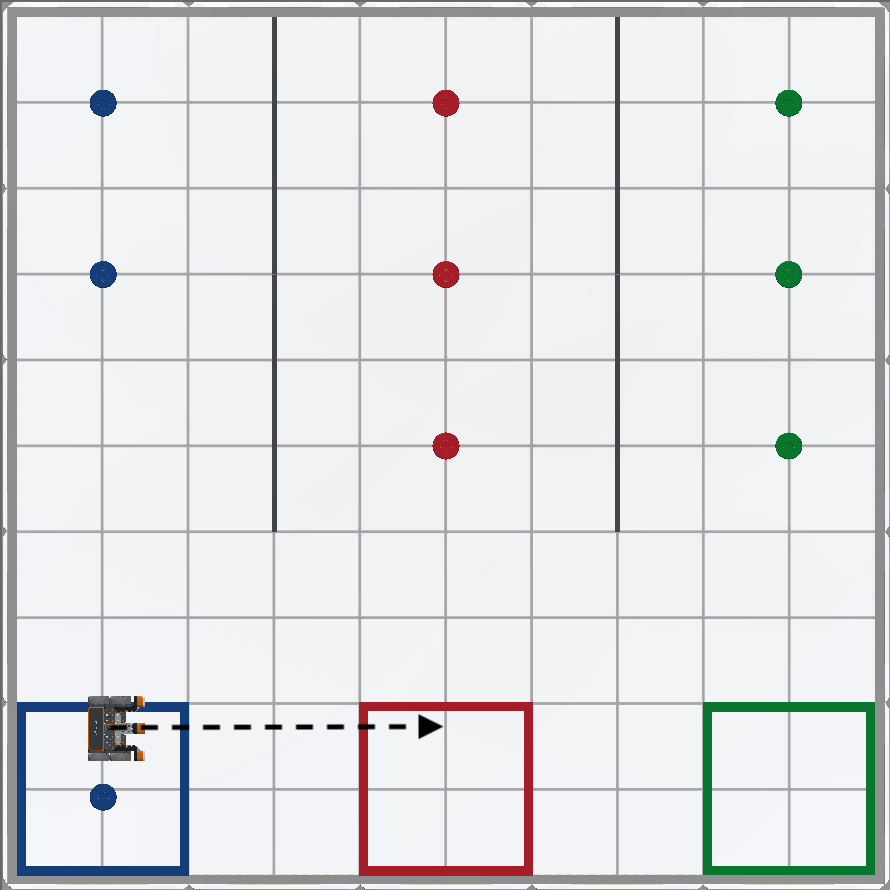
Next, the VR Robot will need to drive forward to the next colored goal. Note that the VR Robot will have to drive forward four grid squares, or 800 millimeters (mm) in order to drive to the center of the next colored goal.
-
Add a drive_for command after the turn_to_heading command and set the parameter to forward 800 millimeters (mm), so the fifth section looks like this:
# 5. Turn and drive to next goal drivetrain.turn_to_heading(90, DEGREES) drivetrain.drive_for(FORWARD, 800, MM) -
The VR Robot will now need to turn to face the colored disks.

-
Add another comment and a second turn_to_heading command to the end of the project, and set the parameter to zero degrees. This will turn the VR Robot to face the colored disks. Be sure the commands are indented correctly within your project.
# 6. Turn to disks drivetrain.turn_to_heading(0, DEGREES) - Open the Disk Mover Playground if it is not already open, and run the project.
-
The VR Robot will pick up and move the first blue disk into the blue goal, and then drive over the red goal. The VR Robot will also turn to face the red disks.
Select the Next button to continue with the rest of this Lesson.