
Lesson 4: Using Nested Loops
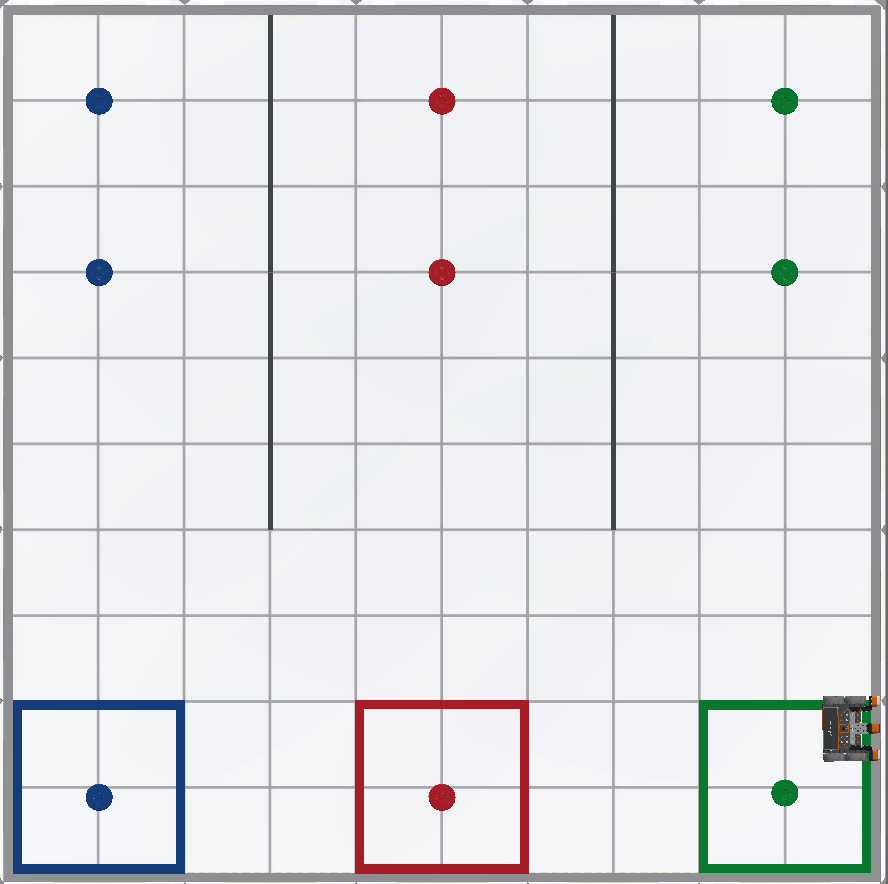
In the previous Lesson, you created a project to instruct the VR Robot to drive to, pick up, and move all three blue disks in the Disk Mover Playground into the blue goal. In this Lesson, you will create a project to pick up and move one disk of each color into its corresponding colored goal in the Disk Mover Playground using nested loops!
Learning Outcomes
- Identify how to nest loops.
- Describe the flow of a project through nested loops.
- Explain why nested loops would be used in a project.
What are Nested Loops?
In previous Units and Lessons in this course, you have used loops from the Control category such as the for loop, while loop, and infinite while loops to repeat behaviors. Placing one loop inside of another loop is called 'nesting'. Nested loops are helpful in projects where a VR Robot repeats the same behaviors more than once, like to move multiple disks on the Playground. Nesting loops can organize and condense a project, to make it more easily understood. This can be helpful to better understand the context and purpose of the code, as well as making it easier to identify errors and troubleshoot a project.
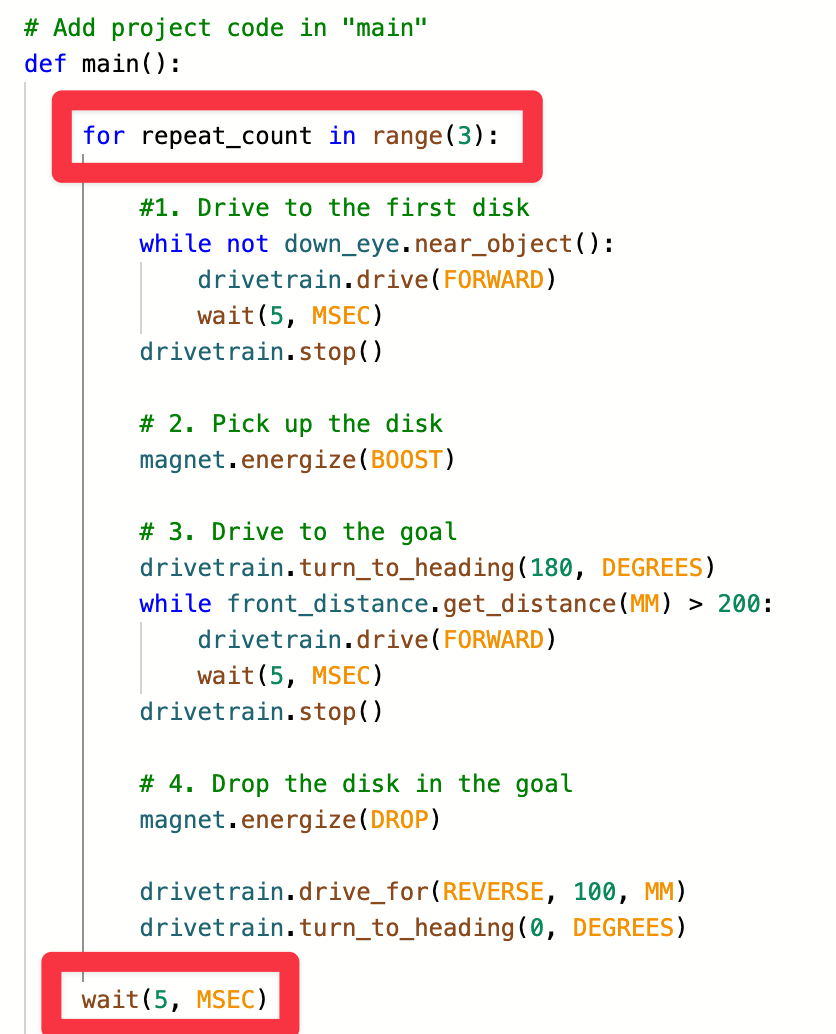
For instance, to move all three blue disks to the blue goal, a for loop can be used to repeat the process of collecting a disk multiple times. The project shown here places the Lesson 3 project to move the first blue disk to the blue goal inside a for loop, with the parameter set to 3. Notice how the four sections of the previous project are indented within the for loop.
def main():
    for repeat_count in range(3):
        #1. Drive to the first disk
        while not down_eye.near_object():
            drivetrain.drive(FORWARD)
            wait(5, MSEC)
        drivetrain.stop()

        # 2. Pick up the disk
        magnet.energize(BOOST)

        # 3. Drive to the goal
        drivetrain.turn_to_heading(180, DEGREES)
        while front_distance.get_distance(MM) > 200:
            drivetrain.drive(FORWARD)
            wait(5, MSEC)
        drivetrain.stop()

        # 4. Drop the disk in the goal
        magnet.energize(DROP)

        drivetrain.drive_for(REVERSE, 100, MM)
        drivetrain.turn_to_heading(0, DEGREES)

    wait(5, MSEC)
When you 'nest' loops, the outer loop controls the number of times that the inner loop is executed. In this project, the for loop is the outer loop, and will repeat the behaviors in the loop three times.
The inner loops are those loops contained within the outer loop. In this example, each of the while loops (to drive to the disk and to the goal) are 'inner loops' that are executed each time the project moves through the for loop.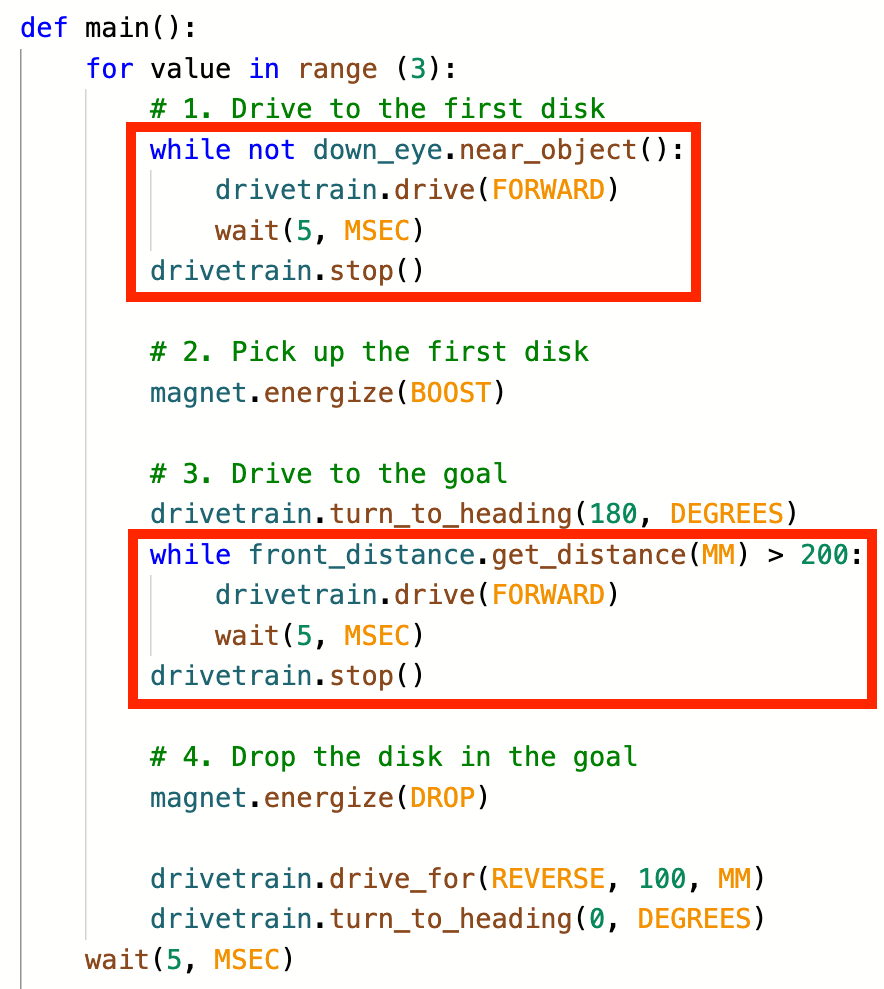
For Your Information
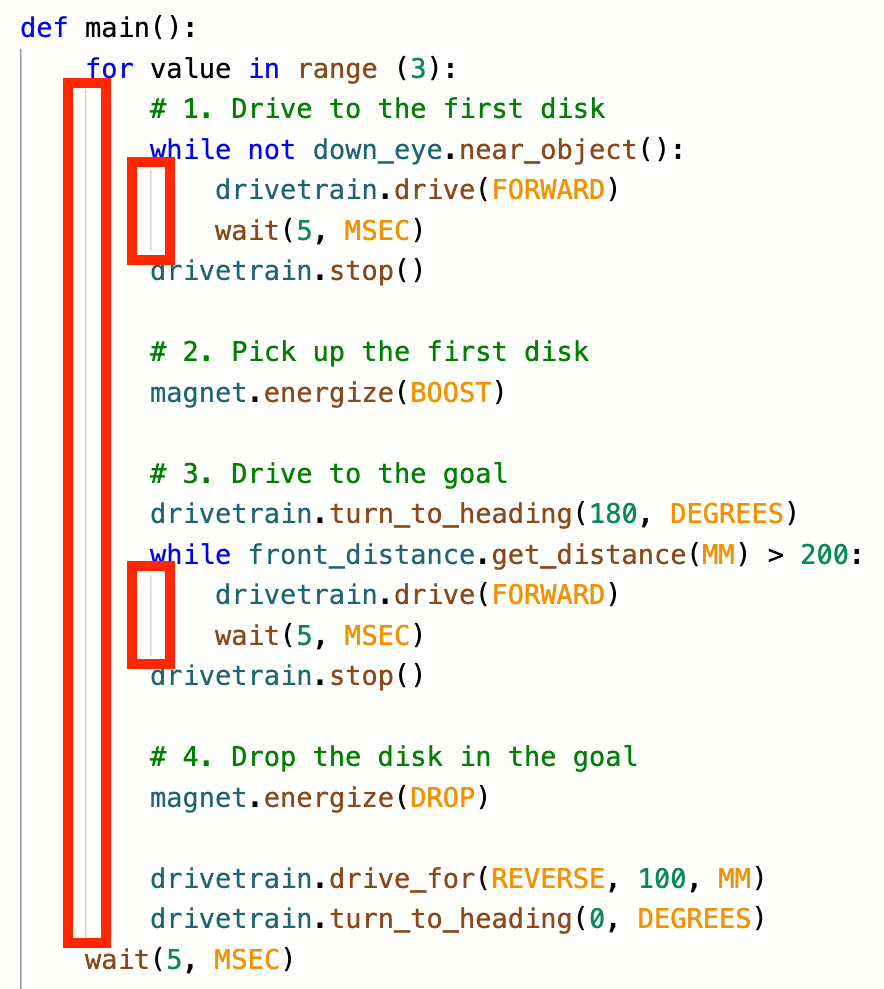
Indentation is important in VEXcode VR Python projects. You can use the gray indicator lines in the workspace as a visual aid when nesting loops, to ensure that your project works as intended. Each line indicates the start and end of a loop.
Flow of a nested loop project
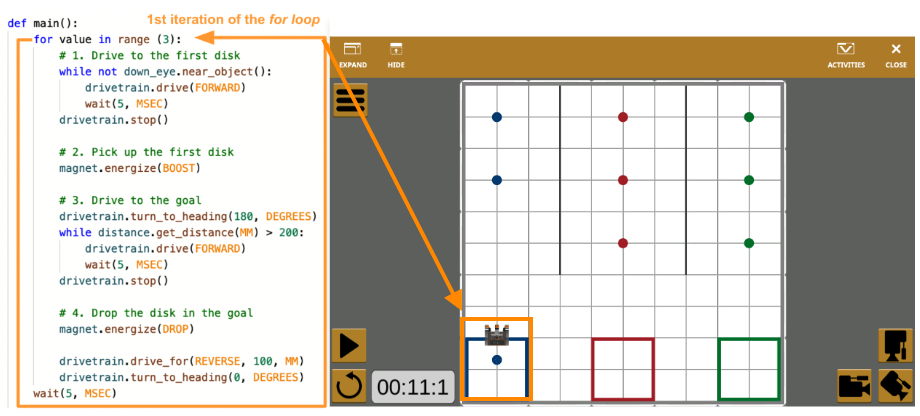
In this example, each time the for loop iterates, a blue disk is picked up and returned to the blue goal.
After the first iteration, the first blue disk is returned to the blue goal and the VR Robot is turned to be ready to collect the second disk.
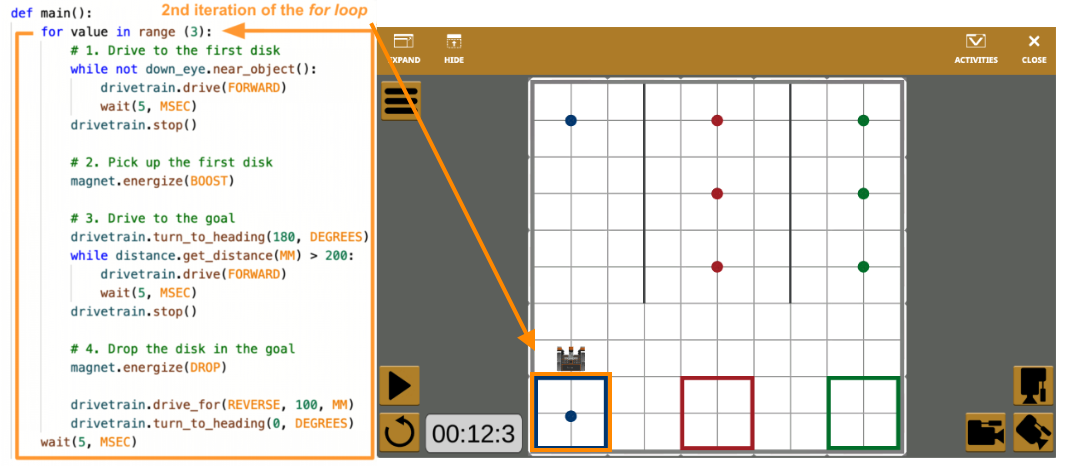
After the second iteration, the second blue disk is collected and the VR Robot is turned to be ready to collect the third disk.
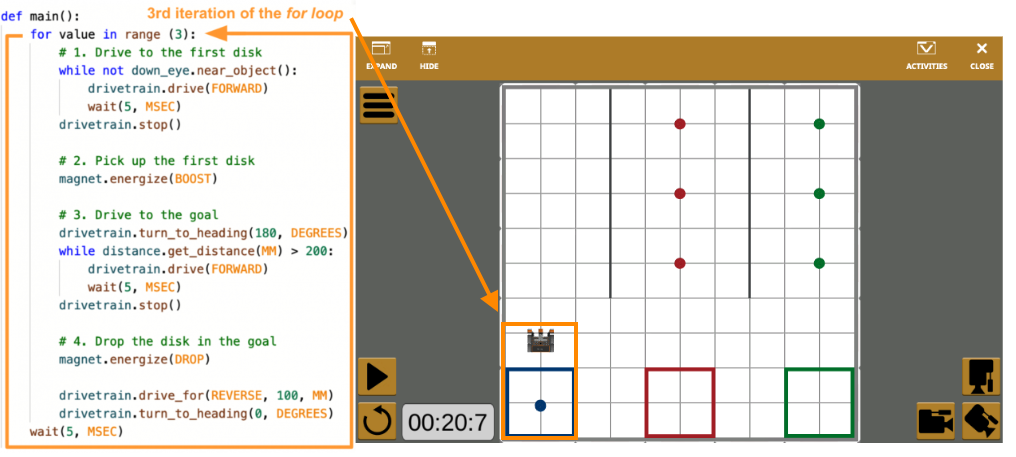
After the third iteration, the third blue disk is collected, and the VR Robot stops moving. The for loop has now completed its range, so the project is completed.
Select the Next button to continue with the rest of this Lesson.