Exploration of Velocity - Part 2
Step 1: Add a Connector Pin to the Wheel Hub.

- The Builder should add a 1x1 Connector Pin to one of the wheel hubs so that you can easily see how fast the motor and wheel are turning.
![]() Teacher Toolbox
Teacher Toolbox
Point out that in the programming area, there is already a {when started} block located there by default. Every program will begin with this block. When the program is started the connected blocks will be followed in the sequence in which they are placed.
Demonstrate clicking on the [drive] block and dragging it to the programming area, connecting it to the {when started} block. You will hear a click when it attaches.
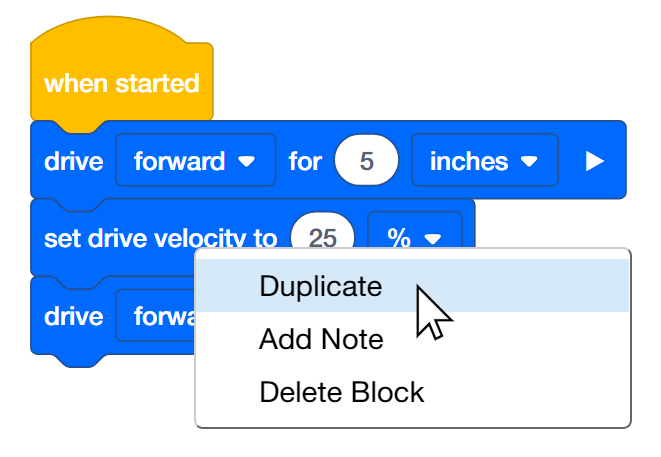
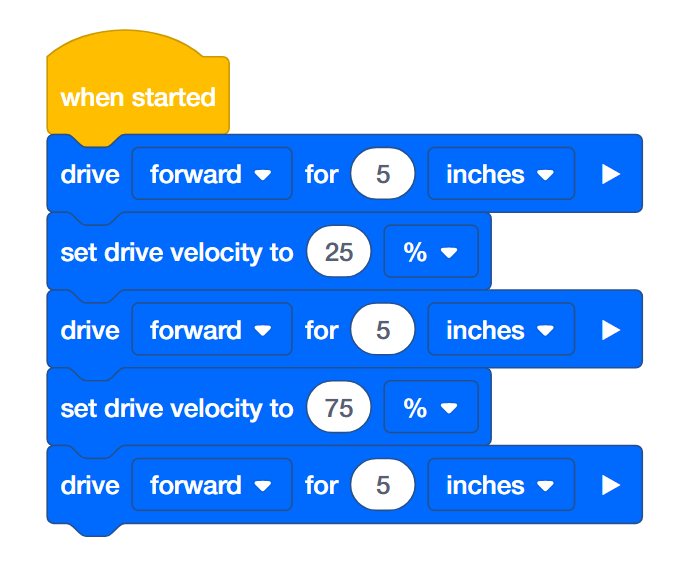
The second and third blocks are the same as the fourth and fifth blocks. After adding the third block, the Programmer can right- or long-click on the second block and choose Duplicate to add the fourth and fifth blocks. Then the velocity of the fourth block can be changed to 75%.
Step 2: Drive Forward for 15 inches at Different Velocities
-
The Programmer should build this project in VEXcode IQ.
-
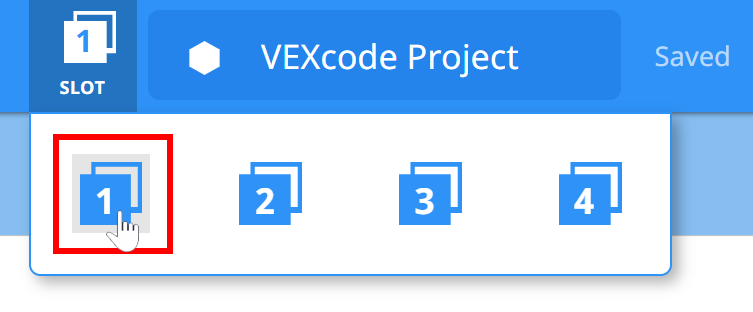
Click on the Slot icon. You can download your project to one of the four available slots in the Robot Brain. Click on the number 1.
-
The Programmer should connect the robot to your computer or tablet. The Brain icon in the toolbar turns green once a successful connection has been made.

-
Then, click the Download button on the toolbar to download the Drive Velocity project to the Robot Brain.
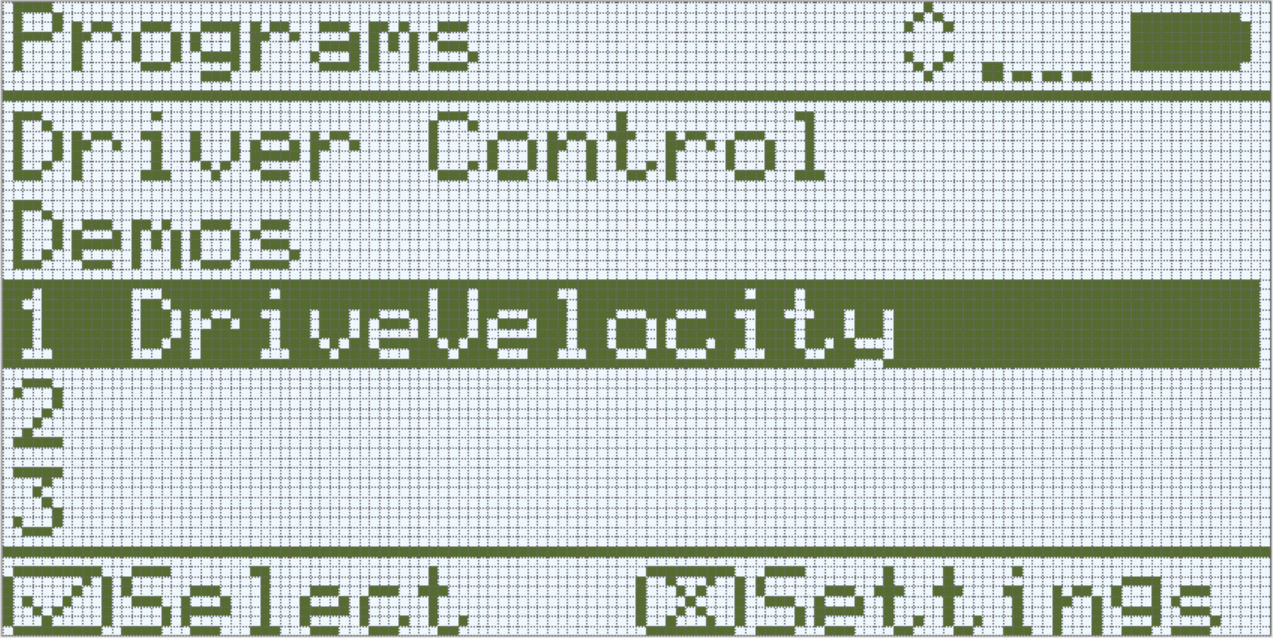
- The Operator should check to make sure your project has downloaded to the Autopilot’s Brain by looking at the Robot Brain’s screen. The project name should be listed in slot 1.
- The Driver should now run the project on the Autopilot robot by making sure the project is highlighted and then press the Check button.
![]() Teacher Toolbox
Teacher Toolbox
-
Stop and Discuss
Ask the students to predict what they think will happen when this project is downloaded and run on the Autopilot robot. Tell the students to record their predictions in their engineering notebooks. If time allows, ask each group to share their prediction.Students should predict that the Autopilot will first move forward at its default velocity (50%), then slower (25%) than the default velocity, and then faster (75%) than the default velocity.
-
Model First
Model running the project in front of the class before having all the students try at once. Gather the students in one area and leave enough room for the Autopilot to move 15 inches if it is placed on the floor.Tell the students it is now their turn to run their project. Make sure that they have a clear path and that no Autopilots will run into each other.
Step 3: Drive Forward and in Reverse at Different Velocities
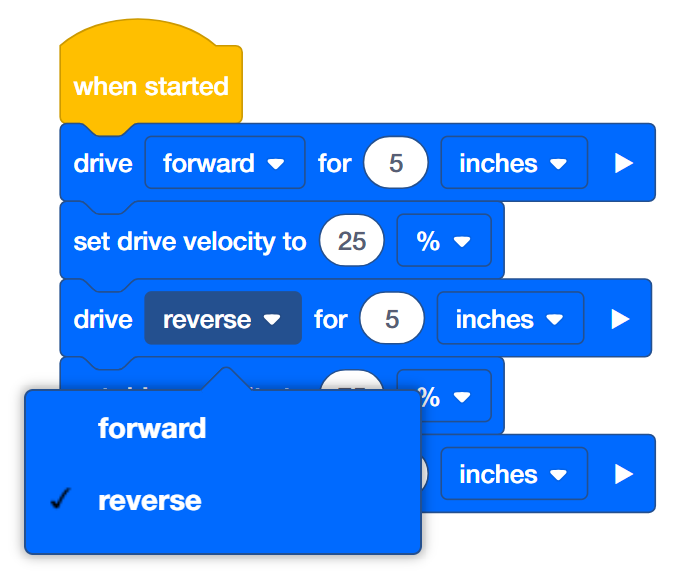
- The Programmer should change the second drive for block to drive in reverse instead of forward.
- The Programmer should then download the project.
- The Driver should now run the project on the Autopilot robot by making sure the project is highlighted and pressing the Check button.
![]() Teacher Toolbox
-
Completing Step 3
Teacher Toolbox
-
Completing Step 3
-
There is no need to save the project again because VEXcode IQ will autosave.
-
To change the [drive for] block from forward to reverse, simply click on the dropdown menu and select reverse.
-
If the students are using a computer, remind them to disconnect the USB cable from Robot Brain before running the program.
-
Because we are not selecting a new slot, the new program will download to Slot 1 and replace the previous program.