
Remix Your Project
![]() Teacher Tips
Teacher Tips
The students can refer to the tutorials if they have any problems creating, renaming, or saving a project. Walk around and monitor the students to ensure they complete all steps.
The Programmer should complete the following steps:

- Open the File menu.
- Select Open Examples.
- Select and open the Autopilot Template.
- Name your project Velocity Remix.
- Save your project.
![]() Teacher Toolbox
-
Behaviors
Teacher Toolbox
-
Behaviors
As mentioned previously, behaviors are a way to talk about the robot's actions. One way to get students thinking about behaviors and organizing actions in a sequence, is to have students label different parts of their project using the [comment] block. The students can label the different behaviors from the challenges throughout the project. For more information about using the [comment] block, use the Help.
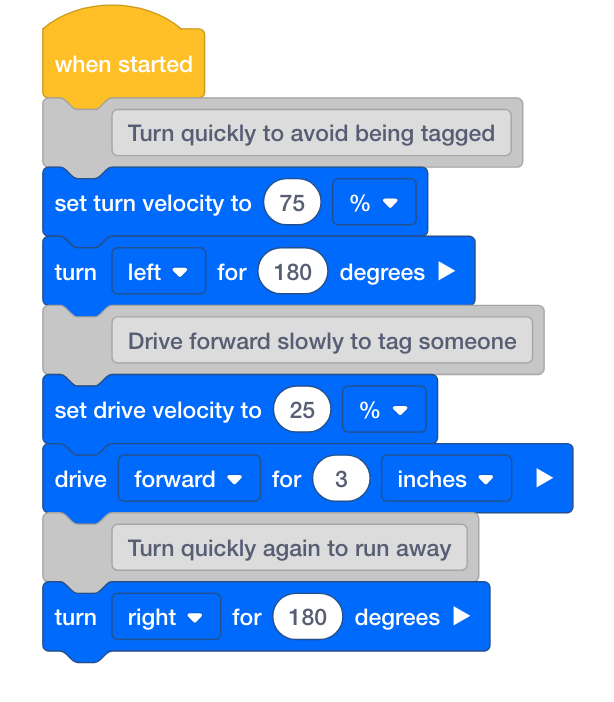
In the Tag You're It! challenge, the students are asked to program the Autopilot to turn quickly to avoid being tagged, drive slowly to tag someone, and then turn quickly again to run away. View the example below of using the comment block to describe the sequence of behaviors:
You can also ask the students to explain how they will plan for these challenges in terms of how they want and expect the robot to behave.
Tag You’re It!
Turn quickly, drive slowly, turn quickly to play a game of tag!
-
The robot wants to play a game of tag-you’re it! Programmer, use the [set turn velocity], [turn for], [set drive velocity], and [drive for] blocks to program the Autopilot to turn quickly to avoid being tagged, drive slowly to tag someone, and then turn quickly again to run away! The velocity percentage for turning should be at least twice as high as the velocity percentage for driving. The project below is started but incomplete. It needs more blocks and set velocities.

- Programmer, save the Tag project and download it to the brain.
- Operator, run the Tag project.
- Does the robot turn quickly, drive slowly, and then turn quickly again?
- Recorder, take notes about the robot’s behavior.
Bonus Challenge: Have the Autopilot play a sound once it tags someone!
![]() Teacher Toolbox
-
Reminders and Solutions
Teacher Toolbox
-
Reminders and Solutions
-
Set up a stationary object such as a book that robot will tag to mimic tagging a person.
-
The teacher can limit the drive distances if space is limited.
-
Students should be working in their groups with their individual roles.
-
The Builder should check that the robot is prepared to run the project.
-
The Programmer should make the changes as directed.
-
The Operator should be running the projects on the robot.
-
The Recorder should document their work and outcomes in their engineering notebooks.
-
Have the students check in when they have completed this activity and either display or run their project(s).
For the solution to Tag You’re It!, click one of the following links (Google Doc/.docx/.pdf).
Protect the Castle!
Move in a square to protect the castle from intruders!
-
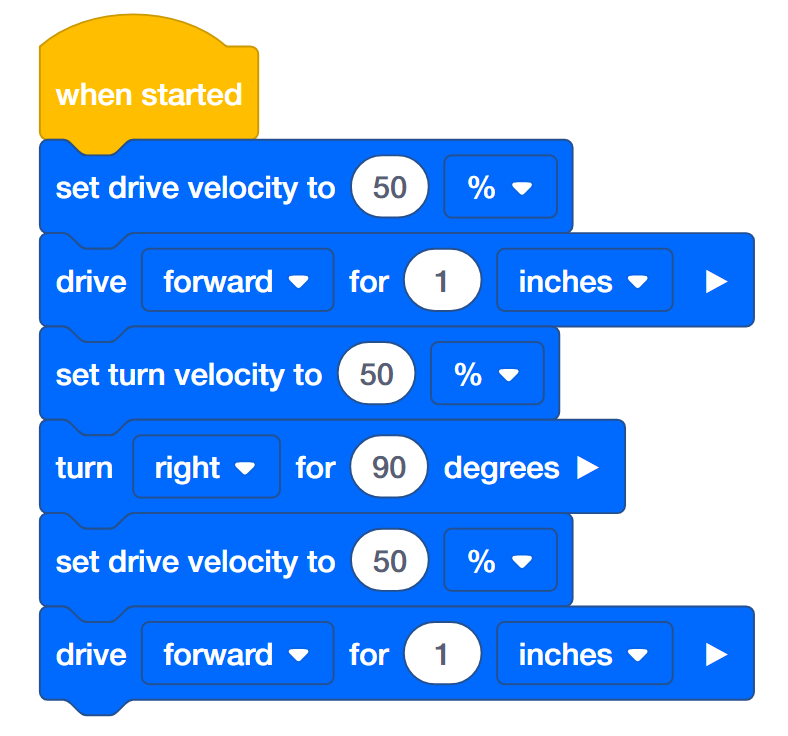
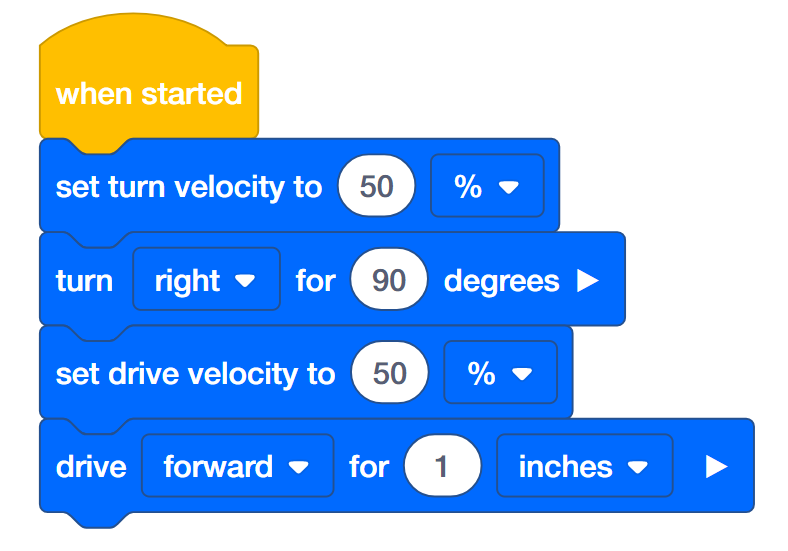
Your king asked you to protect the castle! You must drive around the square castle to make sure it is safe from intruders! Programmer, use the set turn velocity, turn for, set drive velocity, and drive for blocks to program the Autopilot to move in a square. The Autopilot should drive quickly along the sides of the square but turn slowly at the corners. The project below is started but incomplete. It needs more blocks and set velocities.
- Programmer, save the Castle project and download it to the brain.
- Operator, run the Castle project.
- Does the robot move quickly in a square shape but turn slowly at the corners?
- Recorder, take notes about the robot’s behavior.
Bonus Challenges:
- Have the Autopilot’s Touch LED display a different color while it drives on each side of the square.
- The perimeter of the square castle that needs to be guarded is 20 inches. Program the robot to move around the perimeter.
- The area of the square castle that needs to be guarded is 49 inches. Calculate the length of each side and move in a square that covers the area.
![]() Teacher Toolbox
-
Reminders and Solutions
Teacher Toolbox
-
Reminders and Solutions
-
The teacher can limit the drive distances if space is limited.
-
Students should be working in their groups with their individual roles.
-
The Builder should check that the robot is prepared to run the project.
-
The Programmer should make the changes as directed.
-
The Operator should be running the projects on the robot.
-
The Recorder should document their work and outcomes in their engineering notebooks.
-
Have the students check in when they have completed this activity and either display or run their project(s).
For the solutions to Protect the Castle!, click one of the following links (Google Doc/.docx/.pdf).
Robot Waiter
Don’t spill the drinks!
-
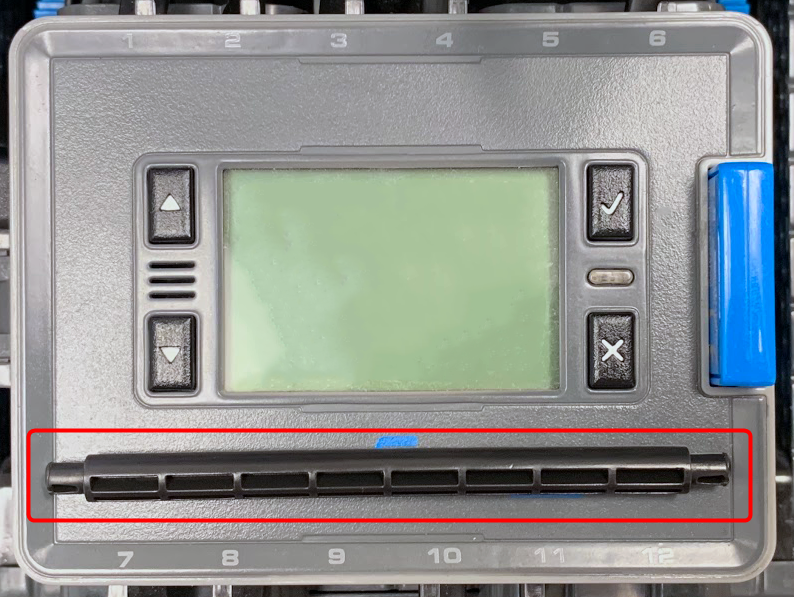
Your robot is training to be a waiter at a new restaurant in town. Program the robot waiter to be able to move quickly without spilling what it is carrying! Use the 6x Pitch Standoff to simulate food or drinks that the waiter would be carrying. Programmer, use the set turn velocity, turn for, set drive velocity, and drive for blocks to program the Autopilot to turn 360 degrees and drive 12 inches as quickly as possible while balancing a 6x Pitch Standoff on the Autopilot’s brain. The project below is started but incomplete. It needs to have the velocities and distances set.
-
Builder, lay a 6x Pitch Standoff from the VEX IQ Kit across where VEX IQ is written on the brain.
- Programmer, set the velocities and distances. Then save the Robot Waiter project and download it to the brain.
- Operator, run the Robot Waiter project.
- Does the robot turn and drive while keeping the beam on top of the brain? How fast can the robot move before the beam slides off?
- Programmer, test faster and faster velocities until you find the limit. The limit for turning might be different than the limit for driving. Use the information from the Recorder in order to make decisions on which velocity is the best choice.
- Recorder, take notes about the robot’s behavior, its velocity, and whether the beam falls off. Make note of how the velocities are changing each time the project is tested.
![]() Teacher Toolbox
-
Iterative Design
Teacher Toolbox
-
Iterative Design
This activity focuses on asking the students to engage in an iterative design process. The students are asked to test their projects before making changes. Encourage the students to fully design, test, make changes based on feedback, and test again. The adjustments to the velocity should be based on the results of the tests and/or the feedback from the other group members. Encourage the students to follow the iterative design process instead of just guessing and checking to come to a conclusion as to which velocity is best. The best velocity will ensure the robot waiter does not spill anything.
Iterative design is an important design methodology in robotics as well as other engineering design processes.
Students will also practice reasoning abstractly while deciding how to adjust the velocity to conclude which one is best.
![]() Teacher Toolbox
-
Reminders and Solutions
Teacher Toolbox
-
Reminders and Solutions
- The teacher can limit the drive distances if space is limited.
- Students should be working in their groups with their individual roles.
-
The Builder should check that the robot is prepared to run the project and that the 6x Pitch Standoff is properly positioned over the VEX IQ decal on the brain before each test of the velocity.

- The Programmer should make the changes as directed.
- The Operator should be running the projects on the robot.
- The Recorder should document their work and outcomes in their engineering notebooks.
-
Have the students check in when they have completed this activity and either display or run their project(s).
For the solution to Robot Waiter, click one of the following links (Google Doc/.docx/.pdf)