Design, Develop, and Iterate on your Project - Blocks-based
Answer the following questions in your engineering notebook as you design your project.
-
What do you want the project have the robot do? Explain with details.
-
What steps will you follow to test the project? Explain with details.
-
How can your robot be programmed to complete the task with the most accuracy? Explain with details.
![]() Teacher Toolbox
-
Answers
Teacher Toolbox
-
Answers
-
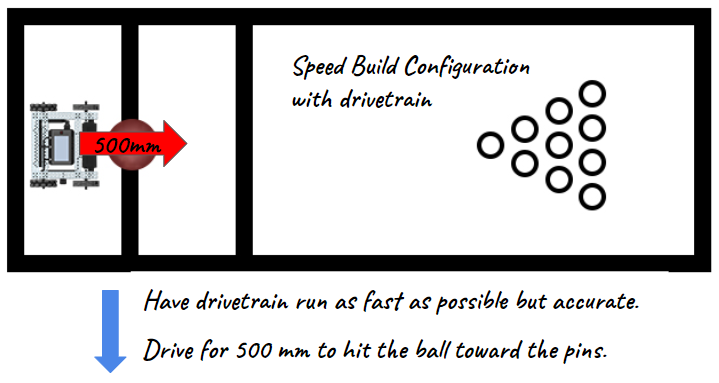
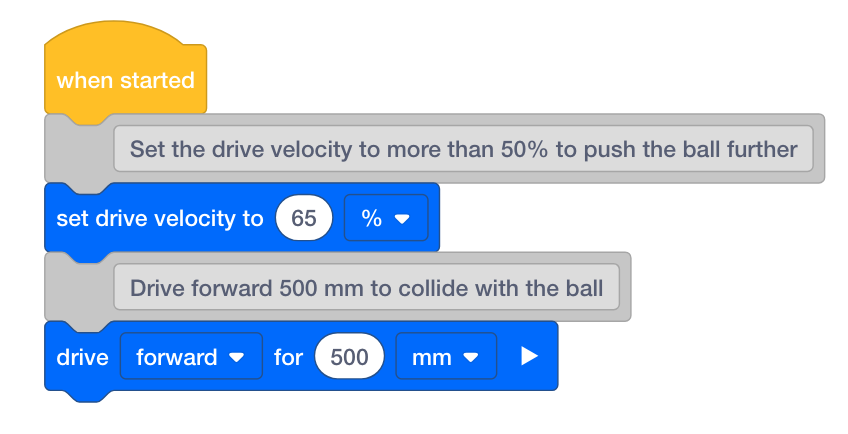
Answers will likely include driving fast and far enough to reach and push the ball forward with optimal force while maintaining accuracy. Ask students to explain how the collisions of the robot with the ball and of the ball with the pins factored into their plans. Connect this back to Newton's Second Law and students will likely want to set the robot to drive at 100% velocity. But highlight that although the highest velocity for the robot would lead to the greatest acceleration of the ball and subsequently the pins after collision, the highest velocity for the robot could jeopardize accuracy in this challenge. They will need to find a compromise between the two and they can use the new table below or their previous tables to collect data and decide the best velocity for this challenge.
-
Answers should include writing out pseudocode, measuring the distance the robot needs to travel, converting that measurement to millimeters, and running the project. Make sure that students understand how to convert centimeters or meters to millimeters for programming.
-
Converting centimeters to millimeters requires adding a zero to the end of the whole number. For example, 10cm is equal to 100mm.
-
Converting meters to millimeters requires adding three zeros to the end of the whole number. For example, 1m is equal to 1000mm.
-
-
Answers could include measuring the exact distance of the robot's start location to the ball's start position and using that measurement to program the precise distance the robot needs to travel. Also, it is important to find the optimal velocity for driving while maintaining accuracy.
Follow the steps below as you create your project:
- Plan out the path you want to program your robot to follow using drawings and pseudocode (Google / .docx / .pdf).
- Use the pseudocode you created to develop your project.
- Test your project often and iterate on it using what you learned from your testing. After each trial, record how far the robot drove, what the velocity was set to, about how far the ball traveled, and how many pins were moved. Here is an updated table for data collection and analysis.
- Use the pseudocode you created to develop your project in VEXcode V5.
- Test your project often and iterate on it using what you learned from your testing. After each trial, record how far the robot drove, what the velocity was set to, about how far the ball traveled, and how many pins were moved. Here is an updated table for data collection and analysis.

![]() Teacher Tips
Teacher Tips
- The table for the Strike Challenge can be downloaded and printed from here (Google / .pdf), or students can recreate the table in their engineering notebooks.
-
Ask students to use a ruler to measure their proposed path. Then, have students evaluate their pseudocode before moving on to the second step.

-
Instruct students to use pseudocode as comments in their project to help with organization, flow, and troubleshooting. Ask students to evaluate their pseudocode before adding instructions to their projects. You can download a pseudocode rubric here (Google / .docx / .pdf).

- As the testing phase continues, review students' data tables and ask groups to explain how they chose the best velocity for the challenge. The two main variables they should be focused on are the velocity of the robot and the number of pins moved but the approximate traveled distance of the ball might also be considered. Again, encourage testing that manipulates only one variable at a time: the velocity of the robot.
If you're having trouble getting started and you're working with Blocks, review one of the following Tutorials in VEXcode V5 :
-
Drivetrain Movements
-
Getting Started
-
Download and Run a Project
-
Moving and Removing Blocks
-
Naming and Saving Projects
-
Using Examples and Templates