
Lesson 3: Turn to Heading
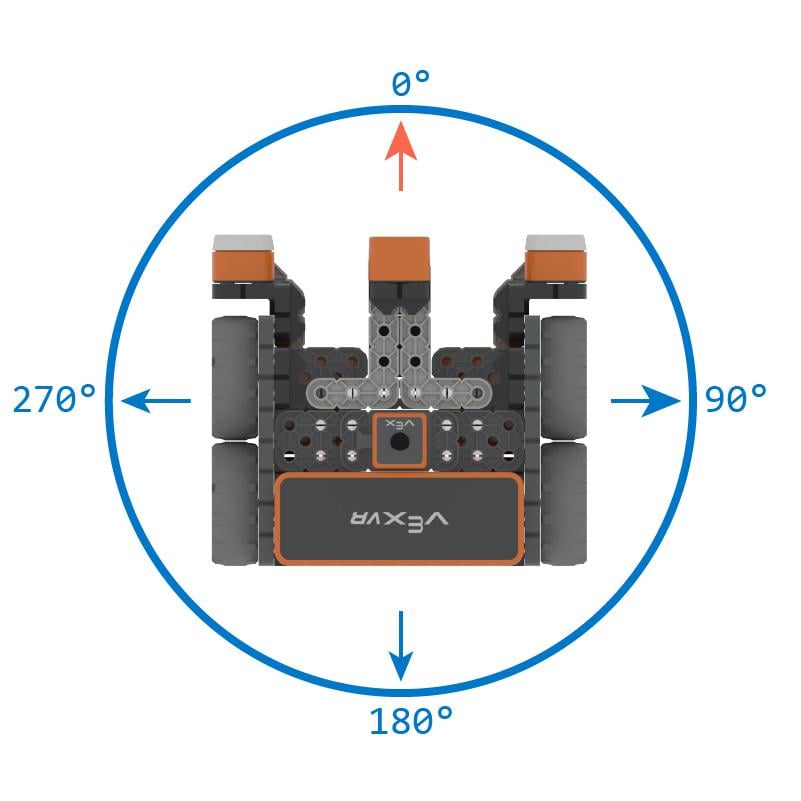
The [Turn to heading] block can also be used to turn the VR Robot. This block turns the VR Robot to a given compass heading between 0 and 359.9 degrees. When a VR Robot collides with a castle, it may be knocked off course. The [Turn to heading] block ensures the VR Robot will turn to face the next castle no matter what previously happened.
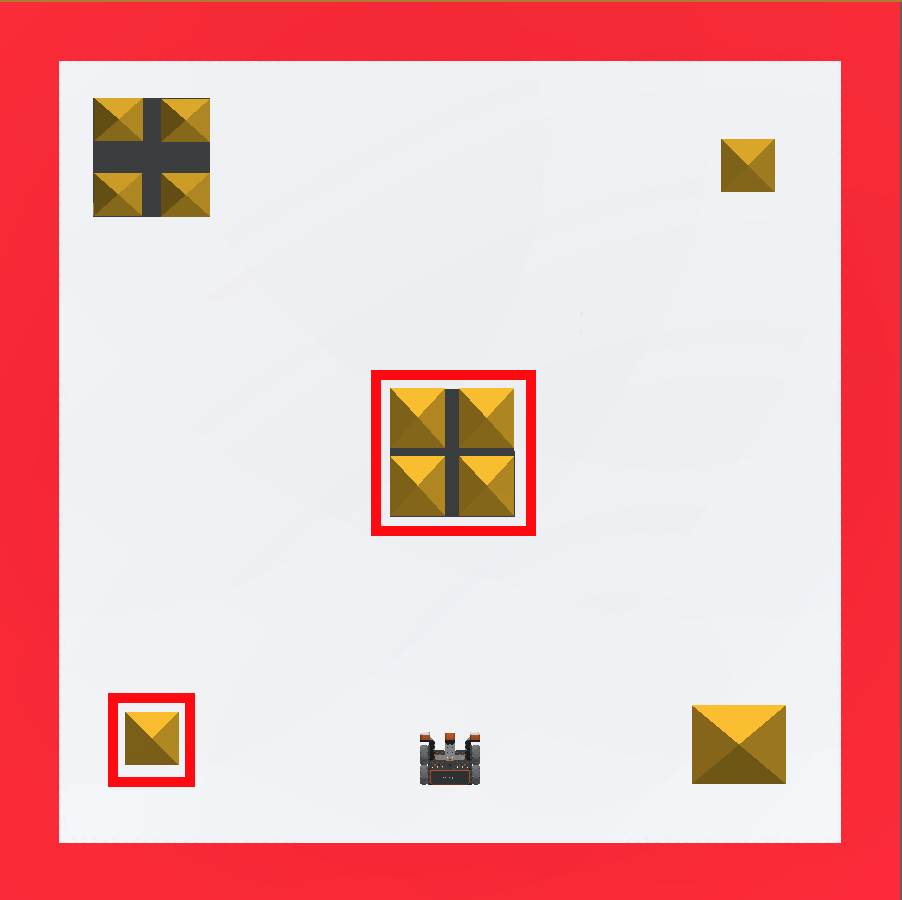
This example will have the VR Robot move to knock over the center building, then turn and knock over the building in the bottom left corner on the Castle Crasher Playground.
-
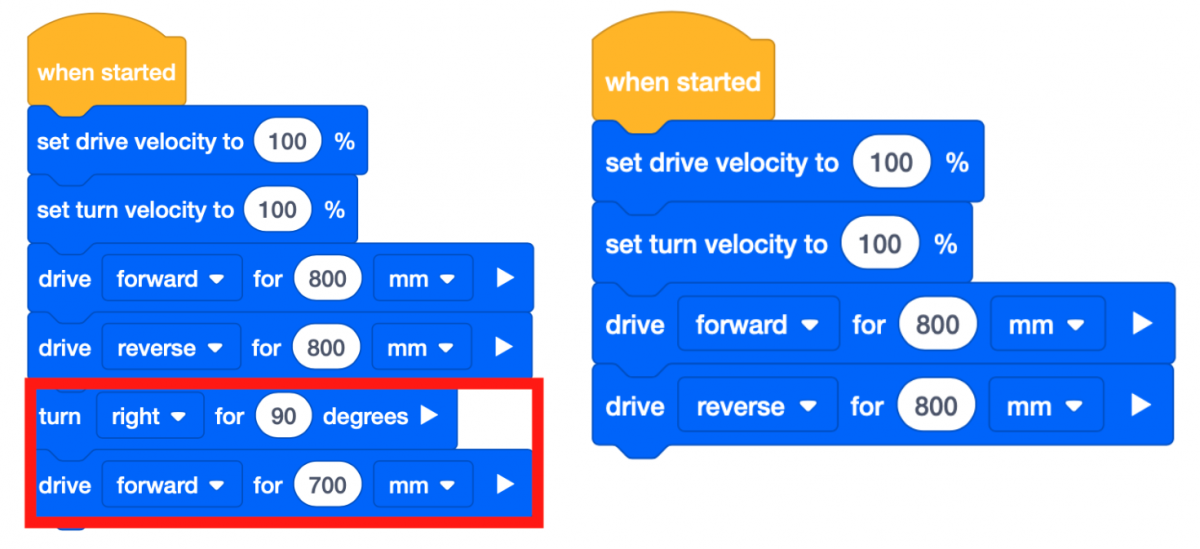
Remove the bottom two blocks from the project.
-
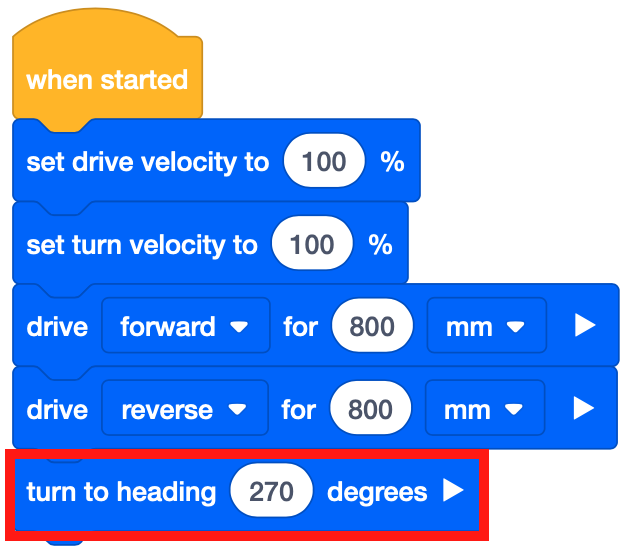
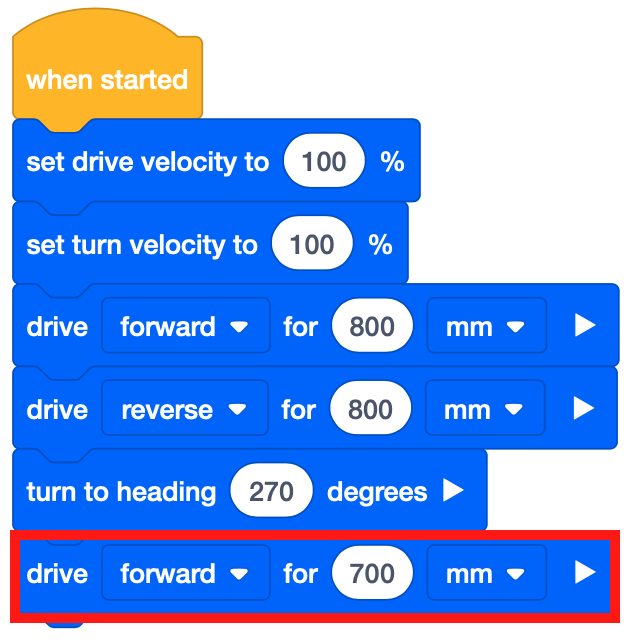
Drag in the [Turn to heading] block and attach it beneath the [Drive for] block. Set the parameters of the [Turn to heading] block to 270 degrees.
-
Drag in the [Drive for] block and attach it below the [Turn to heading] block. Set the parameters of the [Drive for] block to 700 millimeters (mm).
-
Select the “Open Playground” button to launch the Castle Crasher Playground if it is not already open.

-
Select the “Start” button to test the project.

-
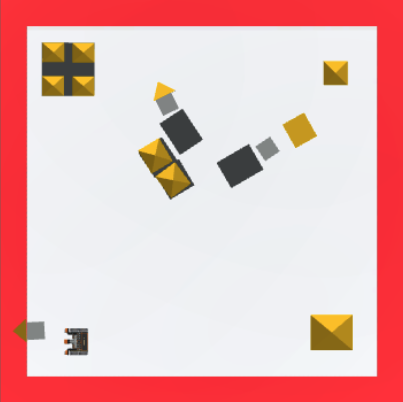
Watch the VR Robot move forward and collide with the center building before reversing back to the start. The VR Robot will then turn to a heading of 270 degrees and drive forward to collide with the building at the bottom left corner of the Castle Crasher Playground.
Mini Challenge
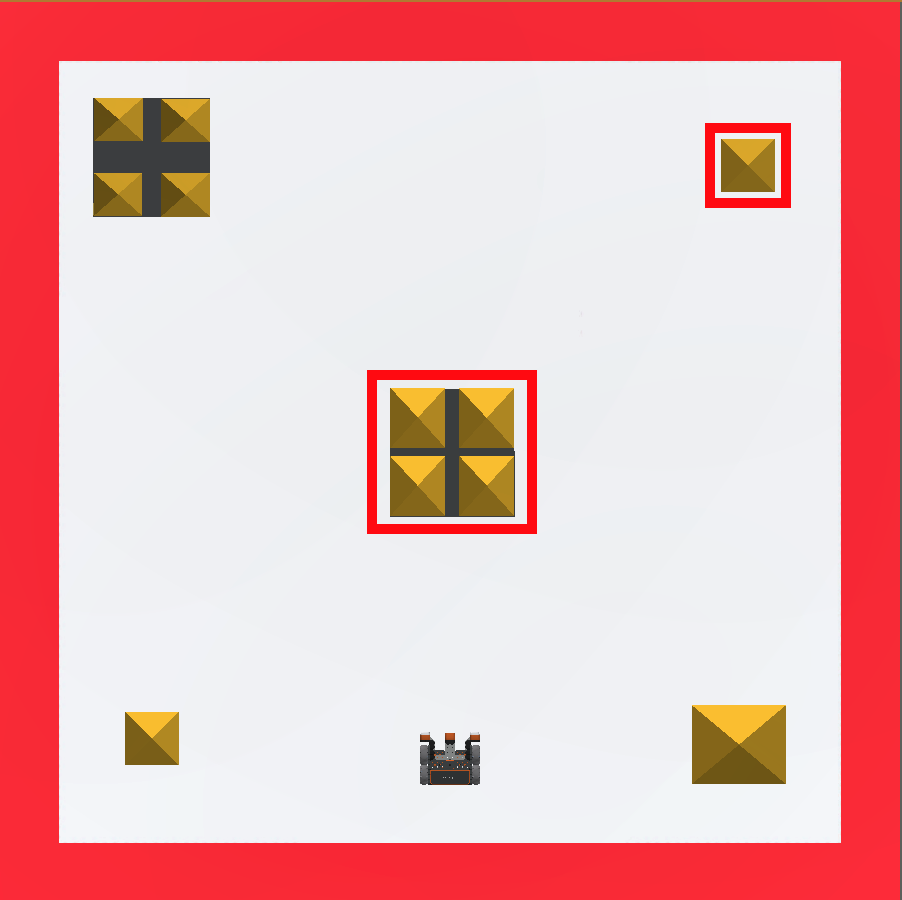
For this mini challenge, the VR Robot should collide with the middle building and the building on the top right of the Castle Crasher Playground. You will be given a project, but there is an error. Edit the project to solve the mini challenge!
Follow these steps to complete the mini challenge:
- The video clip below shows how the VR Robot should move to topple both sets of blocks. The robot should drive straight ahead through the middle set of blocks to knock them over, then turn right and drive forward into the top right set of blocks to topple them as well.
-
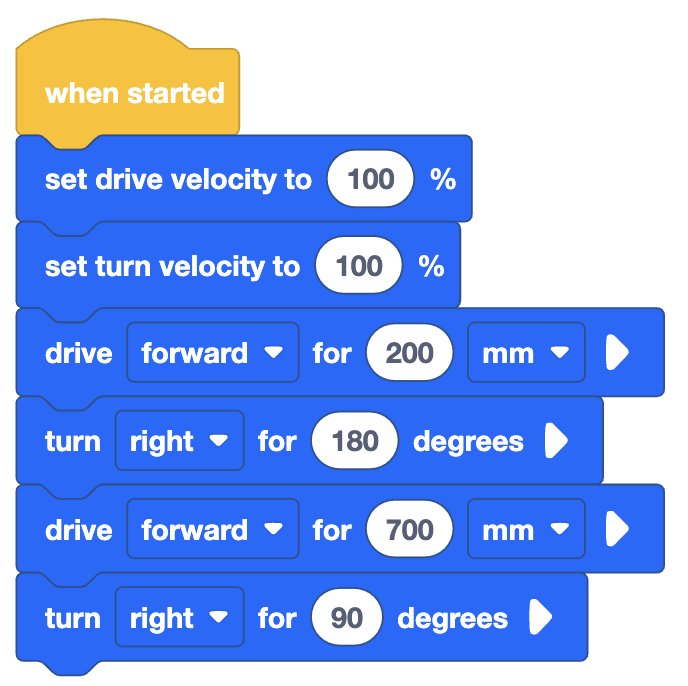
Create this project by adding or removing the necessary blocks to the Unit2Lesson3 project.
- Start the project to see where the error is in the code.
- Edit the code and try again. Continue this process until the mini challenge is complete.
- Once the VR Robot successfully collides with the middle building and the building on the top right of the Castle Crasher Playground, save the project.
- Save the project before moving on.
Congratulations! You solved the mini challenge!