
Lesson 2: Flow of a Project with a For Loop
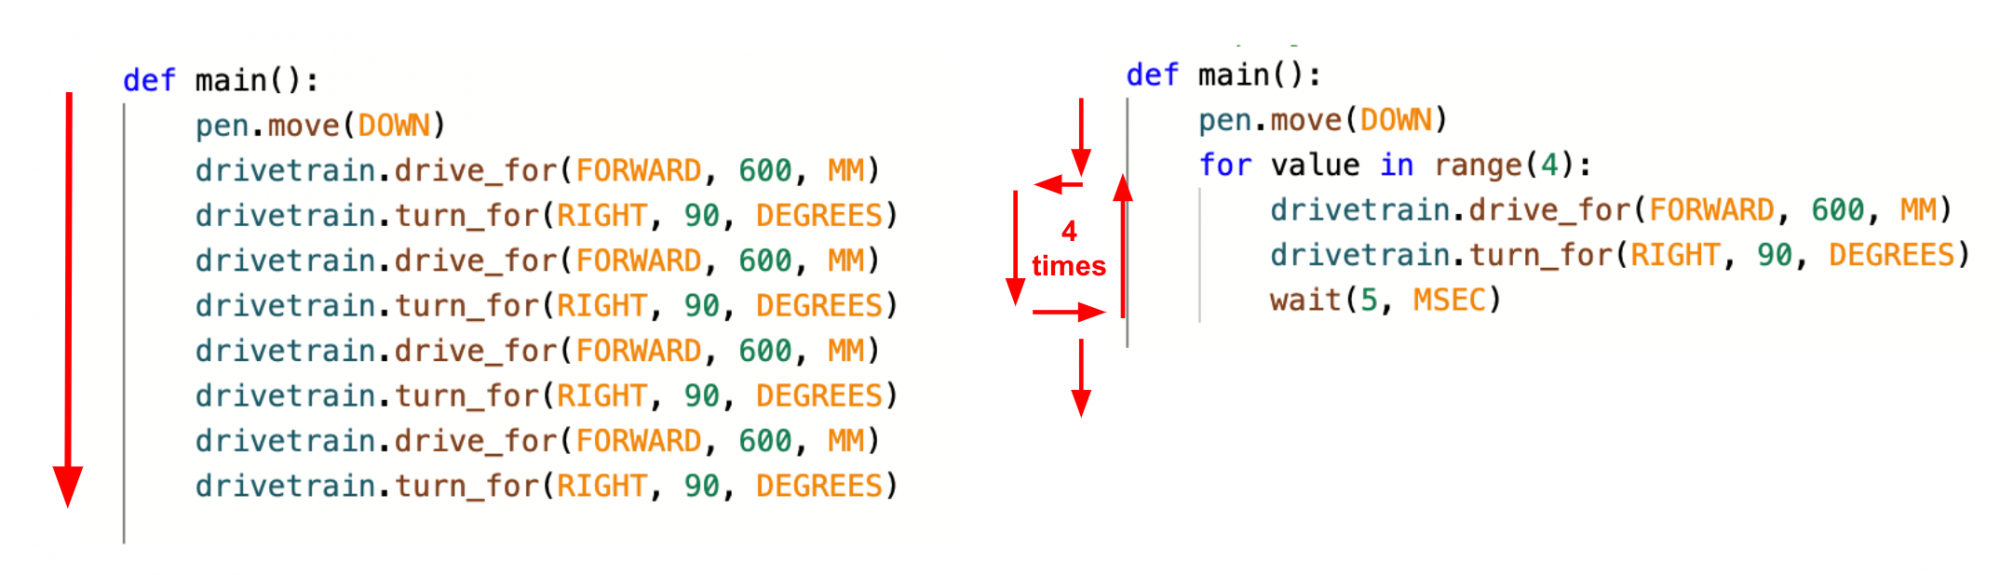
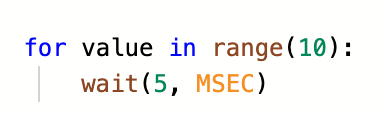
When a project uses a for loop, it still follows the same logic while executing the commands. For instance, these two code samples will make the VR Robot move in the same way. However, the project with the for loop, repeats the two Drivetrain commands four times in order to do so.
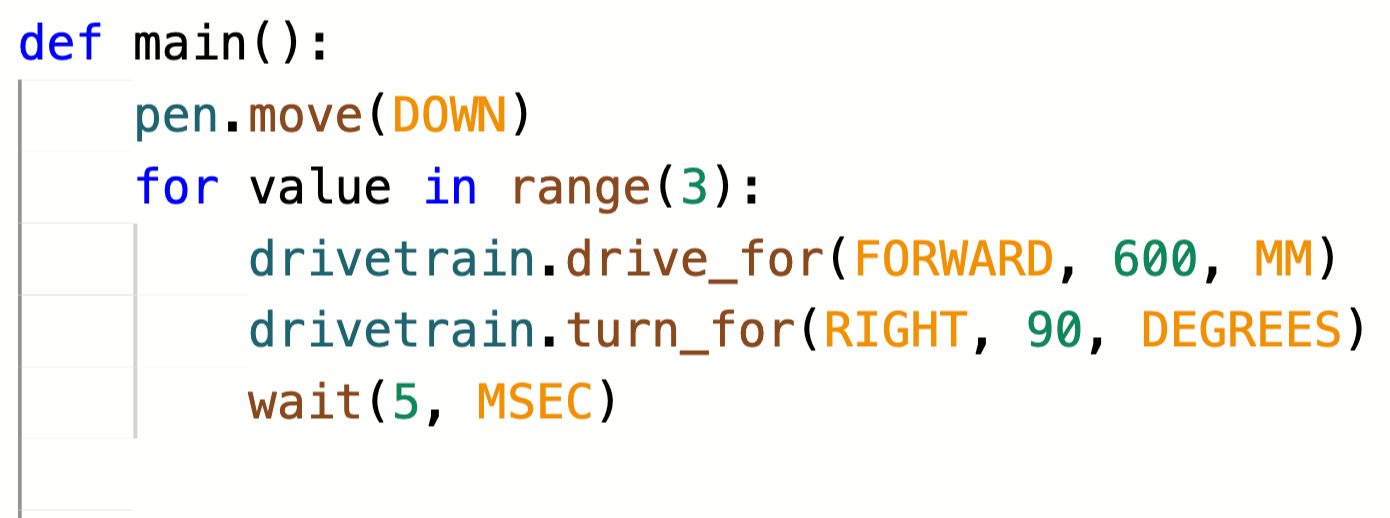
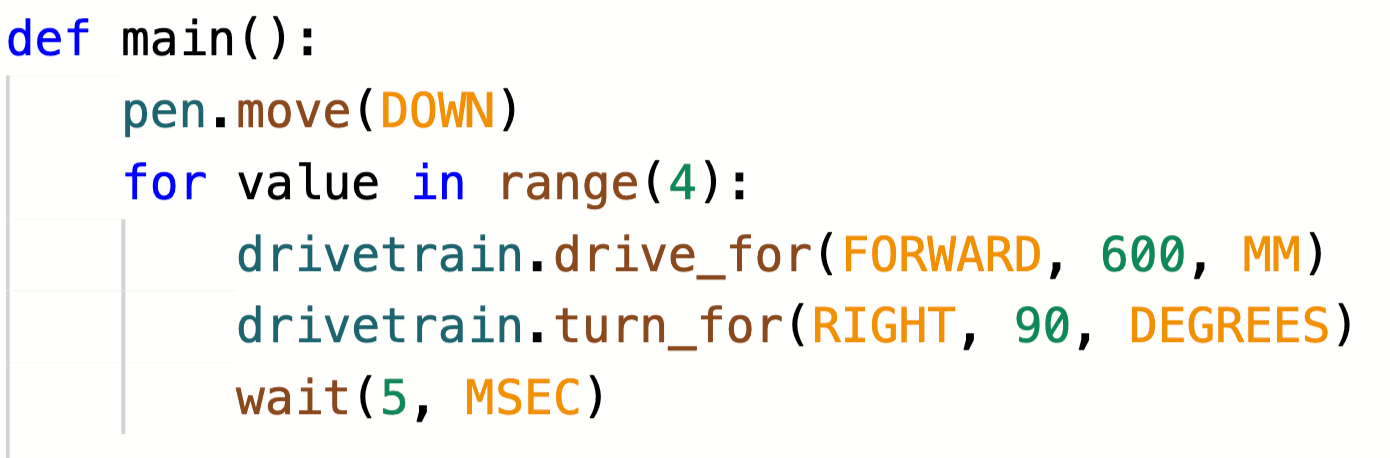
A for loop is used to repeat a series of commands a specified number of times. The for loop repeats (also known as iterates) over the sequence of commands inside it. In a Python for loop, the variable 'value' is used to track the current iteration, and the key word 'in' uses the range function to specify the number of iterations. 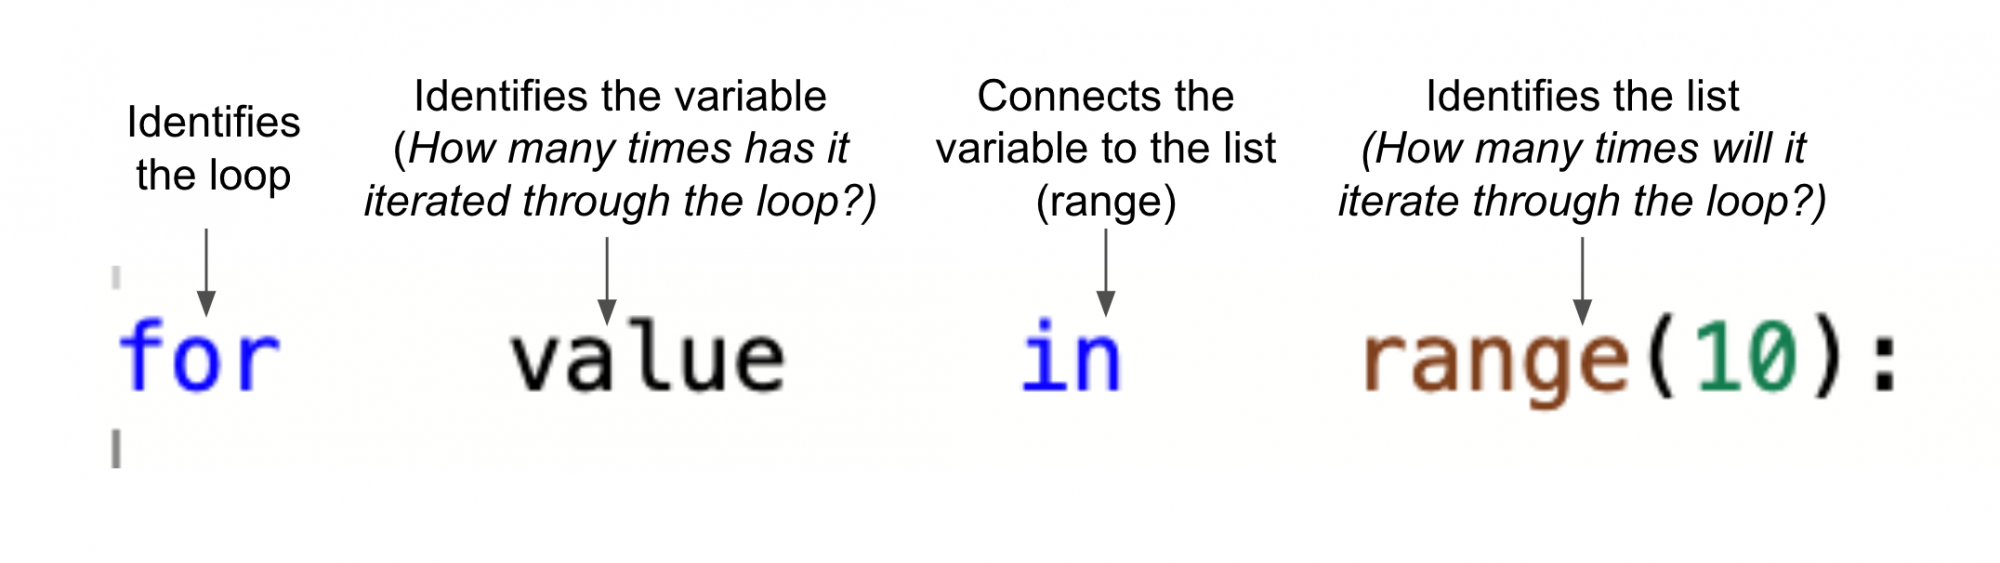
The range function identifies how many times the loop should iterate (or repeat). To repeat the behaviors for the desired number of times, set the parameter of the range function.
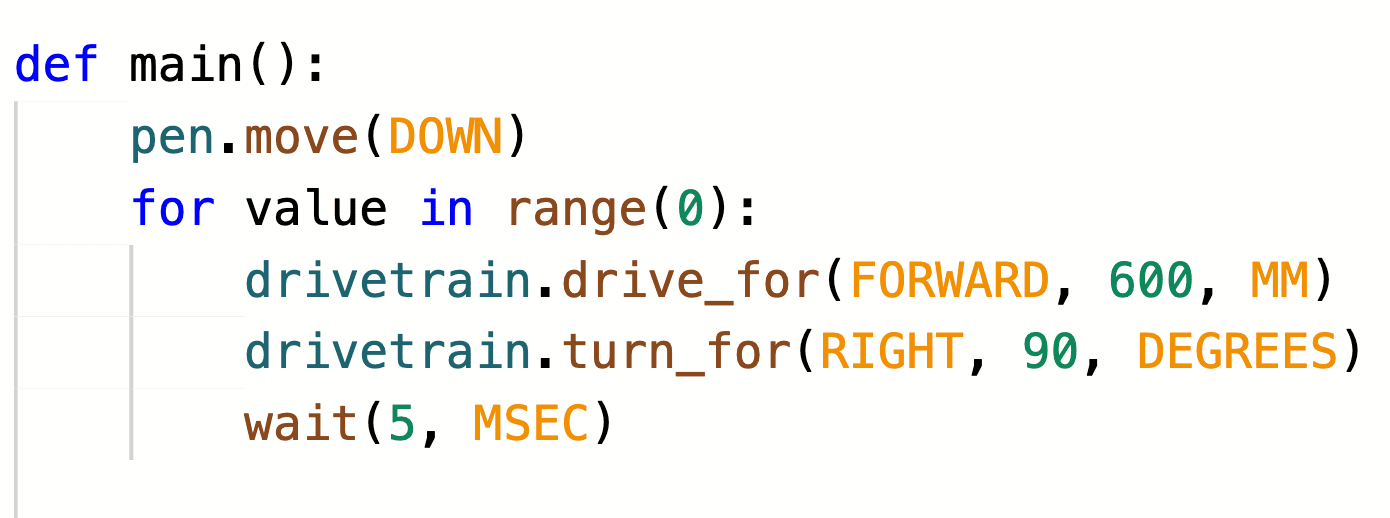
The range function essentially creates a temporary list that specifies what the loop should iterate through, in order to be completed. In the case of repeating behaviors, like drawing the four sides of a square, the range function uses a temporary list of (0, 1, 2, 3) to enable the VR Robot to execute those commands four times. The movement of the VR Robot will change depending on the parameter of the range function, as shown here.
 |
 |
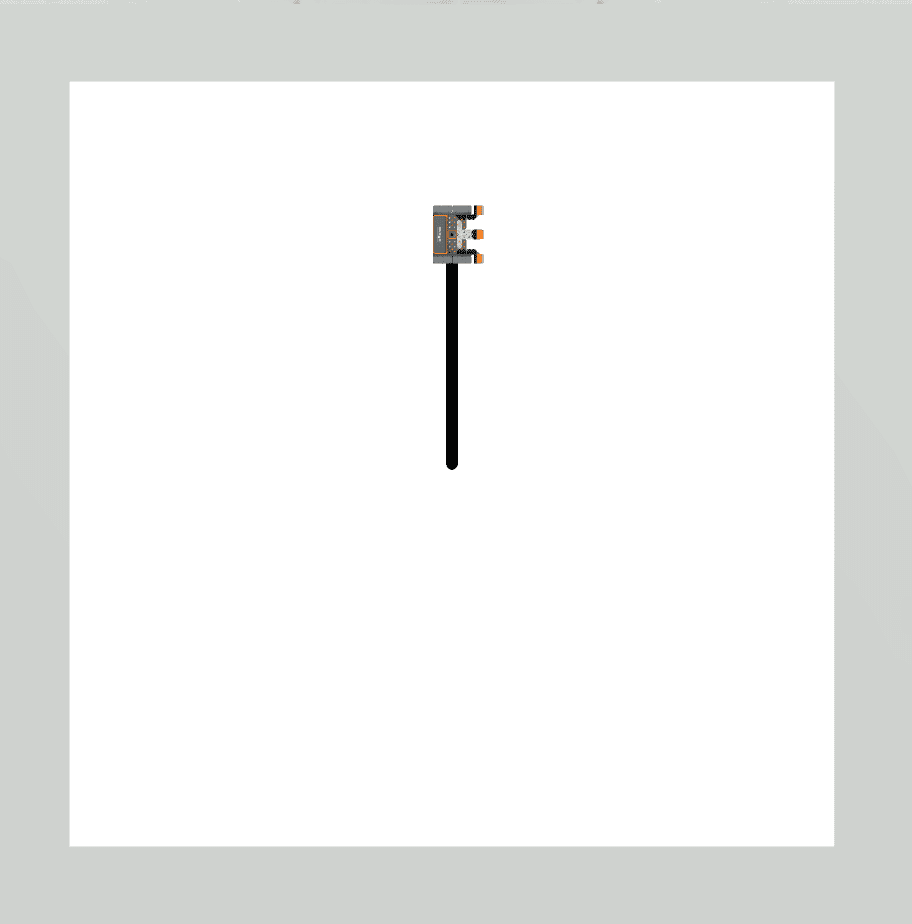
Drivetrain commands executed 0 times. |
 |
 |
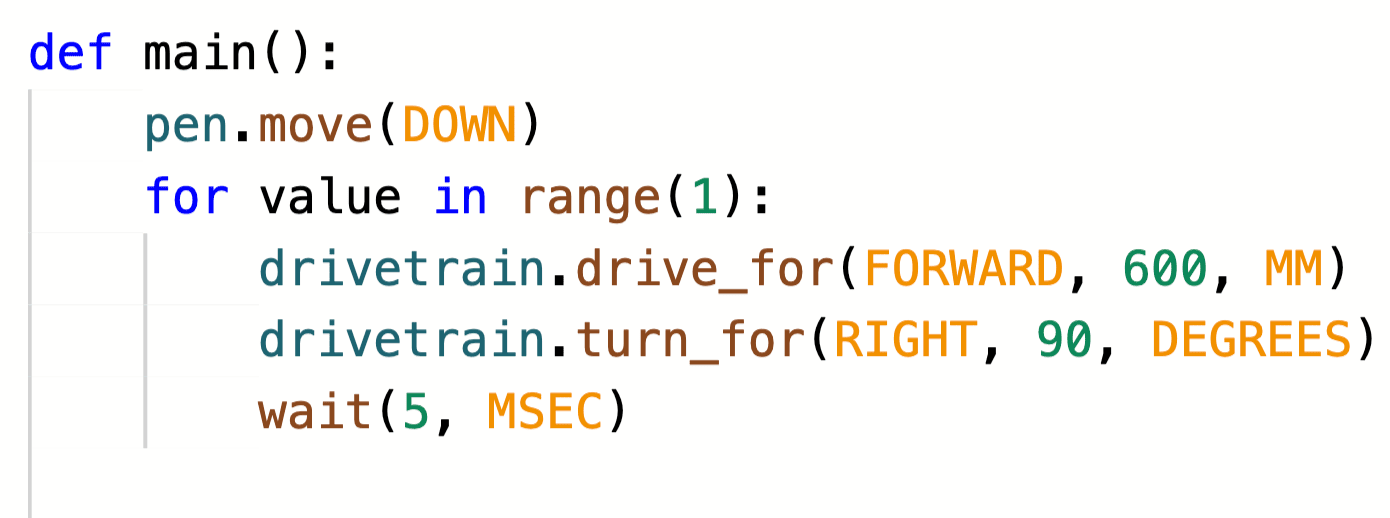
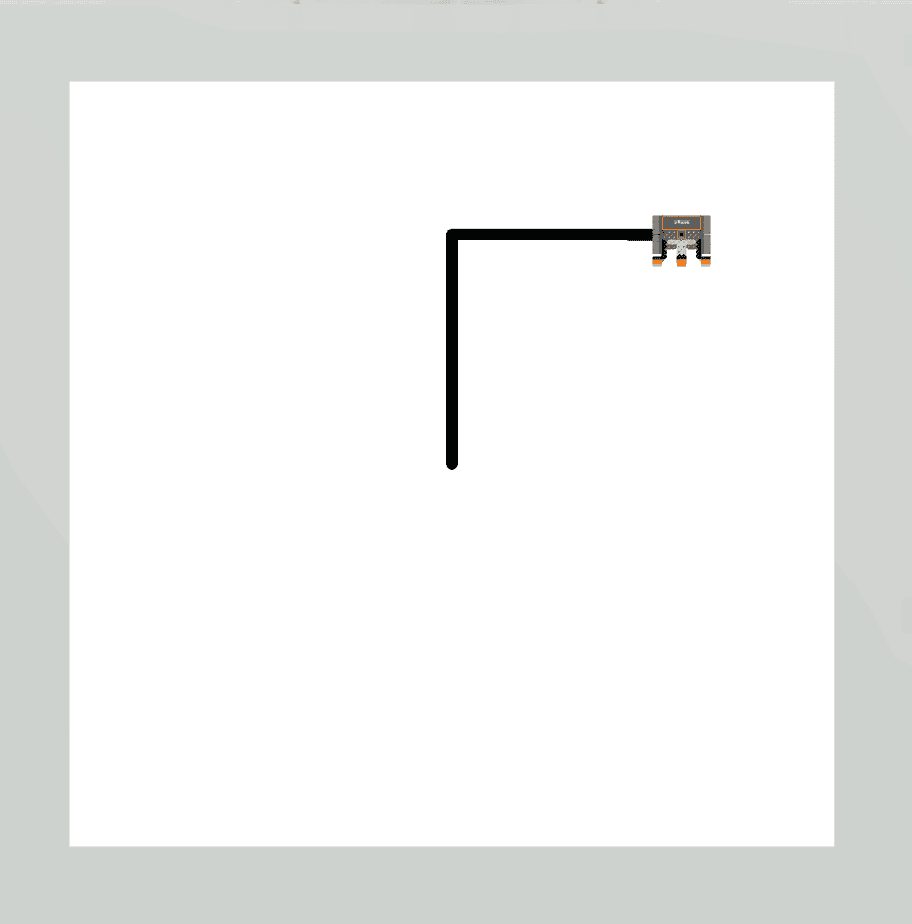
Drivetrain commands executed 1 time. |
 |
 |
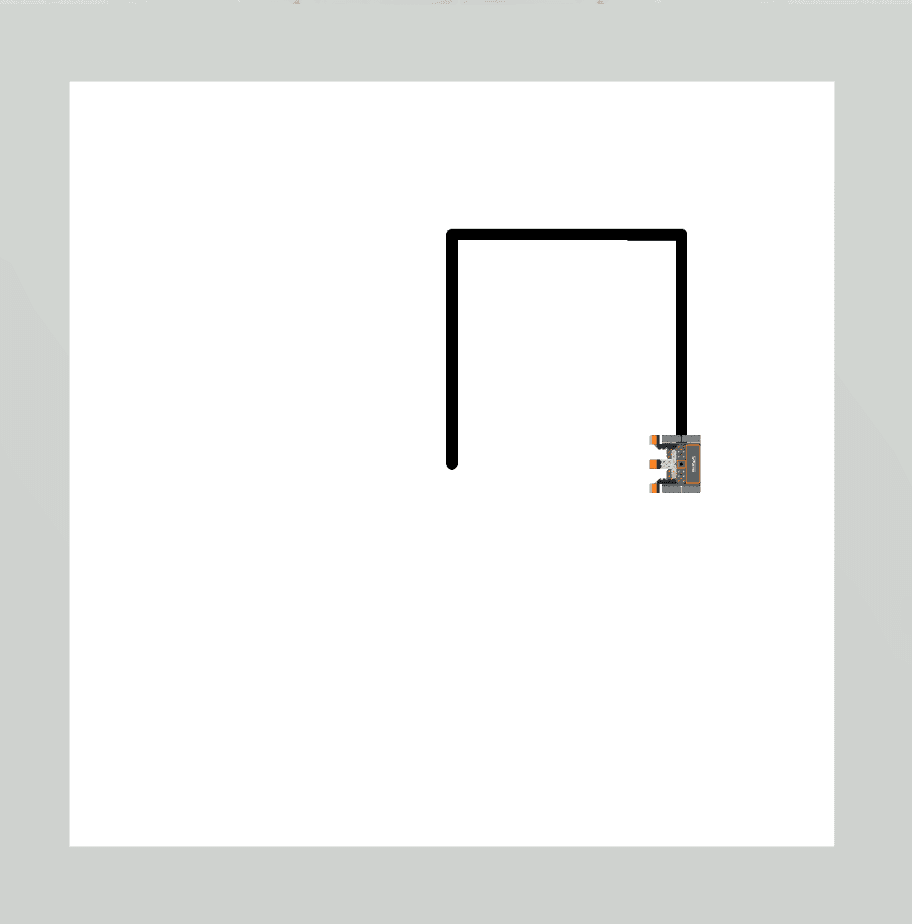
Drivetrain commands executed 2 times. |
 |
 |
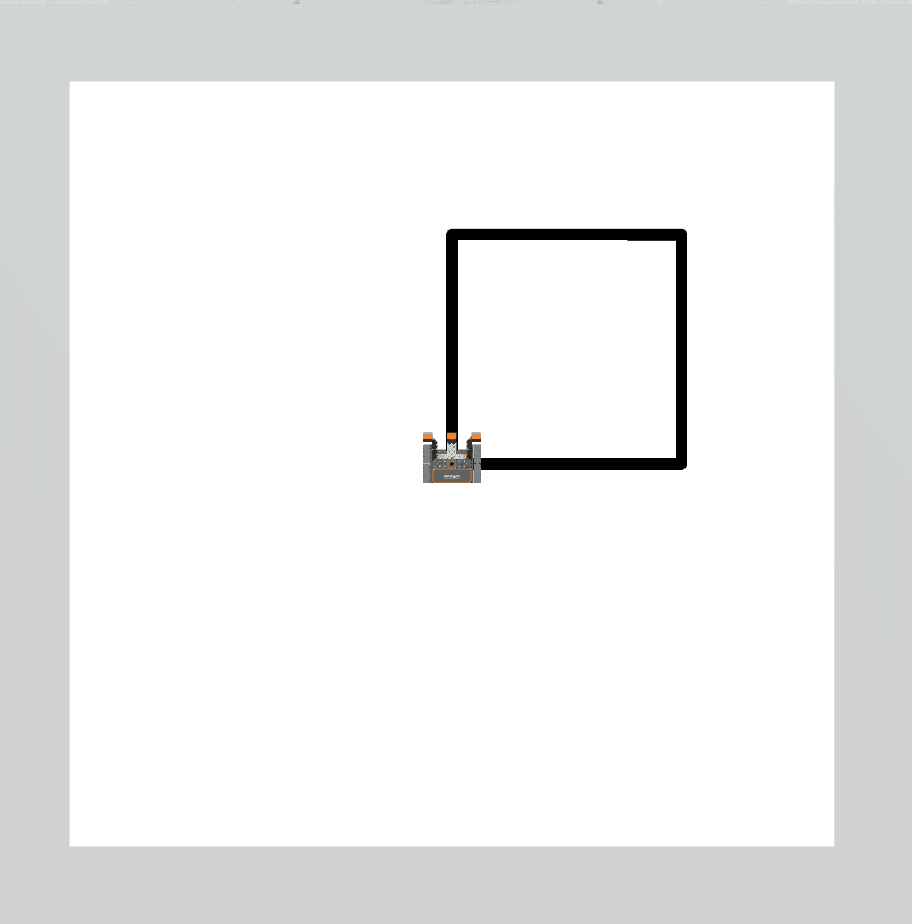
Drivetrain commands executed 3 times. |
 |
 |
Drivetrain commands executed 4 times, completing all 4 sides of the square. |
|
|
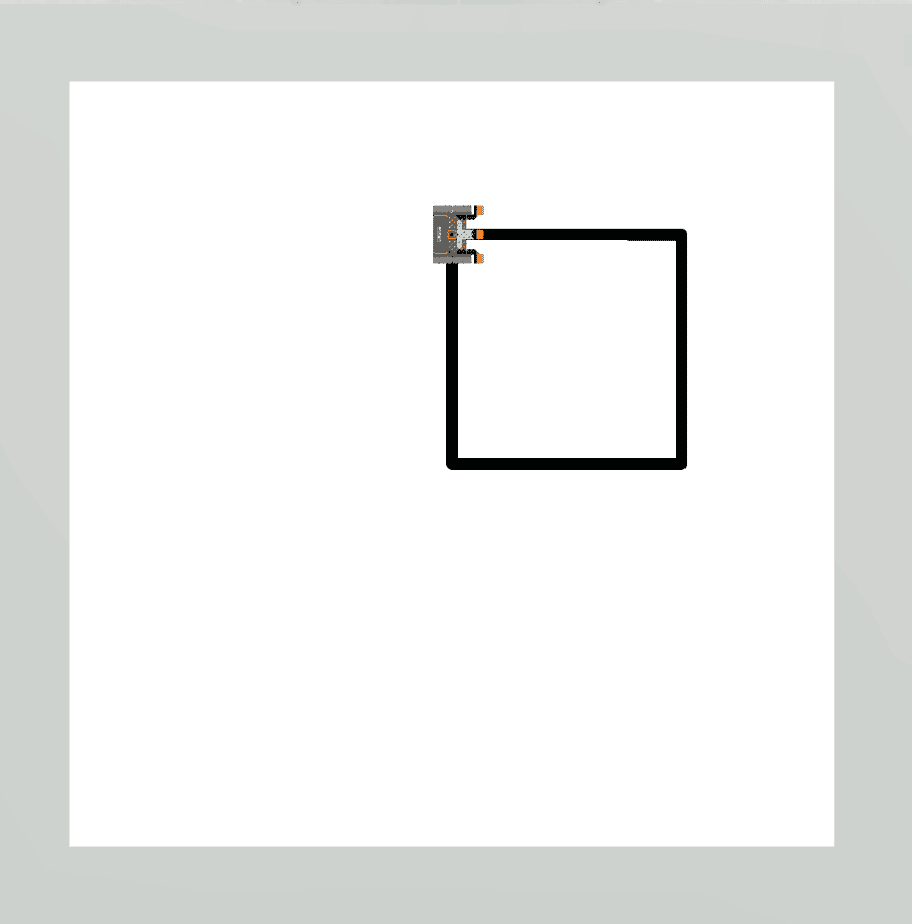 |
Drivetrain commands executed 5 times, completing the square, then tracing over the first side again. |
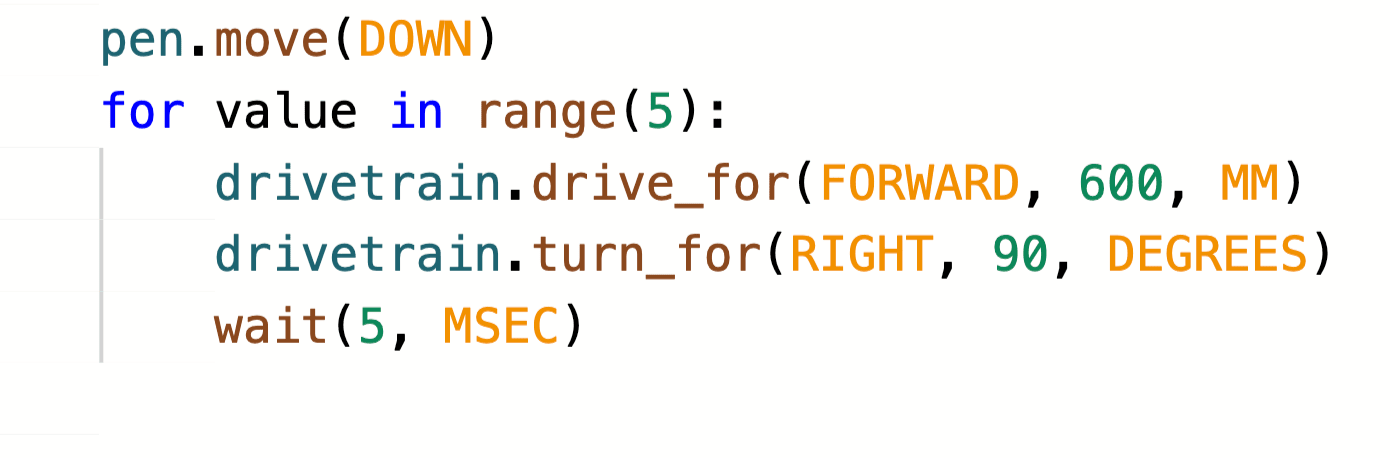
Notice that the drawn shape of the square did not change when the range function changed from four to five; but the final position of the VR Robot did. As such, using a for loop with the default range function of ten, would result in the same square shape being drawn, but the VR Robot would continue to repeat the behaviors an additional six times.
The VR Robot will move through the commands from the for loop header to the last indented command. The for loop header indicates that the VR Robot should repeat the actions inside the loop the specified number of times before moving on to the next command outside of the for loop. The indented lines indicate what commands are inside the for loop and should be repeated.
For Your Information
In VEXcode VR, a wait command is always added with the for loop. The purpose of the wait command is to ensure that VEXcode VR can properly run the project as intended, due to the web-based nature of the VEXcode VR platform. The wait command should never be deleted when using a for loop, or your project may not run as intended.
The specified number of times that the for loop is set to execute, enables the project to flow through out of the for loop when it has completed the necessary iterations. The parameter of the range function in the for loop must be reached before the project will move on to the next command outside the loop. In the code sample below, once the Drivetrain commands in the for loop have been executed four times, the project will move out of the for loop, set the pen color to red, and drive in reverse. 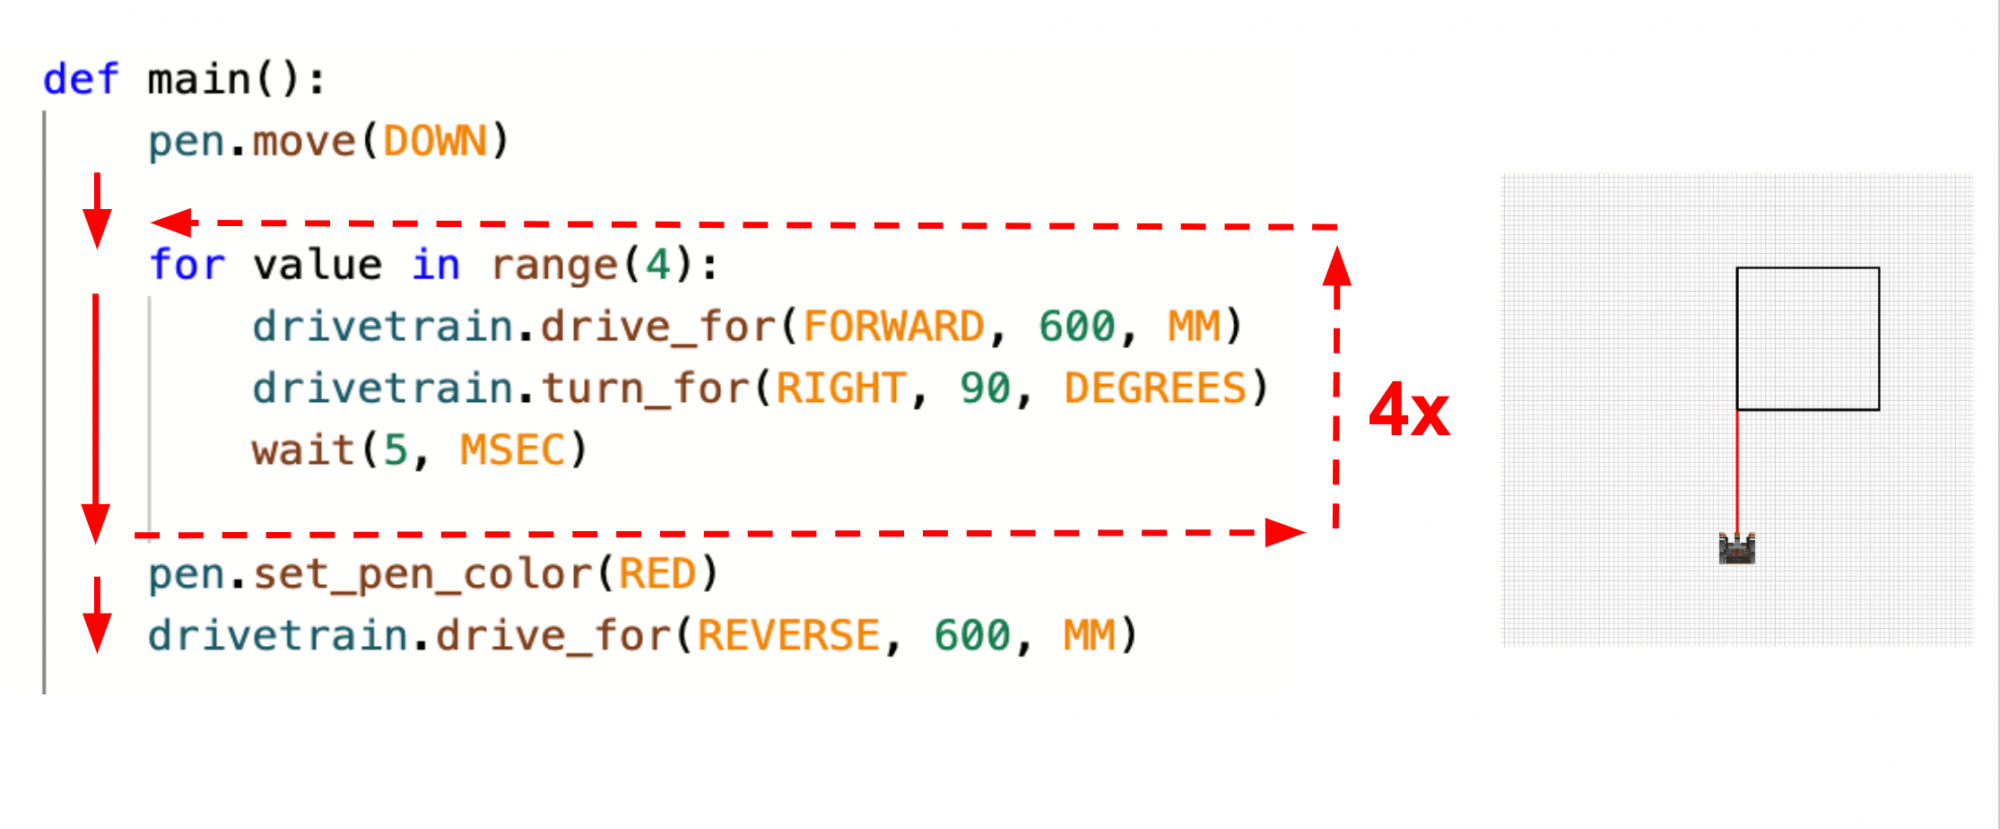
Mini Challenge
In this project, the VR Robot should draw a blue square on the Art Canvas Playground, but there are errors in the project. Edit the project to solve the mini challenge!
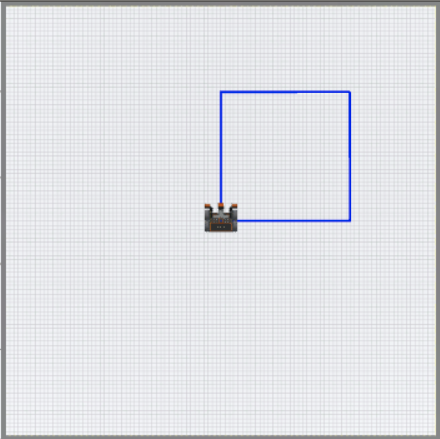
The video below shows what to do to complete the mini challenge. The robot starts in the middle of the playground and draws the four sides of a large blue square.
- Watch the solution video and review how the VR Robot should move in order to complete the mini challenge.
- Modify the Unit3Lesson2 project to match this image, or copy the code below.
def main():
	pen.move(DOWN)
	pen.set_pen_color(RED)
	drivetrain.drive_for(FORWARD, 600, MM)

	for value in range(3):
		drivetrain.drive_for(FORWARD, 600, MM)
		drivetrain.turn_for(RIGHT, 90, DEGREES)
wait (5, MSEC)- Start the project and identify where the VR Robot does not complete the expected behaviors.
- Modify the project and run the project again. See if the VR Robot completes the expected behaviors.
- If the VR Robot does not draw a blue square, repeat the previous step and try again. Continue to modify and run your project until the VR Robot draws a blue square.
- Once the VR Robot successfully draws a blue square on the Art Canvas Playground, save the project.
Congratulations! You solved the mini challenge!