Movement Example
![]() Teacher Toolbox
-
Introduce the Play Section
Teacher Toolbox
-
Introduce the Play Section
In this Play section, groups will draw two points on the whiteboard and create the 'Lab 4- Movement' project in VEXcode V5. They will add and remove blocks to their project to observe linear and joint movement of the arm on the Workcell.
What the Teacher Will Do:
- Bring students together for whole-class instruction.
- Introduce the Lab to the students.
- Tell students that arms can move in two ways: linear movement and joint movement. There are advantages and disadvantages to each type of movement, which students will learn through the course of subsequent Labs.
- Tell students that in their groups, they will create the 'Lab 4- Movement' project in VEXcode V5 to observe linear and joint movement.
![]() Teacher Toolbox
-
Facilitating the Movement Example page
Teacher Toolbox
-
Facilitating the Movement Example page
What the Teacher Will Do:
- Keep students together for a whole-class discussion about the activity.
- Instruct students that they will be working together in their groups to follow the steps on this page.
- Ensure each group of students has their devices to run VEXcode V5 and to view this page in the Lab.
- Tell students to check in with you once they have completed the activity.
- Break students off to work within their groups for the activity. Walk around the room as students are working to answer any questions if they arise.
- As groups check in, engage them in a discussion to ensure they have built their project correctly before moving on. Guidance for the discussion is provided in a Teacher Toolbox at the bottom of this page.
For more information about how to facilitate this activity, go to the V5 Workcell Educator Certification.
In this Play section, you will be exploring the difference between linear and joint movement. You will do this by selecting two points, point 1 and point 2, on the Workcell and connecting them using both joint and linear movement. Once you have connected them, you will compare the difference between the two movements.
| Quantity | Materials Needed |
|---|---|
| 1 per group |
V5 Workcell |
| 1 per group | |
| 1 per group |
Engineering Notebook |
| 1 per group |
Device to run VEXcode V5 |
| 1 per group |
Micro-USB cable |
| 1 per group |
Dry-erase marker |
In order to obtain point 1 and point 2, you first need to build the 'Lab 4- Movement' project.
In VEXcode V5, follow the steps in this video to open the 'Arm Manual Movement' example project, input your mastering values, adjust the tool, name, and then save the project as 'Lab 4- Movement.'
Ensure you are using your mastering values, and not the ones displayed in this video.
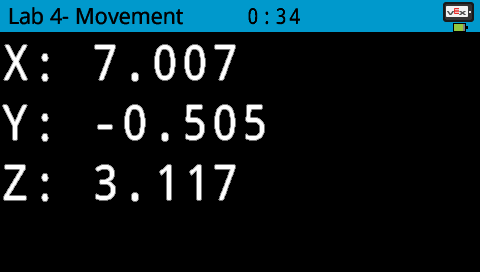
Download and run the project. (x, y, z) values will be displayed on the Brain's screen.


For Your Information
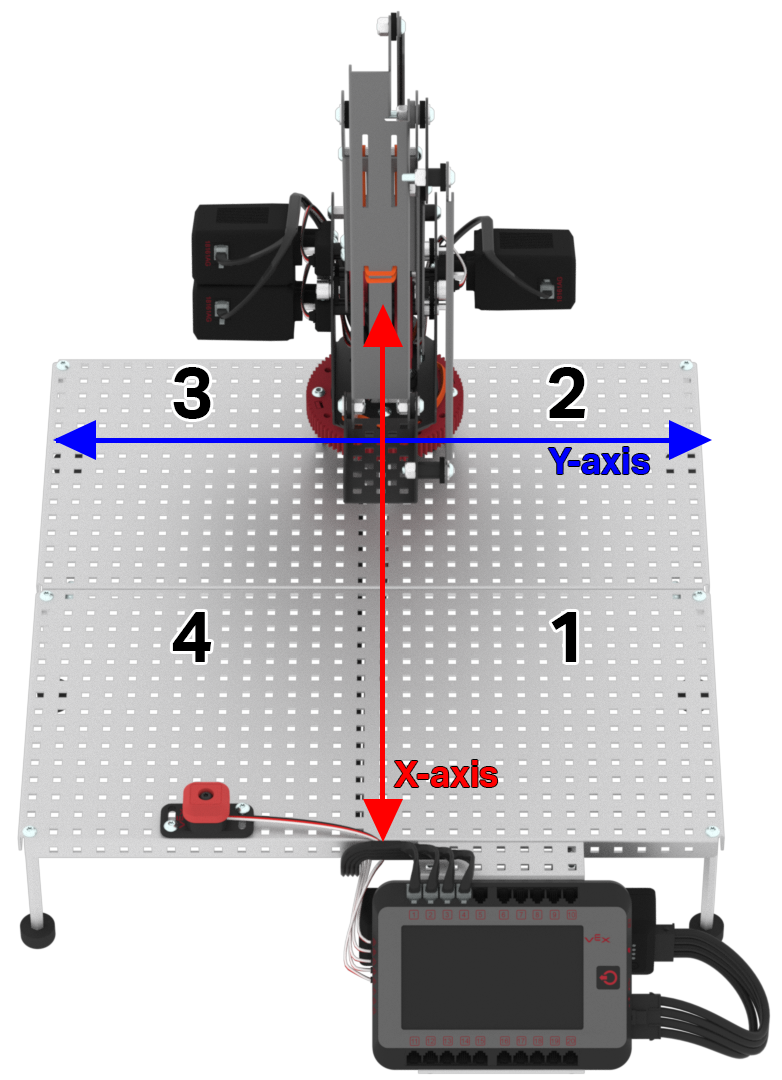
The intersection of the x and y-axes on the Workcell creates four quadrants.
| x-axis | y-axis | |
|---|---|---|
| Quadrant 1 | positive(+) | positive(+) |
| Quadrant 2 | negative(-) | positive(+) |
| Quadrant 3 | negative(-) | negative(-) |
| Quadrant 4 | positive(+) | negative(-) |

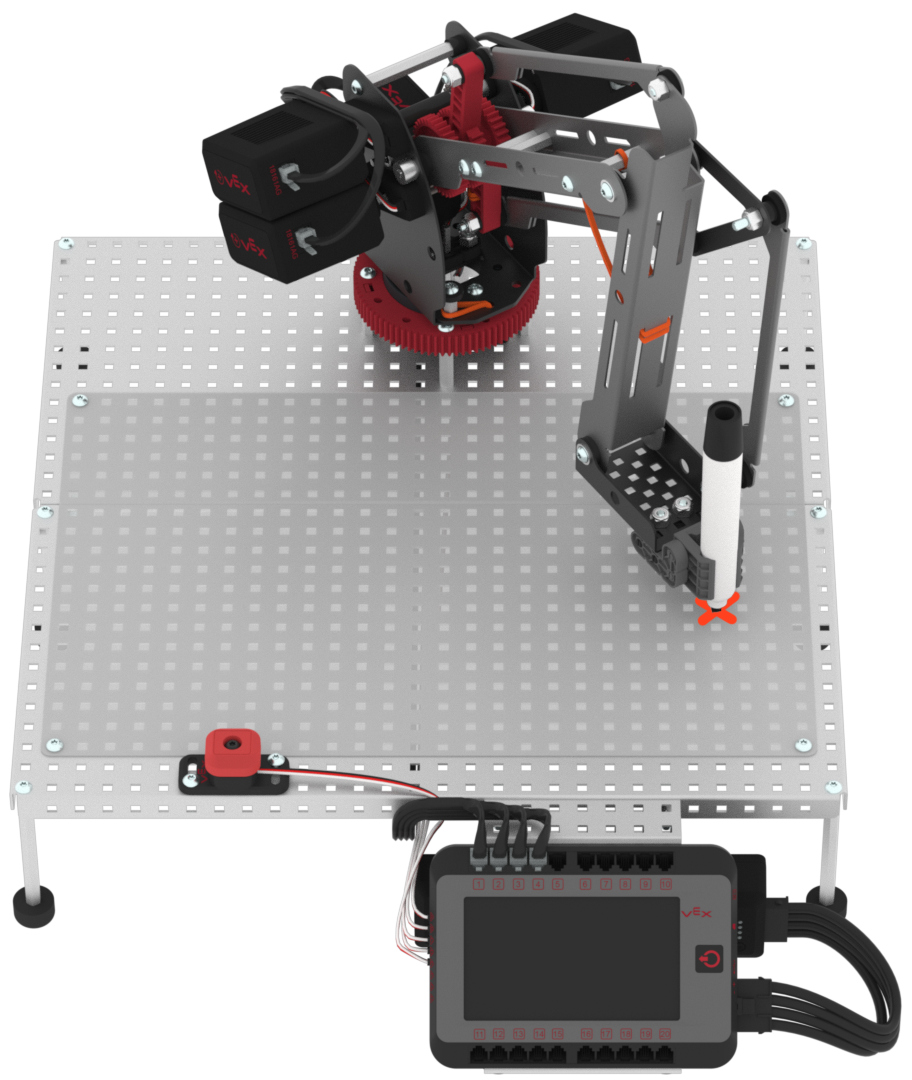
Manually move the arm so that the marker is touching the whiteboard to the right of the Brain in quadrant 1. The mark made on the whiteboard will be point 1. Record the (x, y, z) coordinates of point 1 in your engineering notebook.
Choose your own location for point 1, it does not have to match the point shown in the image.

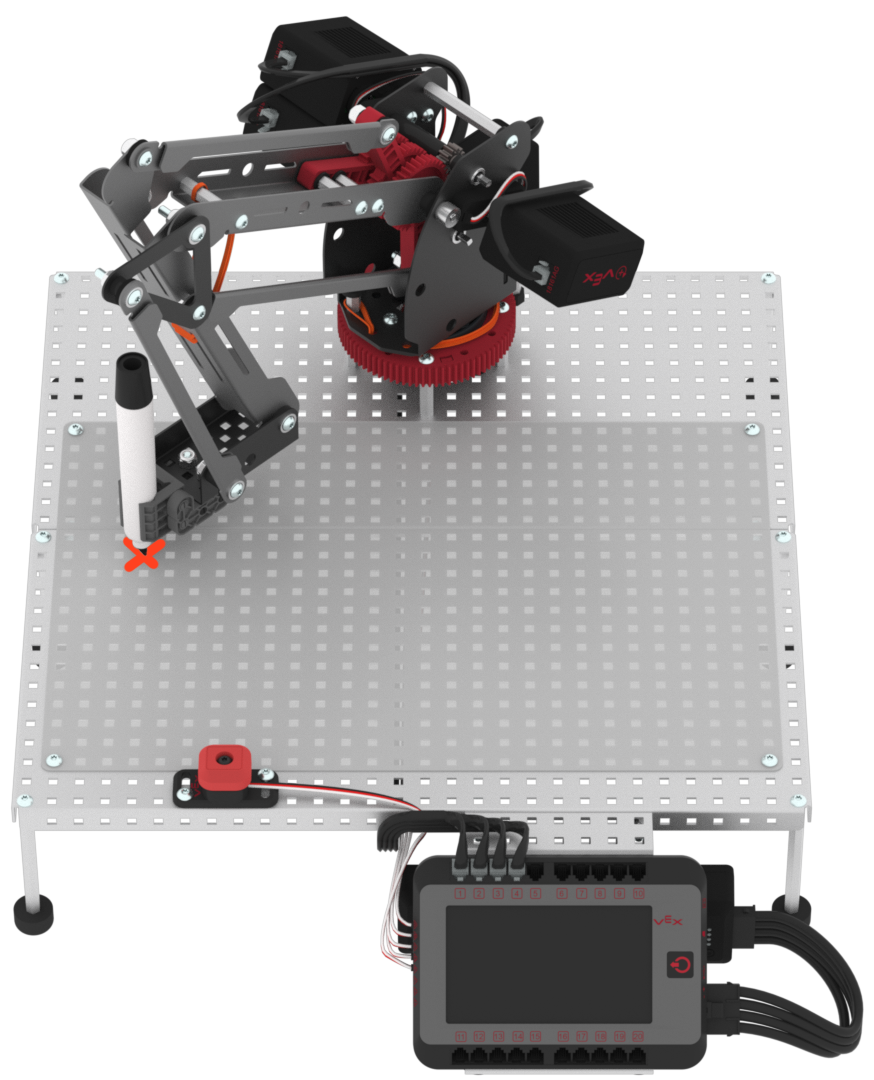
Manually move the arm so that the marker is touching the whiteboard to the left of the Brain in quadrant 4. The mark made on the whiteboard will be point 2. Record the (x, y, z) coordinates of point 2 in your engineering notebook.
Choose your own location for point 2, it does not have to match the point shown in the image.

Once you have finished recording both point 1 and point 2, stop the project and check in with your teacher.

![]() Teacher Tips
Teacher Tips
- Saving a VEXcode V5 project may look different depending on the device that your students are using. For more information on how to save on a specific devices, view the Save a Blocks Project (iPad, Chromebook, Windows, macOS) articles from the Knowledge Base.
- For more information on opening example projects, view this article from the Knowledge Base.
- Remind students that their mastering values will be different than the one shown in the video. Students should be using their values, and not the values from the video.
- Encourage students to choose their own point 1 and point 2, it does not have to match the points shown in the images.
- For additional tips, go to the V5 Workcell Educator Certification.
![]() Teacher Toolbox
Teacher Toolbox
Review the following with the group during their check in:
- Ensure their project contains the correct mastering values and the tool plate is set to 'marker.'

- Ensure points 1 and 2 are far enough away from each other so that when a line is drawn between them, it will be visible.
- Ensure points 1 and 2 are not close to the edge of the whiteboard. This could result in the arm drawing off of the whiteboard surface when it moves.


