Lesson 3: Using Reported Sensor Feedback to Place Disks in the Goal
In Lesson 2, the VR Robot drove in reverse back to the starting point to drop off the disk. This required the user to calculate the exact distance for the VR Robot to travel. This may not always be possible. Instead, the VR Robot can use reported sensor values to pick up and drop disks with consistent precision.
Lesson 3 uses reported sensor feedback to determine where the VR Robot should stop driving when returning to the goal. In using the <Eye Sensor near object> block earlier in this lesson, there is no need to know the distance from the goal to each disk.
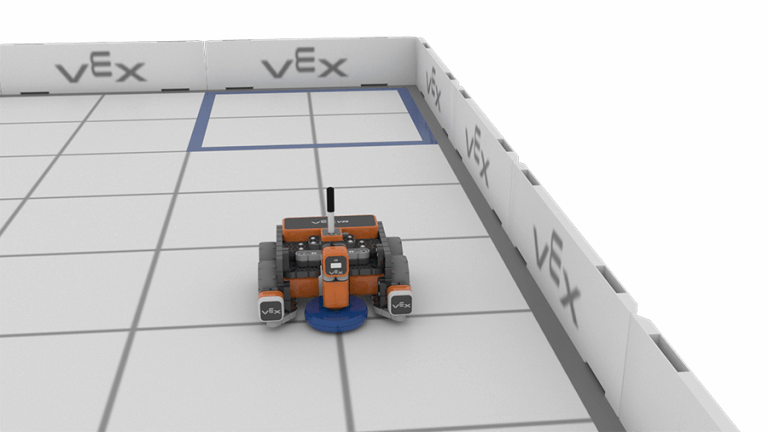
The VR Robot will drive back towards the blue goal using data from the Distance Sensor to determine where to stop driving. Once the VR Robot has stopped inside the blue goal, the VR Robot will drop the blue disk.
- Continue working in the Unit8Lesson3 project.
- The Distance Sensor measures the distance from the front of the VR Robot to the nearest object. For this reason, the VR Robot will need to turn around 180 degrees before driving back towards the blue goal.
- The VR Robot will use the Distance Sensor with the back wall of the Playground in order to determine where to drop the disk. For this reason, the VR Robot will need to turn around 180 degrees before driving back towards the blue goal.
-
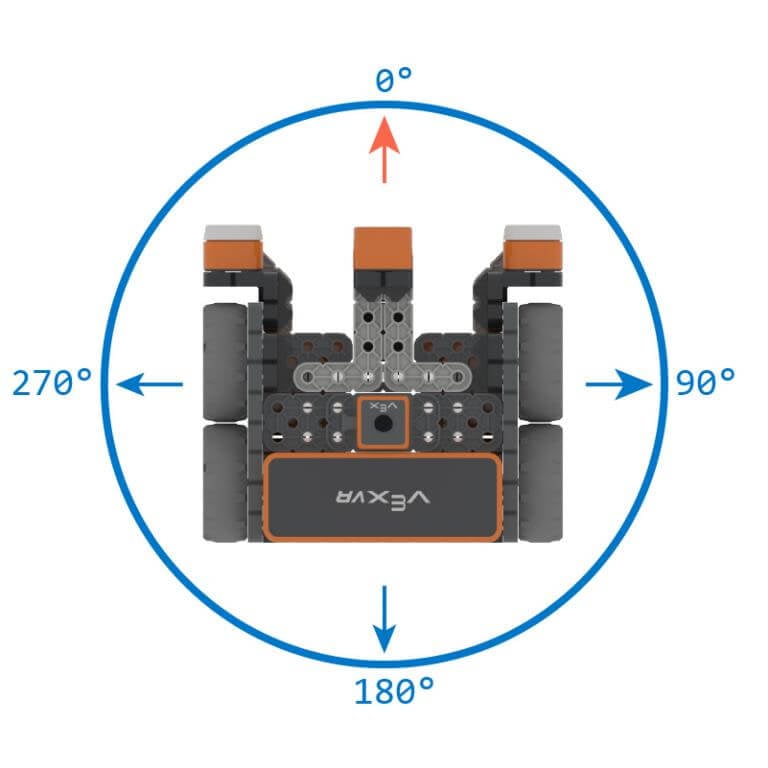
The [Turn to heading] block can be used to ensure the VR Robot turns to the correct heading.

Using Switch Blocks
This is the Switch [turn to heading] block. You can modify the degree of the turn by changing the numerical value in the parentheses. Remember that the number must be written before the unit of measurement (DEGREES), separated by a comma.

For Your Information
The [Turn to heading] block turns the VR Robot to a specific heading using the Gyro Sensor. The direction the VR Robot will turn (left or right) is determined based on the current heading of the Gyro sensor. The [Turn to heading] block is used to direct the VR Robot to a specific heading regardless of the VR Robot’s position. As you pick up or drop a disk, the VR Robot may be knocked off course. Using the [Turn to heading] block ensures that the VR Robot will turn to the absolute position rather than a position relative to the prior heading.
-
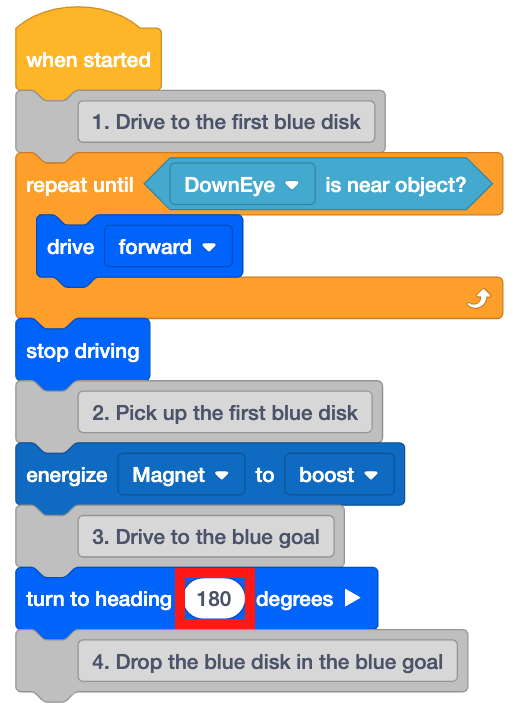
Add a [Turn to heading] block beneath the third comment.

-
Set the [Turn to heading] block to 180 degrees.
-
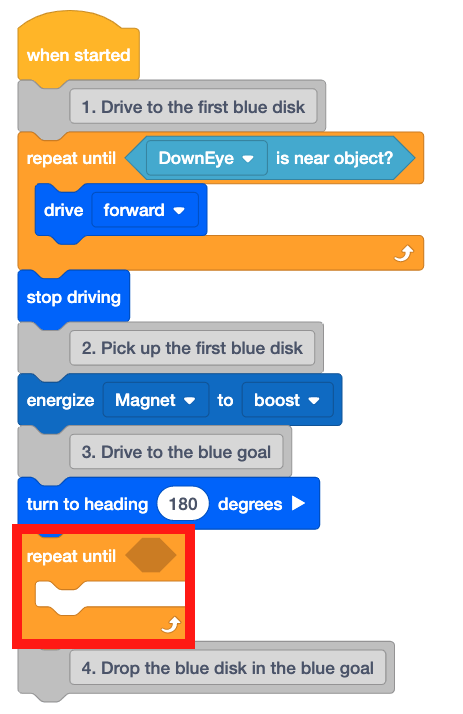
Now that the VR Robot is oriented towards the starting position, the VR Robot will need to drive back to the blue goal. Add a [Repeat until] block beneath the [Turn to heading] block.
-
To drive back to the blue goal, the VR Robot will use data from the Distance Sensor to determine when the VR Robot is inside the blue goal. As discussed in the previous lesson, each grid square on the Disk Mover Playground measures 200 millimeters (mm) by 200 millimeters (mm).
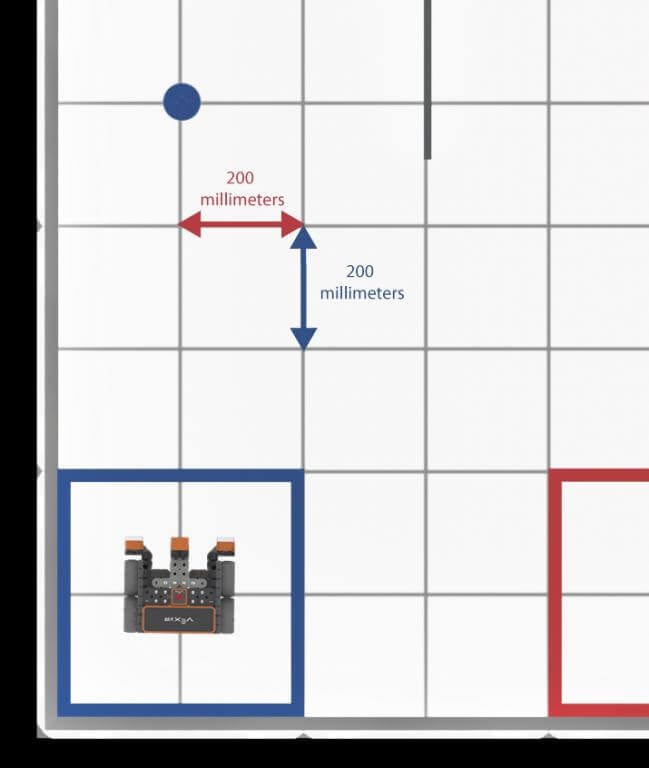
-
Using those measurements, the center of the blue goal can be determined to be approximately 200 millimeters (mm) from the wall of the Playground.
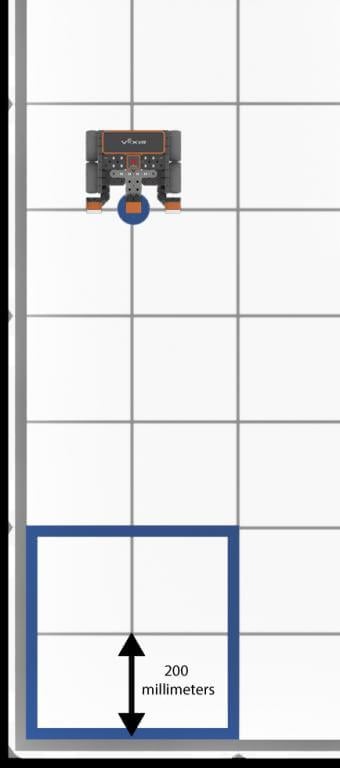
-
The VR Robot should stop driving when the Distance Sensor reports that the VR Robot is less than 200 millimeters (mm) from the wall of the Playground. Add the following blocks to the [Repeat until] block.
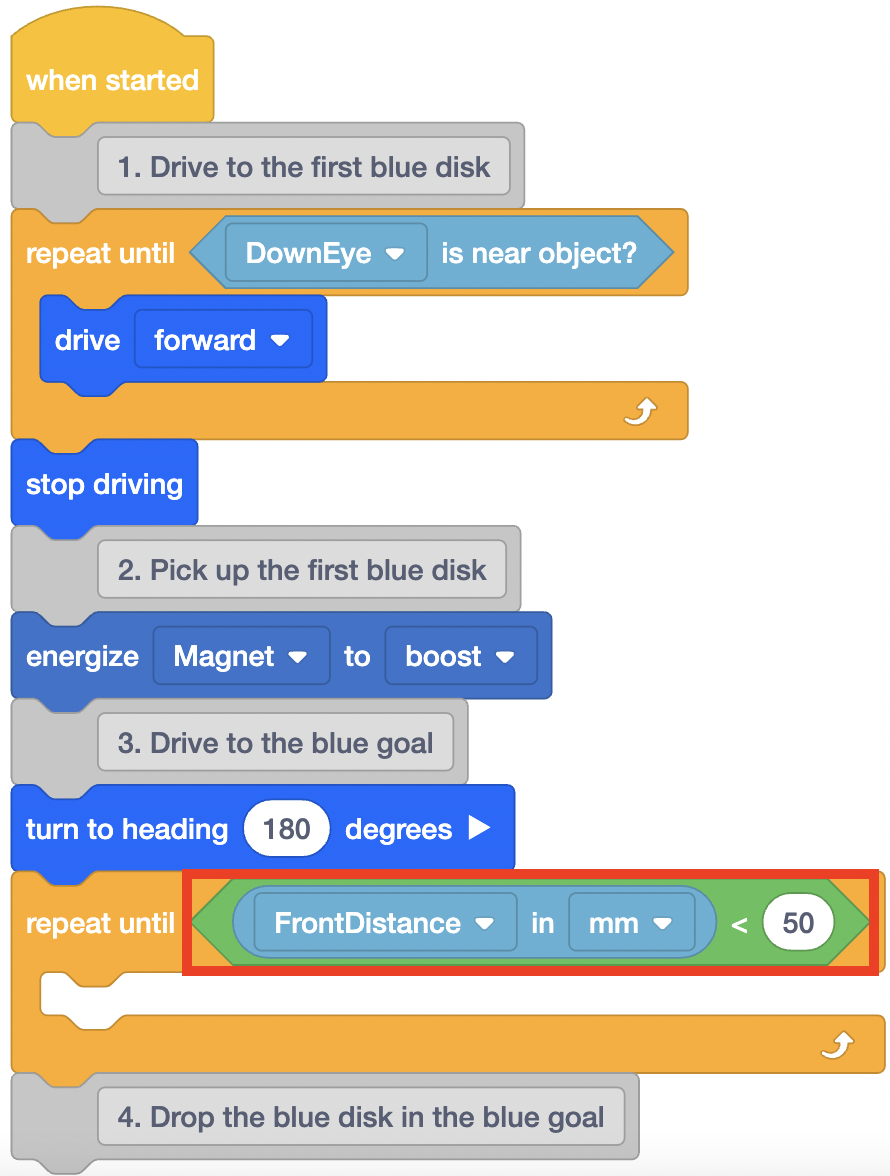
-
Change the parameter in the <Less than> block to 200.
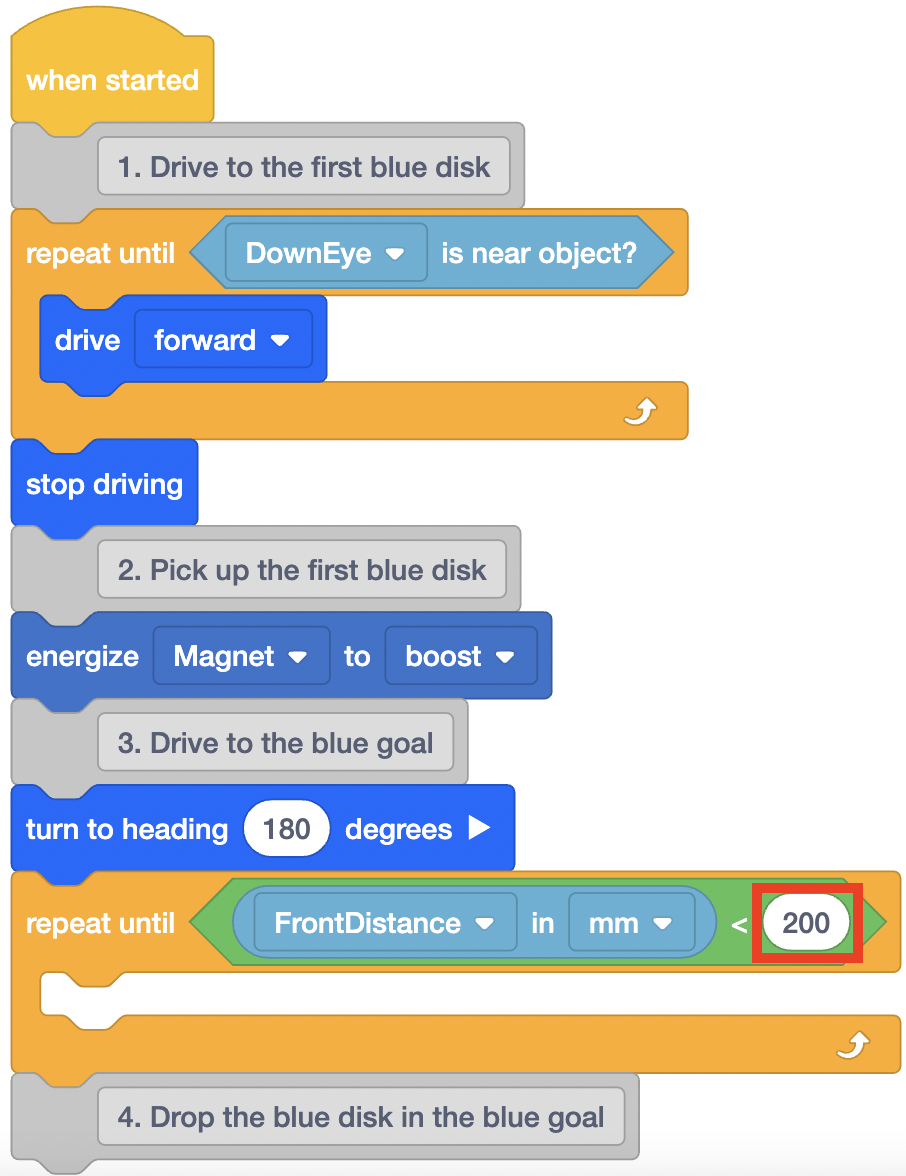
-
Add a [Drive] block into this [Repeat until] block. This will instruct the VR Robot to drive forward until the Distance Sensor reports a distance of less than 200 millimeters (mm).
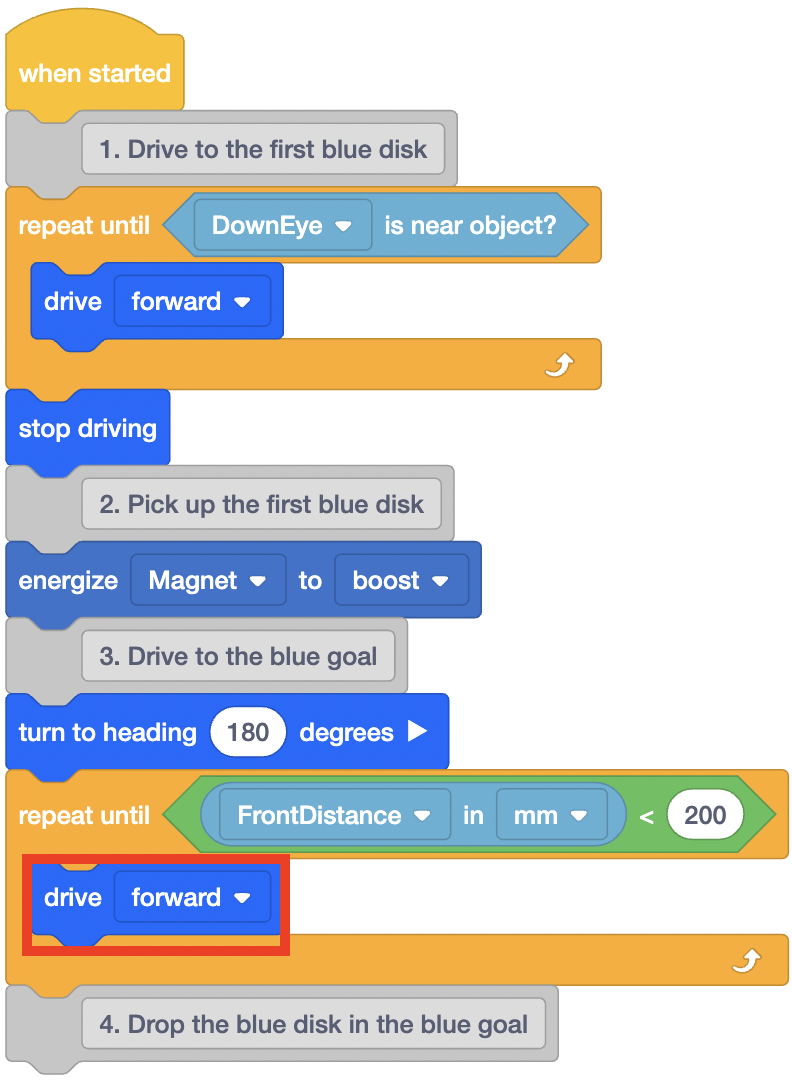
-
Once the VR Robot has reached the blue goal (200 mm from the wall), the VR Robot will need to stop driving. Add a [Stop driving] block beneath the [Repeat until] block.
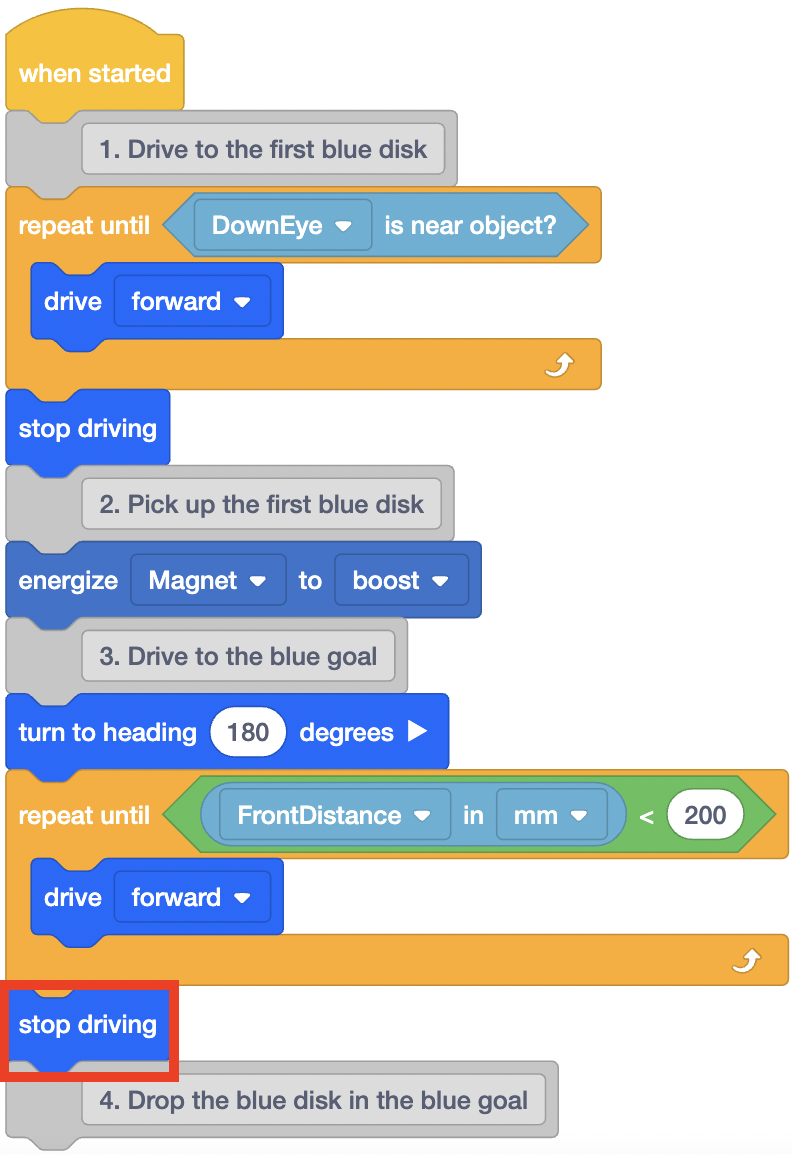
-
Now that the VR Robot is stopped in the blue goal, it can drop the disk. Add an [Energize Electromagnet] block beneath the fourth comment and set the block to ‘drop.’
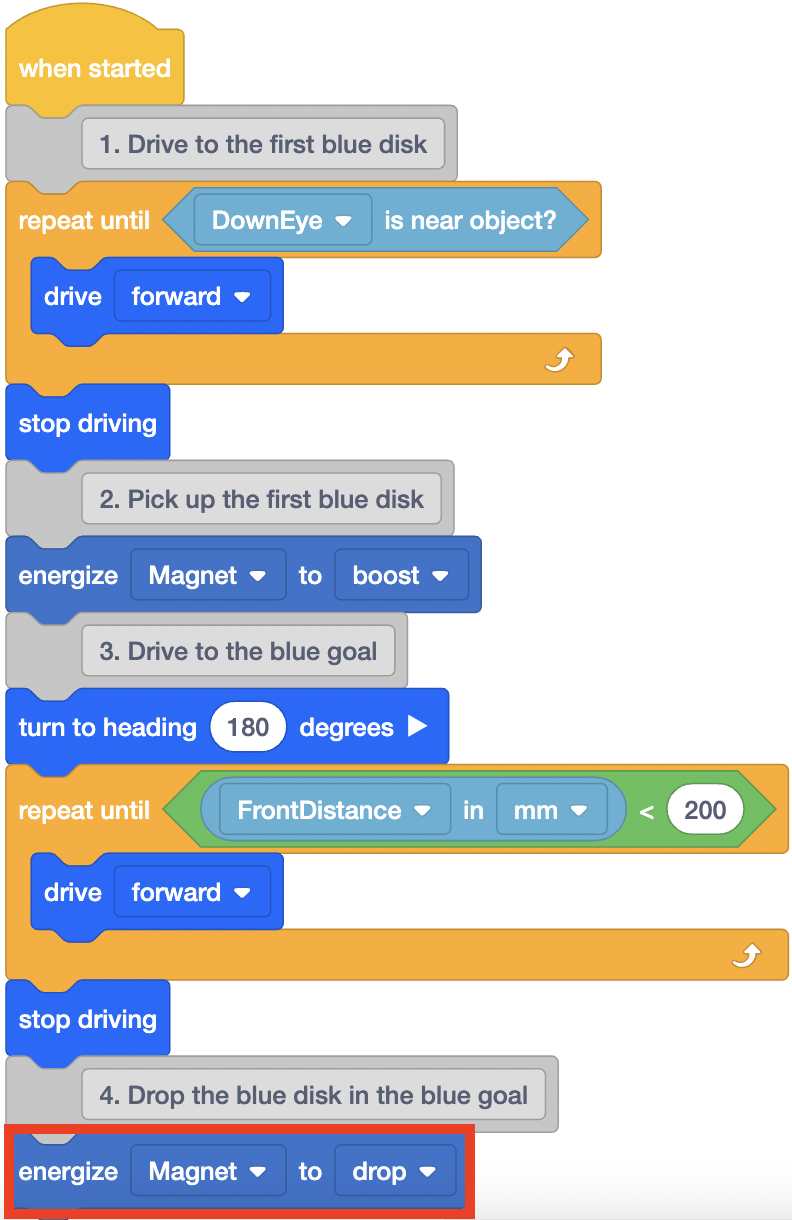
-
The VR Robot will need to drive in reverse a short distance to avoid knocking over or colliding with any disks. Colliding with a disk could potentially knock the VR Robot off course. Add the following blocks to instruct the VR Robot to drive in reverse for 100 millimeters (mm) and turn back to a heading of 0 degrees.

- Open the Disk Mover Playground if it is not already open and run the project.
-
The VR Robot drives forward, picks up the first disk, then turns to a heading of 180 degrees to face the blue goal. The VR Robot then uses the values from the Distance Sensor to determine when to stop driving and drop the blue disk.

- Notice how the second [Repeat until] block functions in this part of the project.
- When the Distance Sensor on the VR Robot detects the wall of the Playground is less than 200 millimeters (mm) away, the project will move to the next block in the stack below the [Repeat until] block.
- In this project, that meant the VR Robot stops driving and drops the Electromagnet in the blue goal.
Select the Next button to continue with the rest of this Lesson.