
Lesson 3: Picking Up and Moving Disks
In the previous Lesson, you used the [Energize Electromagnet] block and Drivetrain blocks to pick up and move disks on the Disk Mover Playground with the VR Robot. This Lesson will solve the same challenge using reported sensor feedback and [Repeat until] blocks.
Learning Outcomes
- Identify how to use the [Repeat until] block in a project.
- Identify that the <Eye Sensor near object> block reports if the Eye Sensor is close enough to an object to detect a color.
- Identify that the [Turn to heading] command turns a drivetrain to a specific heading, using the Gyro Sensor.
- Identify that the [Turn to heading] command will determine which direction to turn based on the current heading of the Gyro Sensor.
- Explain why a [Turn to heading] command would be used instead of a [Turn] or a [Turn for] command.
Why Use Sensors?
In Lesson 2, the VR Robot drove a specified distance using the [Drive for] block to pick up and move a blue disk back to the goal. The distance between the VR Robot and the first blue disk was estimated and checked using the dimensions of grid squares on the Disk Mover Playground. While this did solve the challenge, there is much room for error in duplicating the process to pick up multiple disks at various distances, which is necessary to solve the Disk Mover Challenge at the end of this Unit. Using reported sensor feedback is a more efficient way to solve this challenge, while also optimizing the project by using fewer blocks.
What if the VR Robot collides with a disk and is knocked off course? What if the disks are in slightly different locations from the goal? Feedback from sensors can be used to precisely pick up and move disks without knowing their exact location on the Disk Mover Playground.
The steps to solve the challenge can be used to determine which sensors to use in the project.
-
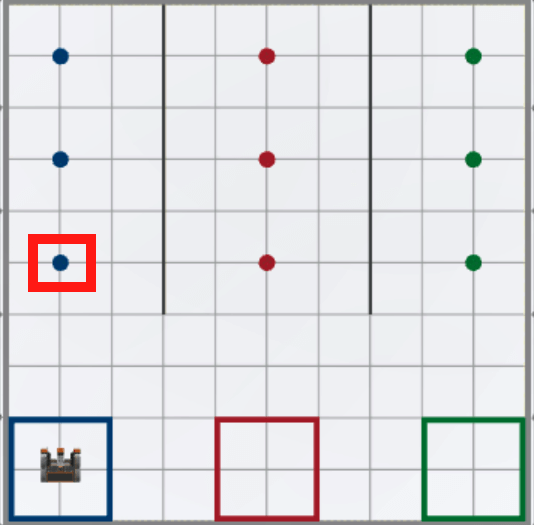
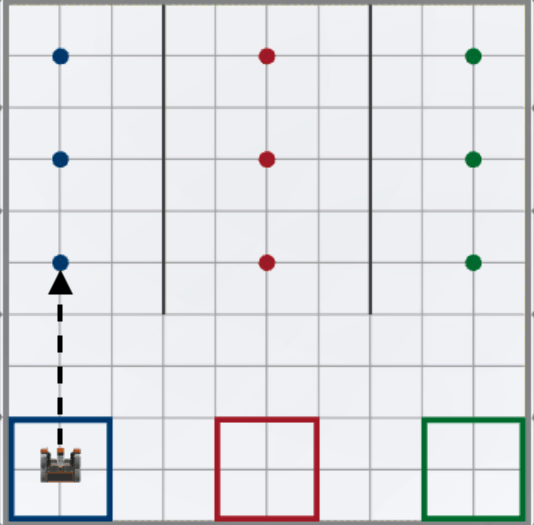
First: The VR Robot will drive to the first blue disk.
-
The disks are on the ground of the Playground. To determine where a disk is located, the Down Eye Sensor can be used with the <Eye Sensor near object> block.

-
-
Second: The VR Robot will pick up the first blue disk.

-
Third: The VR Robot will drive back to the blue goal.

-
While driving back to the blue goal, the VR Robot will use the Distance Sensor to determine when to stop driving. The Distance Sensor can be used to determine how far away the front of the VR Robot is from the wall of the Playground.
-
-
Finally: The VR Robot will drop the blue disk into the blue goal.
Select the Next button to continue with the rest of this Lesson.