Lesson 4: Move a Red and Green Disk
-
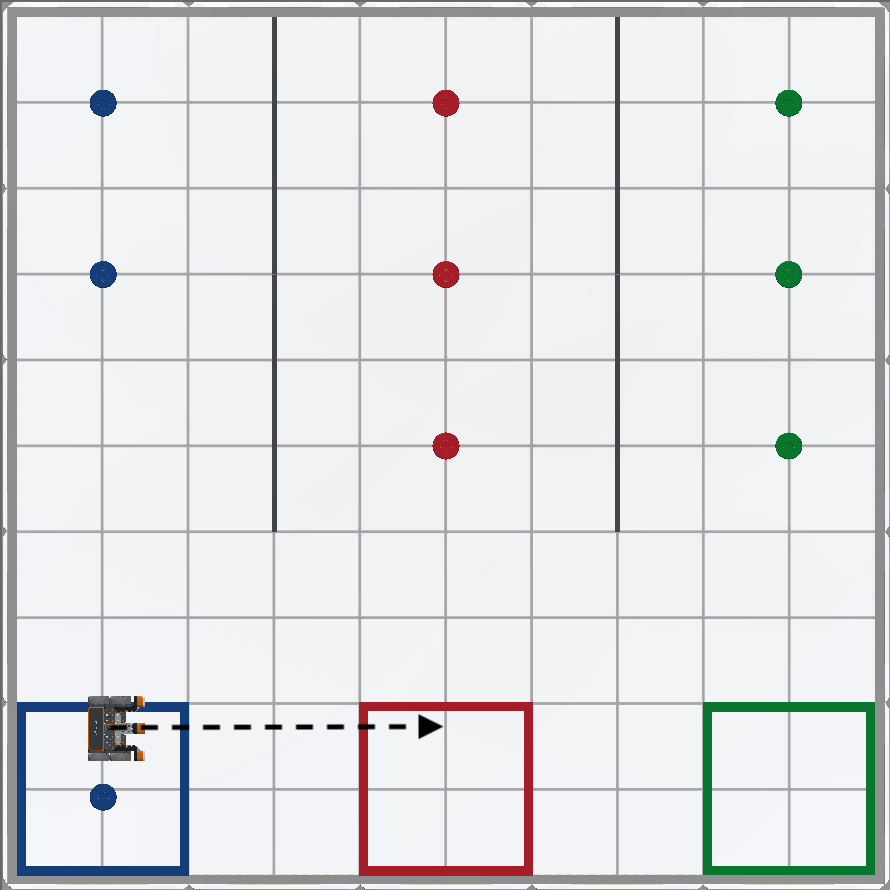
Next, the VR Robot will need to drive forward to the next colored goal. Note that the VR Robot will have to drive forward four grid squares, or 800 millimeters (mm) in order to drive to the center of the next colored goal.
-
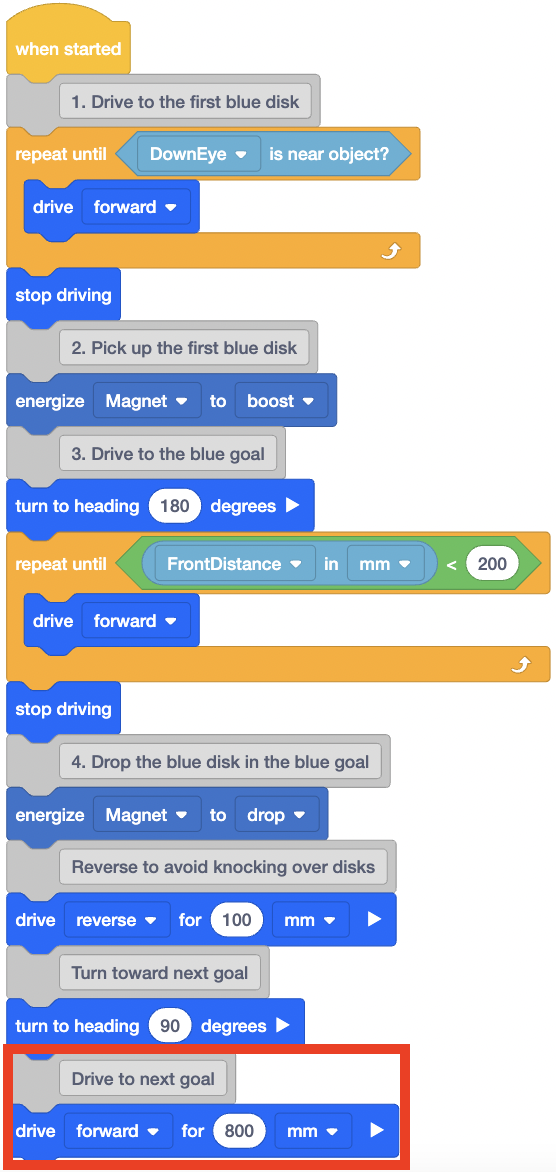
Add a [Drive for] block to the code and set the parameter to 800 millimeters (mm).
-
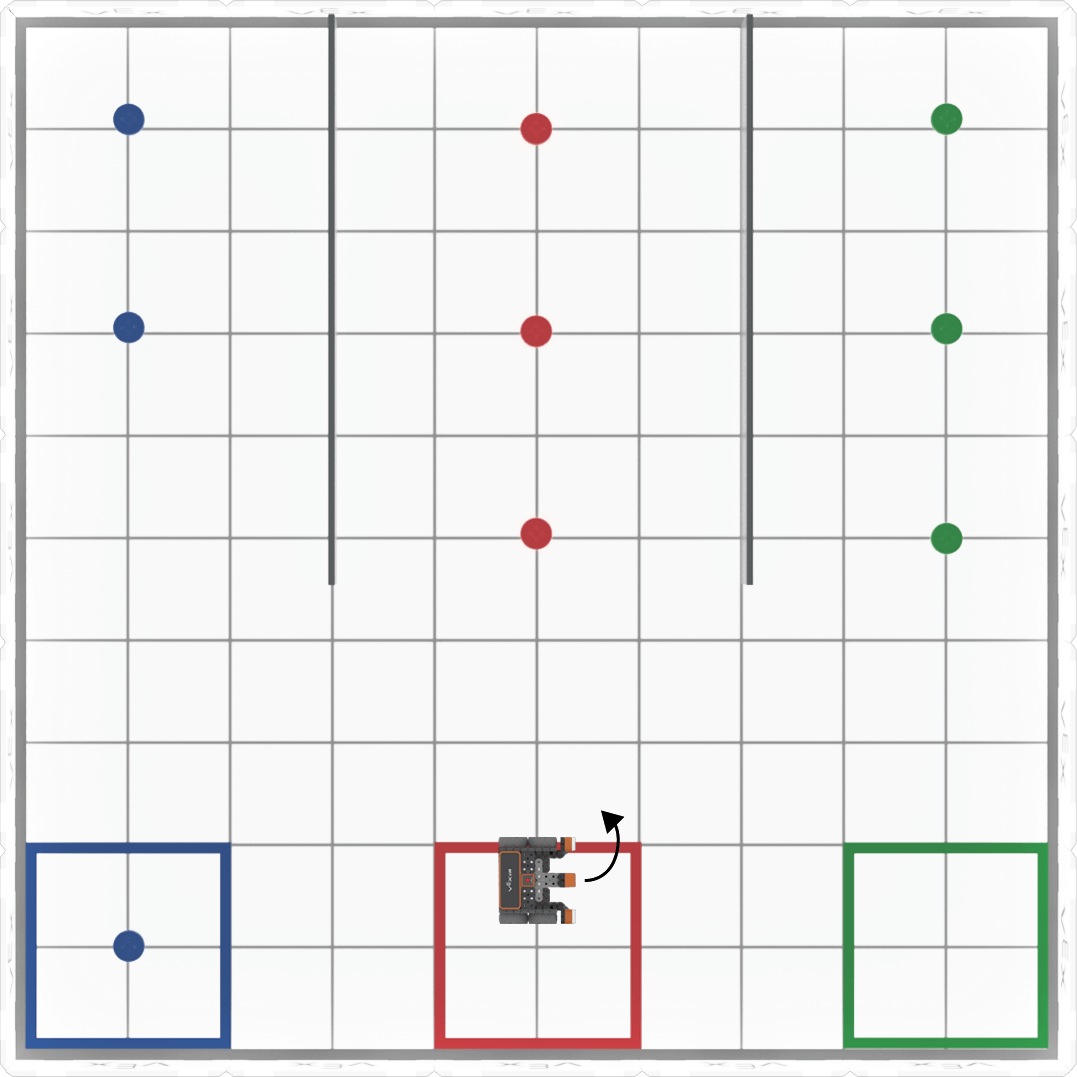
The VR Robot will now need to turn to face the colored disks.
-
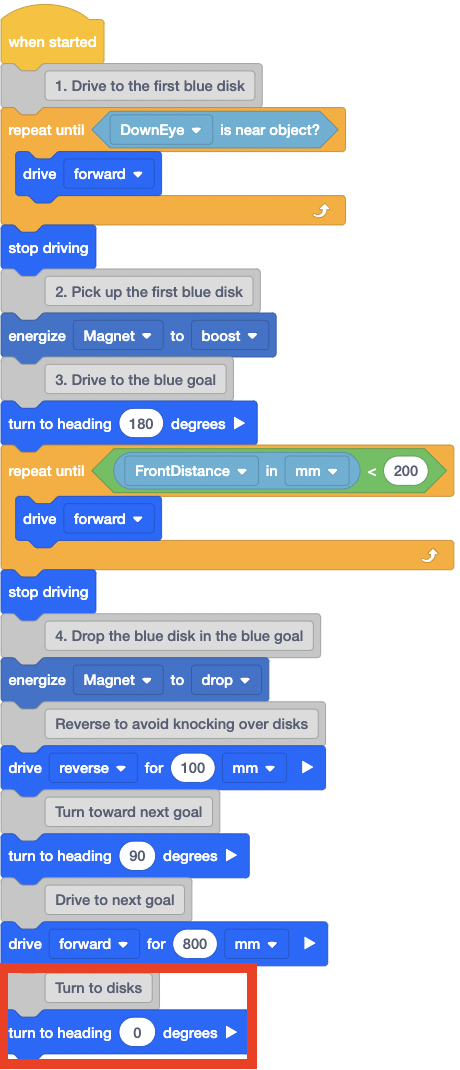
Add a second [Turn to heading] block to the code and set the parameter to zero degrees. This will turn the VR Robot to face the colored disks.
- Open the Disk Mover Playground and run the project.
-
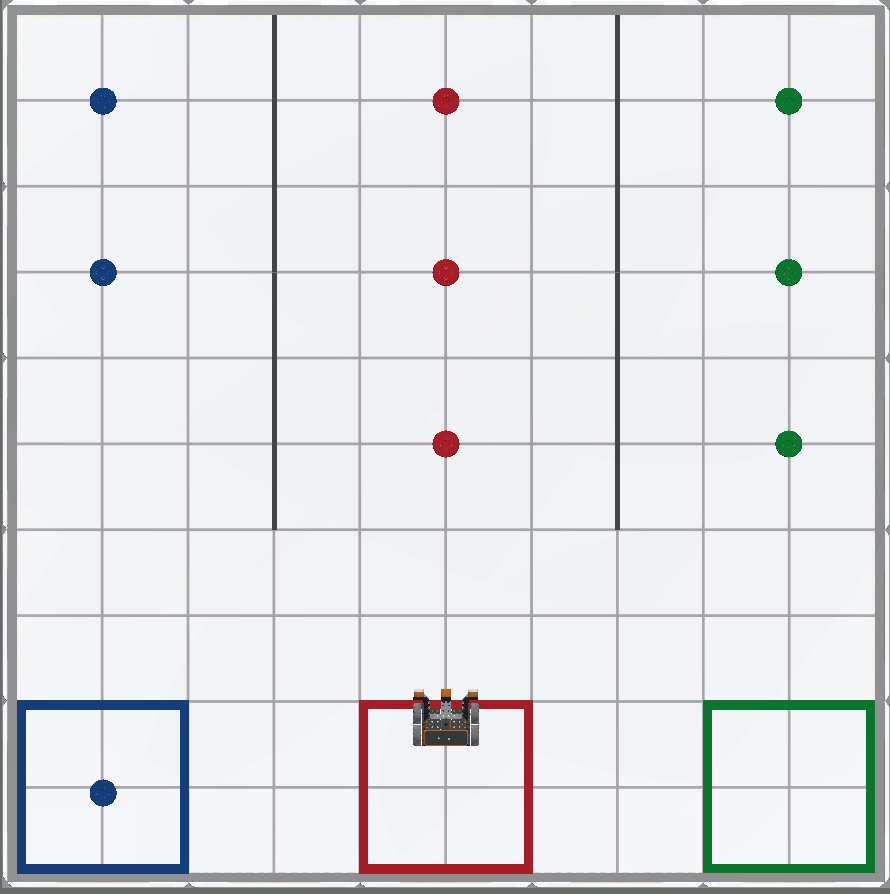
The VR Robot will pick up and move the first blue disk into the blue goal, and then drive over the red goal. The VR Robot will also turn to face the red disks.
-
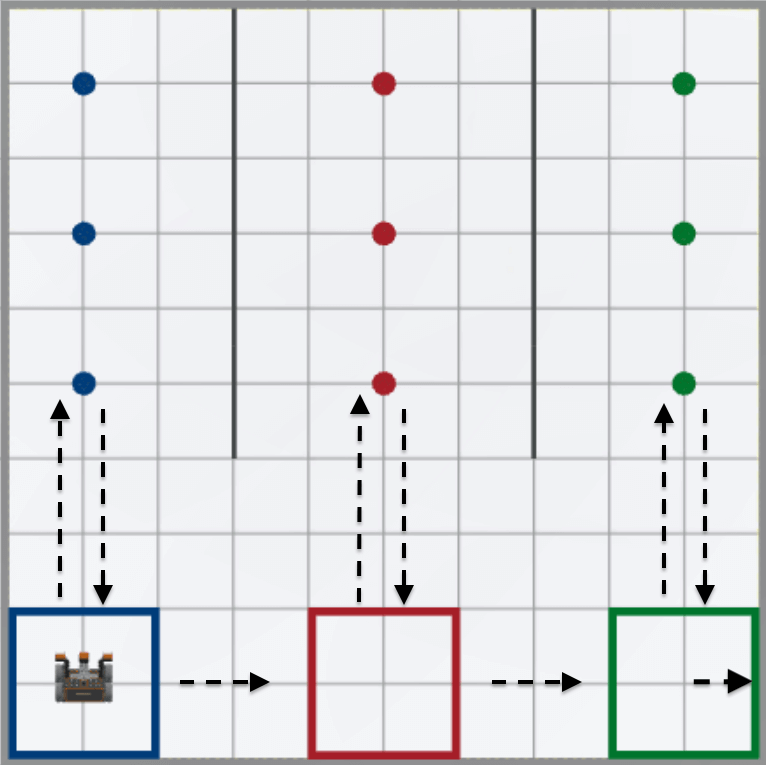
Now that the VR Robot is facing the red disks, the VR Robot will need to repeat the same behaviors that were used to collect the blue disk, in order to pick up and move the red disk. The behaviors of driving forward to pick up the disk, turn around, and drive back to the same colored goal to drop off the disk.

-
Once the first red disk is moved, the VR Robot will then need to drive to the green goal and perform the same actions that were used to move the blue and red disk, to move the first green disk.
-
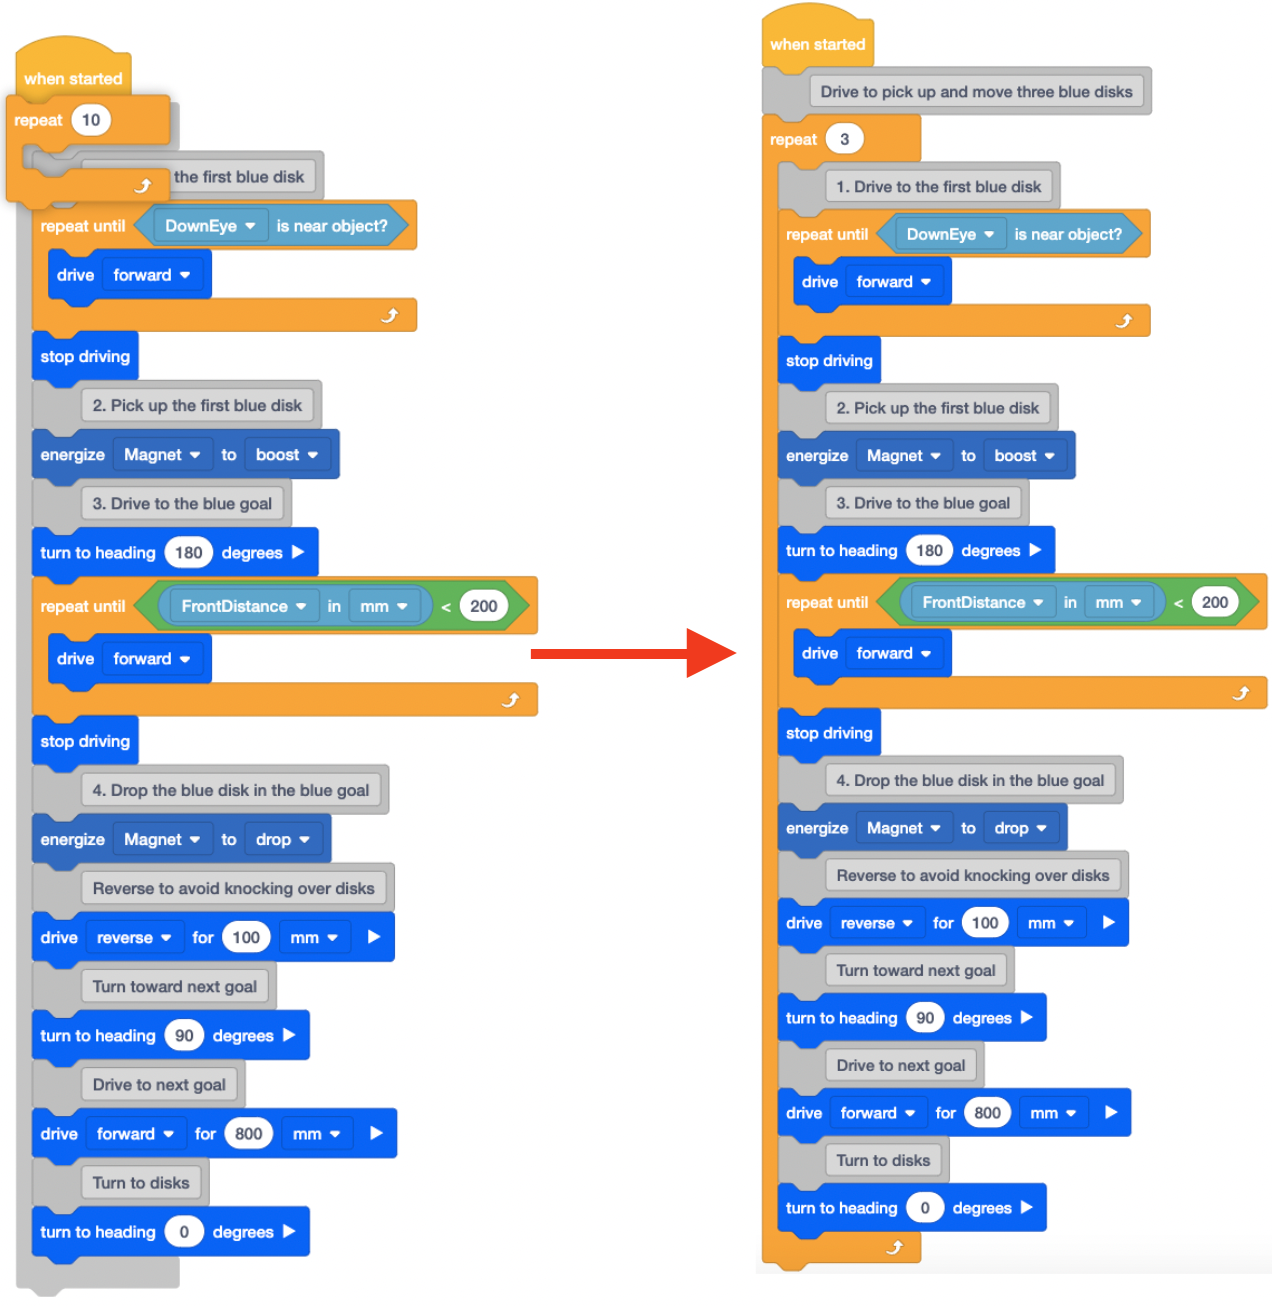
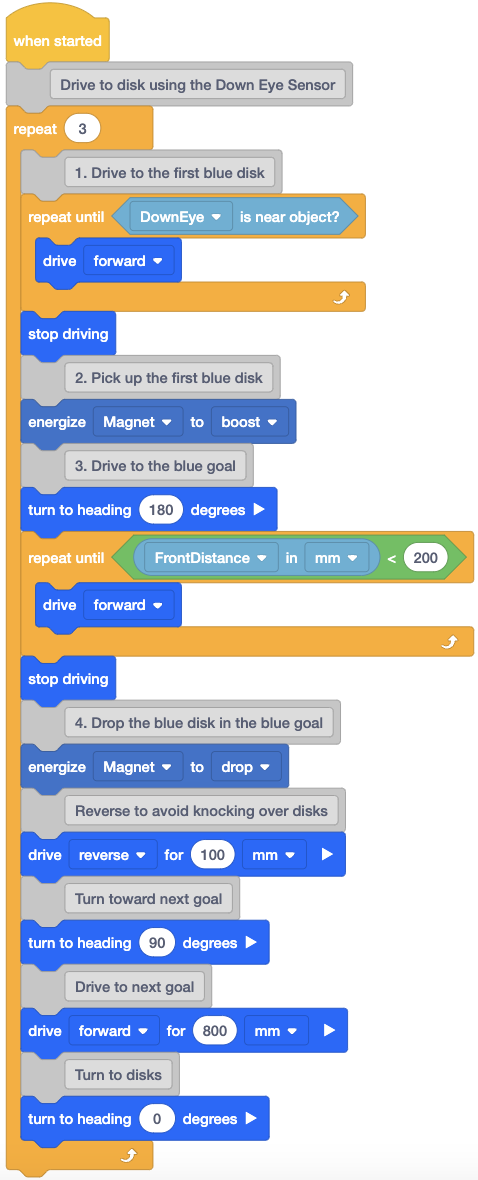
In order to repeat behaviors multiple times, a [Repeat] block can be used.

-
Add a [Repeat] block to the code and set the parameter to ‘3.’
- Open the Disk Mover Playground and run the project.
-
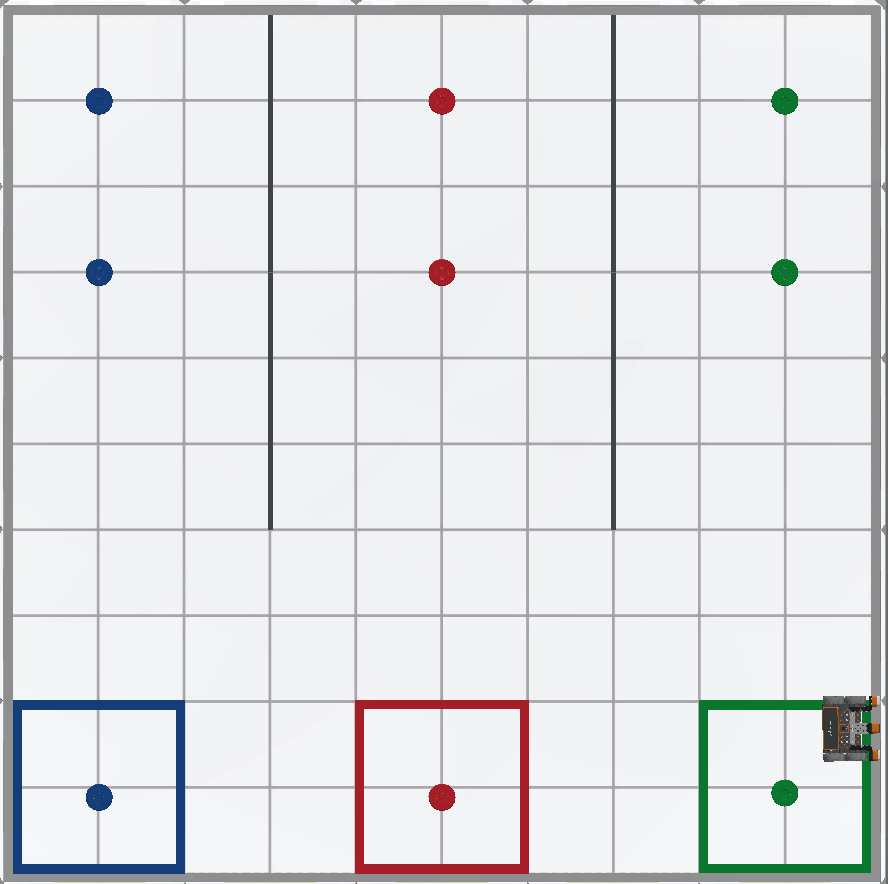
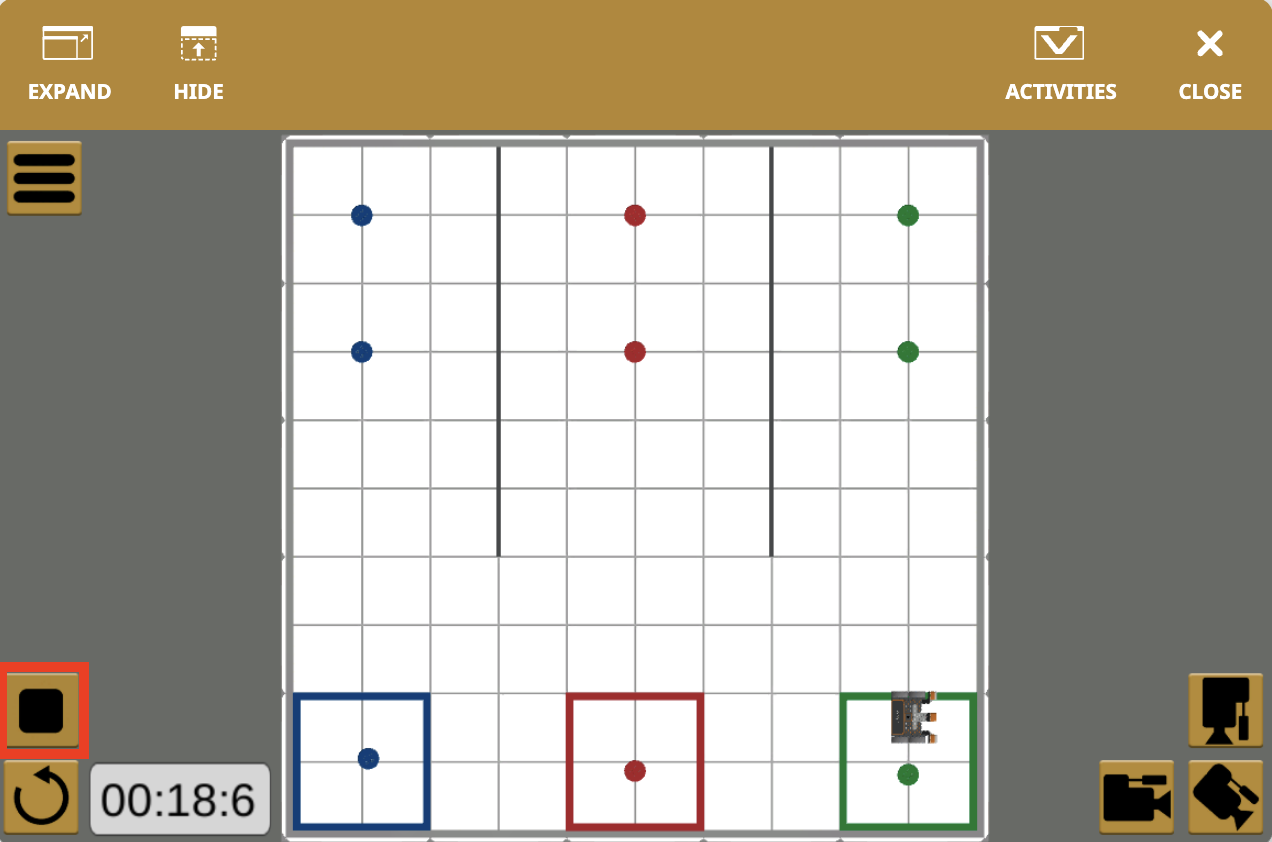
When this project is run, the VR Robot picks up and drops one disk of each color into its corresponding colored goal.
-
Note that the VR Robot continued to drive into the wall. This behavior is expected since the project instructed the VR Robot to turn right and drive toward the next goal, three times. The first time is driving from blue to red. The second is from red to green, and the third is from green into the wall, since there is not another colored goal. Stop the project once the VR Robot hits the wall. The project could be improved so that the VR Robot stops after it picks up and moves the green disk, but this would increase the overall complexity of the project.
For Your Information
Placing one loop inside of another loop is called nesting. When you “nest” loops, the outer loop controls the number of times the inner loop executes. There are many different types of loops that can be nested. For example, in the previous code above, the [Repeat until] blocks are nested inside of a [Repeat] block.
A [Repeat] block can also be nested inside another [Repeat] block. In the following example, since the outer [Repeat] block is set to ‘3,’ the VR Robot will draw three squares on the Playground.

Nested loops are helpful in projects where a VR Robot repeats the same behaviors more than once. Nesting loops organizes and condenses a project. This can be helpful to better understand the context and purpose of the code, as well as making it easier to find errors.
Select the Next button to continue with the rest of this Lesson.