
Lesson 2: Plan the Project
In this Lesson, you will learn how to use the [Energize Electromagnet] block to pick up and drop disks on the Disk Mover Playground. You will use the [Energize Electromagnet] block with Drivetrain blocks to pick up and move three blue disks into the blue goal in the mini challenge.
Learning Outcomes
- Identify that the [Energize Electromagnet] block has two different modes: boost or drop.
- Identify that the [Energize Electromagnet] block, when set to boost, attracts a disk to the Electromagnet.
- Identify that the [Energize Electromagnet] block, when set to drop, releases the disk that the Electromagnet is holding.
- Identify that the [Energize Electromagnet] block is a stack block that can be used with Drivetrain blocks to pick up disks.
- Describe the program flow in a project that has the VR Robot pick up, carry, then drop a disk.
How to Use the Electromagnet
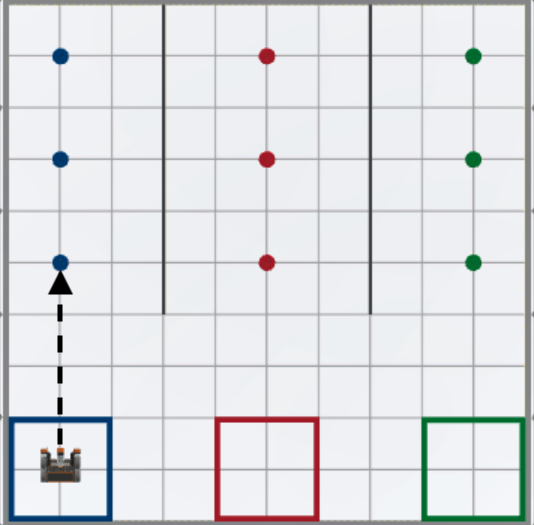
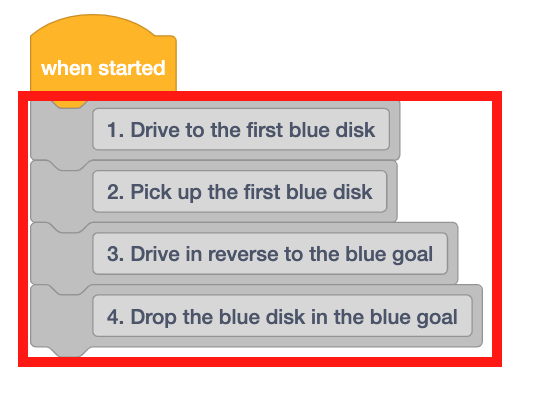
In this challenge, the VR Robot will complete four behaviors using the [Energize Electromagnet] and the [Drive for] blocks to place a blue disk in the blue goal. These steps are also reflected in the comments of the project being built.
-
First: The VR Robot will drive forward to the first blue disk.
-
Second: The VR Robot will pick up the first blue disk.
-
Third: The VR Robot will drive in reverse to the starting position in the blue goal.
-
Finally: The VR Robot will drop the blue disk into the blue goal.
-
This project will use comment blocks to help plan the behaviors of the VR Robot by organizing them into smaller sections within the project. While building the project, the blocks associated with each desired behavior will be placed beneath the matching comment.
-
Start a new project in VEXcode VR and name the project Unit8Lesson2.

-
Drag four [Comment] blocks into the workspace. Add comments for each of the steps outlined above.
-
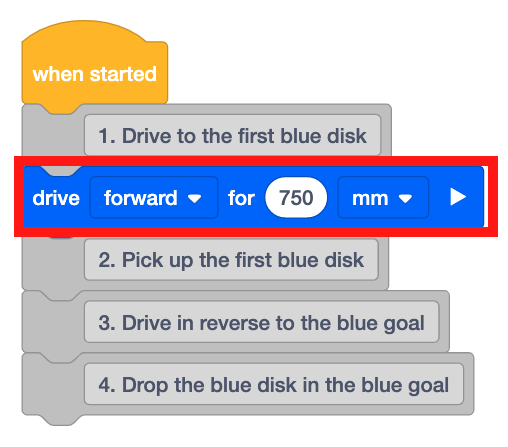
The first blue disk is 750 millimeters (mm) away from the starting point of the VR Robot on the Disk Mover Playground. Drag in a [Drive for] block beneath the first comment and set the parameter to 750 millimeters (mm).
For Your Information
The distance between the starting point of the VR Robot and the first blue disk was estimated using the dimensions of each grid square. Each grid square on the Disk Mover Playground is 200 millimeters (mm) by 200 millimeters (mm).
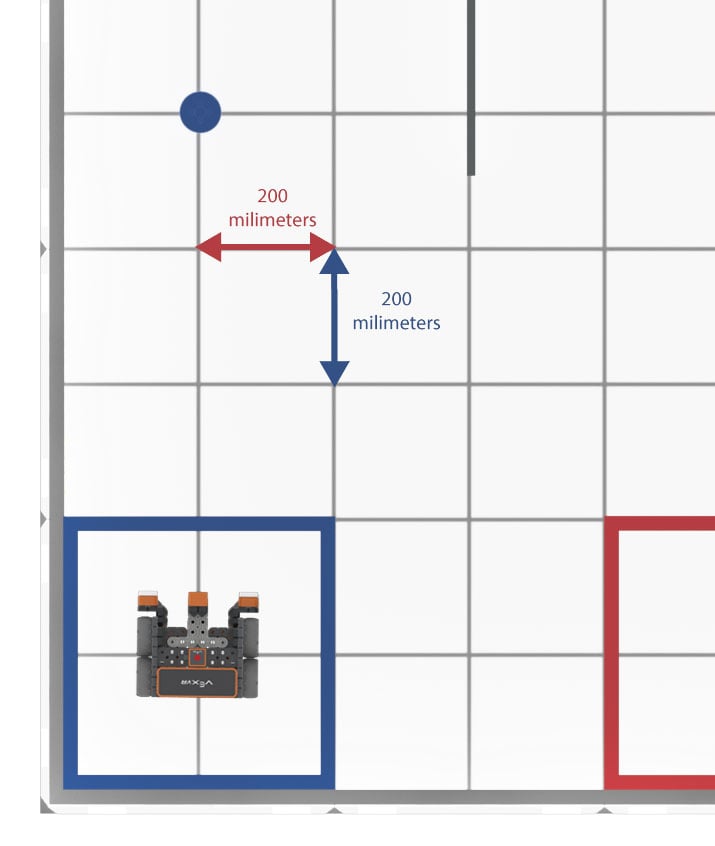
Using this information, it can be estimated that the first blue disk is 800 millimeters (mm) from the center of the VR Robot. Since the Electromagnet is on the front of the VR Robot, the distance between the Electromagnet and the first blue disk may be slightly shorter than the 800 millimeters (mm).

Select the Next button to continue with the rest of this Lesson.