Lesson 4: Move a Blue Disk

Move One Disk of Each Color

In Lesson 3, you created a project to have the VR Robot pick up and drop each of the three blue disks into the blue goal on the Disk Mover Playground.
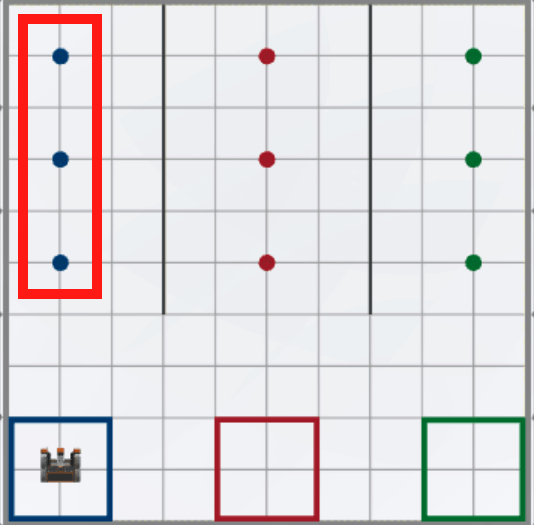
Top down view of the Disk Mover Playground with the VR Robot in the blue goal starting position and all three of the Blue Disks highlighted with a red box.

In this Lesson, you will now create a project to pick up and move one disk of each color into its corresponding colored goal in the Disk Mover Playground!
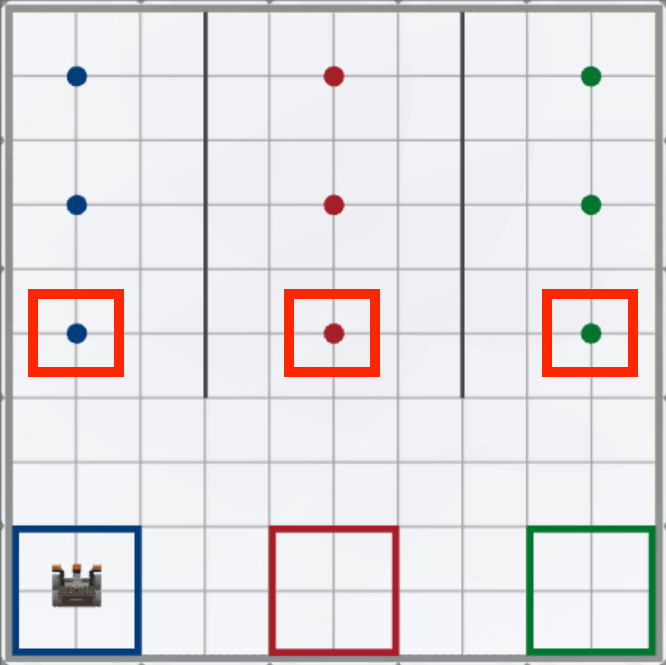
Top down view of the Disk Mover Playground with the VR Robot in the blue goal starting position and the first disk of each color - blue, red, and green - highlighted with a red box.
  • The VR Robot will need to repeat the behaviors of driving to the disk, picking it up, turning around, and then driving back to the colored goal one time for each color. In order for the VR Robot to repeat the actions of picking up and dropping one disk of each color, the VR Robot will need to perform the following behaviors three times:
    • First, drive forward to the first blue disk using the Down Eye Sensor.
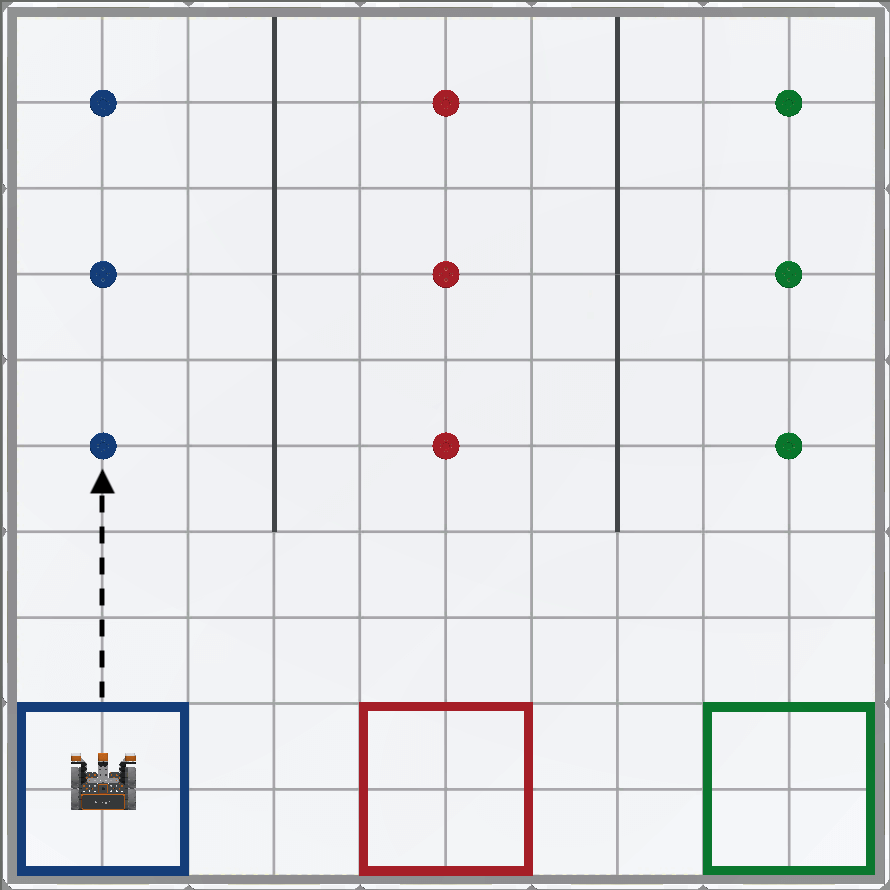
      Top down view of the Disk Mover Playground with the VR Robot in the blue goal starting position and a dotted arrow going from the front of the VR Robot to the first blue disk, indicating the intended movement needed to pick up the Disk.
    • Then, pick up the first blue disk.

      The VR Robot on the Disk Mover Playground with the blue disk attached to the Electromagnet.
    • Next, turn around.

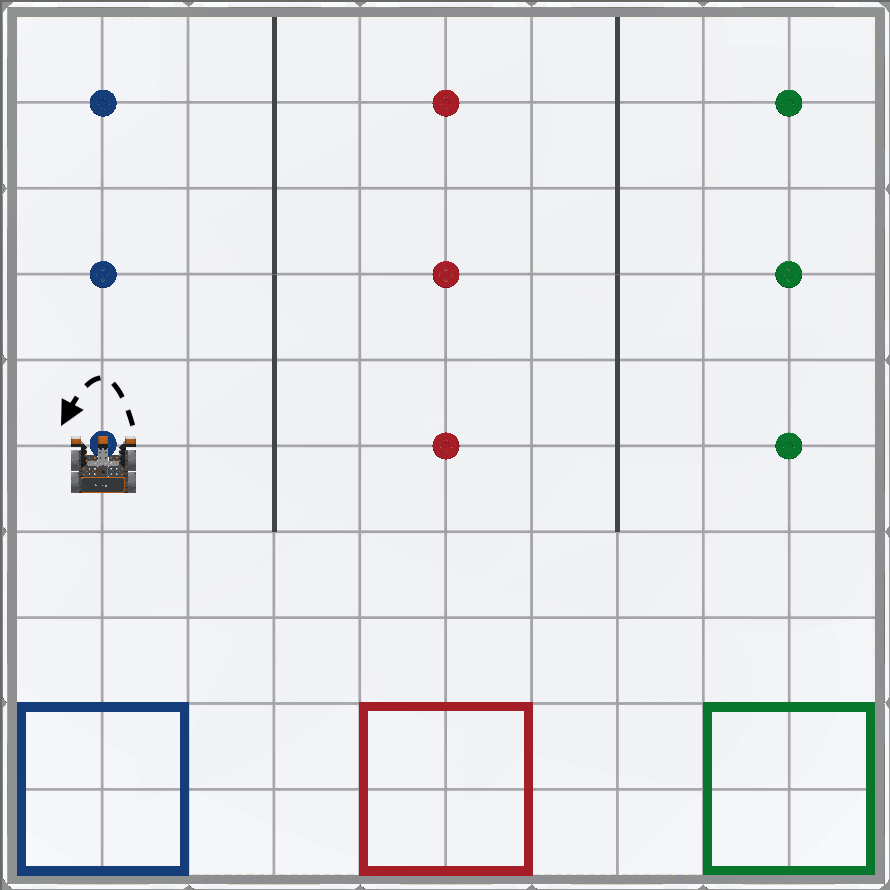
      Top down view of the Disk Mover Playground with the VR Robot picking up the first blue disk. A dotted curved arrow points from the front of the robot around towards the goal, indicated the necessary turn to face the blue goal.
    • Then, drive back to the goal using the Distance Sensor and drop the disk.

      Top down view of the Disk Mover Playground with the VR Robot at the first blue Disk facing the blue goal, with a dotted arrow pointing from the front of the VR Robot to the goal area, indicating the movement needed to get to the goal.
  • Start a new project in VEXcode VR and name the project Unit8Lesson4.

    Project name box in the center of the VEXcode VR Toolbar, highlighted by a red box, to the left of the Select Playground button. The project name reads unit 8 Lesson 4.
  • Build the following code that instructs the VR Robot to complete the four behaviors listed above.
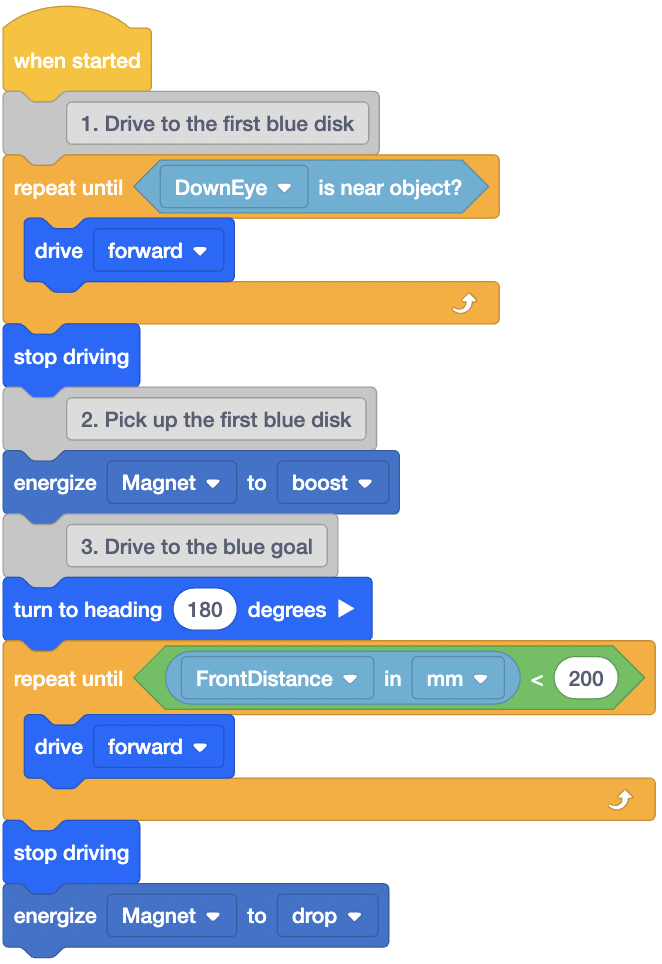
    A VEXcode VR project, like that in the previous lesson, to drive and pickup the first blue disk and drop it in the blue goal. The project has three sections, one for each comment. From top to bottom the first comment attached to the When started block reads Drive ot the first blue disk, and contains blocks that read Repeat until Down Eye is near object, with a drive forward block inside the C, and a stop driving block beneath it. The second comment section reads Pick up the first blue disk, with an Energize electromagnet to boost block attached. The third comment section reads Drive to the blue goal and contains the following blocks: Turn to heading 180 degrees; Repeat until Front Distance in mm is less than 200; drive forward, then stop driving, and energize magnet to drop.
  • Open the Disk Mover Playground and run the project.
  • When this project is run, the VR Robot will drive and pick up the first blue disk, turn around, drive to the blue goal, and drop the disk.

    A top down view of the Disk Mover Playground at the conclusion of the project, showing the VR Robot dropping the blue disk in the blue goal and stopped in the goal.
  • In order to collect the next colored disk, the VR Robot will need to drive toward the next colored goal. However, in order to prevent colliding with the blue disk, the VR Robot will now need to move out of the way of the disk. To do this, the VR Robot will need to reverse 100 millimeters (mm), or half of the length of a grid square on the Playground.
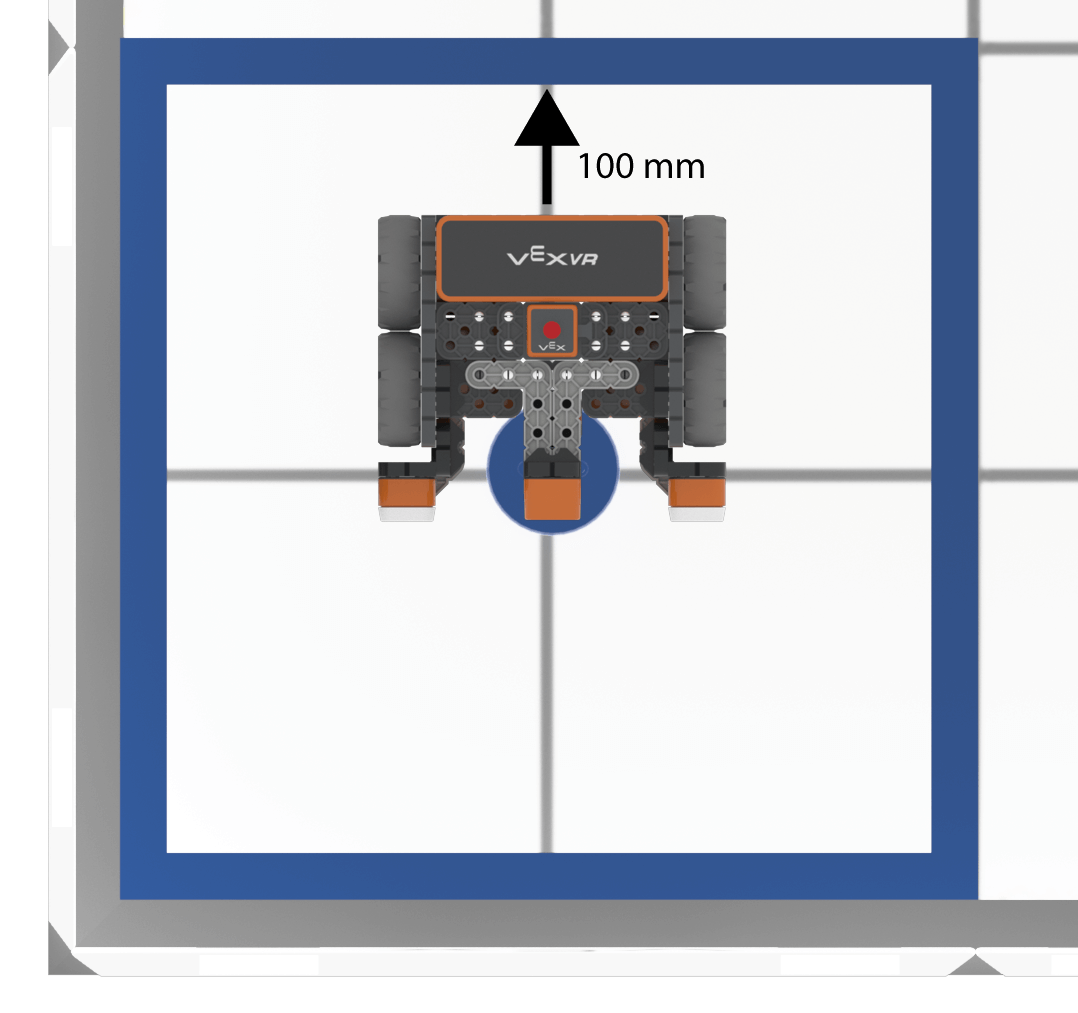
    A close up top down view of the blue goal area of the Playground with the VR Robot delivering the blue disk. An arrow points from the back of the robot to the edge of the goal showing a dimension of 100mm, indicating how far the robot should reverse to leave the disk in place.
  • Add a [Drive for] block to the code and set the parameter to “reverse” for 100 millimeters (mm).
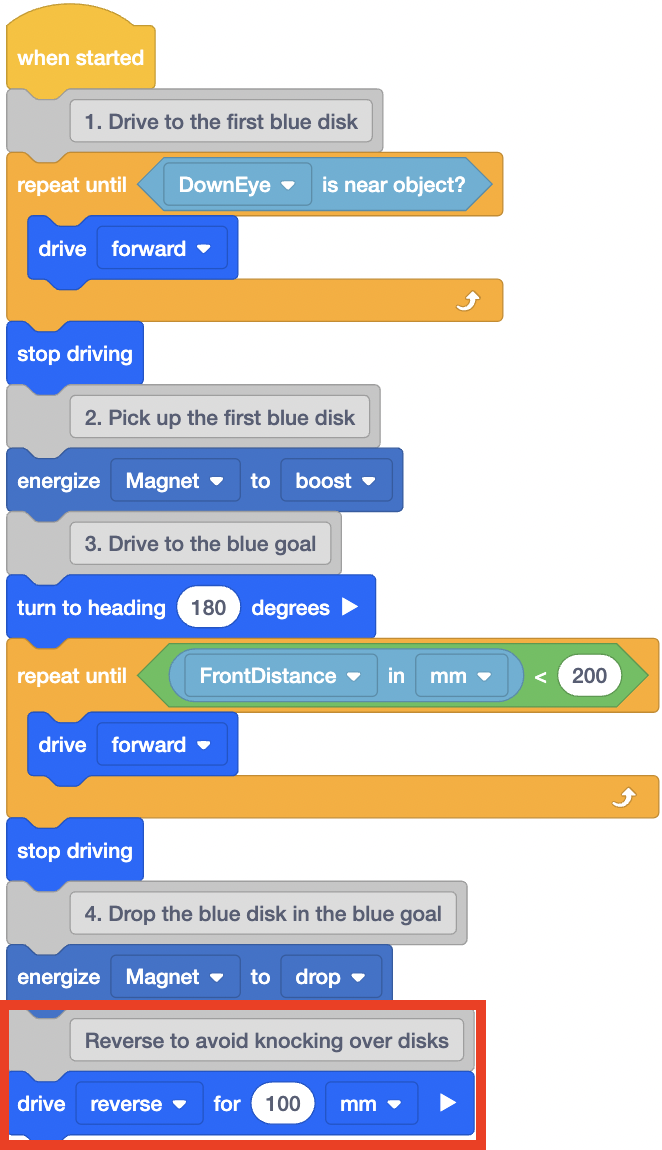
    The same VEXcode VR project as before, with an additional comment added to the end of the stack that reads 'Reverse to avoid knocking over disks', and a Drive for block reading Drive reverse for 100mm beneath it.
  • The VR Robot will now need to turn left to face the next colored goal.
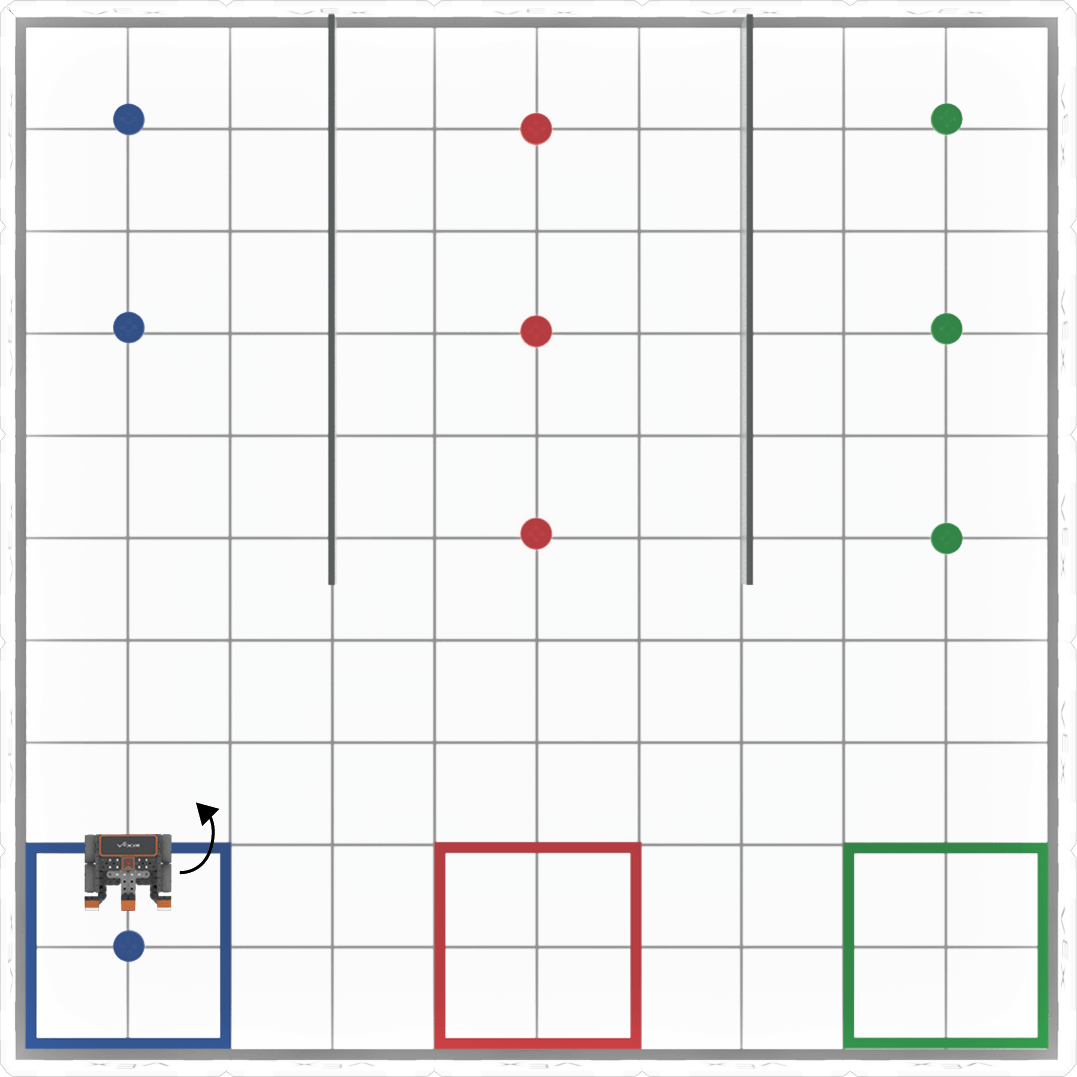
    A top down view of the Disk Mover Playground, showing the final position of the VR Robot after reversing from the blue disk in the blue goal, with an arrow indicating the necessary turn to face additional disks.
  • Add a [Turn to heading] block to the code and set the parameter to 90 degrees in order for the VR Robot to face the next goal.
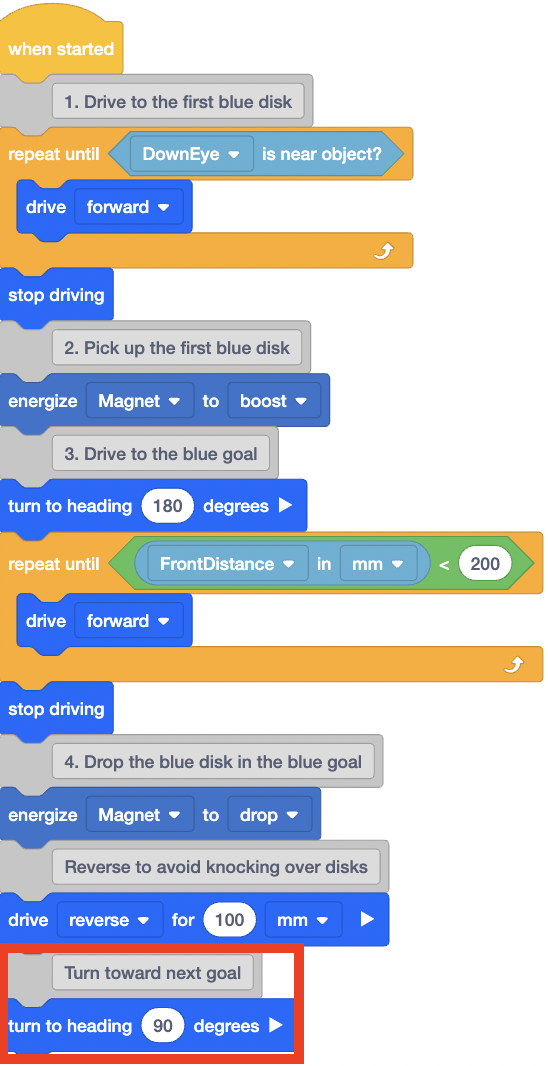
    The same project as before, with an additional comment and Turn to heading block added to the stack. The end of the project now reads Turn toward next goal; Turn to heading 90 degrees.

Select the Next button to continue with the rest of this Lesson.