
Programming the Robot Arm - C++
![]() Teacher Toolbox
-
Activity Outline
Teacher Toolbox
-
Activity Outline
-
This exploration will introduce students to basic programming of the V5 Clawbot's Arm Motor.
-
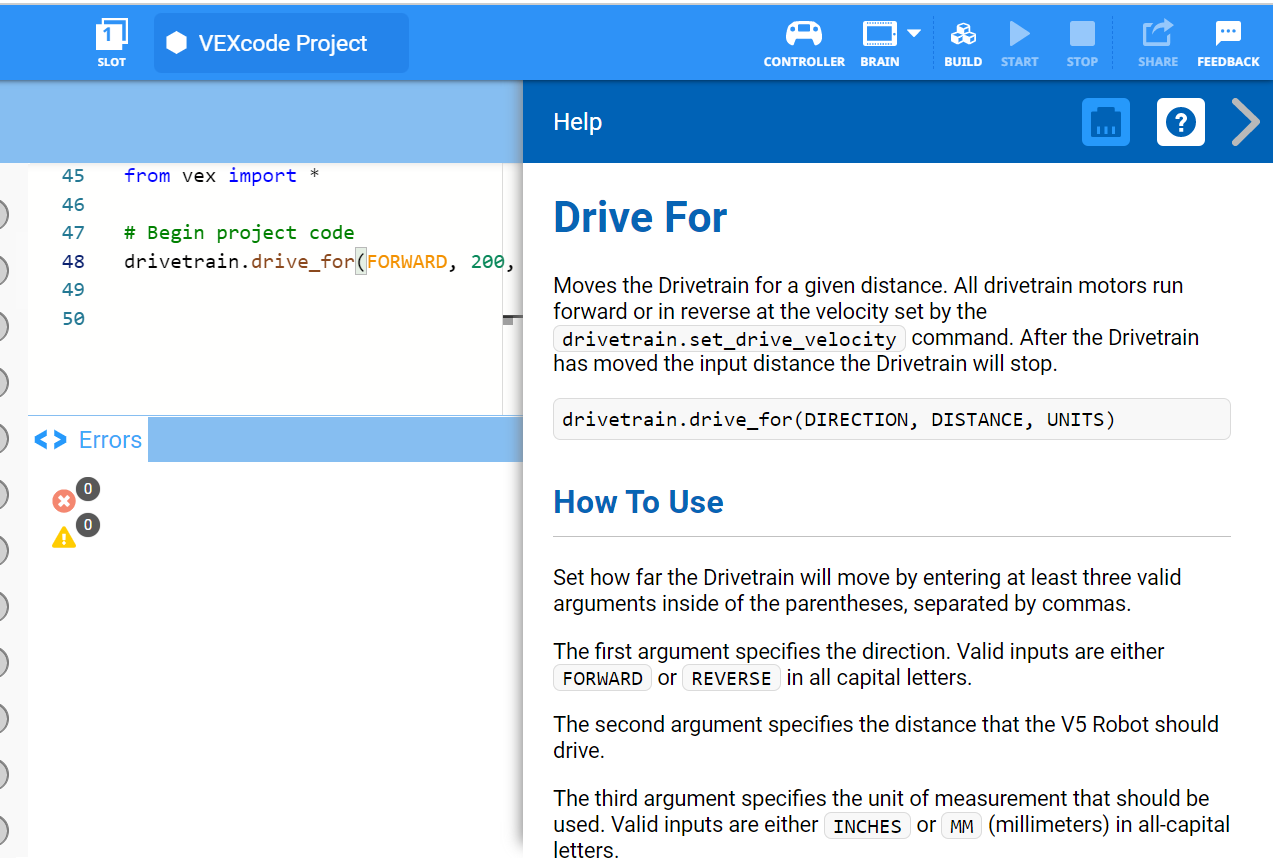
Learning to program the Arm Motor enables students to properly control the V5 Clawbot's arm movements. For more information about the instructions used in a text program, visit the help information.
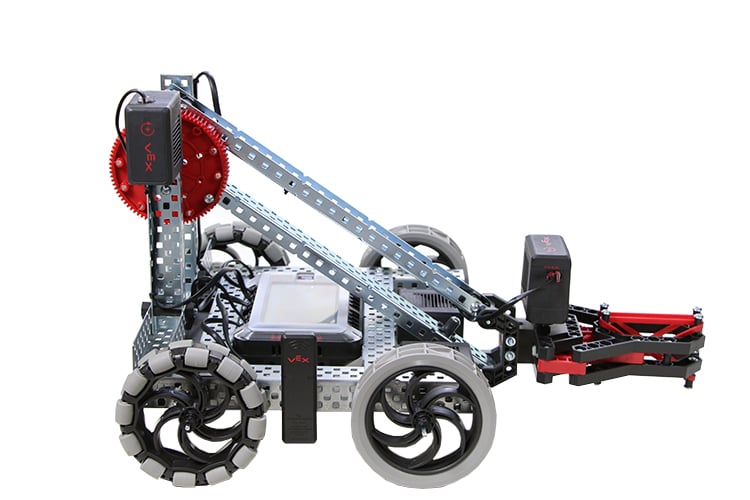
The V5 Clawbot is ready to reach!
This exploration will give you the tools to be able to start creating some cool projects that use the V5 Clawbot's arm.
- VEXcode V5 instructions that will be used in this exploration:
- ArmMotor.spinFor(forward, 90,degrees);
- ArmMotor.setPosition(0, degrees);
- wait(2, seconds);
-
To find out more information about the instruction, select Help and then select the question mark icon next to a command to see more information.
- Make sure you have the hardware required, your engineering notebook, and VEXcode V5 downloaded and ready.
| Quantity | Materials Needed |
|---|---|
| 1 |
VEX V5 Classroom Starter Kit (with up-to-date firmware) |
| 1 |
VEXcode V5 |
| 1 |
Engineering Notebook |
| 1 |
Clawbot and Advanced TrainingBot (Drivetrain 2-motor, No Gyro) example project |
Step 1: Preparing for the Exploration
Before you begin the activity, do you have each of these items ready? Check each of the following:
-
Are the motors plugged into the correct ports?
-
Are the smart cables fully inserted into all of the motors?
-
Is the Brain turned on?
-
Is the battery charged?
![]() Teacher Tips
Teacher Tips
Model each of the troubleshooting steps for the students.
Step 2: Start a New Project
Before you begin your project, select the correct template project. The Clawbot and Advanced TrainingBot (Drivetrain 2-motor, No Gyro) example project contains the Clawbot's motors configuration. If the template is not used, your robot will not run the project correctly.
Complete the following steps:
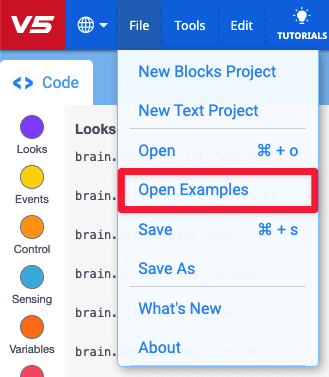
- Open the File menu.
- Select Open Examples.
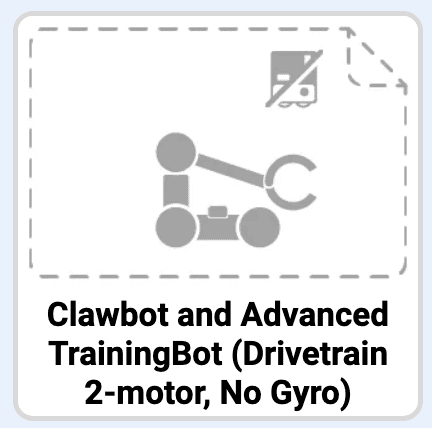
- Select and open the Clawbot and Advanced TrainingBot (Drivetrain 2-motor, No Gyro) example project.
- Since we will be programming to control the arm, rename your project ArmControl.
- Save your project.
- Check to make sure the project name ArmControl is now in the window in the center of the toolbar.

![]() Teacher Tips
Teacher Tips
-
Since this is a beginning activity with programming, the teacher should model the steps, and then ask the students complete the same actions. The teacher should then monitor the students to ensure that they are following the steps correctly.
-
Make sure that the students have selected Open Examples from the File menu.
-
Make sure that the students have selected the Clawbot Template (Drivetrain 2-motor, No Gyro) example project.
You can point out to the students that there are several selections to pick from on the Examples page. As they build and use other robots, they will have a chance to use different templates.
-
You can ask students to add their initials or the name of their group to the project name. This will help differentiate the projects if you ask the students to submit them.
![]() Teacher Toolbox
-
Saving Projects
Teacher Toolbox
-
Saving Projects
-
Point out that when they first opened VEXcode V5, the window was labeled MyProject1. MyProject1 is the default project name when VEXcode V5 is first opened. Once the project was renamed Drive and saved, the display was updated to show the new project name. Using this window in the toolbar, it is easy to check that the students are using the correct project.
-
Tell the students that they are now ready to begin their first project. Explain to the students that by just following a few simple steps, they will be able to create and run a project that will raise and lower the Clawbot's arm.
-
Remind students to save their projects as they work. This article from the VEX Robotics Knowledge Base explains saving practices in VEXcode V5.
![]() Teacher Toolbox
-
Stop and Discuss
Teacher Toolbox
-
Stop and Discuss
This is a good point to pause and have the student groups review the steps that were just completed on starting a new project in VEXcode V5.
Step 3: Move the Arm Up
We are now going to begin by programming the arm to raise!
int main() {
  // Initializing Robot Configuration. DO NOT REMOVE!
  vexcodeInit();

  ArmMotor.setPosition(0, degrees);

}- Write the ArmMotor.setPosition(); instruction as shown above in the programming area to set the starting position for the arm.
  ArmMotor.setPosition(0, degrees);
ArmMotor.spinFor(forward, 90, degrees);- Add the ArmMotor.spinFor(); instruction below the ArmMotor.setPosition() command as shown above to move the arm up. Be sure the Spin For is indented to match the Set Position command, and that all commands are within the curly braces.

- Click on the Slot icon. You can download your project to one of the available slots in the Robot Brain. Click on Slot 1.
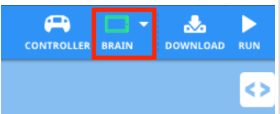
- Connect the robot to your computer or tablet. The Brain icon in the toolbar turns green after a successful connection has been made.

- Click the Download button on the toolbar to download the Drive project to the Robot Brain.
![]() Teacher Toolbox
-
Help with Text
Teacher Toolbox
-
Help with Text
-
If the students are using a computer, ask them now to disconnect the USB cable from the Robot Brain. Having the robot connected to a computer while running a project could cause the robot to pull on the connection cable.

- Check that the ArmControl project has downloaded to the brain in the slot you chose.
![]() Teacher Toolbox
-
Option to Model First
Teacher Toolbox
-
Option to Model First
Model running the project in front of the class before having all of the students try at once. Gather the students in one area and leave enough room for the Clawbot to move its arm. Demonstrate how to end the project and have the Clawbot's arm lower back to its resting position.
Tell the students it is now their turn to run their projects. Make sure that they have adequate space to safely have the Clawbot's arm raise.
- Run the project on the Clawbot by making sure the project is selected and then press the Run button. Congratulations on creating your first Claw Arm project!
Step 4: Try This: Program the Arm Down
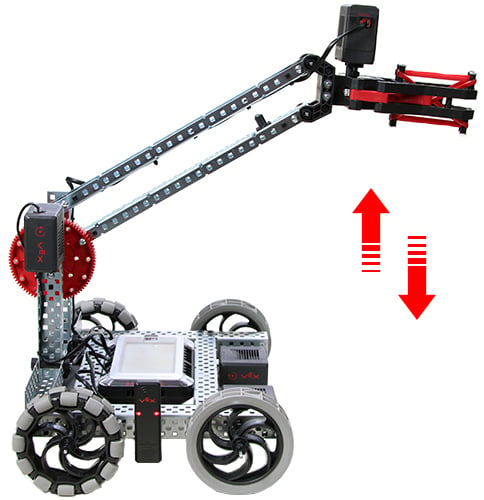
Now that you have programmed the arm to move up, you will now program the arm to lower or move down.
![]()
- Add a second ArmMotor.spinFor(); instruction to your ArmControl project so that the arm raises to 90 degrees, waits 2 seconds, and then back down.
- Hint: You will need to change the direction within the instruction.
- Notice that the arm holds its position while the wait command is running. The motor draws power from the battery to hold the arm up against the force of gravity. That's because the default setting for having the motor stop is the hold setting. There are two other settings for stopping - brake and coast. You will learn about those in another lab.
![]() Teacher Toolbox
-
Solution
Teacher Toolbox
-
Solution
The solution to the challenge is below. To lower the arm, students needed to change the “forward” parameter to “reverse” in the ArmMotor.spinFor(); instruction that was added.
// Begin project code
int main() {
  // Initializing Robot Configuration. DO NOT REMOVE!
  vexcodeInit();

  ArmMotor.setPosition(0, degrees);
  ArmMotor.spinFor(forward, 90, degrees);
  wait(2,seconds);
  ArmMotor.spinFor(reverse, 90, degrees);

}
Step 5: Complete the Flight Traffic Controller Challenge
![]() In the Flight Traffic Controller Challenge, the Clawbot must move its arm up and down once for 90 degrees, wait 3 seconds, move the arm up and down two times for 45 degrees, wait 5 seconds, and then move the arm up and down three times for 90 degrees.
In the Flight Traffic Controller Challenge, the Clawbot must move its arm up and down once for 90 degrees, wait 3 seconds, move the arm up and down two times for 45 degrees, wait 5 seconds, and then move the arm up and down three times for 90 degrees.
Here is a list of the Clawbot's behaviors:
- Move arm up and then down for 90 degrees.
- Wait 3 seconds.
- Move arm up and then down for 45 degrees.
- Move arm up and then down for 45 degrees.
- Wait 5 seconds.
- Move arm up and then down for 90 degrees.
- Move arm up and then down for 90 degrees.
- Move arm up and then down for 90 degrees.
![]() Teacher Toolbox
-
Solution
Teacher Toolbox
-
Solution
Most of the instructions within this challenge are ArmMotor.spinFor();. After adding an instruction for moving the arm upward, and one for moving the arm downward, you can highlight the two instructions, right-click, and then choose to copy and paste them as many times as needed. Then the parameters can be changed to meet the challenge and wait(); instructions can be added between.

- Flight Traffic Controller Challenge Solution:
// Begin project code
int main() {

  // Initializing Robot Configuration. DO NOT REMOVE!
  vexcodeInit();

  ArmMotor.setPosition(0, degrees);
  ArmMotor.spinFor(forward, 90, degrees);
  ArmMotor.spinFor(reverse, 90, degrees);
  wait(3, seconds)
  ArmMotor.spinFor(forward, 45, degrees);
  ArmMotor.spinFor(reverse, 45, degrees);
  ArmMotor.spinFor(forward, 45, degrees);
  ArmMotor.spinFor(reverse, 45, degrees);
  wait(5, seconds)
  ArmMotor.spinFor(forward, 90, degrees);
  ArmMotor.spinFor(reverse, 90, degrees);
  ArmMotor.spinFor(forward, 90, degrees);
  ArmMotor.spinFor(reverse, 90, degrees);
  ArmMotor.spinFor(forward, 90, degrees);
  ArmMotor.spinFor(reverse, 90, degrees);

}- Programming Rubric (Google Doc / .docx / .pdf )