Adding a Second Button to the Brain's Screen- Blocks-based
| Quantity | Materials Needed |
|---|---|
| 1 |
VEX V5 Classroom Starter Kit (with up-to-date firmware) |
| 1 |
VEXcode V5 (latest version, Windows, macOS, Chromebook) |
| 1 |
Engineering Notebook |
| 1 |
StopOrDrive project from the previous Play page |
The brain's screen can have more than one button.
This activity will let you program the robot to drive forward and turn left or right depending on which side of the brain's screen is pressed.
The three additional types of blocks that you will need during this activity are the following:
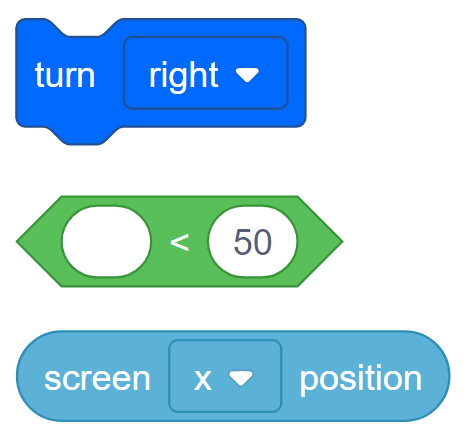
You can use the Help information inside of VEXcode V5 to learn about the blocks. For guidance in using the Help feature, see the Using Help tutorial.

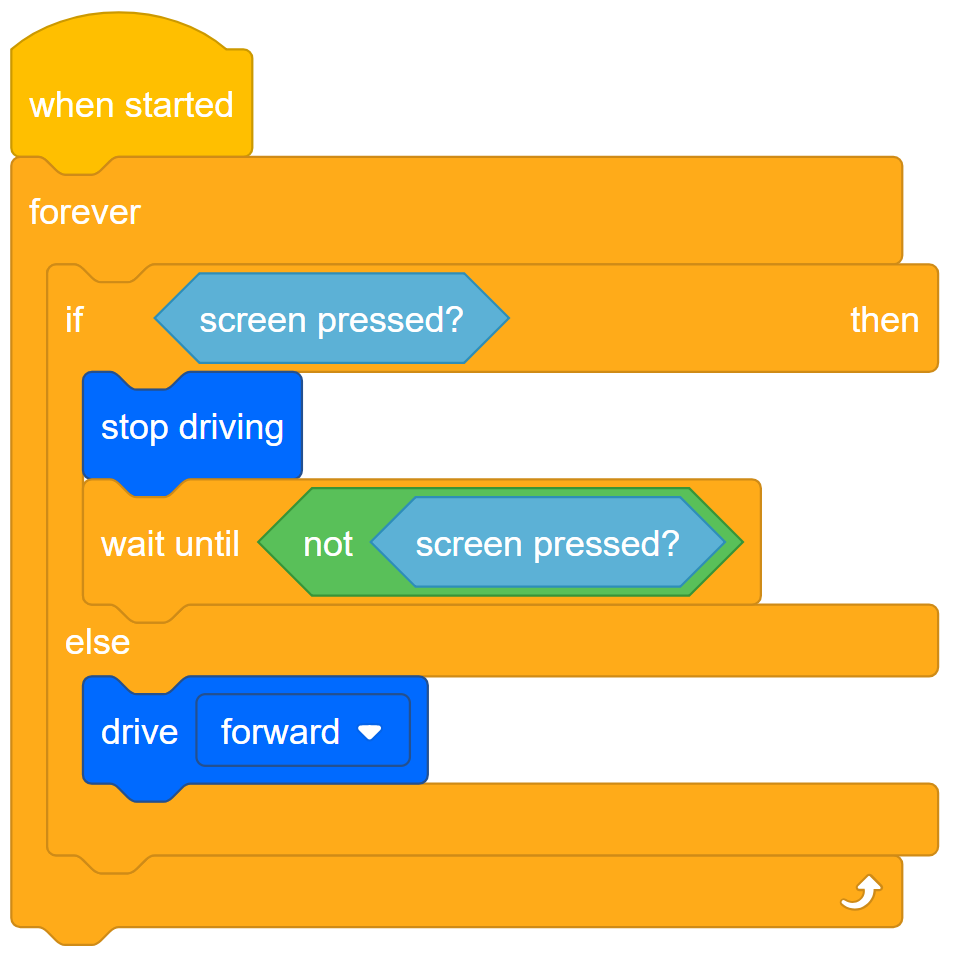
Step 1: Let's start by reviewing the StopOrDrive project.
The StopOrDrive project had the Clawbot stop if the screen was pressed, or else it had it drive forward.
The entire screen was one big button but in this next project, we want half the screen to be one button and the other half to be the other.
In order to split the screen into two buttons, we need to understand more about the layout of the screen.
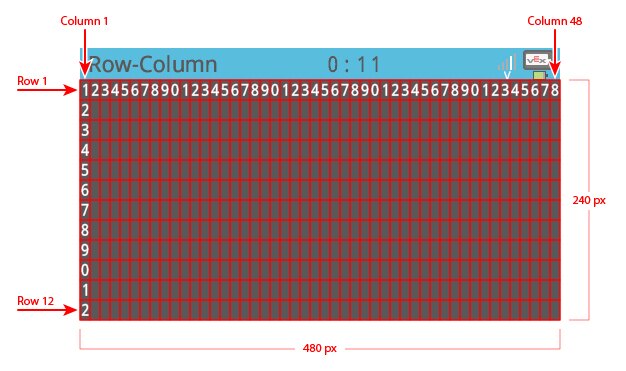
- Notice that the columns increase in number from left to right. The number of columns is 48 and the screen is 480 pixels wide.
- Write down in your engineering notebook that the x-value on the screen is equal to the number of pixels measured from left to right.
- What is the x-value of the center of the screen? For this activity, you can focus on the x-axis alone because you only need a left and right button.
Step 2: Programming for two buttons
- Save StopOrDrive as the LeftOrRight project.
- Remember, if you need help opening, naming, or saving projects, watch the Tutorials in VEXcode V5.

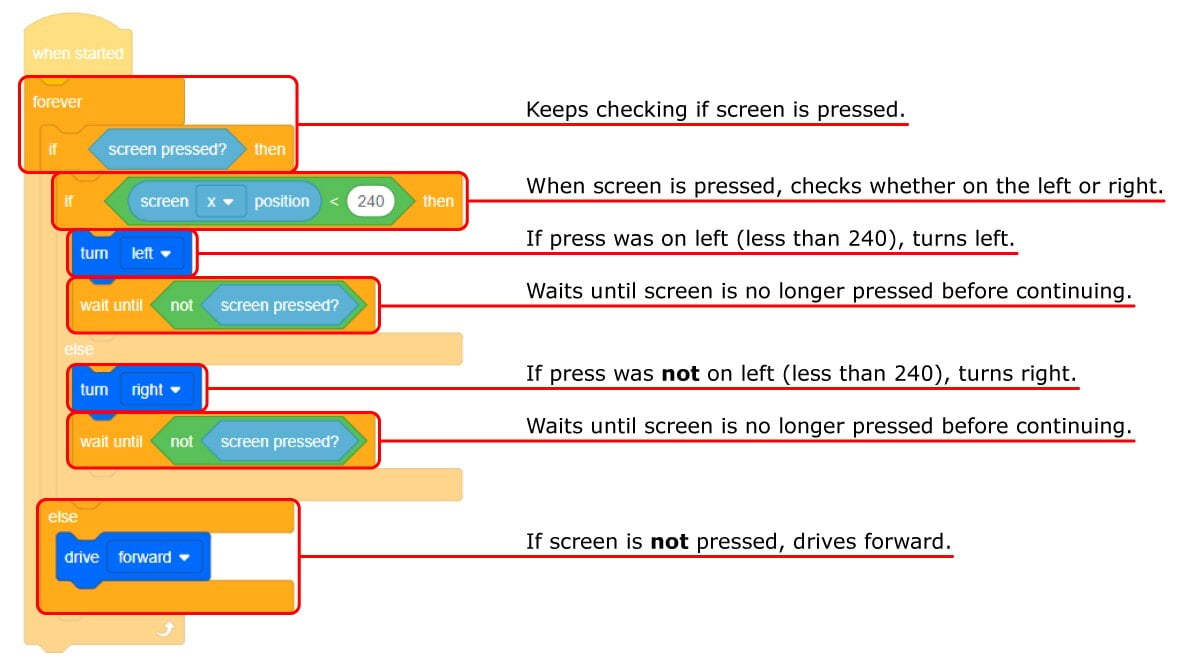
- Build the project below. It will have the Clawbot turn left or right when the screen is pressed, depending on the side it is pressed on.
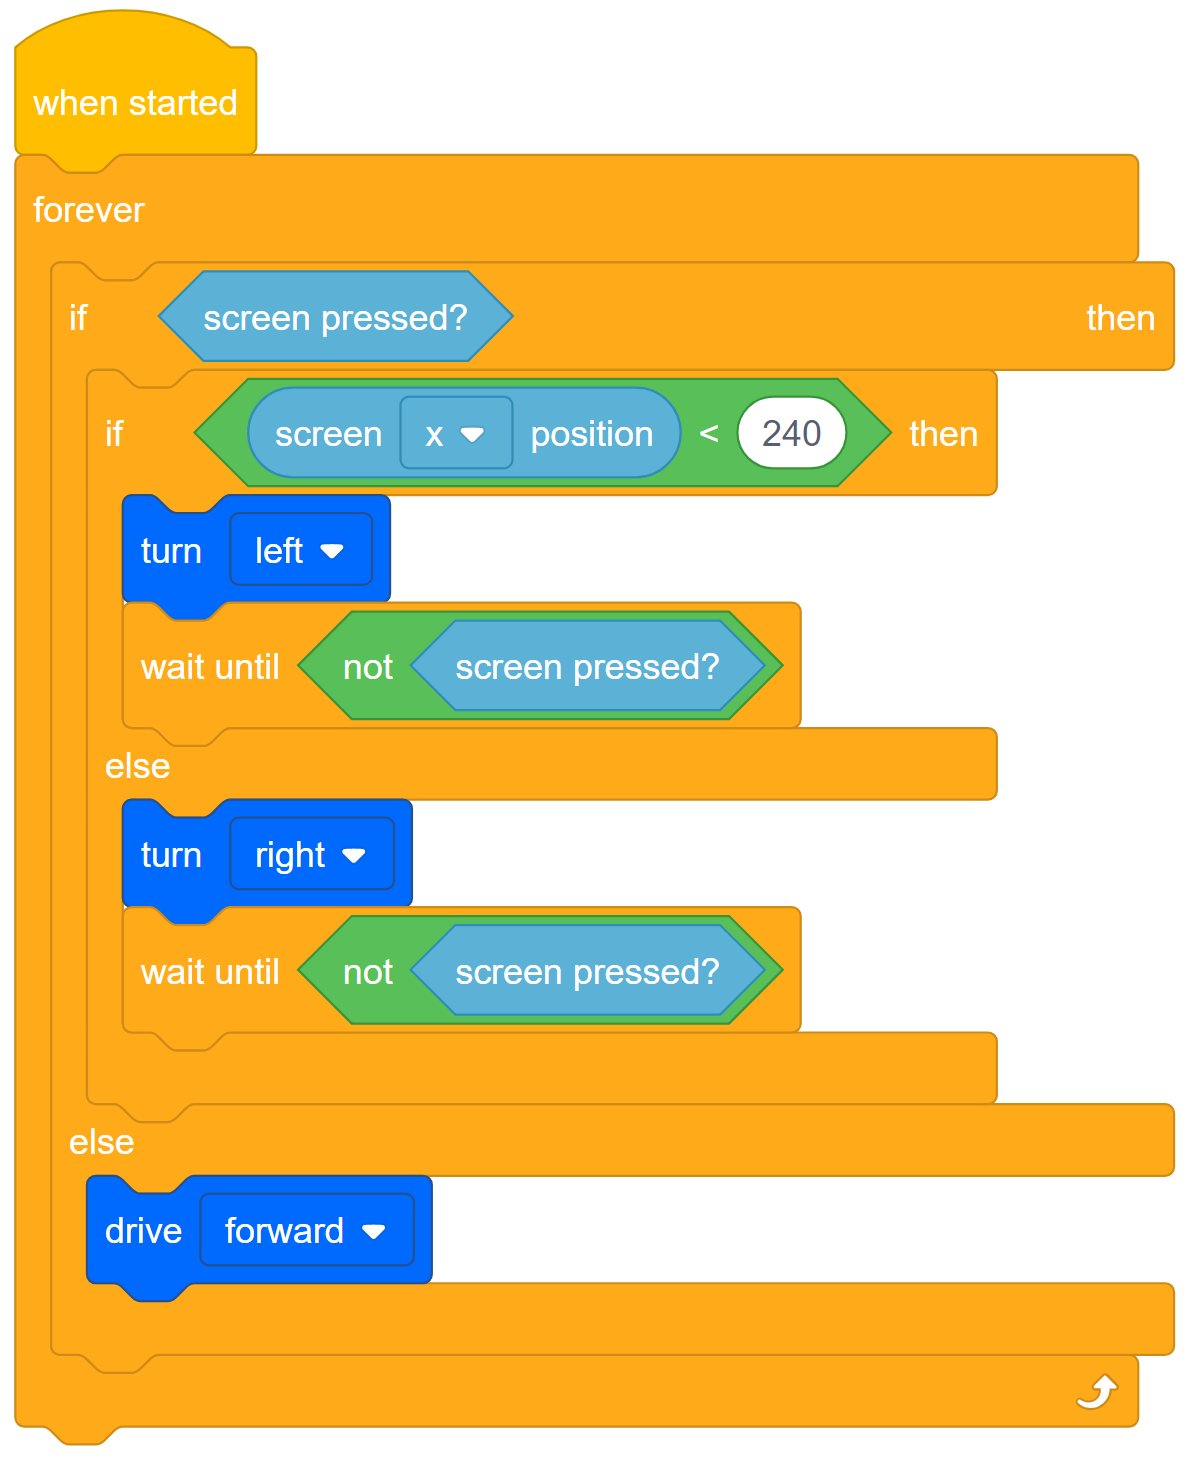
- Let's review what this project does.
It keeps checking if the screen is pressed. If the screen isn't pressed it drives forward but if it is, it checks where the screen is pressed.
If the press was on the left side (less than 240), it turns left. Otherwise, it turns right. We don't need another condition for when the x-value is greater than 240 because if it isn't less than 240 (turn left), it must be greater (turn right). We only have two buttons to worry about.
The wait until Control blocks after each turn have the project wait until the screen is no longer being pressed before continuing.

- Now that the project is done, download and run it to test how it works.
- For help, watch the Download and Run a Project tutorial video in VEXcode V5.
- Take notes in your engineering notebook about how the buttons control the movements of the Clawbot.
When pressing the screen's buttons from behind the Clawbot as it drove forward, you pressed on the right side of the screen to turn left and on the left side of the screen to turn right. That is not a good User Experience. A User Experience is how well a user can interact with a User Interface to control a computer system. There is more information about User Interfaces in the Apply section of this lab.
In this case, we need to improve the User Interface in order to improve the User Experience.
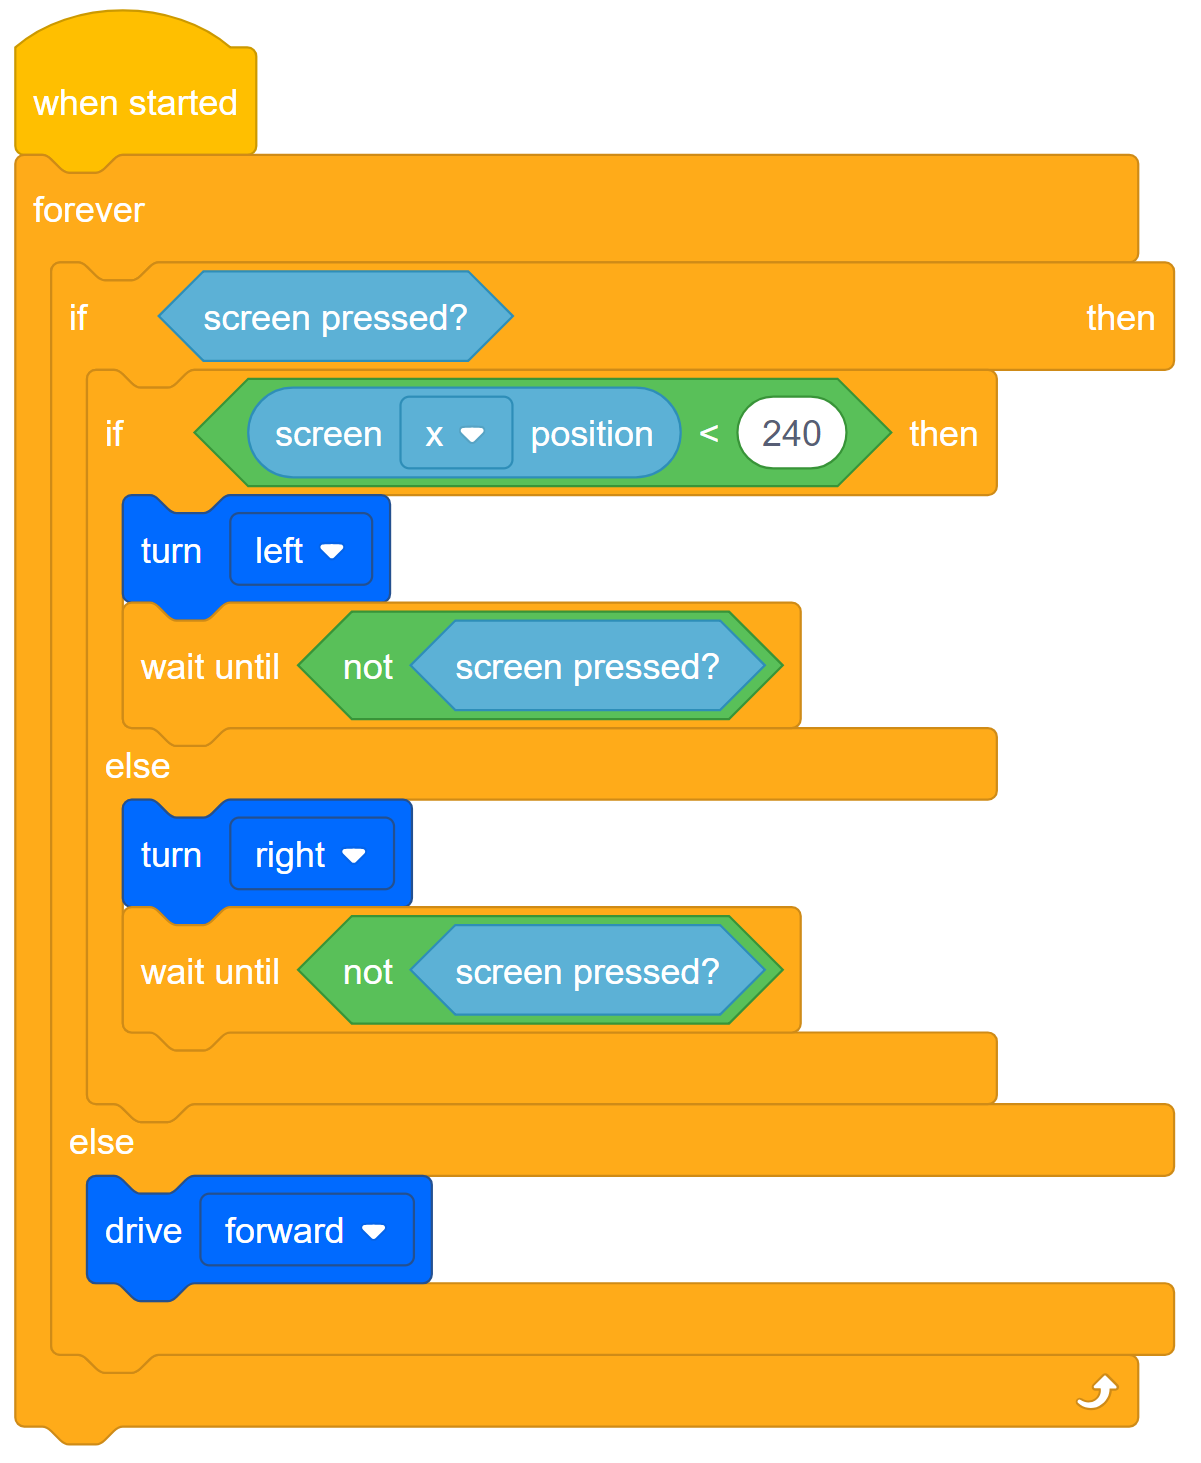
- Review the LeftOrRight project and revise it so that when the user presses the buttons from behind the Clawbot, the robot turns right when the user presses the left side of the screen. Or else, the Clawbot turns left.
- Plan, test, and iterate on this project in your engineering notebook so that the project makes the Clawbot turn toward the side of the screen that the user is pressing from behind the Clawbot.